How to Retrieve Unsaved Audio Recording on Windows?
Have you ever recorded an important meeting, lecture, or personal note on your Windows computer, only to realize you forgot to save it? Losing an unsaved audio recording can be a frustrating and stressful experience. Audio recordings are a convenient way to capture and store important information, but what happens when you accidentally close the recording application without saving your work?
Don't panic! In this article, we'll explore two reliable methods to retrieve your unsaved audio recordings on Windows. We'll also introduce you to a powerful tool that can help you recover your lost files quickly and easily. Keep reading to learn how to get your valuable audio recordings back and prevent this problem from happening in the future.

Part 1: Can I Retrieve Unsaved Audio Recording on Windows?
The short answer is yes! It is possible to retrieve unsaved audio recordings on your Windows computer. When you create an audio recording using a recording application, the data is temporarily stored on your computer's hard drive. Even if you close the application without saving the recording, the data may still be present on your device.
However, it's important to act quickly if you want to recover your unsaved audio recording. The longer you wait, the higher the chances are that the data will be overwritten by new files. This is where data recovery software comes in handy.
Data recovery tools are designed to scan your hard drive and locate files that have been lost, deleted, or unsaved. These tools can help you retrieve your unsaved audio recordings, even if you can't find them through traditional methods.
Part 2: How to Retrieve Unsaved Audio Recording on Windows?
Now that you know it's possible to retrieve unsaved audio recordings on Windows, let's explore two effective methods to get your files back. In the following sections, we'll guide you through using 4DDiG Windows Data Recovery and the Windows Recycle Bin to recover your unsaved audio recordings.
Way 1: Retrieve Unsaved Audio Recording via 4DDiG Windows Data Recovery
If you're looking for a reliable and efficient way to retrieve your unsaved audio recordings on Windows, 4DDiG Windows Data Recovery is an excellent choice. This powerful data recovery software is designed to help you recover audio files, deleted, or unsaved files from your computer's hard drive, external storage devices, and even from lost partitions or crashed systems.
One of the key advantages of 4DDiG Windows Data Recovery is its high success rate in recovering data. With advanced scanning algorithms and deep search capabilities, this software can locate and restore your unsaved audio recordings, even if they haven't been saved properly. It supports over 1000 file types, including popular audio formats like MP3, WAV, and AAC. The software's AI-powered recovery and repair capabilities set it apart. It doesn't just recover audio files; it can also repair corrupted files, which is particularly useful if your recordings are damaged. This dual functionality ensures that your recovered files are not only accessible but also in good condition.
Secure
Download
Secure
Download
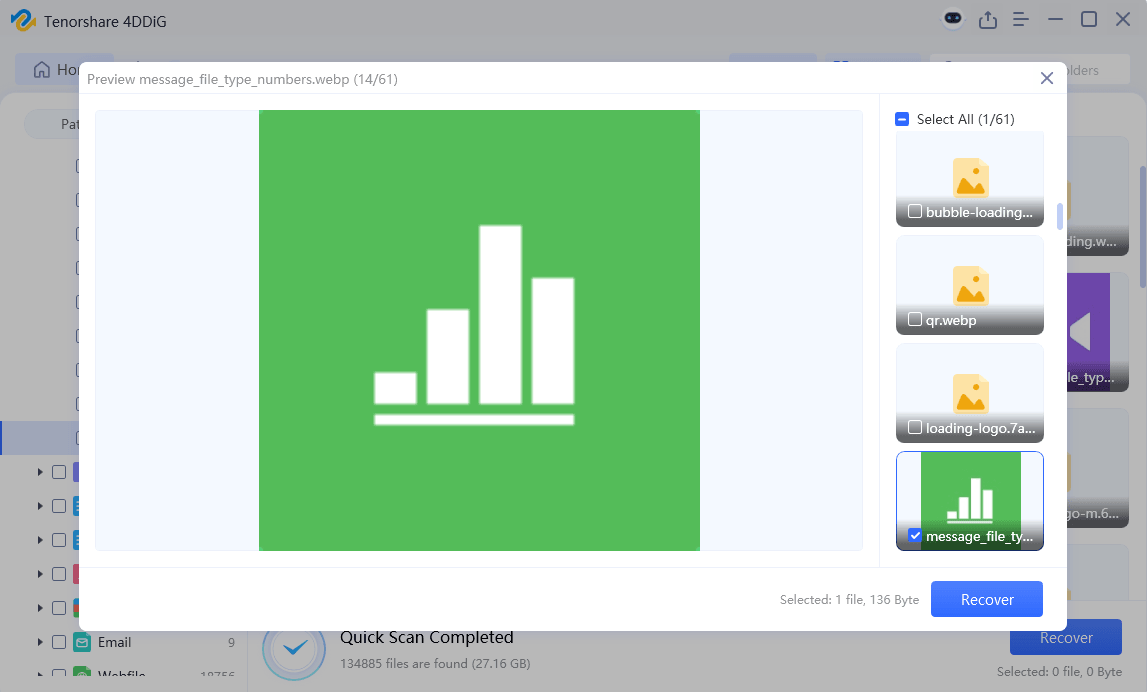
4DDiG has a user-friendly interface. You don't need to be a tech expert to use this software effectively. 4DDiG also offers a preview feature that allows you to listen to the recoverable audio files before saving them. This ensures that you can identify and recover the exact recordings you need, saving you time and effort.
Some of the standout features of 4DDiG Windows Data Recovery include:
- Comprehensive scanning: The software performs a thorough scan of your selected drive or location, increasing the chances of finding your unsaved audio recordings.
- Recovery from various scenarios: Whether you've accidentally deleted your recordings, experienced a system crash, or formatted your drive, 4DDiG can handle different data loss situations.
- Secure and safe: 4DDiG ensures the safety of your data during the recovery process, preventing any further data loss or overwriting.
- Supports multiple devices: You can use 4DDiG to recover audio recordings from various devices, including PC/laptop, digital cameras, drones, HDD/SSD, memory cards, and more.
Here are the easy steps to use 4DDiG Windows Data Recovery to recover unsaved audio recordings on windows:
-
Download and Install 4DDiG
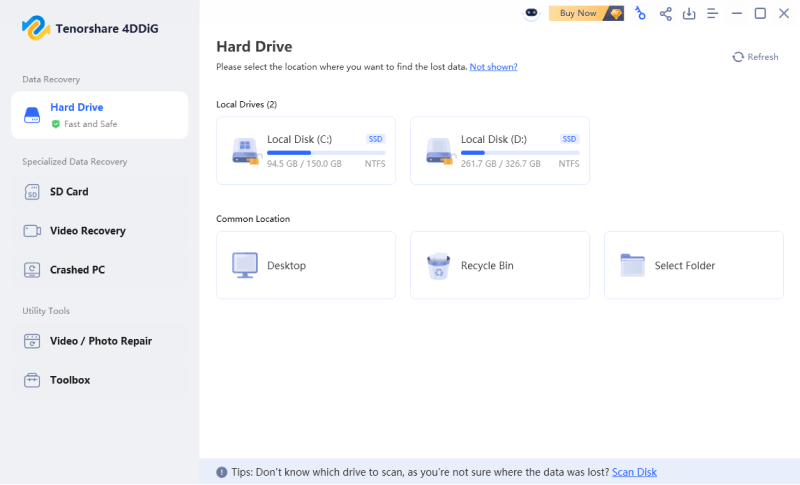
Visit the official website of 4DDiG and download the software. Once the download is complete, install the program on your Windows computer. Launch the software and select the drive where you lost your unsaved audio recordings.
-
Scan for Lost Audio Files
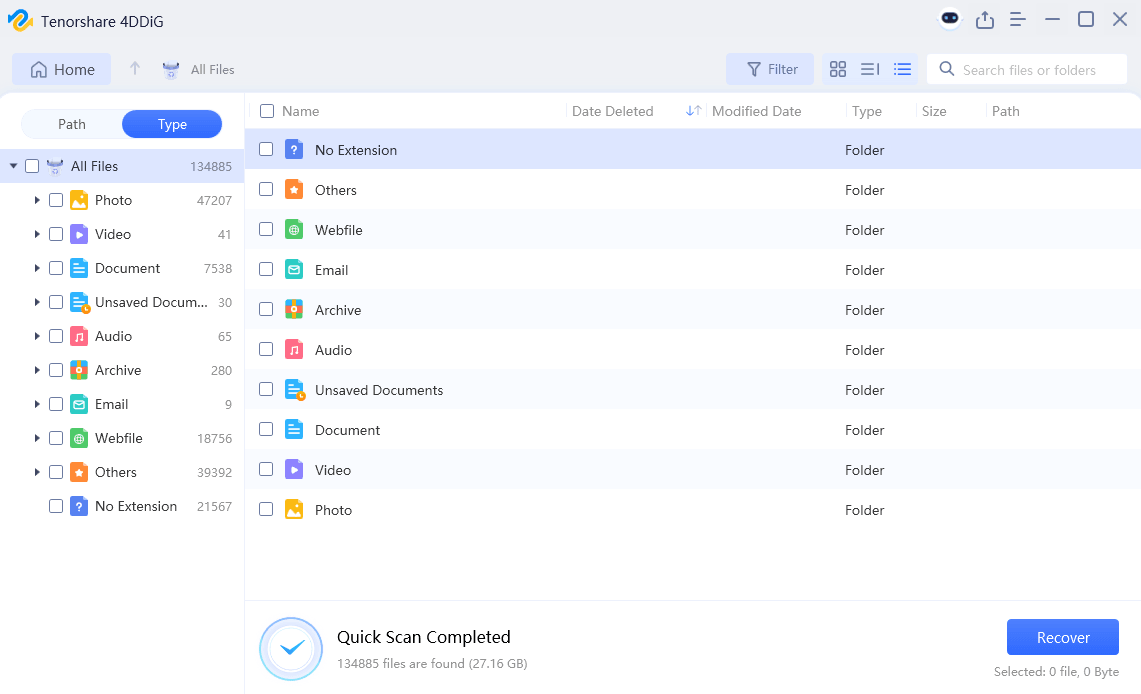
Click on the "Scan" button to start searching for your unsaved audio recordings. 4DDiG will perform a deep scan of the selected drive, looking for any traces of your lost files. You can pause or stop the scan anytime if you locate your desired files.
-
Preview and Recover Unsaved Audio Recordings
Once the scan is complete, browse through the recoverable files. Use the preview feature to listen to the audio recordings and ensure they are the ones you need. Select the files you want to recover and click the "Recover" button. Choose a safe location on your computer to save the recovered audio recordings.
Way 2: Retrieve Unsaved Audio Recording from Recycle Bin
If you've accidentally deleted your unsaved audio recording, there's a chance it might still be in your Windows Recycle Bin. The Recycle Bin is a temporary storage location for deleted files, giving you an opportunity to restore them before they're permanently removed from your system.
To retrieve your unsaved audio recording from the Recycle Bin, follow these simple steps:
- Open the Recycle Bin: Double-click on the Recycle Bin icon on your desktop to open it.
- Locate Your Unsaved Audio Recording: Look through the contents of the Recycle Bin to find your unsaved audio recording. You can sort the files by name, date, or file type to make your search easier.
-
Restore the Audio Recording: Once you've found your unsaved audio recording, right-click on the file and select "Restore." This will move the file back to its original location on your computer.

- Check the Restored File: Navigate to the location where the file was restored and double-click on it to ensure that it plays correctly and is the audio recording you were looking for.
It's important to note that files in the Recycle Bin are not stored indefinitely. Windows automatically deletes older files from the Recycle Bin to make room for new ones. Therefore, it's crucial to restore your unsaved audio recording as soon as possible before it gets permanently deleted.
If you can't find your unsaved audio recording in the Recycle Bin, it may have been permanently deleted. In this case, you can try using data recovery software like 4DDiG Windows Data Recovery to scan your hard drive for the missing file.
Part 3: How to Protect Audio Recording?
Losing unsaved audio recordings can be a frustrating experience, but there are steps you can take to prevent it from happening in the future. Here are five tips to help you protect your audio recordings:
- Enable auto-save: Most audio recording software has an auto-save feature that you can enable to automatically save your progress at set intervals. This way, even if your program crashes or you forget to save manually, you'll have a recent version of your work.
- Use reliable software: Choose a reputable and stable audio recording program that is less likely to crash or cause data loss. Research and compare different options to find software that suits your needs and has a good track record for reliability.
- Create backups: Regularly backup your important audio recordings to an external hard drive, cloud storage service, or another secure location. This ensures that you have a copy of your files even if something happens to your main computer or storage device.
- Minimize interruptions: When recording audio, try to minimize the risk of interruptions that could cause your software to close unexpectedly. Close unnecessary programs, disable notifications, and ensure your computer is plugged in or has sufficient battery life to complete your recording session.
- Save before editing: Before making any significant edits or changes to your audio recording, save a separate copy of the original file. This way, if something goes wrong during the editing process, you can always revert back to the original version without losing any of your work.
By following these tips, you can reduce the chances of losing your unsaved audio recordings and protect your hard work from potential data loss.
✅ What To Do If Your Screen Recording Failed to Save Due to Various Reasons
Part 4: Frequently Asked Questions
Q: How to Retrieve Unsaved Audio Recording from WhatsApp?
And: If you accidentally deleted an unsaved WhatsApp audio recording, you can recover it using data recovery software like 4DDiG. Simply scan your device's storage and look for the missing file.
Q: How to Retrieve Unsaved Audio Recording in Samsung?
Ans: On a Samsung device, check if the unsaved audio recording is in the trash folder of your recording app. If not, use data recovery software to scan your device and retrieve the file.
Q: Why Are Audio Recordings Deleted?
Ans: Audio recordings can be deleted due to various reasons, such as accidental deletion, app crashes, or device malfunctions. Sometimes, users may also forget to save their recordings before closing the app.
Final Thoughts
Losing an unsaved audio recording can be a stressful experience, but it's not always a lost cause. By using data recovery software like 4DDiG Windows Data Recovery Tool or checking your Recycle Bin, you can often retrieve your unsaved files. Remember to save your work frequently, use reliable software, and create backups to prevent future data loss. If you accidentally delete an audio recording from WhatsApp or your Samsung device, don't panic – there are still ways to recover it. By following the tips and methods outlined in this article, you'll be well-equipped to handle any audio recording mishaps that come your way.
💡 Summarize with AI:
You May Also Like
- Home >>
- Windows Recovery Solutions >>
- How to Retrieve Unsaved Audio Recording on Windows?

 ChatGPT
 Perplexity
 Google AI Mode
 Grok
Grok

