Loss of audio files may be caused by a variety of factors, including accidental deletion, overwriting, or formatting the disk on which your audio recordings, music collection, podcasts, or other audio files are stored but there are solutions to recover audio files. It is possible for audio or music files to be lost or erased from mobile phones, iPods, or USB sticks when they are being transferred to a computer or synchronized using iTunes or another media program. If you have accidentally erased audio files on your personal computer (either a PC or a Mac), this article will show you how to retrieve them. You may recover lost audio and music files of any type by using the techniques that are provided here. These methods can be used on a hard drive, SD card, or compact flash card that is used in an MP3 Player, Android phone, or other portable music player or recorder..
Part 1: Common Causes of Audio File Loss
- Deleting a whole music album or library out of an MP3 player or laptop by accident.
- An unexpected break occurred when transferring audio recordings or songs between a PC, Android phone, MP3 Player, iPod, and other devices.
- The formatted external drivers, or hard disks.
- Corrupted SD card or hard drive as a result of a virus or another cause.
After understanding the above reasons for audio file loss, you may be wondering how to restore audio files on a PC or a Mac when no software is installed? You may simply restore audio files from the Recycle Bin, regardless of whether the tracks belonged to your song list or other recordings; the only exception is if you deleted the files completely by pressing the Shift key and the Delete key simultaneously. In addition, the backup folder, if there is one, may include copies of any data that you have erased. A powerful piece of audio file recovery software is the only way to retrieve your missing music and other audio recordings if you have already tried these other methods.
Part 2: The Best Solution to Recover Audio Files
2.1 What is Tenorshare 4DDiG?
With the assistance of this data recovery software, you are able to retrieve a broad variety of information from a variety of IT settings. These environments include digital cameras, hard drives, and partitions. The application safeguards Windows and Mac, which are the three operating systems that see the most widespread usage. You may examine the recoverable data before you commit to the more time-consuming recovery methods, which further saves you time.

Tenorshare 4DDiG is an all-inclusive data recovery software program that can restore files and information from your organization's IT environment or your personal computer and drivers. And most importantly, you can recover different file types including images, videos, documents, audio files recovery, etc.
- Straightforward and simple to use: Users have claimed that the program comes with a variety of data recovery options, allowing them to salvage any data that has been lost regardless of the circumstances.
- Rapid file recovery: The tool performs a rapid recovery of deleted audio/music file.
- Data recovery on different devices: Successfully retrieve lost data from sd card, usb flash drives, internal, external and other storage disks.
- Deep scan: It can do an in-depth scan of their computer since it allowed them to retrieve data from all locations on their system.
2.2 How to Recover Audio Files on Windows?
In order to recover audio on your Windows PC and local disk, please first download the Tenorshare 4DDiG and simply follow the steps below:
For PC
Secure Download
For MAC
Secure Download
- After the connection has been established, the first screen that appears will provide you access to Data Recovery as well as Advanced Options. From this page, you may go through the list of hard drives, choose the disk on your local computer where the data was lost, and then click the Start button to get started. You also have the option of selecting target file types before the scanning begins.
- Under the Tree View, you will be able to make use of categories such as Deleted Files, Existing Files, Lost Location, RAW Files, and Tag Files while the scanning process is being carried out. Alternatively, you might move to the File View in order to examine the different sorts of files and filter the audio files in this instance to recover audio files.
- After you have located the target audio files that you want to restore, you will be able to preview and restore them to a safe place. It is recommended that you choose a new file location rather than the one that was previously used, and the new location should be straightforward to locate.
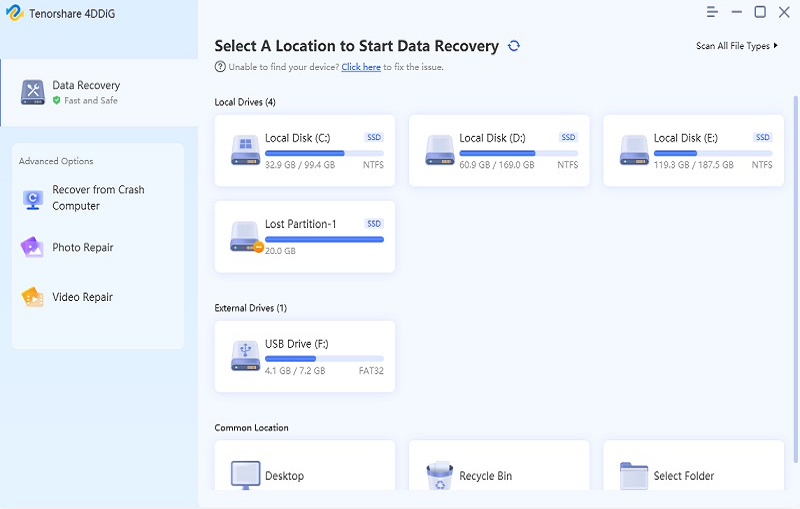
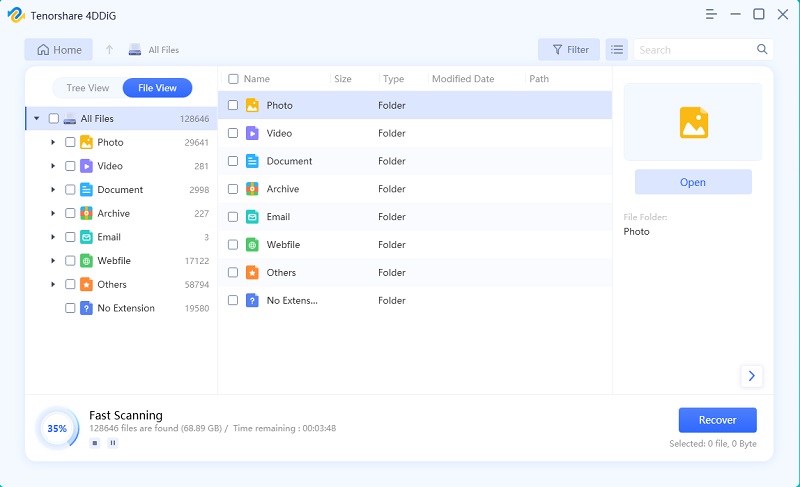
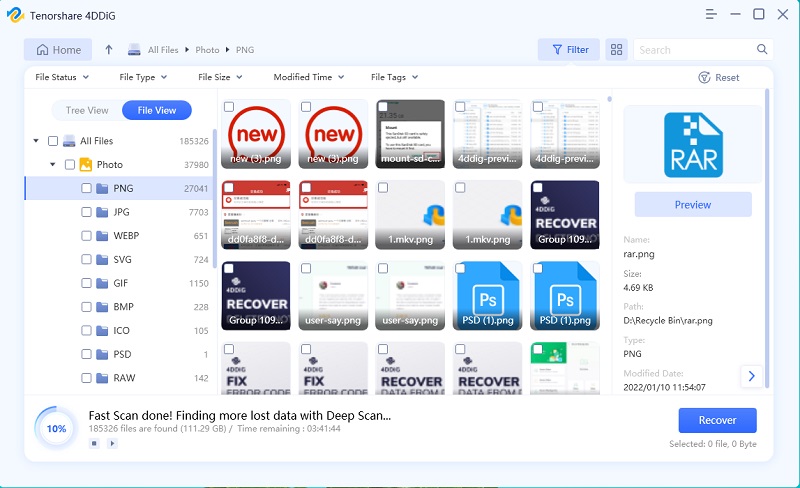
The steps to follow are pretty similar:
- Open the software, choose Recycle Bin, and afterward click Start to proceed.
- When you see the file name you wish recover, just pause the search process. 4DDiG quickly scans the chosen disk all around for missing data. Likewise, you may use file type to narrow your search for audio files.
- You may examine the files when the search is finished and restore the audio files you need.
2.3 How to Recover Audio Files on Mac?
For PC
Secure Download
For MAC
Secure Download
- After installation, use 4DDiG-Mac and choose a destination, such as one of your local disks, to begin Mac audio files recovery. Put your cursor over the chosen spot, and the word "Scan" will appear as an icon in the bottom right-hand corner. Next, select Scan to begin locating all missing files.
- After the scanning results are produced, you may filter to audio files to recover audio on Mac by clicking on certain file types to access more information.
- Click Recover and choose a place to store the files you find.


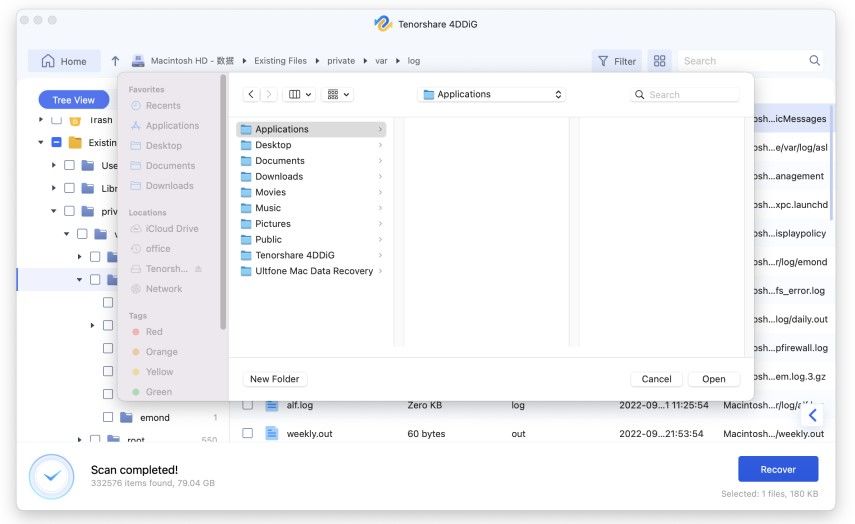
You must do the following if your Mac has crashed and you need to restore audio files from it.
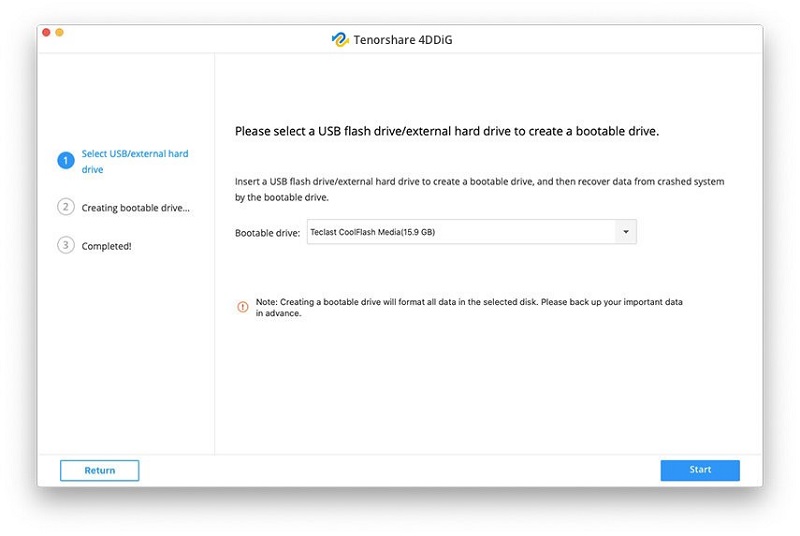
- To start your damaged Mac and retrieve your data, have a functional Mac and a USB or external portable hard drive ready. Install 4DDiG for Mac Data Recovery on a working Mac. After installation, click on Recover Data from Crashed System and then Scan to recover deleted audio files.
- Select the one you just installed by selecting Start after inserting the USB drive into the bootable Mac's "Bootable drive" option. You'll get a notification prompting you to back up your data.
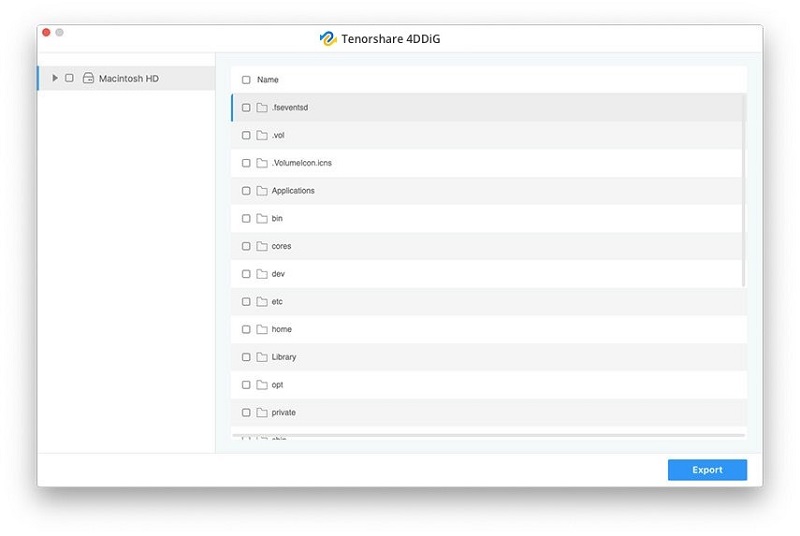
- To start the Mac that is stuck at the loading screen, insert this bootable disk and press and hold the "Option" key. When you reach the plate selection screen, let go of the key and choose 4DDiG for Mac Data Recovery to boot the disk circle. Currently, selecting Export will provide you access to the data and you can try to restore audio files.

FAQs about Audio Files Recovery:
1. How do I recover audio recordings?
You can try to check your backups if your device is synced with Cloud and benefit from auto-backups, also you can try to connect your mobile device to a PC to use the File Explorer function. Or, you can directly use a data recovery program like Tenorshare 4DDiG.
2. How do I find lost music files on my computer?
First, you should look at the recycle bin. If it is deleted from there too, utilize File Explorer to navigate the storage drive of the device. This strategy's effectiveness is dependent on two elements. First, rather than permanently deleting the file, your recorder must relocate it to another folder or rename it. Second, the file must be stored on your recorder in a format that your computer can read.
3. How to recover deleted audio files for free?
If your computer isn't helping you locate your deleted recording, you could have more success utilizing a recovery software tool that you can get online. If you want to recover deleted audio files from your PC, consider Tenorshare 4DDiG.
Conclusion
If you need to recover audio files and even many more types of lost documents, and it is too late for CTRL +Z to save them from recycle bin, then Tenorshare 4DDiG data recovery software is your ultimate go-to option for data recovery without working so hard for technical details. You can recover your audio files within a few steps as shown above!
 ChatGPT
 Perplexity
 Google AI Mode
 Grok
Grok
