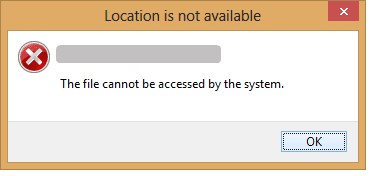
How to Recover a Cut and Paste File

5 mins read

Updated on 2024-04-17 15:11:09 to Windows Recovery Solutions

Have you ever been in a situation where you lost your important files while moving them with the cut and paste method? You select files to transfer to a USB drive or a memory card, use the cut and paste commands for quick movement, and suddenly, due to an unexpected error, your files vanish. Now, you're wondering, how to recover cut and paste files?

Many people have faced this problem and it can be really upsetting, especially when trying the usual undo (Ctrl + Z) doesn't work. If this has happened to you, don’t panic: this blog post will help you.

We're going to show you different ways to recover files that got lost during cut and paste. It doesn't matter if your computer shut down unexpectedly or if you removed your USB drive too soon - there are methods to get your files back. Keep reading to find out how to fix this issue like a pro!

how to recover a cut and paste file

Part 1: Can I Recover Cut and Paste Files?

Yes, you absolutely can recover files that you lost during a cut and paste operation. When you cut a file from one place on your computer, it doesn't get deleted right away. It's just marked to be moved. If something interrupts this process, your file might still be on your computer, just hidden.

This part of the blog will guide you through the steps to locate and retrieve your files, ensuring that what might seem lost can be found again. So, let's get started and learn how to recover your cut and paste files efficiently.

Part 2: How to Recover Files Lost in Cut and Paste?

Before we jump into the six ways to get back your lost files, let's try two simple things. First, press Ctrl + Z on your keyboard. This might undo your last cut and paste. Or, try pressing Windows + V to see if your files are in your clipboard history.

Also, take a quick look in your computer's Temp folder. Just press Windows + R, type in %temp%, and press OK. If you still can't find your files, no worries. Our guide covers everything from simple tricks to powerful software. No matter if it's an important document or a favorite photo, we'll help you recover it. Let's go through each way, step by step, and get your files back!

cut and paste files

Way 1: Recover Files Lost in Cut and Paste via 4DDiG Data Recovery

Losing files during a cut and paste operation can be stressful. But with 4DDiG Data Recovery, you've got a powerful solution at your fingertips. This software is a top pick for recovering lost files. Because it's designed to handle various data loss scenarios effortlessly.

Whether it’s a system crash, accidental deletion, or a corrupted SD card, 4DDiG comes to the rescue. Its user-friendly interface makes it simple to use, even if you're not tech-savvy. What makes 4DDiG Windows Data Recovery so reliable?

First, it can handle a wide range of file types, over 2000 in fact, including photos, videos, documents, and audio files. This means no matter what type of file you've lost, there's a good chance 4DDiG can recover it.

Plus, it's not just for PCs - this tool works with various storage devices like USB drives, external disks, and SD cards. It scans your desired location thoroughly, finds the lost files, and helps you recover them quickly.

This software is especially useful when you face unpredictable situations like power failures or system crashes that disrupt file transfers. So why not give it a try and see how easily you can get your lost files back? Ready to reclaim your lost data with 4DDiG? Let's get started!

FREE DOWNLOAD

Secure Download

FREE DOWNLOAD

Secure Download

  • Begin by acquiring and installing Tenorshare 4DDiG Windows Data Recovery. Open the application, attach your external hard drive to your PC, and choose the external disk to initiate the scan.

    nas recovery
  • 4DDiG thoroughly scans the external hard drive for missing data. Pause or stop the search when needed. Explore categories like Deleted Files, Existing Files, Lost Location, RAW Files, and Tag Files in the Tree View. Switch to File View to inspect Photo, Video, Document, Audio, Email, and more. Utilize the search or Filter on the right panel for specific files.

    tree view
  • After discovering the target files, preview and recover them to a secure location. To prevent disk overwriting and permanent data loss, avoid saving to the same partition where you lost them.

    save recovered

Way 2: Try to Show Hidden Files

Sometimes, files lost during a cut and paste are simply hidden, not gone. To find these, you can show hidden files in Windows. It's an easy fix that often solves the problem.

Here's how you do it:

  • Open the Control Panel on your computer. You can do this by searching for 'Control Panel' in the Start menu.
  • In the Control Panel, click on 'Appearance and Personalization'.

    appearance
  • Now, look for 'File Explorer Options' and click on it. This is where you can change settings related to how files and folders are displayed.

    file explorer options
  • Inside the File Explorer Options, go to the 'View' tab.
  • Here, you will find an option to 'Show hidden files, folders, and drives'. Check this box to make hidden files visible.

    show hidden files

It's an easy trick that works well on Windows devices and can save you a lot of worry. So, before you panic about lost files, try this simple step – your files might just be hiding!

Way 3: Recover Files Lost during Cut and Paste via CMD

Recovering files lost after a cut and paste can also be done using the Command Prompt (CMD) in Windows. This method might sound technical, but it's quite straightforward.

Here's how you can do it:

  • Type 'Command Prompt' in the Windows search box. When it appears, right-click on it and choose 'Run as administrator'. This step is crucial for giving you the necessary permissions.
  • A prompt window will pop up asking for permission. Click 'Yes' to proceed.
  • Now, it's time to check the disk for errors and try to fix them. Type in 'chkdsk (drive letter): /f' and press Enter. Replace '(drive letter)' with the actual letter of the drive where your files were lost. For example, if it's the G drive, type 'chkdsk G: /f'.

    type chkdsk
  • Next, input the command 'attrib -h -r -s /s /d (drive letter)*.*'. Again, replace '(drive letter)' with the appropriate letter of your drive. This command helps in recovering hidden or system files.

After completing these steps, check your drive to see if your lost files have reappeared. If this method doesn't work, don't worry – there are more ways to recover your files. Let's move on to the next solution and see if that can help you get your files back.

Way 4: Enabled File History to Recover Cut and Paste Files

For Windows 10 users, there's a handy feature called File History that can help recover files lost during cut and paste operations. But first, you need to make sure it's turned on.

Here's how you can check and use it:

  • Go to 'Settings' on your Windows 10 computer.
  • Click on 'Update & Security', then select 'Backup'.
  • Check if 'Automatically back up my files' is enabled. If it's not, this method won't work for you.

    automatically back up

    If you had File History enabled before your files went missing, you're in luck:

  • Find the folder where your missing file should be.
  • Click on the 'Home' tab at the top and then choose 'History'.
  • Look for your missing file. When you find it, just double-click and select 'Restore' to get your file back.

This method is a lifesaver if you've accidentally lost files during cut and paste. It's like having a time machine for your files!

Way 5: Apply the System Restore

If you've lost files during a cut and paste and have System Restore enabled on your Windows 11/10 PC, you can get them back. System Restore lets you take your computer's system files and settings back to an earlier point in time, potentially before the files were lost.

Here's how to use it:

  • In the Windows search box, type 'Create a restore point' and open it.

    open
  • Click on 'System Restore' in the window that appears.

    system restore
  • Click 'Next'. You'll see a list of restore points. Choose one with a date and time before you lose your files.
  • Click 'Next', then 'Finish'. Your computer will start the restore process. After the process finishes, check your documents folder to see if your lost files are back.

Way 6: Check Cloud Backup to Recover Cut and Paste Files

If you've lost files during a cut and paste operation and use cloud storage like Google Drive or Dropbox, there's a good chance you can recover them.

Here's a simple way to check:

  • Open your web browser and log in to your cloud storage service. Make sure not to sync your local app at this stage, as it might overwrite the cloud version.
  • Once logged in, look for the files you lost. They might still be there, especially if you've set up automatic syncing.
  • If you find your files, you can easily save them back to your Windows computer.

    save them back

This method is quite handy when files disappear after a cut and paste error. But, if the files are permanently deleted from your cloud storage, you might need to use a professional data recovery tool like 4DDiG Data Recovery for further assistance.

Part 4: Frequently Asked Questions

Q 1: When Do You Get Files Lost During Cut and Paste?

Ans: Files are often lost during cut and paste when there's an interruption, like a power failure or system crash. It can also happen if the destination drive is removed too soon.

Q 2: Where Does the Cut and Paste File Go?

Ans: When you cut a file, it stays in its original location until the paste operation is completed. If the paste isn't successful, the file may remain hidden or unsaved in the original location.

Q 3: What Are the Differences between Copying and Cutting?

Ans: Copying creates a duplicate of the file in a new location without removing the original. Cutting moves the file to a new location, removing it from the original place after pasting.

Final Thoughts

Losing files during cut and paste is a common problem many users face. It's frustrating, especially when you're moving important data. In this article, we've explored six effective ways to tackle this issue. Each method provides a unique approach to recovering your lost files. However, if these methods don't work, don't lose hope. 4DDiG Windows Data Recovery is a reliable software that can come to your rescue. It's designed to handle various data loss scenarios, making it an excellent option when other methods fall short. So, if you're still struggling to recover your lost files, give 4DDiG Data Recovery a try. It's user-friendly, efficient, and could be the solution you need.

Remember, with the right tools and methods, recovering lost files is often possible. Use 4DDiG, get things fixed, and say goodbye to the stress of lost data.

William Bollson (senior editor)

William Bollson, the editor-in-chief of 4DDiG, devotes to providing the best solutions for Windows and Mac related issues, including data recovery, repair, error fixes.

(Click to rate this post)

You rated 4.5 ( participated)