Quick Ways to Enlarge Image without Losing Quality
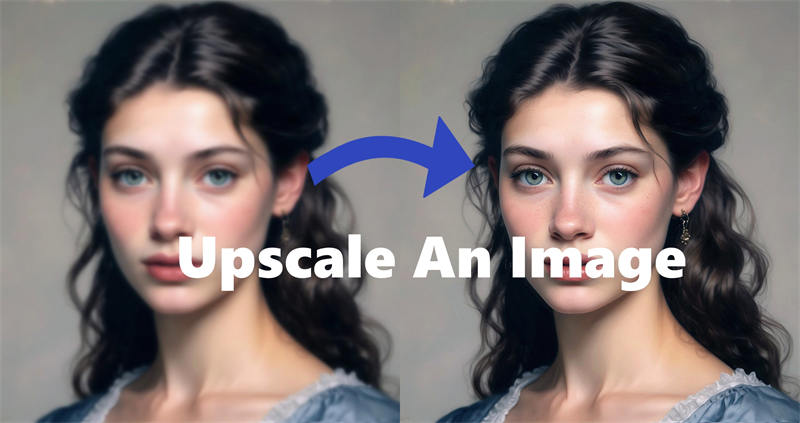
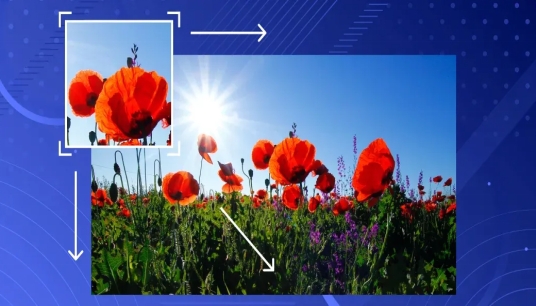
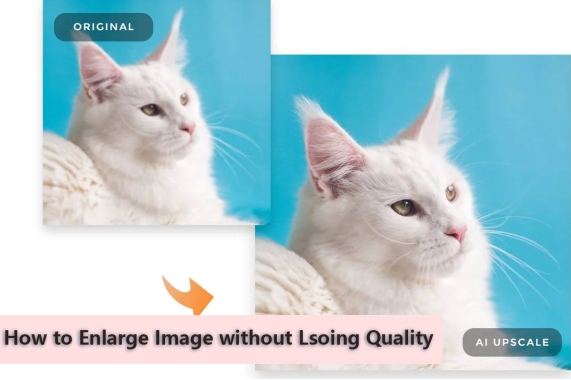
It can be a challenge to enlarge image without losing quality. When you resize an image to make it bigger, the pixels stretch, often resulting in a blurry or pixelated photo. Thankfully, advanced tools and techniques can help you enlarge images while maintaining their clarity and sharpness. This guide provides detailed steps and solutions for achieving high-quality results.
Why Does Enlarging Images Lead to Quality Loss?
Enlarging an image often leads to quality loss due to the following reasons:
- Pixelation: Images are made up of tiny squares called pixels. When stretched, these pixels become visible, leading to a pixelated look.
- Lack of Data: Many images are saved in compressed formats (like JPEG). Low-resolution images have fewer pixels, so when enlarged, there isn’t enough data to maintain clarity.
- Interpolation Methods: Many resizing tools use basic interpolation methods that guess the new pixel values, causing blurriness or distortion.
- Loss of Detail: Enlarging an image may make it blurry or lose sharpeness, which cannot see fine details clearly.
- Aspect Ratio Distortion: If only change the dimensions of an image but not maintaining its aspect ratio can lead to stretching. it can distort the image and make it look unnatural.
- Compression Artifacts: Many images are saved in compressed formats (like JPEG). Enlarging a compressed image can make these artifacts more pronounced.
Understanding these issues helps in selecting the right tools and techniques to minimize quality loss.
Why It Is Significant to Enlarge Photos Without Losing Quality
Enlarging images without compromising quality is essential for several scenarios:
- Printing: For large prints like posters, maintaining high resolution is crucial.
- Professional Use: Businesses need sharp images for branding, presentations, and advertisements.
- Online Sharing: Social media and websites often require specific resolutions for better engagement.
- Restoring Old Photos: Enlarging low-quality or old photos without losing detail helps preserve memories.
Choosing the right method ensures your photos remain visually appealing and fit for their intended purpose.
Method 1: How to Resize Images Without Losing Quality Using Software Tools
Here you will be learning how do you enlarge a photo without losing quality:
1. How to Enlarge Picture without Losing Quality Photoshop
Photoshop is a professional tool that offers advanced options for resizing images. Photoshop’s smart resizing features ensure minimal quality loss.
☞ Steps to Enlarge Images in Photoshop:
-
Launch Photoshop and load your image by clicking “File” > “Open”.
-
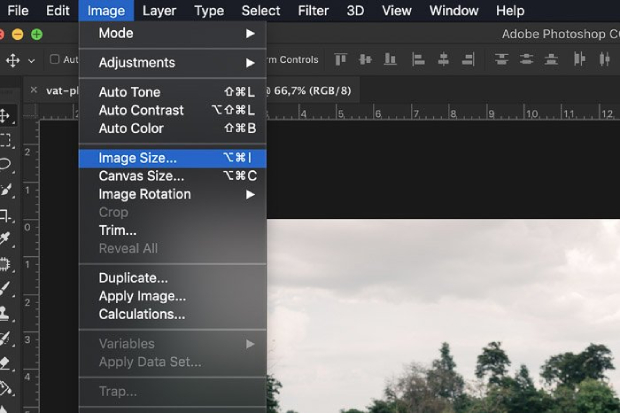
Click on the top "Image" tab in the menu and select "Image Size".

-
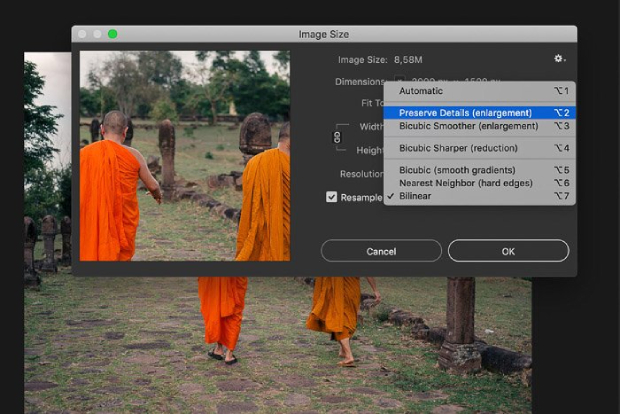
Check the "Resample" box and choose "Preserve Details 2.0" or “Preserve Details (enlargement) from the dropdown.
-
Adjust the “Resolution”, “Width”, and “Height” values to your desired size.
-
Click "OK" and save the enlarged image.

2. How to Use GIMP to Enlarge an Image Without Losing Quality
GIMP is a free alternative to Photoshop with powerful resizing options. GIMP’s interpolation settings help maintain clarity during resizing.
☞ Steps to Resize Images in GIMP:
-
Start GIMP and select “File” > “Open” to import your image.
-
Proceed to press "Image" from the top toolbar and tap "Scale Image".
-
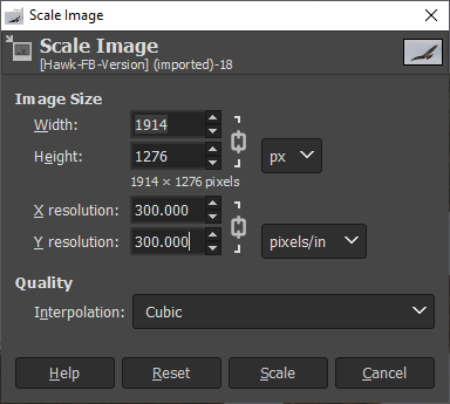
On the new pane, select "Cubic" or "Sinc (Lanczos3)" for better results from the “Interpolation” section.
Meanwhile, adjust the width and height as needed.
-
If necessary, adjust the X Resolution and Y Resolution to a higher value (e.g., 300 ppi).
-
Once done, click “Scale” and then Save the enlarged image in a high-quality format.

Method 2: Use Professional AI Image Enlarger Without Losing Quality
In fact, it is complicated for beginners to use the Photoshop and GIMP photo editing software. If so, you can turn to an expert photo enlarger. That is 4DDiG AI Photo Enhancer, a cutting-edge tool designed to enlarge images while improving their quality simultaneously. It is equipped with a leading AI technology to analyze the image and intelligently add missing details, ensuring sharp and vibrant results.
Secure Download
Secure Download
⭕ What 4DDiG AI Photo Enhancer Can Do
- Increase resolution of image up to 4K and even 8K without distortion.
- Sharpen blurry photos to enhance details and clarity.
- Resize and enhance multiple images in bulks simultaneously
- Simple and intuitive for both Pros and novices.
- Remove noise and grainness from photos for clearer visuals
- Restore old images and add color to black-and-white photos with AI.
- High success rates and quick enlarge speed
⭕ How to Enlarge Image and Increase Quality Using 4DDiG AI
-
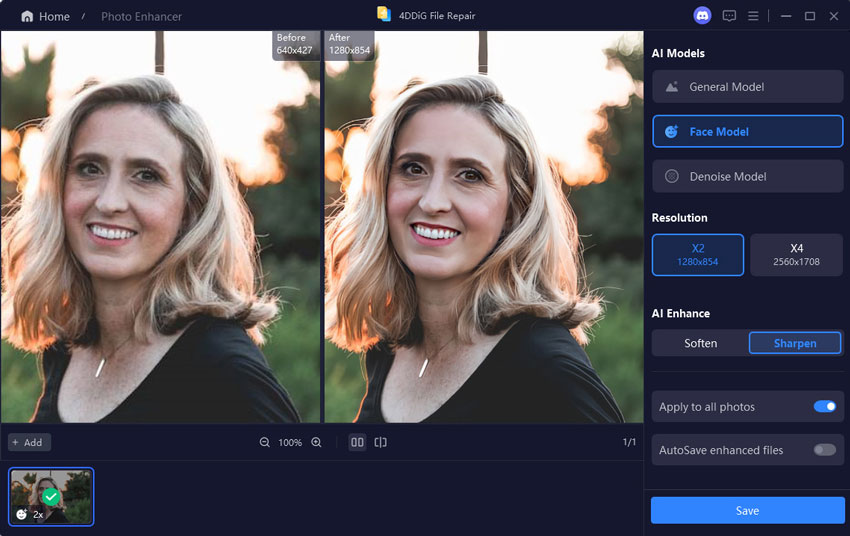
Initiate the 4DDiG Photo Enhancer AI software. Later, navigate to “AI Enhancer” from the left and choose “Photo Enhancer”.

-
Press the “Add Videos” button to commence the image uploading process for enlargement later.

-
From the right panel on the new screen, customize the Width and Height to higher values on the “Custom” section. Upon customization, tap “Enhance” to start enlarging.
Tips:
To enlarge image and increase quality at the same time, click an AI model based on your image’s style. Then customize the Resolution. “X4” is recommended, which can increase photos to 3080p and higher.

-
When finished, click the Play icon to preview the enlarged effect and hit the “Save” button at the bottom right to store the image.

Method 3: How to Make Images Bigger Without Losing Quality Online Free
In case you prefer to find a solution to enlarge image and keep quality without software, please walk through the following tips:
1. Fotor Free Online Image Enlarger
Fotor is a user-friendly online free image enlarger that allows you to enlarge images easily and for free. It applies algorithms to upscale images without losing quality, ensuring that enlarged images remain sharp and clear.
Besides enlarging images, Fotor also provides a range of editing features, such as filters, cropping, and text addition. However, it is not as professional as the specialized software like 4DDiG Photo Enhancer. And it feeds with pop-up ads, which may contains viruses and malware.
☞ Steps to Enlarge Images Using Fotor:
-
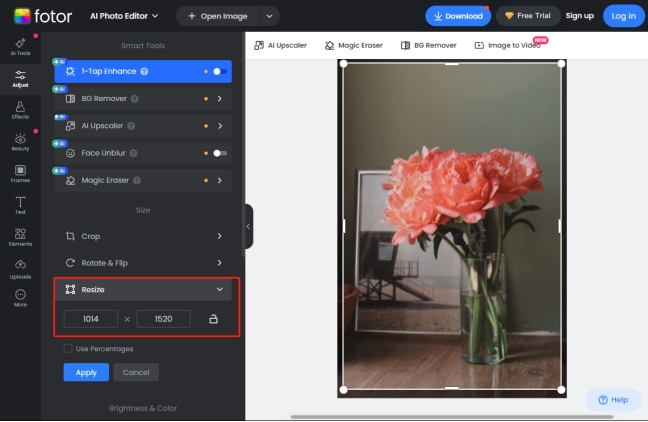
Visit the Fotor AI Image Enlarger website and drag you photos to it’s screen.
-
Then from the left menu, pick th the “Adjust” > "Resize" option. And enter higher dimensions to the boxes under “Resize”.
-
Once entered, click “Apply” and wait it to start complete the image enlargement.
-
Fianlly, click the top “Download” button if you are content to the enlarged result.

2. Let’s Enhance
Let’s Enhance is another popular online tool designed to improve and upscale images using advanced artificial intelligence algorithms. It empowers us to enhance and enlarge photos while preserving details and reducing artifacts.
Likewise, it’s drwabacks is less professionalism and not completely free. Users can only enhance 10 pictures for free unless you upgrade to its paid version.
☞ Steps to Use Let’s Enhance:
-
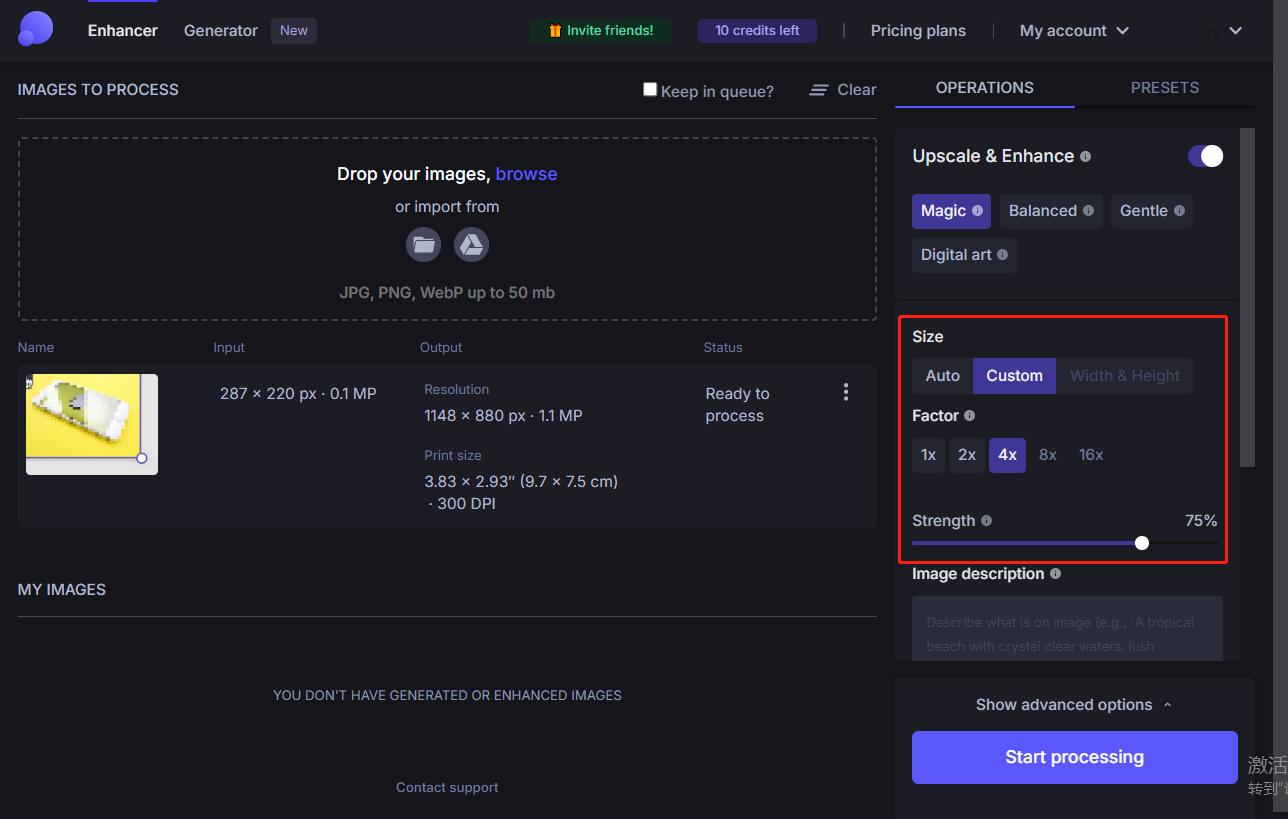
Go to the Let’s Enhance webpage.
-
Tap the blue “browse” tab or drag your images directly to import them to this online tool.
-
The under the right “Size” section, choose “Custom” to select a higher dimension factor (e.g., 2x, 4x). You can also select “Width & Height” if you have its paid version.
-
Afterward, click the “Start processing” button to begin enlarging photos.

Method 4: Practical Tips to Enlarge Photos Without Losing Quality
It might be surprising, but enlarging images has some interesting features that have to be followed effectively. These tips help to achieve high quality in different conditions of resizing.
- 💡 Tips
- 📌 Purpose
- Bring High-Quality Source Pictures
- This helps because most images should always be resized, and using a larger picture leads to better results.
- Adjust DPI Settings
- Raising the DPI for the print quality retains clarity on small scales as it is set at a standard value
- Use Vector Images
- In the case of vectors, you can extend the images as almost much as you want without it degrading in quality.
- Keeping the Aspect Ratio Intact to Avoid Distortion
- Remember to set the width and height of the image in order not to expand and give a squeezed appearance after shrinking.
- Export Pictures in High Quality Only
- For best quality, preserve the images in the PNG or TIFF formats.
- Prevent Excessive Upscaling
- Optimizing images by greatly, for example, 5x6 or 8x11, is not advisable as it compromises the quality of the compact images.
- Sharpen the Image
- Sharpening tools are then applied to editing software after resizing to enhance very small detail such as skin pores.
- Process Image in Layers
- This has the advantage of enabling better control of quality adjustments in the event that editing is done on layers
People Also Ask about Enlarging Photos without Losing Quality
Q1: What Image Does Not Lose Quality When Enlarged?
Vector images, such as SVG files, do not lose quality when enlarged because they are based on mathematical equations rather than pixels.
Q2: How to Enlarge Image Without Losing Quality in Word or PowerPoint?
Use high-resolution images and resize them proportionally in Word or PowerPoint. Additionally, save the document in a high-quality format to preserve clarity.
Conclusion
It is possible to e nlarg e image without losing quality with the right tools and techniques. From professional software like Photoshop and GIMP to AI-powered solutions like 4DDiG AI Photo Enhancer, there are options for every need and skill level. Online tools like Fotor and Let’s Enhance also offer convenient, free solutions.
By following practical tips and leveraging advanced tools, you can achieve sharp and clear enlarged images for printing, sharing, or restoring memories. Start experimenting today and unlock the full potential of your photos!
Secure Download
Secure Download


 ChatGPT
 Perplexity
 Google AI Mode
 Grok
Grok

