How to Upscale An Image (2026 ): 7 Methods to Help
Quality images get everyone’s attention whether they’re used for marketing products on social media or simply for presenting professional work. Therefore, knowing how to upscale an image without losing its quality becomes a must for someone having low-resolution photos that they would like to improve.
You can use Photoshop and GIMP software for this purpose. In this tutorial, we will share how to work with these tools for effective photo upscaling. We also have a better alternative that guarantees improved pictures without losing their quality. So, read on to learn the best image upscaling techniques!
Part 1: What Is an Image Upscaler?
An Image Upscaler is an AI tool that increases resolution of an image without sacrificing detail and sharpness. It analyzes an image and fills in new pixels based on learned patterns or surrounding pixels (super-resolution and interpolation). Another method, wavelet transformation, processes smaller parts of an image to reduce noise.
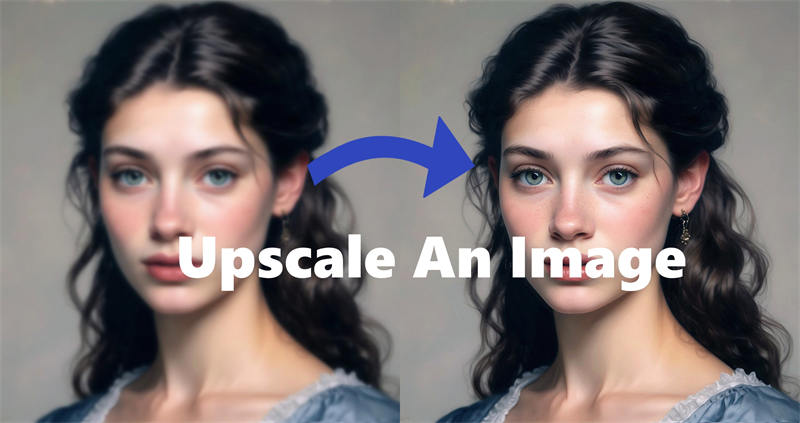
Part 2: How to Upscale An Image (Photoshop / GIMP)?
Hinging on which of two Image Scalers you prefer, you could either use Adobe Photoshop or GIMP (GNU Image Manipulation Program) to improve a picture. On one hand, Adobe Photoshop is a photo editing app by Adobe Inc. and is widely popular among professionals and hobbyists alike. It offers functions like photo retouching, image enlargement, graphic design, and 3D modeling, down to digital painting.
On other hand, GIMP is a free-of-cost, feature-laden image editor, with various tools for upscaling or improving low-resolution images similar to those in Photoshop. But unlike Photoshop, though, its interface is utterly ancient and doesn’t contain any advanced image editing features. Still, it’s a good alternative, mainly if you’re looking for a free tool. Here’s how to upscale images in Photoshop and GIMP:
☞ If you are new to photo editing software like Photoshop but just want to seek a free Chrome extension to enhance images, just check this listTop 5 AI Image Enhancer Free Extensions in 2025
In Photoshop:
Method 1: Adjust Image Resolution
If you want to change image DPI or PPI for print or screen without altering an image’s physical dimensions, adjust its resolution in Photoshop. This makes it suitable for print quality or optimizing display on various devices. Here’s how to do that:
-
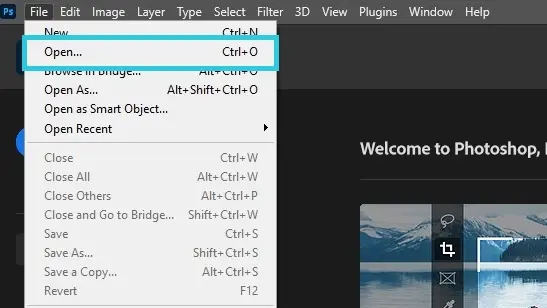
Open any image whose resolution you wish to adjust with Photoshop.

-
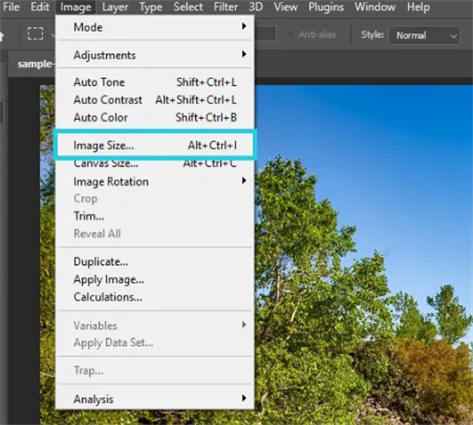
Head to “Image.” Then, choose “Image Size.”

-
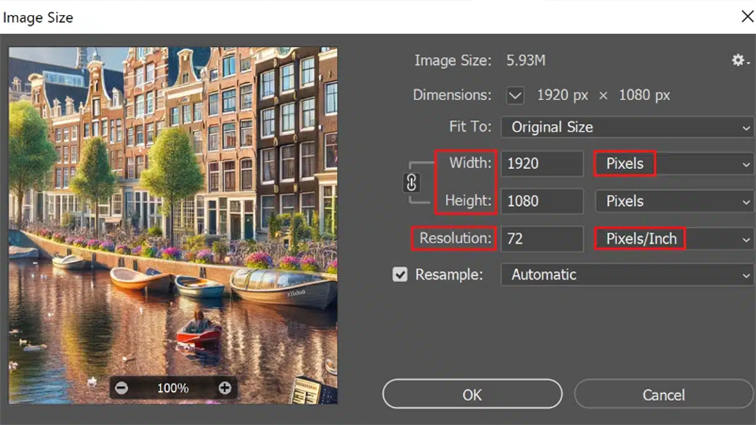
Next, uncheck “Resample” to keep same pixel count.
-
Input your desired resolution (pixels/inch), and Photoshop will adjust image size accordingly. You can also adjust height and width of picture and Photoshop will automatically adjust resolution accordingly. Hit “OK.”

Method 2: Increase Image Resolution
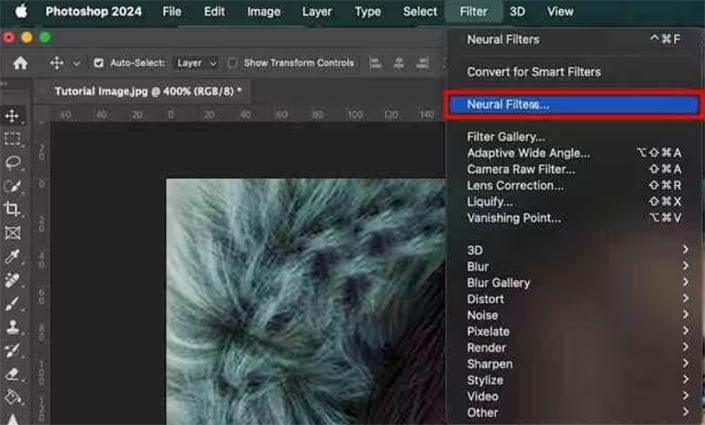
Photoshop offers several filters such as “Photo Restoration" or “Neural Filters” to improve image resolution and reduce artifacts. Here’s how to upscale an image in Photoshop using these them in Photoshop:
-
Open an image in Photoshop. Head to “Filter” up top. Then, select “Neural Filters” from the dropdown.

-
In right panel, move to “Photo Restoration.” Toggle it on.
-
Use sliders to adjust “Enhance Face” and “Photo Enhancement.” Open “Adjustments” for options like noise and JPEG artifact reduction. When satisfied, hit “OK.”

Method 3: Use the ‘High Pass Filter’
Sharpening an image improves contrast along edges where brightness and texture change. In Photoshop, a “High Pass Filter” feature can detect and highlight these edges to upscale an image. Here’s how to upscale an image without losing quality with this function:
-
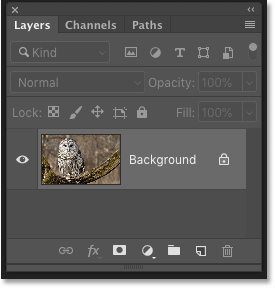
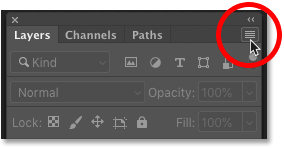
Open your image in Photoshop. Then, convert it to a “Smart Object” by clicking “menu” icon in “Layers” and allow filter adjustments.


-
Head to “Filter.” Then, choose “Other.” Pick “High Pass.”

-
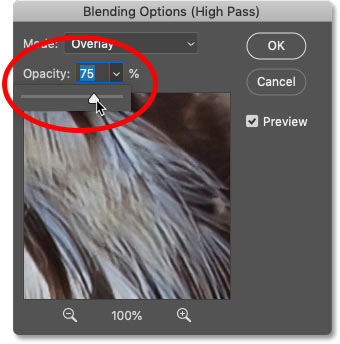
Choose a small radius (1-7) for subtle sharpening. In “Blending Options,” try “Overlay” for high contrast. Tap “Soft Light” for softer effects.
-
Use “Opacity Slider” to control sharpening intensity.

In GIMP:
Method 1: Upscale Layer
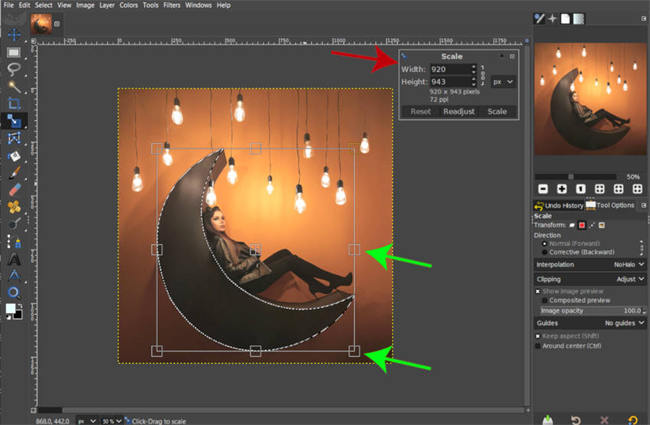
Layer scaling resizes an entire image or a specific layer in GIMP. This is ideal for when you want to enlarge everything uniformly, keep aspect ratio, or apply filters and effects to upscaled results. Here’s how to upscale an image in Gimp by upscaling layer:
-
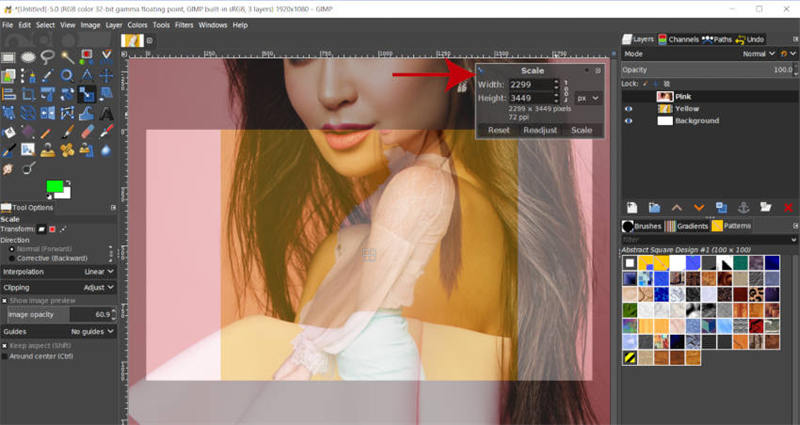
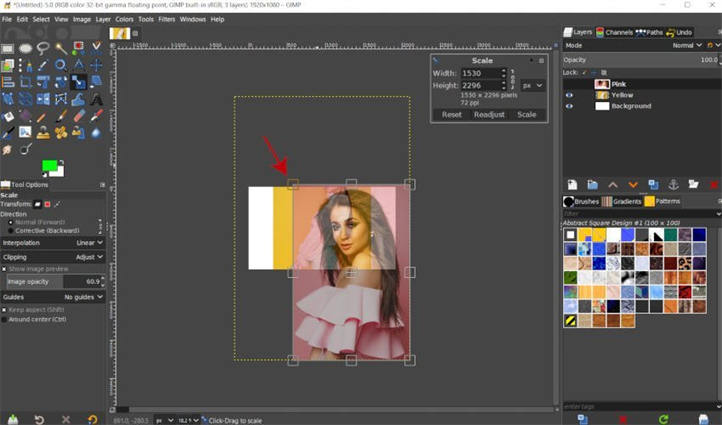
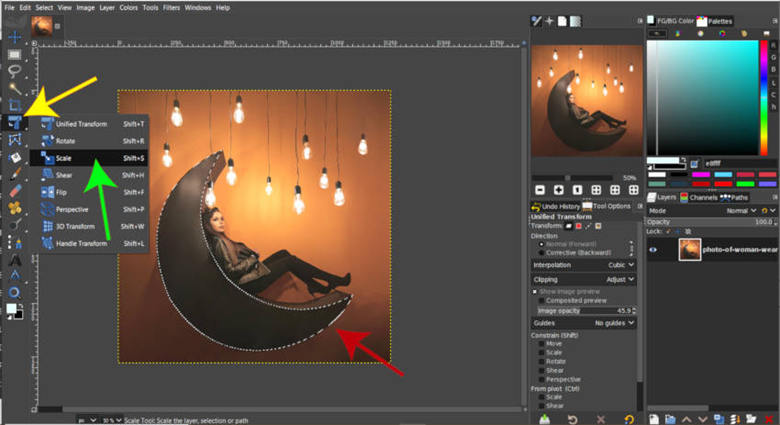
Open your image in GIMP. Then, click “Scale Tool” icon (small square over large square) in “Toolbox.”

-
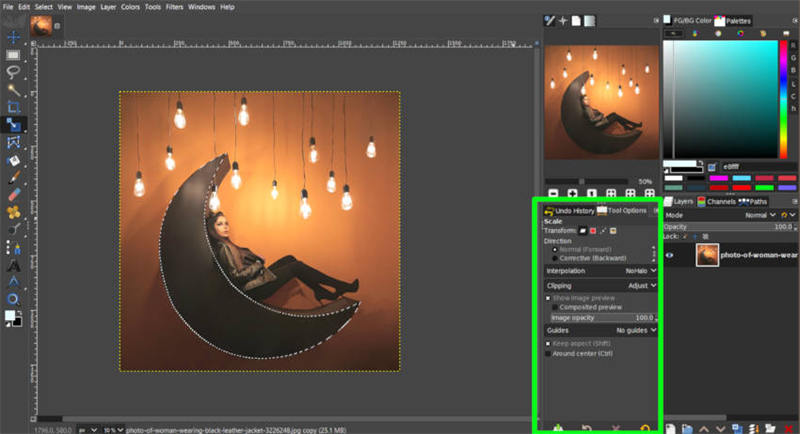
In “Toolbox Options” pick overlapping squares icon to scale layers.
-
Next, drag a corner handle to enlarge layer, holding “Ctrl” to maintain proportions.

-
Click “Scale.” GIMP will outline upscaled layer with a yellow dashed line.
Method 2: Upscaling the Selection
Selection scaling resizes only a chosen area of an image in GIMP. This is useful for enlarging a specific part of a picture while keeping rest unchanged. The upscaling selection allows applying effects or filters to just a chosen section. Here’s how to upscale an image by selecting scaling:
-
Open any image you wish to upscale in GIMP. Then, pick “Rectangular Select” tool. Drag to outline area you want to upscale in picture.
-
Tap “Scale” tool. Then, select “red square” icon in “Toolbox Options” to scale only selected area.


-
Drag to resize selection border (image inside remains unchanged). Next, hit “Scale.”
Method 3: Upscale a Path
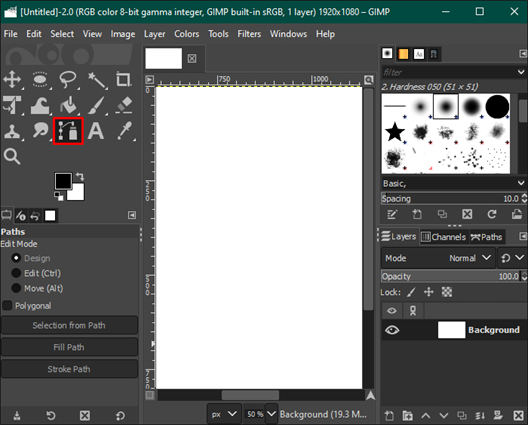
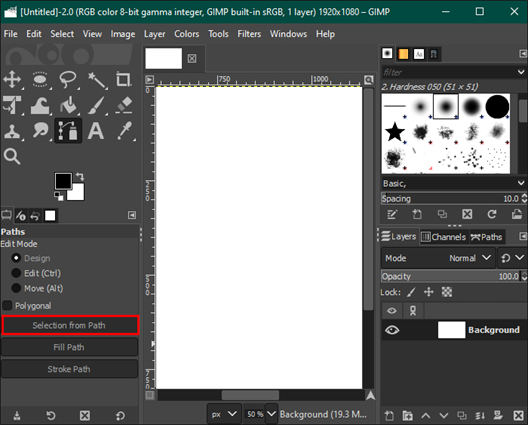
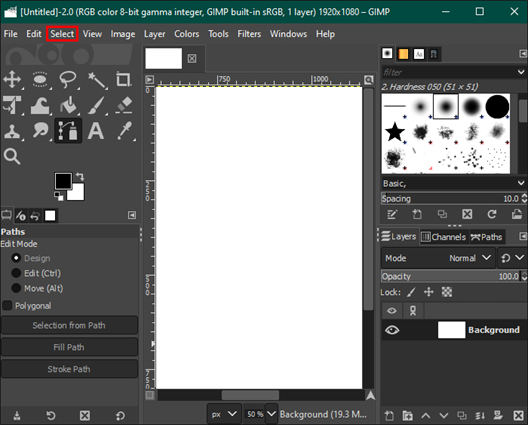
Path scaling resizes vector shapes or lines within an image, allowing you to adjust specific graphics without altering other elements. It’s useful for applying strokes or fills to enlarged path. Follow steps below to upscale a path:
-
Open an image in GIMP. Then, head to “Paths” toolbar on left. Pick “Selection from Path.”


-
Head to “Select.” Adjust your selection.

Part 3: How to Upscale An Image Without Losing Quality?
Using Photoshop or Gimp to learn how to upscale an image requires you to have technical knowledge of using them. Moreover, it’s impossible to eliminate quality loss completely with these tools.
Therefore, a better alternative would be to use an automatic AI Image Upscaler app that doesn’t require manual intervention and can upscale an image without quality loss. That’s where AI Photo Enhance feature in 4DDiG AI Photo Enhancer tool shines. Want to know what more this feature can do? Check out below:
- Upscale images to 4K and up to 8K without losing quality.
- Can improve specific photo types using 4 AI models: General, Face, Denoise, and Colorize Models.
- Precisely clear blurriness and background artifacts with AI.
- Remove noise and grain from photos for clarity.
- Improves images in various formats simultaneously.
- Allows zoom and view adjustments on upscaled images.
- Can zoom and enlarge images with increasing quality.
- Color black-and-white images to restore them with vibrant hues.
Here’s how to upscale an image with this AI Photo Enhance feature:
Secure Download
Secure Download
-
Install this photo quality enhancing tool on your computer and execute it. Then, tap “AI Enhancer” on tool. Next, click “Photo Enhancer.”

-
Choose “Add Photos” to upload images you want to upscale. Next, choose an AI Model (General, Denoise, or Face). Adjust resolution if needed. Tap “Enhance.”


-
The “AI Photo Enhancer” feature will upscale you rimage. You can preview it then adjust accordingly. Hit “Save” to export upscaled pictures to your computer.


How to Upscale An Image FAQs
Q1: How do I change a picture to high quality?
To change a picture to high quality use 4DDiG Photo Enhancer AI. It offers an AI Enhacer feature to improve picture quality up to 8K. Moreover, it can also reduce artifacts from pictures and allows you to preview them before saving.
Q2: How to upscale ablurry image?
You can upscale a blurry image in Photoshop. Here’s how to do that:
-
Load a blurry image in Photoshop. Then, press Ctrl + J (Windows) or Cmd + J (Mac).
-
Head to “Filter.” Then, choose “Blur.” Pick “Gaussian Blur” and adjust slightly.
-
Head to “Filter.” Hit “Sharpen.” Afterward, choose “Unsharp Mask” and set it to sharpen.
-
Head to “Filter.” Pick “Other.” Then, tap “High Pass” and adjust radius to improve detail in photo.
-
Next, adjust layer opacity. Consider using “Neural Filters” for additional improvements.
Q3: How to enlarge an image without losing quality?
You can enlarge an image without losing quality with help of AI Photo Enhancer feature in 4DDiG AI Photo Enhancer tool. It can successfully upscale pictures of various format at one time.
Conclusion
Now that you’ve learned how to upscale an image with Photoshop and GIMP you know these tools though offer control, require skill to use. They are also time-consuming and may not always yield best results when it comes to improving images without losing quality. For an automatic yet high-quality option, try “AI Photo Enhancer” feature in 4DDiG Photo Enhancer. It can boost resolution up to 8K effectively without sacrificing quality.
Secure Download
Secure Download





 ChatGPT
 Perplexity
 Google AI Mode
 Grok
Grok


