VP9 Video Extensions Download: Install, Offline Installer & Fix Playback Issues

5 mins read

Updated on 2026-07-15 11:12:06 to Video Tips

The VP9 Video Extension enables seamless playback of VP9-encoded videos, a modern, open-source codec designed for efficient streaming and high-quality playback on platforms like YouTube. Part of the Microsoft Windows VP9 Video Extensions Library, it’s essential for smooth video performance on Windows 10/11. Common issues like missing codecs or conflicts can disrupt playback, but this guide covers everything from understanding VP9 to downloading, updating, and uninstalling the extension for a hassle-free experience.

Part 1. VP9 Video Extensions Download from Microsoft Store for Windows 11/10

Before downloading, know that there are two main options: downloading from the Microsoft Store or using offline installers. For systems without Microsoft Store access, the VP9 Video Extensions without Microsoft Store method is ideal.

Common Download Sources:

  • Microsoft Store: Official source for the VP9 Video Extensions Metro App (version 1.2.6.0 as of May 2025).

Download VP9 Video Extensions from Microsoft Store

  • Open the Microsoft Store app on your Windows 10/11 device.

  • Search for “VP9 Video Extensions” or visit the direct link: Microsoft Store VP9 Video Extensions.

    download vp9 video extension metro app
  • Click Get to download and install the VP9 Video Extensions Metro App. Sign in with a Microsoft account if prompted.

  • Wait for the installation to complete, then test by playing a VP9-encoded video in the Movies & TV app.

Part 2. Install VP9 Video Extensions Using Offline Installer & Widget & Powershell (Without Microsoft Store)

If Microsoft Store is blocked, unavailable, or keeps failing to download VP9 Video Extensions, you can still install the codec without opening the Store app. This is useful for work computers, school PCs, restricted Windows environments, or users who receive Microsoft Store errors during installation.

There are three practical ways to install VP9 Video Extensions without using the Microsoft Store interface: using an offline installer, installing it with Winget, or reinstalling it with PowerShell when the extension is already broken or not working properly.

1. VP9 Video Extensions Offline Installer

If your device can’t access the Microsoft Store:

  • Visit a trusted third-party site like Uptodown or Microsoft update catalog.

    download vp9 video extension from uptodown
  • Download the VP9 Video Extensions offline installer (e.g., Microsoft.VP9VideoExtensions_1.2.6.0_x64.appx).

  • Open PowerShell as an administrator. Just right-click “Start” > select “Windows PowerShell” (Admin).

  • Run the command: Add-AppxPackage -Path "C:\Path\To\Downloaded\Microsoft.VP9VideoExtensions_1.2.6.0_x64.appx" (replace with your file path).

  • Press Enter to install and verify by playing a VP9 video.

If double-clicking the package does not work, you can install it manually with PowerShell. Right-click the installer file, copy its file path, then open Windows PowerShell as administrator and run:

Add-AppxPackage -Path "C:\Users\YourName\Downloads\VP9VideoExtensions.appxbundle"

Replace the example path with the actual location of your downloaded VP9 Video Extensions package.

Notes

Avoid downloading unknown codec packs or modified installers. For safety, use a reliable package source and make sure the installer is not bundled with unwanted software.

Method 2. Install VP9 Video Extensions with Winget

If your computer supports Windows Package Manager, you can install VP9 Video Extensions with Winget. This method does not require you to search for the extension manually in Microsoft Store, but it still uses the Microsoft Store source to get the package.

Follow these steps:

  • Right-click the Start button.

  • Choose Terminal (Admin), Windows PowerShell (Admin), or Command Prompt (Admin).

  • Run the following command:

winget install --id 9N4D0MSMP0PT --source msstore
  • Wait for the installation to finish.

  • Close and reopen your video app or browser.

  • Try playing the VP9, WebM, MKV, or MP4 video again.

This method is especially helpful when Microsoft Store opens slowly, cannot load the VP9 Video Extensions page, or keeps showing download errors.

Tips

If Winget is not recognized on your PC, your Windows version may not include Windows Package Manager, or it may be disabled by your organization. In that case, use the offline installer method instead.

Method 3. Reinstall VP9 Video Extensions with PowerShell

If VP9 Video Extensions is already installed but your VP9 or WebM videos still cannot play, the extension may be outdated, damaged, or not registered properly. Reinstalling it can help fix broken codec components.

First, check whether VP9 Video Extensions is installed on your PC. Open Windows PowerShell as administrator and run:

Get-AppxPackage *VP9VideoExtensions*

If the extension is installed, PowerShell will return package information such as the package name, version, and install location. If nothing appears, VP9 Video Extensions may not be installed.

To remove the current VP9 Video Extensions package, run:

Get-AppxPackage *VP9VideoExtensions* | Remove-AppxPackage

After the removal is complete, reinstall VP9 Video Extensions with Winget:

winget install --id 9N4D0MSMP0PT --source msstore

Once the installation is finished, restart your video player or browser and open the VP9 video again.

Notes

If the video still shows a black screen, has no sound, freezes, or cannot be opened after reinstalling VP9 Video Extensions, the issue may come from the video file itself rather than the codec. In that case, the VP9/WebM file may be corrupted. You can try repairing it with 4DDiG Video Repair before converting the video or reinstalling codecs again.

Part 2. What Is VP9 Video Extension & Do I Need It?

1. What does VP9 Stand For & VP9 Video Extension Meaning

VP9 stands for “Video Processing 9,” a royalty-free, open-source video coding format developed by Google. It’s widely used for online video platforms such as YouTube and Netflix, where it enables smooth, high-resolution video playback without using excessive bandwidth.

The VP9 Video Extension is a Microsoft-developed add-on that allows Windows apps — including Edge, Movies & TV, and third-party players — to decode VP9 content natively. It is part of the Microsoft Windows VP9 Video Extensions library and is available for free via the Microsoft Store or other sources.

Without this extension, users may encounter:

  • Playback errors in web browsers when streaming VP9 content
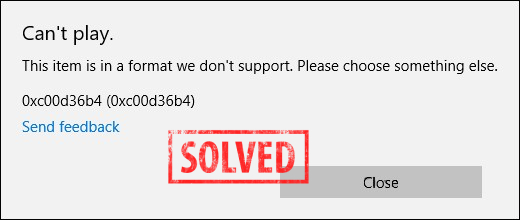
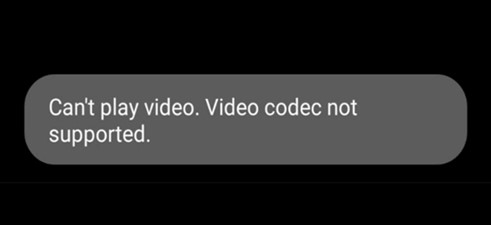
  • "Format not supported" messages in media players
  • Audio-only playback with missing video streams
  • Performance issues when accessing YouTube, Netflix, and other streaming platforms

2. Do I Need VP9 Video Extension?

Yes. You need it, especially if you encounter any of the following scenarios:

  • You're trying to play VP9-encoded videos (.webm or .mkv) in Microsoft Edge or the Movies & TV app, but see playback errors.
  • You use video editing or playback software that depends on system codecs.
  • You want to watch 4K or 8K videos on YouTube without stuttering.
  • Your hardware supports VP9 acceleration but lacks software decoding.

If you're running Windows 10 or 11 and care about streaming efficiency or modern media compatibility, having the VP9 Video Extension installed ensures better performance and fewer compatibility issues.

Part 3. How to Uninstall VP9 Video Extension

If you no longer need the VP9 Video Extensions or want to remove VP9 Video Extensions due to conflicts or minimal usage, uninstalling is straightforward. This can free up space or resolve issues on systems like Windows 10/11 LTSC where codec management is critical. Follow these steps to safely remove the extension using built-in Windows tools.

Via Settings

  • Open Settings (Windows key + I) and navigate to Apps > Apps & features.

  • Search for “VP9 Video Extensions” in the list.

  • Click on the app and select “Uninstall”. Confirm if prompted.

  • Restart your PC to ensure the extension is fully removed.

Via PowerShell (For Advanced Users or LTSC Systems):

  • Open PowerShell as an administrator.

  • Run the command: Get-AppxPackage Microsoft.VP9VideoExtensions | Remove-AppxPackage.

    uninstall vp9 video extension with powershell
  • Press Enter to uninstall the VP9 Video Extensions Metro App.

  • Verify removal by checking if VP9 videos no longer play natively in Windows apps like Movies & TV.

Part 4. Bonus Tip: How to Fix Corrupted Video Files After VP9 Installation Issues

Sometimes, during VP9 installation or conversion processes, your video files may become corrupted, showing no image, audio glitches, or playback failure. Don’t worry. You can repair these files using a professional tool like 4DDiG Video Repair.

FREE DOWNLOAD

Secure Download

FREE DOWNLOAD

Secure Download

4DDiG Video Repair is a powerful tool designed to fix broken, unplayable, or corrupted video files, including those affected by VP9 codec issues. It supports a wide range of video formats like MP4, MOV, AVI, MKV, Webm (VP9-related video codec), and more.

It’s especially useful if:

  • VP9 files crash media players after installation
  • Conversion attempts lead to file damage
  • Videos freeze or show green/black screens
  • Fire up the 4DDiG File Repair software on PC. Then choose “Video Repair” > “Add Videos” box to upload the VP9-related video files (Webm) or other popular files (MP4, MOV, etc) to this software or via the drag-and-drop action.

    add vp9 related videos to repair
  • Once uploaded, hit “Repair All” to kick off the repair process for corrupted files affected by VP9 Video Extension. Also, you can enable the bottom “Advanced Repair Mode” for higher success rates.

    repair all added video files
  • Wait it to complete. Afterward, you can check the repaired result from “Preview” and export them from "Save" or "Save All".

    preview and save repaired videos

People Also Ask about Windows VP9 Video Extension

Q1: Is VP9 a good codec?

Yes. VP9 is a highly efficient, open-source codec developed by Google. It provides excellent video quality at lower bitrates compared to older formats like H.264. It’s widely supported by YouTube, Netflix, Chrome, Firefox, and newer Android and Windows systems.

Q2: Does MP4 support VP9 codec?

Technically, MP4 can support the VP9 codec, but it’s not commonly used. MP4 containers typically use H.264 or H.265 codecs due to broader compatibility. VP9 is more often found in .webm or .mkv containers, especially for streaming. If you need VP9 in an MP4 file, you can convert it using tools like Online-Convert. The VP9 Video Extensions latest version ensures Windows apps can play VP9 content, regardless of the container.

Q3: What is VP9 Video Extension and do I need it?

The VP9 Video Extension is a Microsoft add-on for Windows 10/11 that enables apps like Edge and Movies & TV to play VP9-encoded videos smoothly. You need it if you experience playback errors on YouTube, Netflix, or when playing .webm/.mkv files.

Q4: How to install VP9 Video Extension on Windows 10/11?

You can install it directly from the Microsoft Store by searching for "VP9 Video Extensions". For systems without Store access, you can also use the offline installer through PowerShell.

Conclusion

The VP9 Video Extension enhances Windows 10/11’s ability to play high-quality VP9 videos, like those on YouTube, using the Microsoft Windows VP9 Video Extensions Library. Now you have figured out its purpose, installation, conversion to MP4, and fixing corrupted files with tools like 4DDiG Video Repair. Whether installing, uninstalling, or troubleshooting, these steps ensure seamless video playback.

FREE DOWNLOAD

Secure Download

FREE DOWNLOAD

Secure Download

William Bollson (senior editor)

William Bollson, the editor-in-chief of 4DDiG, devotes to providing the best solutions for Windows and Mac related issues, including data recovery, repair, error fixes.

(Click to rate this post)

You rated 4.5 ( participated)