Top 6 Ways to Increase Resolution of Image
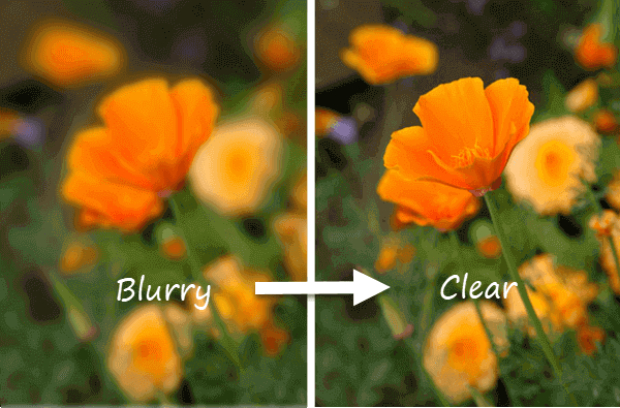
Learn how to increase resolution of Image using 4DDiG Photo Repair and explore other 5 easy-to-follow methods that will help you increase photo resolution in no time.
“How to increase the resolution of an image?”
“I scanned an old photograph of my mom and her late father with the intention of printing and framing it as a gift. But, it came to about 600x400px which is not really ideal for a larger print. Is there a way to increase its resolution so that I can make a print while maintaining its original quality? Any advice would be very much appreciated.”
Are you wondering how to increase resolution of image? If you find yourself in a similar situation to the one described above, where the need to boost image resolution for larger and high-quality prints arises, you're in luck. This guide will delve into the top 6 methods to elevate the resolution of your images, enabling you to produce stunning prints while preserving the original image’s quality. So, let’s get started.

Part 1. Can You Increase the Resolution of a Photo?
The short answer is Yes. In the past, while you could employ certain techniques to increase image resolution , it often led to a loss of image quality and it couldn't magically introduce details that were absent in the original image.
Today, thanks to advanced photo editors like Adobe Photoshop, and AI-driven image upscaling software like 4DDiG Photo AI Photo Enhancer, increasing the resolution of an image without compromising its quality has become a possibility. These cutting-edge tools allow you to increase image resolution while preserving the integrity of the original image.
Now let's discuss how to increase the resolution of image using these tools.
Part 2. How to Increase Resolution of Image?
We’ve lined up the top 6 methods and tools to help you increase your image resolution. Let’s dive right in and explore how to make an image higher resolution using these resources.
Method 1. Increase the Resolution of Image in Photoshop
Adobe Photoshop, a popular image editing software, offers interpolation options that can help you increase the pixel count of your images. With its upscaling algorithms, you can increase your photo resolution and quality to perfection.
Here’s how to increase the resolution of an image in PhotoShop.
-
Open your Image in Photoshop and go to Image> Image Size. A window will appear showing the current dimensions of your Image.

- In the Image Size window, type in your desired width or height, and Photoshop will automatically adjust the other dimension to maintain the aspect ratio. If you want to adjust both width and height separately, click the chain icon.
-
Next, you'll see a field called "Resolution." This refers to the number of pixels per inch (DPI) in your Image. For online use, a resolution of 72 DPI is sufficient, while for print, 300 DPI is the standard. Adjust the resolution according to your needs.

-
Click the Resample drop-down menu, choose “Bicubic Smoother” or “Bicubic Sharper” to produce better result.

-
To enhance the overall clarity of the image after you increase its resolution, go to Filter > Sharpen > Unsharp Mask.

-
In the Unsharp Mask window, adjust the Amount and Radius sliders to find the right level of sharpening. Start with an Amount of around 100% and a Radius of 1.0, then adjust as needed.

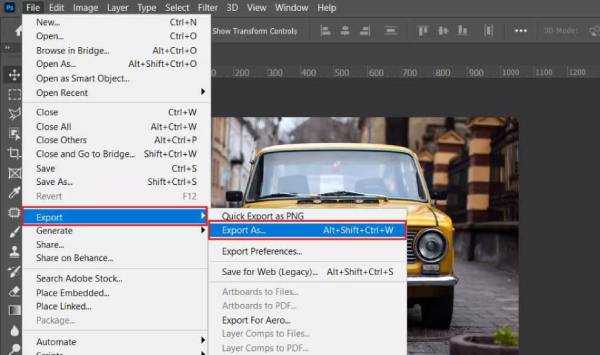
- Finally, save your Image after making these adjustments by selecting File > Save or Save As.
By following these simplified steps, even beginners can increase the resolution of their images using Photoshop.
Method 2. Increase Photo Resolution with Image Upscaling Software
If you’re wondering how to increase the resolution of an Image without Photoshop, upscaling dedicated image software can be a convenient solution. Among the available options, 4DDiG AI Photo Enhancer comes to the forefront. This software employs advanced AI algorithms to automatically increase the resolution of your images while enhancing their quality. It simplifies the photo upscaling process, making it user-friendly for both beginners and experienced users. Whether you're dealing with old photographs, digital images or snapshots captured with various devices, its advanced algorithms ensures that you can achieve your desired outcome.
Here are more features of 4DDiG Photo Enhancer:
- Suitable for various image types, including damaged, blurry or old photos.
- Offer multiple AI enhancement modes for high-quality results.
- Reduces noise and grain for cleaner images.
- Batch enhance multiple images at once.
- Allow you to preview enhanced images before saving.
- Support various image formats like JPG, PNG, RAW, and more.
To increase the resolution of an image using 4DDiG Photo Enhancer, follow these steps:
-
After installing this software on your Windows PC or Mac, open the tool and go to the left "AI Enhancer" tab. Then pick "Photo Enhancer" to proceed.
FREE DOWNLOADSecure Download
FREE DOWNLOADSecure Download

-
On the new screen, tap on the blue button "Add Videos" to add your low-resolution photo to this enhancer.

-
Once added, from the right side, choose an AI model according to the style of your photo. Most importantly, select "X4" from the Resolution section. Then click "Enhance" to start increasing photo resolution.

-
After increasing, check and then store the high-resolution photo by clicking "Save".

So that’s all about how to increase photo resolution using the 4DDiG Photo Enhancer tool.
Method 3. Increase the Resolution of Image Using GIMP
GIMP, a free and open-source image editor, provides features for increasing image resolution. While it may not be as robust as Photoshop, it can be a valuable alternative, especially for those on a budget.
Follow these steps to learn how to make an image higher resolution using GIMP:
- Launch GIMP and open the image you want to work on.
-
Go to the “Image” menu and select "Scale Image" to access the resizing options.

-
In the Scale Image dialog box, keep the X and Y resolutions linked to one another, then type in your desired resolution within the X Resolution box, and the Y Resolution will adjust accordingly.

- Click the “Scale” button to apply the changes and increase the resolution of the Image.
-
Once you are satisfied with the results, save the enhanced Image using the “Save” or “Save As” option, choosing your preferred file format and location.

Method 4. Increase Image Resolution with Preview in macOS
If you're a macOS user, the Preview application offers a basic image resizing feature. While it may not provide the same level of control as professional software, it can be a quick and convenient option for increasing image resolution.
The below steps show you how to change resolution of image on your MacBook.
- Right-click on the low-resolution image file and open it with the Preview application.
- In the top menu bar, click on “Tools” and select "Adjust Size" from the drop-down menu.
-
In the Adjust Size dialog box, deselect “Resample image” and then change the resolution by entering a new value in the "Resolution" field. Ensure that the "Scale proportionally" box is checked to maintain the aspect ratio of the Image.

- Once you’re done increasing the resolution, click “OK” to apply the changes.
- To save your modified image, go to the “File” menu, select “Save As” and give it a new file name.
Method 5. Make a Picture Higher Resolution Online
If you're looking for a convenient way to increase image resolution online without the need for specialized software, some popular online services, such as Let's Enhance, Waifu2x, and AI Image Enlarger, offer image upscaling services. These platforms allow you to upload your image, and they utilize AI algorithms to enhance its resolution.
Let’s show you how to make a picture higher resolution online using Let's Enhance.
- Go to the Let's Enhance website using your web browser. Quickly create your account and log in.
-
Click “Browse” to select and upload the image you want to enhance.

-
Choose the desired enhancement options, such as Smart Enhance or Smart Resize.

-
Start the enhancement by clicking “Start Processing.” The Let’s Enhance algorithm will analyze and improve image quality.

- Once the enhancement is complete, click “Download” and save the enhanced image to your device.
Method 6. Increase Resolution of Image on Phone
If you want to increase photo resolution on your mobile device, various apps are are available for this purpose. Examples of such apps include PicsArt Photo Editor, Remini, and Adobe Lightroom Mobile. These apps allow you to enhance photos directly on your smartphone, making them a convenient choice for on-the-go editing.
Here’s how to increase resolution of image on your phone with PicsArt:
- Open the PicsArt Photo Editor app once it’s installed on your phone.
- Tap on the purple plus sign to upload the image you want to enhance.
-
Tap on Tools in the app’s editing options. Then select Resize.

- Type in your preferred new image size width and height values. For a better result, you can click the Adjust tool and sharpen your image.
-
Once you are satisfied with the changes, click Next to save the enhanced Image to your phone’s gallery or share it directly from the app.

FAQs about Increasing the Resolution of Image
Q1: What happens when you increase the resolution of an image?
When you increase the resolution of an image, you are adding more pixels to the Image, resulting in a higher level of detail and sharpness. The image will appear clearer and more defined, especially when viewed at larger sizes or printed at higher resolutions.
Q2: Does increasing resolution increase quality?
Increasing the resolution of an image can improve its quality to some extent by making it sharper and more detailed, especially if done using advanced algorithms or photo upscaling software. However, the overall quality improvement depends on factors such as the original image’s clarity and the method used to increase resolution.
Q3: Does changing resolution affect image size?
Yes, changing the resolution of an image can affect its size. Increasing the resolution typically results in a larger file size because more pixels are being added. This can impact the image’s storage requirements and its ability to be displayed or shared efficiently.
The Bottom Line
In conclusion, we’ve covered several ways to increase resolution of image using different photo editing and upscaling tools. While each of these tools can be effective, the standout recommendation is 4DDiG AI Photo Enhancer . With advanced algorithms, a user-friendly interface, and the ability to increase resolution while preserving image quality, it outshines the competition. So don't wait – download 4DDiG Photo Enhancer now to make your photo higher resolution sharper details and outstanding print quality.


 ChatGPT
 Perplexity
 Google AI Mode
 Grok
Grok


