How to Take Screenshot on Windows 11: Easy Shortcuts, Tools, and Pro Tips
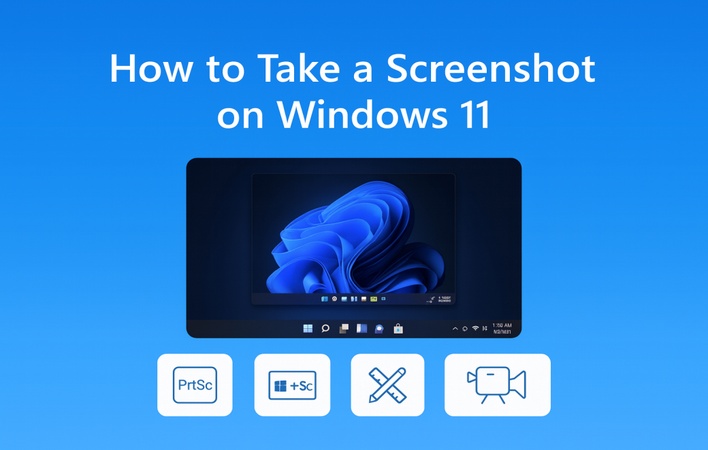
Taking a screenshot on Windows 11 is easier and more flexible than ever. While the classic Print Screen key still works, Microsoft has introduced several smarter tools to capture your screen just the way you want. Whether you need to grab a full-screen image, a specific window, or a custom area, Windows 11 offers multiple built-in options. You can even record your screen or extract text from images using OCR.
This article explore how to take screenshot on Windows 11 and discuss 6 effective ways to take a screenshot on Windows 11, no matter your experience level.
Part 1. Basic Methods: How to Take a Screenshot on Windows 11 (No Software Installed)
Windows 11 offers multiple built-in ways to capture your screen without any third-party tools. Whether you need a full-screen shot, an active window capture, or a custom snip, these basic methods are fast and reliable. Below are the five easiest ways to take a screenshot on Windows 11.
1. Print Screen on Windows 11 with Print Screen Key (PrtSc Button)
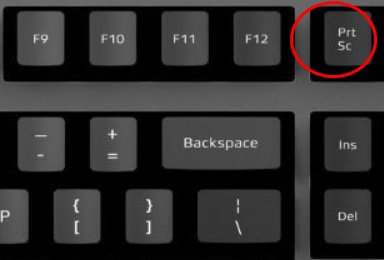
The Print Screen key, often labeled PrtSc, is the most straightforward way to capture your entire screen. This method copies your screen to the clipboard, allowing you to paste it into Paint, Word, or other editing tools. It’s ideal for quick captures when you don’t need automatic saving. By the way, on laptops, you may need to press Fn + PrtSc.
-
Open the window or screen you want to capture. Make sure it’s visible on your desktop.
-
Press the PrtSc key on your keyboard to take a screenshot of your whole screen. It will be copied to your clipboard. You won’t see a notification, but the screenshot is ready to paste.

-
Open an app like Paint or Word, then press Ctrl + V to paste the screenshot. You’ll see the captured image appear in the program.
-
To save it, click “File,” choose “Save”, enter a name for your file, select a folder, and click “Save.” You can also pick a file type like PNG or JPEG.
2. Using Windows 11 Screenshot Shortcut (Windows + Print Screen) – Full-Screen Capture
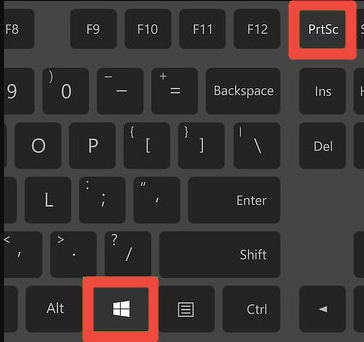
To capture and automatically save a full-screen shot, use the Windows + Print Screen shortcut. It’s the most reliable shortcut for taking screenshot in Windows 11. Once pressed, the screen dims briefly, and your image is saved automatically in the Screenshots folder—no need to paste manually.
-
Open the screen you want to capture and close any unwanted windows.
-
Press Windows key + Print Screen together. The screen will dim for a moment, showing a screenshot was taken.

-
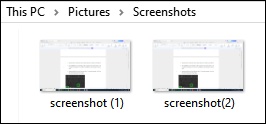
Find your screenshot in the This PC > Pictures > Screenshots folder. It’s saved automatically as a PNG file.

If your keyboard doesn’t have a Print Screen key, use Windows + Fn + Spacebar instead. This is the fastest way to capture your entire screen in Windows 11.
3. Using the Snipping Tool / Snip & Sketch in Windows 11
One of the easiest ways to capture screenshots in Windows 11 is by using the Windows Snipping Tool. This updated tool combines the classic Snipping Tool with the Snip & Sketch app, offering an all-in-one screenshot utility that’s fast, flexible, and easy to use. By default, screenshots captured using the Snipping Tool are saved to your clipboard. You can easily paste them into applications like Paint, Word, or WPS Office.
-
Open the screen, app, or interface you want to capture on your Windows 11 system.
-
Press Windows + Shift + S on your keyboard to launch the Snipping Tool shortcut.
-
In the Snipping Tool menu, choose one of the four snip options: Rectangular Snip, Freeform Snip, Window Snip, or Full-screen Snip.

-
Click and drag your mouse to select the area you want to capture, then release the button once you’ve highlighted the desired section.
4. Game Bar for Gamers: Xbox Game Bar Screenshots
Gamers can use the Xbox Game Bar, a built-in Windows 11 overlay for recording and capturing gameplay. It’s great for saving highlights or taking snapshots mid-game without interruptions. This tool also works on regular Windows, not just games, making it versatile for all users.
-
Press Windows key + G to open the Xbox Game Bar (or go to Settings > Gaming > Xbox Game Bar). It lets you take screenshots, record videos, and capture any open window.
-
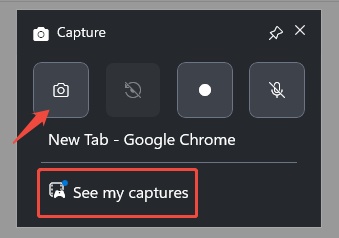
Click the “Capture” widget (usually on the left), and then click the Camera icon or use the shortcut.

-
A notification confirms the save; the screen may flash briefly.
-
Find your screenshot in File Explorer under This PC > Videos > Captures (editable in the Gallery app).
-
Click "See my captures" at the bottom of the widget to view your screenshots.
5. Using Windows + Volume Down (On Devices with Touchscreen)
On touchscreen devices such as the Surface Pro, you can take screenshots without a keyboard. The Windows + Volume Down shortcut instantly captures your entire display, similar to taking a photo on a smartphone. It’s the easiest way to screenshot on tablets or hybrid Windows 11 devices.
Open the screen, app, or page you want to capture.
-
Press the Windows button and the Volume Down button at the same time.
-
You’ll see the screen dim for a moment. This means your screenshot has been taken successfully.
-
Open the Photos app or File Explorer > Pictures > Screenshots to view and share the PNG file.
This shortcut is especially handy when you’re in tablet mode or don’t have a physical keyboard attached. It may take a few tries to get the timing right, press both buttons simultaneously and hold them for a second, but once you do, it becomes second nature.
Part 2. Advanced Methods to Screenshot on Windows 11 (Scrolling Screenshot, Hotkeys, Software)
While the built-in tools are great for basic use, advanced users often require more features, such as scrolling screenshots, annotations, or editing tools. Here’s how to take it a step further.
1. Using the Snipping Tool with Third-Party Tools (Snagit)
The modern Snipping Tool is perfect for quick grabs, but pairing it with Snagit unlocks pro-level power. Snagit is often ranked the best screenshot tool for Windows 11. It offers full-page scrolling screenshots, region selection, annotation, and instant auto-save. It’s ideal for capturing long documents or web pages beyond the visible area, giving you total flexibility and advanced editing control in one seamless workflow.
Snagit automatically saves every capture to its library. It is ideal for heavy users who need quick access to prior screenshots without repeating captures.
Steps:
-
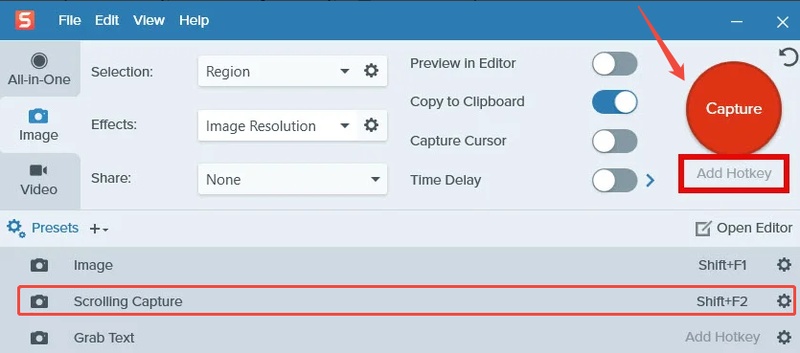
Install and open Snagit from its official website. Launch it and set up hotkeys in Preferences > Hotkeys (e.g., Ctrl+Shift+1 for scrolling capture).
Select the capture mode (image, video, scrolling).
-
Hit the “Capture” button on Snagit or press the PrtSc hotkey. select the All-in-One tab, then choose your window or area—orange crosshairs appear for precise selection.
-
For scrolling, click the "Capture" arrow, enable "Scrolling Capture" (or press Shift+F2) and select vertical/horizontal scroll; Snagit auto-scrolls and combines into one image (works on single monitor by focusing on active window).

Edit and save your screenshot in the Snagit Editor.
2. Scroll Screenshot Using Browser Extensions (GoFullPage Chrome Extension)
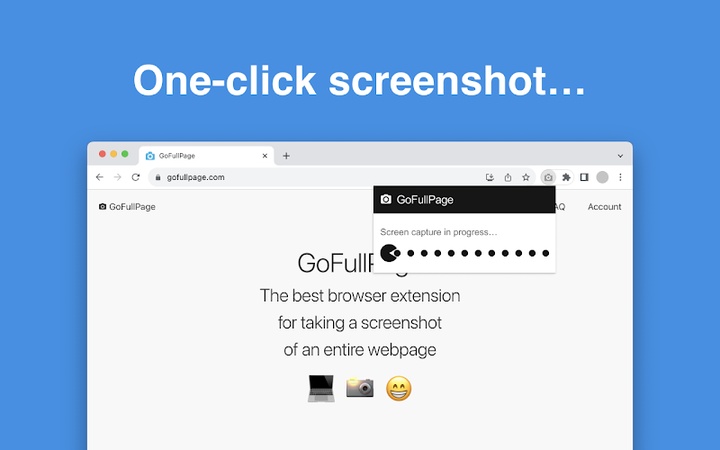
If you often capture long articles, chat threads, or reports, try the GoFullPage Chrome Extension—one of the best free screenshot apps for Windows 11. It automates scrolling screenshots by capturing the entire webpage, top to bottom, and compiles it into one clean, high-resolution image. It’s simpler than Chrome Developer Tools and delivers consistent full-page results in seconds.
This is perfect for bloggers or researchers who want to save long web pages seamlessly. It’s also one of the best free screenshot apps for Windows 11.
Steps:
-
Go to the Chrome Web Store and search for GoFullPage. Click Add to Chrome, then “Add extension.”
Open the webpage you want to capture.
-
Click the "Extensions icon" (puzzle piece) and pin "GoFullPage" to your toolbar.
-
Click the "GoFullPage icon" to start capturing.

-
The extension will automatically scroll through and capture the whole webpage.
-
Once done, the captured image opens in a new tab where you can download or save it.
Part 3. How to Enhance Your Windows Screenshots to High-Resolution Pictures (4K & Higher)
Screenshots are an essential part of modern workflows whether you're creating software tutorials, documenting digital projects, or sharing gameplay visuals. However, standard Windows screenshots often suffer from pixelation or blurriness, especially when zoomed in or used for professional presentations. That’s where 4DDiG AI Photo Enhancer comes in.
This AI-powered image enhancer transforms low-quality or blurry screenshots into ultra-HD (4K and higher) visuals. With intelligent AI upscaling, it not only increases resolution but also refines colors, reduces noise, and restores lost details for a crisp, professional look.
Secure Download
Secure Download
Key Features of 4DDiG AI Photo Enhancer
- AI-powered upscaling up to 4K resolution
- Intelligent blur correction & photo noise reduction
- Color adjustment for vivid, natural tones
- Face enhancement and blemish removal
- Batch processing for multiple photos
- Support for all popular image formats (JPG, PNG, WEBP, HEIC, HEIF, etc.)
Whether you’re an IT professional, designer, educator, or gamer, 4DDiG AI Photo Enhancer ensures your screenshots always look presentation-ready.
How to enhance screenshots with 4DDiG AI Photo Enhancer:
-
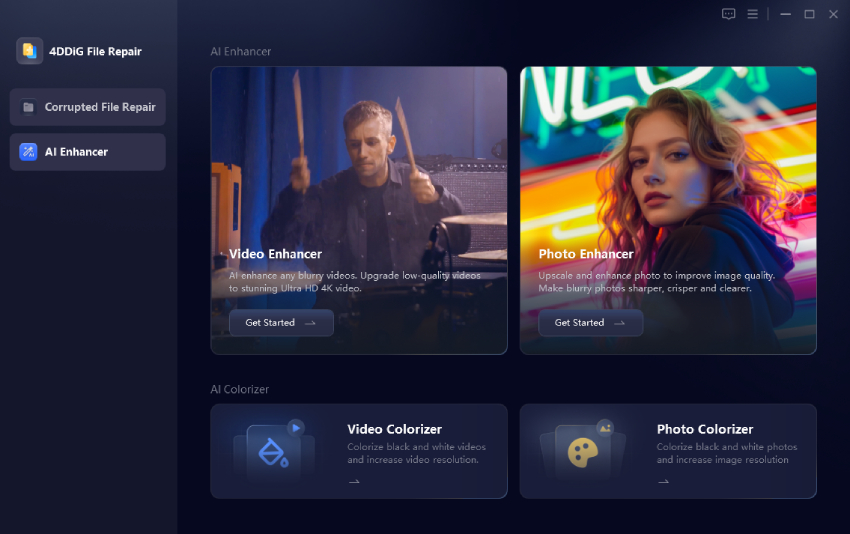
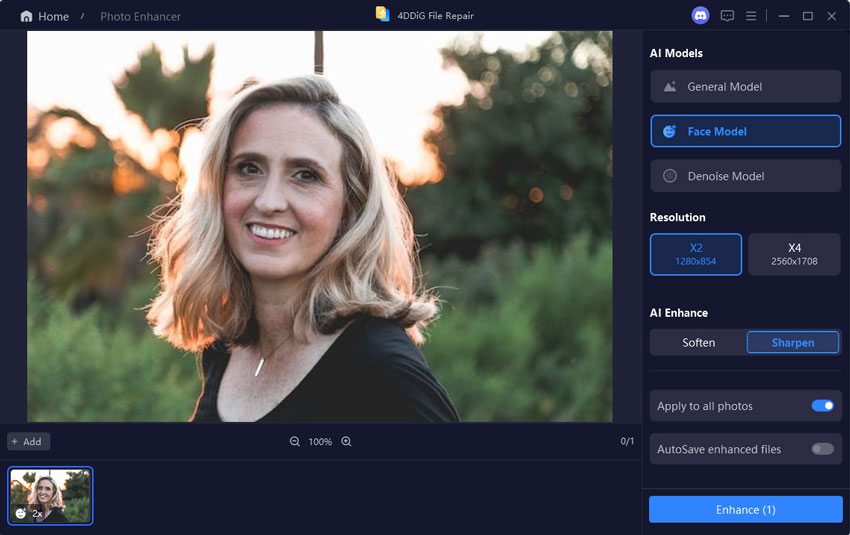
Open the software and navigate to "AI Enhancer" on the left sidebar. Then select the "Photo Enhancer" option.

-
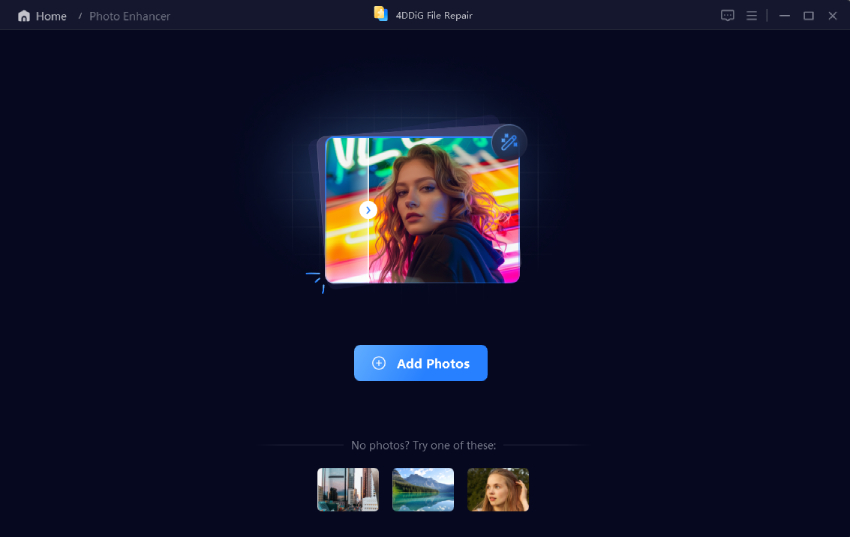
Click "Add Photos" and import your low-resolution or blurry screenshots, or drag and drop them directly into the window.

-
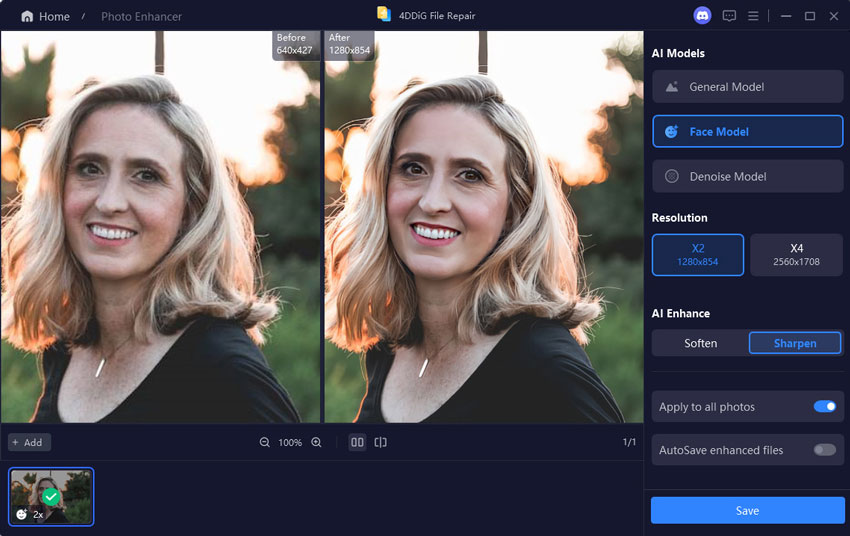
Choose from the three AI models: General Model, Denoise Model and Face Model. Then, set your preferred resolution (e.g., X4 for 4K) and click "Enhance."

-
Once done, use the zoom tools to compare Before and After results. Once satisfied, click "Save" to export your 4K-quality screenshots.

This method helps you turn ordinary screenshots into high-quality visuals perfect for presentations, tutorials, or portfolios.
Part 4. Where Are Screenshots Saved in Windows 11
Many users wonder where screenshots go after pressing shortcuts. Here’s a simple breakdown.
1. Where Do Screenshots Go on Windows 11
- When Using Print Screen (PrtScn): The screenshot is not saved automatically. Instead, it’s copied to your clipboard, allowing you to paste it into apps like Paint, Photoshop, or Word and then save it manually.
- When press ing Windows + Print Screen: Windows automatically saves the screenshot as a PNG file in the Screenshots folder, located here: C:\Users[User Name]\Pictures\Screenshots. The file name follows the format Screenshot (#).png, where the number increases each time you take a new screenshot.
- Windows + Volume Down: If you use devices like Surface tablets, pressing Windows + Volume Down also saves screenshots in the same folder.
- Quick Access: You can quickly access your screenshots by pressing Windows + E, navigating to the Pictures folder, and opening the Screenshots subfolder.
2. How to Change Where Screenshots Are Saved in Windows 11
You can easily change the default Windows 11 screenshot location to keep your captures more organized, especially if you prefer saving them to a specific drive or cloud folder.
Steps:
-
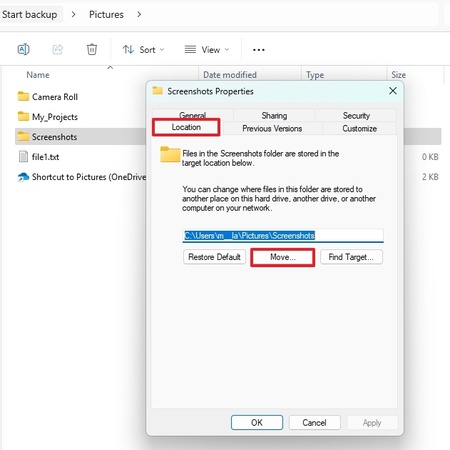
Open File Explorer and navigate to: C:\Users[Your Username]\Pictures\Screenshots.
Right-click the Screenshots folder and select "Properties."
Go to the "Location" tab.
-
Click "Move," then select a new destination (e.g., Desktop, D Drive, or OneDrive folder).
-
Click "Apply", then "OK" to confirm.

From now on, every screenshot taken with Windows + PrtScn will automatically save to your new folder path. This customization is especially helpful if your C: drive is full or if you use OneDrive or Google Drive for automatic syncing.
Part 5. Troubleshoot Common Issues with Windows 11 Screenshot
Sometimes, Windows 11 screenshot functions may stop saving, fail to respond, or lose their shortcut keys. Here are quick fixes:
Fix "Screenshots Not Saving Windows 11"
Sometimes, you press Windows + PrtScn, see the screen dim, but no image appears in your Screenshots folder. This usually means Windows can’t locate or access the save path.
Fixes:
- Confirm enough disk space is available
- Check the Screenshots folder location
- Disable OneDrive or cloud sync conflicts
- Restart File Explorer
- Reset the folder path to default
- Run System File Checker (SFC) to repair any corrupted files
Fix "Windows 11 Screenshot Not Working/Responding"
You might notice that pressing PrtScn, Windows + Shift + S, or using Snipping Tool doesn’t trigger any action. The keys seem dead, or the app fails to launch.
Fixes:
- Restart the Snipping Tool or Game Bar
- Close any screen capture or overlay apps running in the background
- Update Windows and system drivers
- Reboot your PC to clear temporary glitches
- Use an alternative capture tool like Snip & Sketch
Fix "Missing Screenshot Hotkeys"
In some cases, the Print Screen key or shortcut combinations simply stop working, or the system no longer recognizes them after updates.
Fixes:
- Enable PrtScn shortcut under keyboard settings
- Check if Fn (Function) key needs activation
- Update or reinstall keyboard drivers
- Reassign hotkeys in Snipping Tool settings
- Test with another keyboard or USB port
People Also Ask About Taking Screenshots on Windows 11
Q1: How to take screenshot of only one monitor in Windows 11?
Press Windows + Shift + S, select the active monitor area, and save. You can also use third-party tools like Snagit to specify one display.
Q2: How to screenshot on HP laptop in Windows 11?
Use the PrtSc key, or Fn + Windows + Spacebar if your HP laptop has function key mapping enabled.
Q3: How to take high-quality screenshots in Windows 11?
Use the Snipping Tool or Snagit, and enhance the resolution later with 4DDiG AI Photo Enhancer to achieve 4K quality.
Conclusion
Now, you know how to take screenshot on Windows 11 helps you quickly capture anything on your screen. Whether it’s using shortcuts like Windows + PrtSc, the Snipping Tool, or advanced options for scrolling screenshots. Each method makes it easy to save, share, or edit your captures.
If you want to enhance your screenshots into high-resolution, professional-looking images, try 4DDiG AI Photo Enhancer. It transforms your ordinary captures into crisp, detailed visuals with just one click. It’s the perfect solution for anyone who wants high-quality screenshots on Windows 11 without extra effort.
Secure Download
Secure Download
💡 Summarize with AI:
You May Also Like
- Home >>
- Photo Tips >>
- How to Take Screenshot on Windows 11: Easy Shortcuts, Tools, and Pro Tips

 ChatGPT
 Perplexity
 Google AI Mode
 Grok
Grok

