Troubleshooting Premiere Pro Won't Play: Quick Fixes You Need
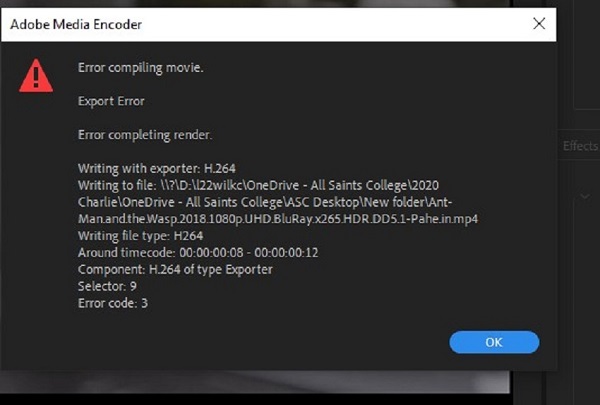
Are you facing a problem where Premiere Pro crashes or does not respond? Not just you! Premiere Pro often causes lag and becomes unresponsive when you do simple tasks like cutting, moving, or playing video. In addition, opening and exporting projects, importing media files, and launching new panels can result in similar freezes and unresponsive errors.
Even worse, many users experience Premiere Pro crashing as soon as they start the program. Sometimes, you don't even see a splash screen, which can frustrate beginners and professionals. Thankfully, the causes of such crashes are often easily solved with Premiere Pro. Let's dive into the possible ways to fix the Premiere Pro won't play error.
Part 1: What Causes Premiere Pro Not Playing?
Before diving into solutions, it’s essential to understand why Adobe Premiere Pro playback is not working. Common culprits include overloaded media cache files, which can clog up the system and prevent smooth playback. Corrupted video files , hardware issues, incomplete software updates, or improper installations may also be responsible for disrupting your editing process. By identifying the root cause, you can apply the appropriate fix.
Part 2: Premiere Pro Won't Play? - 5 Methods to Fix
Method1: Clear Media Cache Files
To stop Premiere Pro from crashing, it's a good idea to regularly clear the media cache files. This not only helps prevent crashes but also makes the software run faster, especially for those using it heavily.
Here’s how to clear media cache files:
-
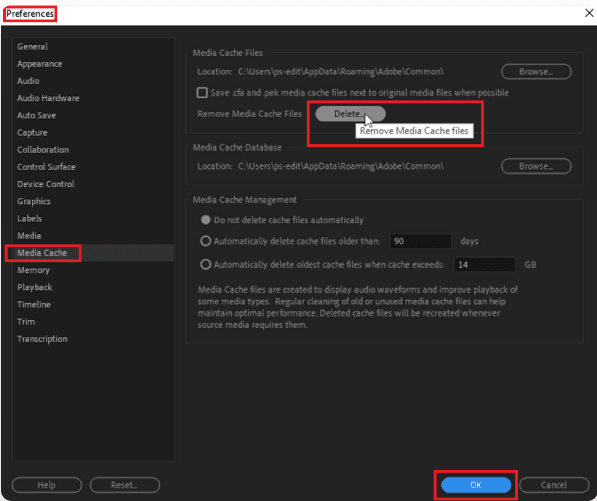
Open Premiere Pro and go to Edit > Preferences > Media Cache .
-
When the media cache window appears, click Delete to remove the files.
-
Click OK and wait for the process to finish removing the temporary files.

Method2: Repair the Corrupted Video Files
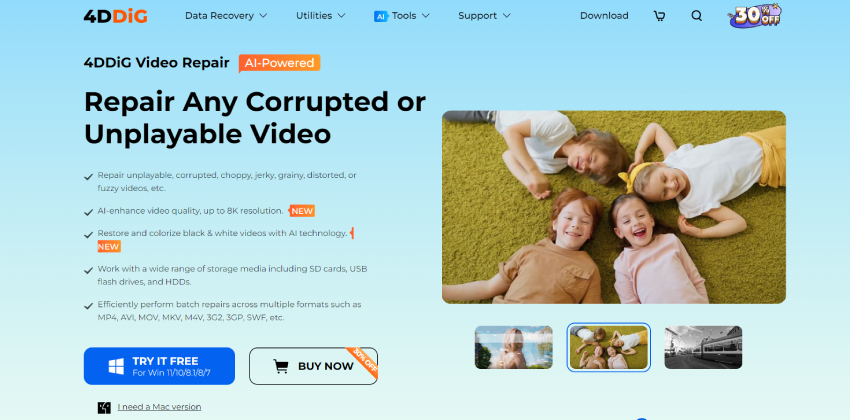
If Adobe premiere pro not playing video, the problem may be caused by corrupted video files. Restoring these files is crucial for smooth editing. One of the most efficient tools for repairing damaged video files is 4DDiG Video Repair . This software offers a simple and reliable solution to restore damaged video files, making them reproducible in Premiere Pro.

Key Features
- Fix videos that are unplayable, corrupted, or suffer from issues like choppiness, jerky motion, graininess, distortion, or fuzziness.
- Boost video quality using AI technology, now supporting resolutions up to 8K.
- Use AI-powered tools to restore and add colour to old black-and-white videos , giving them a fresh look.
- Compatible with various storage devices, including SD cards, USB drives, and hard disks, ensuring flexibility in media recovery.
- Perform batch repairs quickly, supporting multiple video formats like MP4, AVI, MOV, MKV, M4V, 3GP, 3G2, SWF, and more.
How to Repair the Corrupted Video Files
With 4DDiG File Repair, you can restore corrupted or unplayable video files, bringing them back to life. If your videos refuse to play, won't open, show error messages, or display a black screen, the Corrupted File Repair feature can solve the problem. Just download and install the software on your Windows or Mac device and follow these simple steps:
Secure Download
Secure Download
-
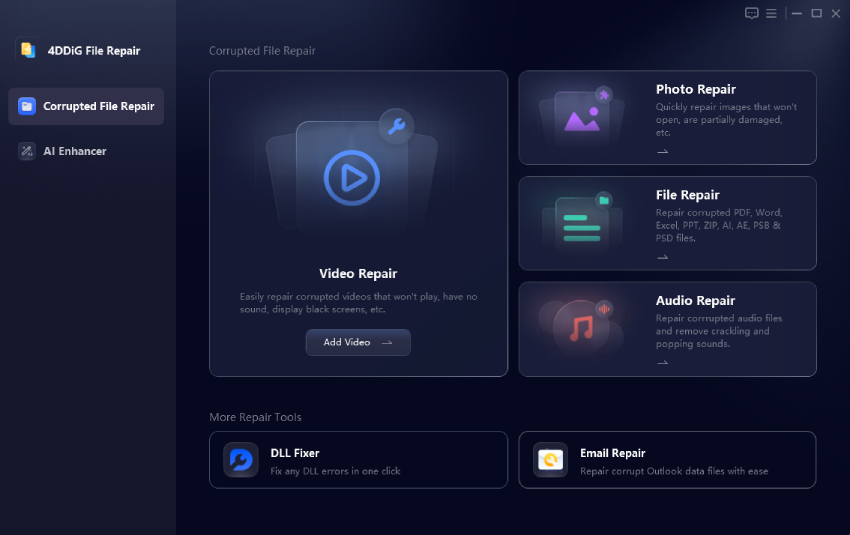
Open 4DDiG File Repair and select "Video Repair" from the Corrupted File Repair menu to begin the process.

-
Click "Add Videos" and choose one or more corrupted video files from your computer to start the repair process.

-
After adding your videos, click the "Repair All" button, and the tool will begin fixing each file one by one.

-
When the repair is finished, click the "Preview" button to check the repaired videos.

-
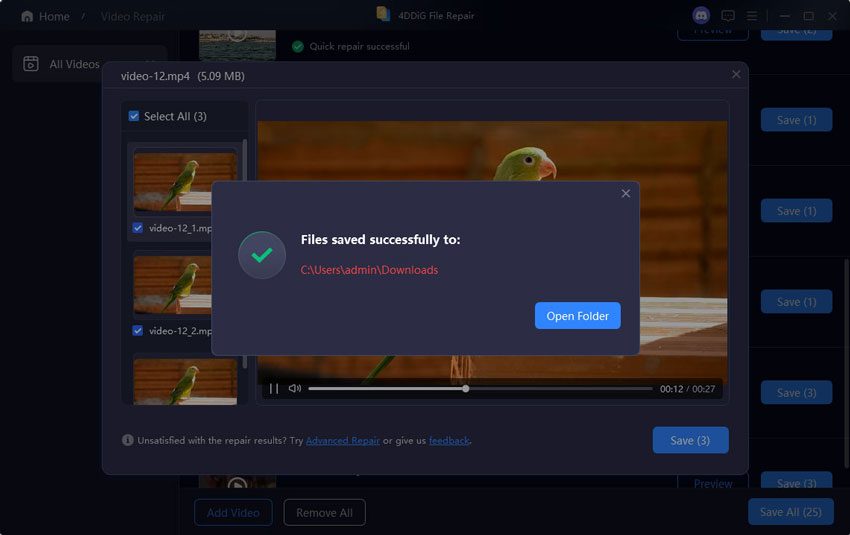
Save the repaired files to your preferred location on your computer. You can either click the "Save" button for each video separately or select "Save All" to export all the repaired videos at once.

Method3: Reset a Workspace
If you have problems with the layout of the Adobe Premiere Pro panels, resetting the current Workspace can help you restore the original, reserved layout of the panels. This action can solve problems and make your editing environment more efficient.
To reset your Workspace, you can follow the following steps:
-
Open the Workspaces drop-down menu at the top of the screen and select Reset to Saved Layout.
EITHER
- Navigate to Window (Window) in the menu bar, then navigate to Workspace and select Reset to Saved Layout.
Method4: Update Video Driver
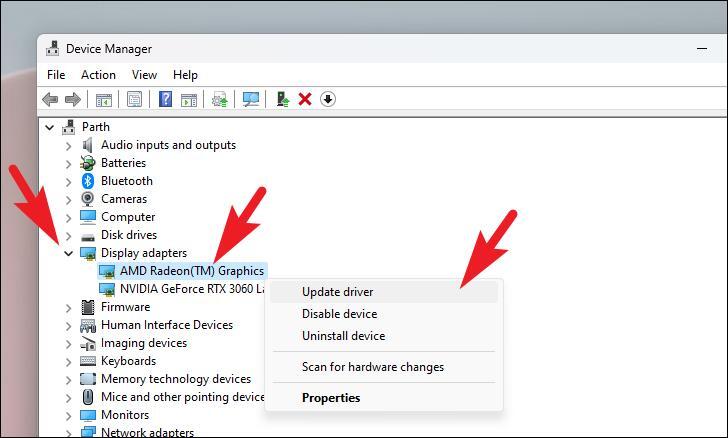
To fix the Adobe Premiere video driver error, we have described another effective solution for the smooth running of your Adobe Premiere Pro project: updating your video driver.
Corrupt or outdated video card drivers often interfere with video playback and cause various problems. To fix this, visit the website of your video card manufacturer, such as Nvidia, Intel, or AMD, and download the latest driver updates. This simple step can greatly improve performance and eliminate playback problems.
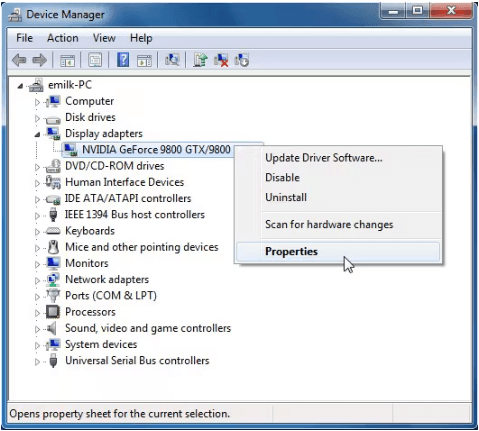
Method5: Update or Roll Back Your Graphics Driver
For the best performance of Adobe Premiere Pro, it is important that your graphics driver is always up to date. An outdated or incompatible driver may cause playback problems, crashes, and other errors. Fortunately, updating or resetting the video driver can fix these issues.
Part 3: How to Prevent Premiere Pro Not Playing?
Solution1: Backup Video Files
Always back up your video files. Storing copies regularly on an external hard drive or cloud storage can prevent data loss due to corruption or accidental deletion. This gives you access to the original files in case of problems, which you can easily import back into Premiere Pro.
Solution2: Regularly Scan for Malware
Malware can affect the normal functioning of your computer and software, including Adobe Premiere Pro. To protect your system, you should regularly check for malware using reliable antivirus software. Ensure that your antivirus definitions are up to date and periodically run full system checks. This preventive measure helps to maintain the performance of your video editing software and protect your files.
Solution3: Ensure the Premiere Pro Is the Latest version
Keeping Adobe Premiere Pro up-to-date is important for optimal performance. Software updates often include bug fixes, improved features, and compatibility improvements that can fix playback problems. To check for updates, open Premiere Pro, go to the Help menu, and select Updates. Follow the instructions to install the latest version so that you can benefit from all the latest improvements.
Premiere Pro Won't Play FAQs
Q1: Why is Premiere Pro crashing?
Premiere Pro may crash due to various reasons, including corrupted media files, outdated graphics drivers, insufficient system resources, or incompatible plug-ins. Heavy workloads with high-resolution footage can also strain your system, leading to crashes. To minimize crashes, ensure that your software and drivers are up to date, and consider optimizing your project settings for better performance.
Q2: How do I recover a crashed Premiere Pro?
If Premiere Pro video not playing, you can recover your project by reopening the software. Premiere usually auto-saves your work periodically, so you should see a recovery prompt upon relaunch. In cases where your video files have become corrupted, you may want to use 4DDiG Video Repair to restore them. This powerful tool can fix various video issues and help you recover your footage seamlessly.
Q3: How do I clear the cache on Premiere Pro?
Clearing the media cache in Premiere Pro can help resolve performance issues. Here’s how to do it:
-
Open Premiere Pro and go to Edit (or Premiere Pro on Mac) in the menu bar.
-
Select Preferences , then choose Media Cache .
-
In the Media Cache window, click on the Delete button to remove all cache files.
-
Confirm the action and wait for the process to complete.
Conclusion
If you find that Premiere Pro won't play video, you're not alone. Many users have problems with playback. However, knowing the most common causes and implementing solutions such as clearing the media cache, updating video drivers, and updating your software can improve your editing experience. Regular backups of your files and scans for malware also help protect your projects.
For corrupted video files, 4DDiG Video Repair is a reliable tool to restore them and make them playable again. By following these practices and using the right software, you can minimize disruption and enjoy smoother work with Adobe Premiere Pro.
Secure Download
Secure Download
💡 Summarize with AI:
You May Also Like
- Home >>
- Video Tips >>
- Troubleshooting Premiere Pro Won't Play: Quick Fixes You Need


 ChatGPT
 Perplexity
 Google AI Mode
 Grok
Grok

