How to Sharpen Image in Photoshop | Step-by-Step Guide
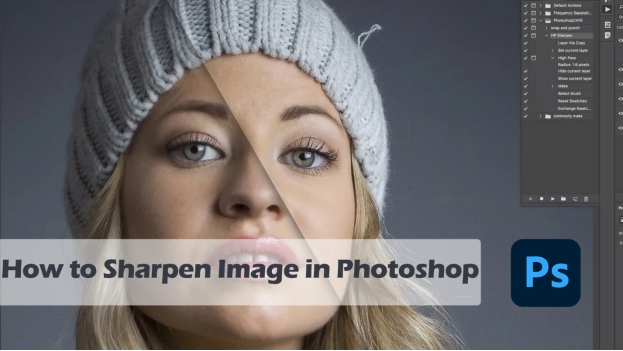
In every photo that you capture, occasionally, the image may not have the level of detail you desire. As a result, it can benefit from the sharpening even if it may suffer from focus problems, shaky camera or low pixelation. Thus, in this article, you will be explained how to deepen an image in Photoshop application and by implementing certain tools and methods to provide clearer images.
Part 1: What Is Image Sharpness?
Image sharpness refers to the clarity of the details in a photograph. A sharp image shows crisp lines, clear edges, and fine details, making it appear in focus. On the other hand, a blurry or out-of-focus image can look soft and unclear.
☞ Common Reasons for Blurriness
There are several reasons an image might appear blurry or lack sharpness:
- Camera Shake: When the camera moves slightly during exposure, the image can become blurred.
- Focus Issues: Sometimes, the camera might not focus on the right object, leading to a soft image.
- Low Resolution: Low-resolution images have fewer pixels, which can cause them to look blurry when enlarged.
- Motion Blur: Fast-moving subjects can create a blur effect in photos if the shutter speed is too slow.
Knowing the cause of the blurriness can help you decide the best way to sharpen photos in photoshop.
Part 2: Useful Sharpening Techniques in Photoshop
Photoshop offers several ways to sharpen images and also unblur images in Photoshop. Each method has its strengths, and knowing which to use will depend on the photo and your goals.
1️⃣ Sharpen Tool
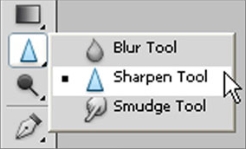
The Sharpen Tool in Photoshop is a simple way to increase contrast along the edges of an image. You can manually paint over areas that need to be sharpened. This tool is especially useful for subtle adjustments to small sections of an image.
2️⃣ Unsharp Mask
The Unsharp Mask is a more advanced sharpening method that adjusts pixel contrast. It has sliders to control the amount, radius, and threshold of sharpening, which helps refine the edges of your photo. This technique is commonly used for general image sharpening.
3️⃣ Smart Sharpening
Smart Sharpening offers more precise control over how sharpening is applied. It minimizes noise in low-contrast areas and sharpens high-contrast edges. This method is ideal for situations where you need more control over the sharpening effect, especially in detailed images.
Part 3: How To Sharpen a Photo In Photoshop
Now, let’s go over the actual steps for sharpening an image in Photoshop. We’ll cover three common methods: the Sharpen Tool, Unsharp Mask, and Smart Sharpening.
1️⃣ Apply Sharpen Tool in Photoshop
-
Run Photoshop and then press “File” > “Open” to import your blurry photos.
-
Go to the left toolbar and select the Sharpen Tool (it looks like a triangle).

-
In the options bar at the top, adjust the strength of the sharpening effect. You can also choose a brush size that suits the areas you want to sharpen.
-
Click and drag the tool over areas that need sharpening, like the edges or focal points of your image.
2️⃣ Apply Unsharp Mask in Photoshop
Upload the blurry image to Adobe Photoshop.
-
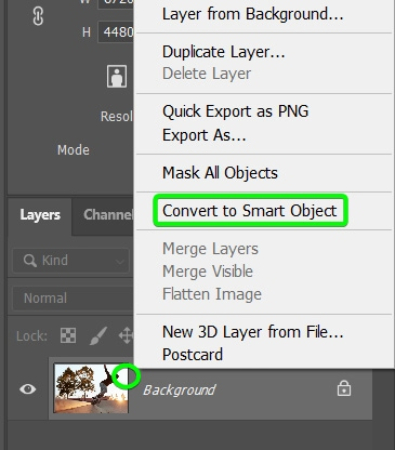
Open the Layers panel and click right on the picture layer and click on the “Convert to Smart Object”. This will let you control the sharpening without having to impacts the sharpened image in a permanent basis.

-
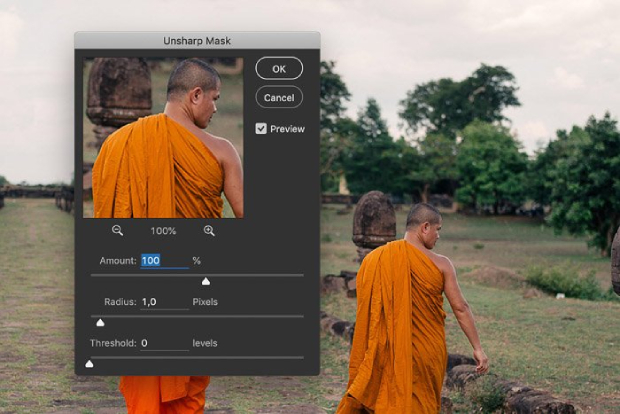
Proceed to the page Filter and choose Sharpen option and then Unsharp Mask.
-
Unsharp Mask dialog box will appear when sharpening an image as shown in the figure below. With feedback click on the sliders Amount, Radius, and Threshold to get a desired amount, radius, and threshold.

The degree of sharpening to be applied is regulated by the amount.
- Radius: Adjusts how much area around the edges gets sharpened.
- Threshold: Helps prevent noise from being sharpened in smooth areas like the sky.
-
Choose the "Preview" checkbox to see the effect in real-time. When satisfied, press OK to apply the sharpening.
3️⃣ Apply Smart Sharpen in Photoshop
Likewise, add your picture blurry to Photoshop.
Right-click the layer and select "Convert to Smart Object."
-
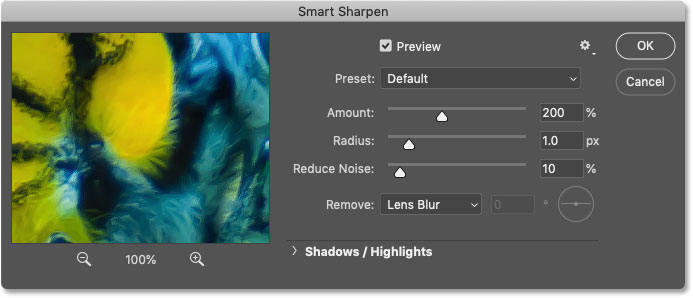
Later, touch the “Filter” label and pick “Sharpen” > “Smart Sharpen” from the dropdown list.

-
In the Smart Sharpen dialog box, adjust the Amount, Radius, and Reduce Noise sliders to fine-tune the sharpening. Smart Sharpen is particularly useful for high-contrast areas or images with lots of detail.
-
Check the “Preview” box to see the sharpening effect and adjust as needed. Once satisfied, press OK.

Part 4: Easier Way to Sharpen Photo in Photoshop with AI
While manual sharpening in Photoshop works great, it is complicated for some users, particularly newbies. Because beginners cannot handle specific details while adjusting some parameters. If you are one of them, don’t fret since there is a much easier tool for you.
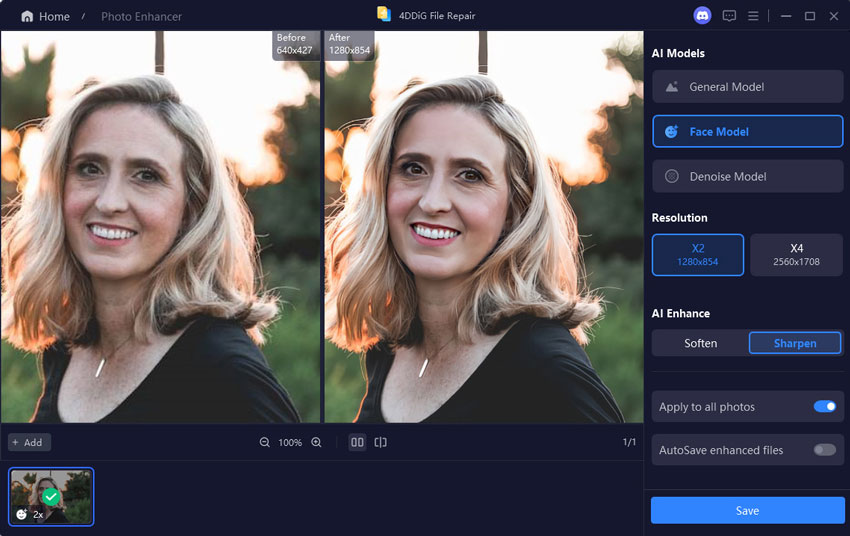
AI-powered tools like the 4DDiG AI Photo Enhancer can make sharpening even easier and quicker. With just one click, this tool automatically enhances the sharpness and details of your images. The AI technology analyzes the photo and applies the best adjustments based on the image content. Most importantly, it provides 4 robust AI models suitable for all scenes: Face, Colorize, Denoise, and General Models.
Main Features of 4DDiG AI Photo Enhancer:
- AI automatically detects the areas that need sharpening and applies the necessary adjustments.
- The AI restores fine details and textures in blurry areas.
- Helps reduce noise from photos while sharpening, ensuring your image remains clean and clear.
- You can use this tool for all common image file formats, like PNG, JPG, WEBP, HEIC, and more.
- Supports batch processing with high success rates.
- Comes with 4 AI models (General/Face/Denoise/Colorize) available on any scenarios
- Restores old/faded photos and color black-and-white images with natural hues.
How to Sharpen Image in 4DDiG Photo Enhancer
-
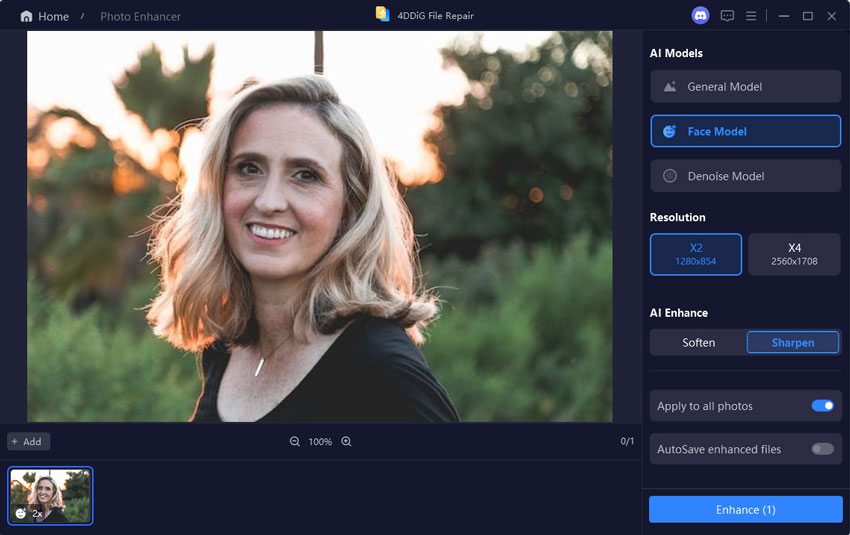
Run 4DDiG Photo Enhancer (aka the 4DDiG File Repair executable) after installation. Once done, head to “AI Enhancer” > “Photo Enhancer”.
FREE DOWNLOADSecure Download
FREE DOWNLOADSecure Download

-
Drag your blurry pictures or press the “Add Videos” label to import them for sharpening.

-
Proceed to select a suitable AI model and reset the resolution as “X4”. Upon selection, hit “Enhance” to start AI sharpening.

-
Finally, compare the 2 pictures before and after sharpening to check the result. Tap “Save” to export the sharpened photo.

Part 5: People Also Ask About Photoshop Sharpen Image
Q1: How to make an image sharper in photoshop?
To sharpen a pixelated image, use Smart Sharpening or Unsharp Mask. Reduce the radius and adjust the Threshold to minimize the pixelation effect. You can also use the Sharpen Tool on smaller, focused areas to increase clarity.
Q2: How to sharpen part of an image in Photoshop?
To sharpen a specific part of an image, use the Sharpen Tool or apply Unsharp Mask or Smart Sharpen to a duplicate layer. You can then use layer masks to apply sharpening only to the desired areas.
Q3: How to sharpen a blurry image in photoshop?
To fix a blurry image, you can use Smart Sharpening or the Shake Reduction filter if the blur is caused by camera movement. Adjust the settings carefully to restore clarity and focus.
Conclusion
Here are all solutions on how to sharpen image in Photoshop. By using tools like the Sharpen Tool, Unsharp Mask, and Smart Sharpening, you can bring out more detail and clarity in your images. If you prefer a simpler solution, the 4DDiG AI Photo Enhancer is a fantastic AI tool that sharpens your photos with just one click, saving you time and effort.
For anyone looking to improve the sharpness of their photos, understanding these methods will allow you to achieve the best results. Try using these techniques to give your images a professional finish today and share your experience below!
Secure Download
Secure Download



 ChatGPT
 Perplexity
 Google AI Mode
 Grok
Grok

