How to Delete Photos from Mac But Not iCloud?
Running out of storage space on your Mac but want to keep your iCloud library intact? Fret not, for this detailed guide will equip you with the knowledge and techniques to delete photos from mac but not icloud. In addition to the primary methods, we'll also delve into scenarios where you might accidentally delete important photos and provide recovery measures to help you restore them. So, let's embark on this journey to declutter your Mac's storage while safeguarding your iCloud photo collection.
Part 1: Is Deleting Photos from Mac but Not iCloud Possible?
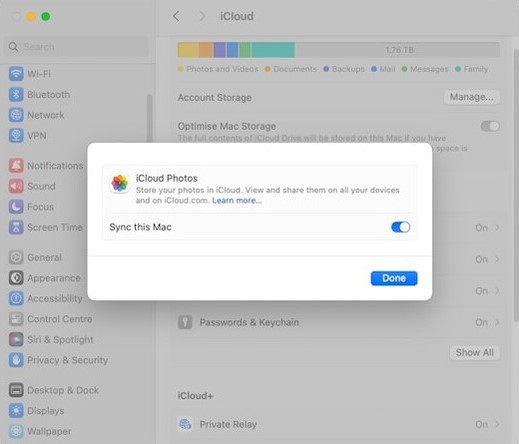
You may remove images from your Mac, but not from iCloud. Deleting images from your Mac will also erase them from iCloud when you activate iCloud images. You may erase images from your Mac without impacting your iCloud storage if you turn off iCloud syncing, use the Optimise Mac Storage function, or transfer the image Library to an external device. Following these steps may save some space on your Mac without sacrificing the security of your images stored in iCloud.
Part 2: Ways to Delete Photos from Mac But Not iCloud.
Here are 4 practical ways to delete photos from Mac but not iCloud:
Way 1: Turn off Syncing
To prevent photos from being deleted from iCloud when you remove them from your Mac, you need to turn off iCloud Photo Library syncing:
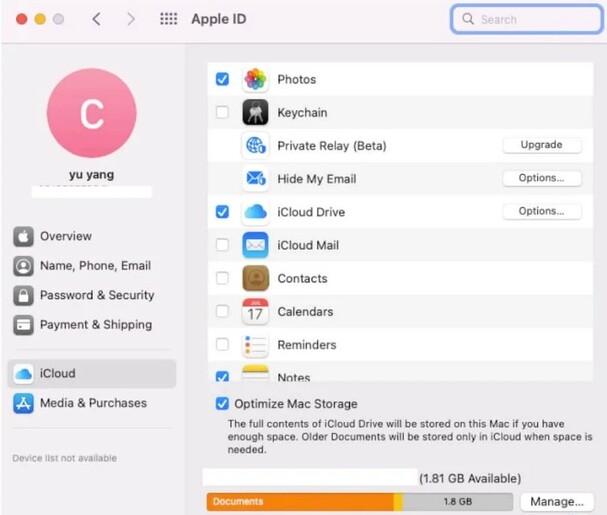
- Launch the Mac's System Preferences.
- Choose iCloud after clicking on Apple ID.
- To turn off synchronization, uncheck the box next to Photos.
- Your iCloud Photo Library will remain unaffected when you remove undesired photos from your Mac.
Way 2: Move Your Photos Library to External Device
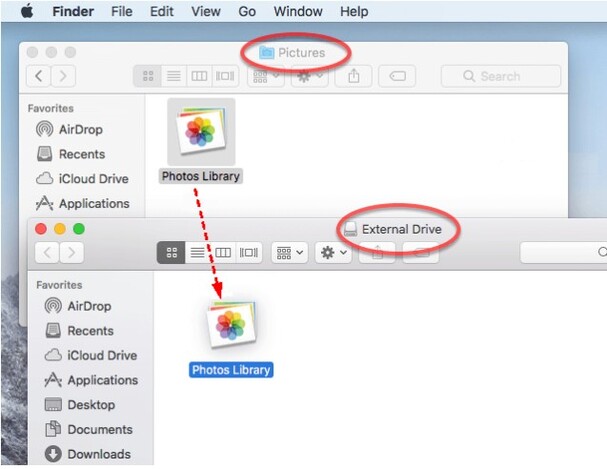
Transferring your Photos Library to an external storage device is another way to manage your Mac's space:
- Attach the external storage to your Mac via USB or Thunderbolt port, available on your Mac machine.
- You Should move the photos Library to that external drive or Archive it.
- Before you empty the recycle bin on Mac, here are the conditions you need to consider: Wa Mac when Cloud Photo is a live sync, here are the conditions you need to consider.
Way 3: Optimize Space on Mac
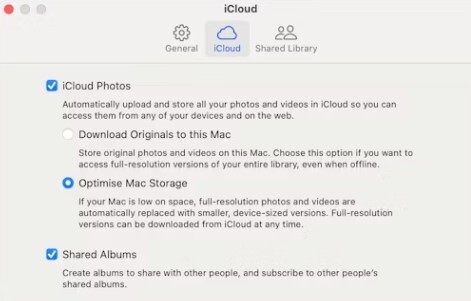
This method does not delete photos on Mac but removes the high-quality copies with low-quality ones remaining on the device. That will unclutter your Mac plenty, but Photos’ functionality remains operational even if you don’t transfer the Library to an external disk. After the editing, you can download high-quality copies of these files if you need the best-quality images for your project. Here's how to do it:
- Turn on your computer and open the Photos application on the screen. Go to the Photos option and select Settings.
- Now go to the iCloud tab.
- When you need more storage space, choose "Optimise Storage" to have lower-resolution copies of your images immediately replaced with the originals.
- Quit the Settings.
Way 4: Try iCloud Alternatives
In addition to Apple's iCloud, other well-known cloud storage services, like Google Photos, Microsoft OneDrive, etc., are compatible with MacBooks and may be used to back up valuable media files. If you back up your Mac to a cloud service other than iCloud, you won't lose any images even if you erase them from your device.
If you own a Mac and want an alternative to iCloud, one option is Google Photos. With this program, customers may remove images from their Macs that aren't in Google Photos. To sync your Mac's photographs with Google Photographs, follow these instructions precisely.
- Start by using a web browser on your Mac. Then, search for and download Google Drive for Mac.
-
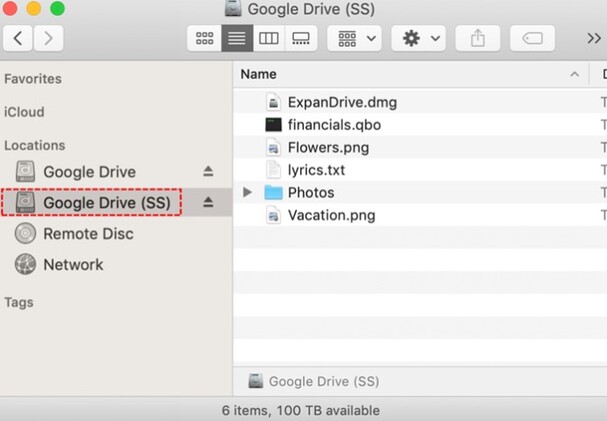
After downloading Google Drive to your Mac, follow the on-screen prompts to set up your account and begin using it. The finder will show Google Drive as a folder. You may sync data with your Google account by copying it and adding subfolders and files.

-
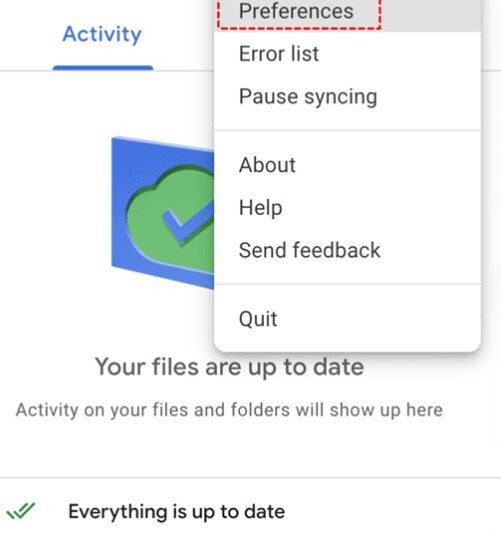
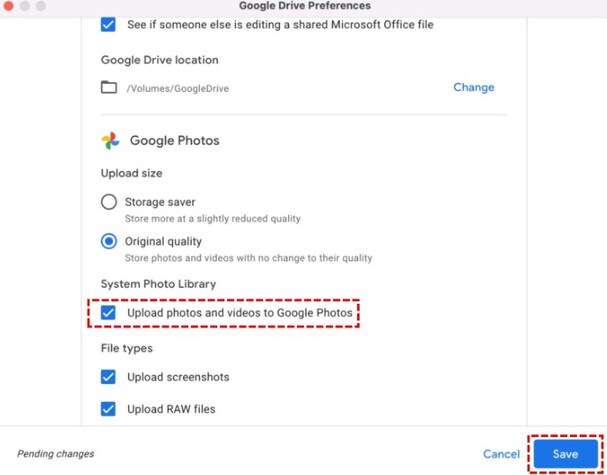
You should see the Google Drive symbol in the top navigation bar. To access its settings, click on it. Afterward, choose "Preferences" from the menu that appears.

-
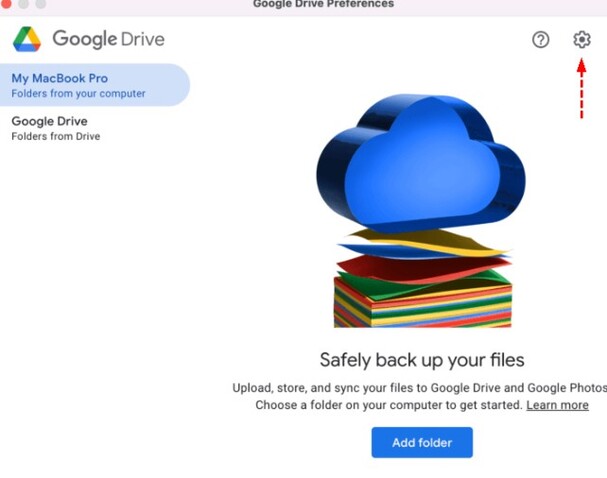
Select the gear icon in the newly opened window.

-
Once you've located the system picture library in the "Google Photos" area, scroll down to the "Upload photos and videos to Google Photos" option, and finally, click ("Save").

- Following that, Google Photos will begin automatically syncing with your smartphone. Similarly, you may use the procedure above to remove images from your iPhone, excluding iCloud.
Part 3: How to Recover When Delete Photos from Mac and iCloud?
If you have accidentally erased images from iCloud, you may get them back using 4DDiG Mac File Recovery Software.. Fast and straightforward file recovery is the primary purpose of this software. Its high success rate makes this program reliable for recovering irreversibly erased data. Its characteristics comprise:
Secure
Download
Secure
Download
-
Get 4DDiG Mac Data Recovery installed on your computer.

-
Find recoverable photographs by scanning your Mac.

-
You may preview the images, choose the ones you want to restore, and then transfer them to your Mac.

Part 4: FAQs
Q 1: What is iCloud Photo?
iCloud Photo is a cloud service provided to AppleApple product users, which allows users to store and sync photos and videos on different devices simultaneously.
Q 2: Does it remove photos from iCloud when you delete them from Mac?
In this case, if you have set up iCloud Photo Library syncing, deleting particular photos on Mac will delete them in iCloud. This is to avoid them inputting the pictures while the synchronization is on.
Q 3: How to remove photos from your Mac to free up storage space?
You can delete photos within the Photos app, turn on the ‘Optimise Mac Storage’ option, or duplicate the Photos Library to an external drive.
Conclusion
To delete photos from Mac but not iCloud, it's essential to disable iCloud Photo Library syncing before removing any photos. It is also possible to modify the storage of your Mac or utilize other devices to work with photographs. If you have erased photos comprehensively from your Mac and erased the backup in iCloud, you can also get help from recovery software like 4DDiG Mac Data Recovery to recover your lost photos. Remember to constantly copy your pictures in case of any hustle since they are susceptible.



 ChatGPT
 Perplexity
 Google AI Mode
 Grok
Grok


