Solved: Google Photos Mess Up Video Quality
If you have discovered you are not seeing your videos on Google Photos in the best quality and they look grainy or low quality then you are not alone. Quality loss is experienced by many users uploading content or playback caused by compression and other reasons.
In this guide, we're going to take a look at why Google Photos mess up video quality and how to fix this to get your videos back up to the standard you paid for.
Part 1. Why Does Google Photos Mess Up Video Quality?
Google Photos is a great platform to store and share your media files without much hassle but there are flaws. After uploading, you may have noticed some users finding big drops in video quality. Here are the main reasons behind these issues:
☞ Compression Algorithms
Google Photos compresses videos that are uploaded in the Google Photos Video Compression Storage Saver mode to save storage space and optimize file transfers. Then this compression process reduces the file size by decreasing the resolution and quality.
☞ Bitrate Settings
Depending on the provider's platform standard, videos with higher bitrates can be automatically corrected to meet the platform standard, with the consequence that they are less clear and not smooth. This is particularly noticeable in fast-moving or detailed scenes.
☞ Codec Compatibility
Some video codecs may not be fully supported by Google Photos which results in video playback issues, or lower quality. For example, videos with older codecs or lesser-known formats may have compatibility problems.
☞ Internet speed
Streaming videos from Google Photos can slow down or cause internet connection to be unstable which results in the platform lowering the playback resolution for a while, resulting in a grainy or blurry viewing experience.
☞ Resolution Management
If the uploaded video’s resolution doesn’t match the way the viewing device's display is capable then the video may unfold stretched, pixelated, or otherwise distorted.
☞ Device Specific Issues
High-definition playback can degrade further, should your device or browser be older or not fully support high-definition playback.
Knowing these factors will aid you in acting proactively before and after Google Photos low-quality video issues.
Part 2. How to Solve Google Photos Ruin Quality of Videos Error
If you are facing the Google Photos mess up video quality issue with your uploads, you can follow the below 2 methods to solve it:
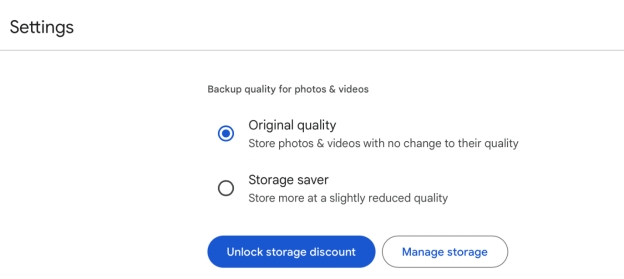
Way 1. Choose Photo and Video Upload Quality as "Original Quality" on Google Photos
When you pick "Original Quality," compression is avoided for every upload. With this, you can keep your videos in their original resolution and quality.
Below are the detailed steps you need to follow to enable this option on Google Photos to prevent video compression:
-
Open “Google Photos” in the browser on your computer and log in with your account.
-
Click the “Settings” button or “Gear icon” from the top left to open Google Photos Settings.
-
Under the “Backup Quality” tab in the settings, you need to select the “Original Quality” option.

Now, when you upload your videos, you will automatically bypass the Google Photos video quality loss. So, from now on, every upload will be in its original quality and you will get a crisp playback experience every time.
Way 2. Upload and Play Videos to Google Photos Online Browser Version
Sometimes the mobile app limitations can cause playback issues, using the browser version of Google Photos sometimes works around this. On top of that, it's a more stable interface for handling large files and files in bulk.
So, here is the step-by-step guide on how to upload and play videos on Google Photos using its online browser version:
-
Open your browser on a computer for a better experience and log in to your “Google Photos account”.
-
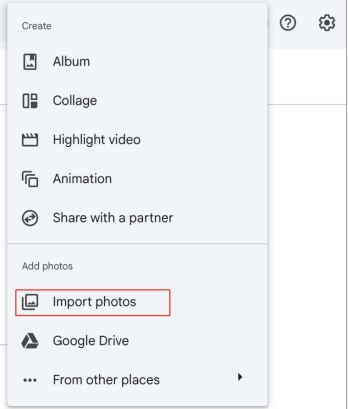
Click the "Create and add photos" or "+ icon" button from the top of the Google Photos interface and select the "Import Photos" button to select videos from your storage to upload to Google Photos.
-
In the Google Photos Home page, you can see your recent uploads in grid format and you can play them by clicking. Alternatively, use the left menu pane to selectively play the videos.

You can play the videos uploaded to check if there is an improvement in quality at the browser level.
Part 3. How to Improve Video Quality on Google Photos
If your videos have already seen a loss of quality (especially resolution or colors), specialized tools like 4DDiG Video Enhancer can make them better than ever. With this AI-powered software, you can upscale your videos to 4K or 8K and remove noise and artifacts the easy way. It even resolves problems for you when Google Photos mess up video quality is not the real issue you are facing.
Professional Video Enhancer 4DDiG Video Enhancer is a video repair and quality improvement tool. It fixes problems caused by Google Photos video compression and with ideal for low-resolution, grainy pictures or bad color contrast.
Secure Download
Secure Download
Key Features of 4DDiG Video Enhancer AI
This AI-powered tool packs a lot of other video quality enhancement and file repairing solutions which make it a one-stop solution for everything you need. Here are some of its key features.
- Upscale videos to 4K (up to 8K) for higher detail.
- Use AI to sharpen videos to improve clarity.
- Provide 4 outstanding AI models: General Denoise, Face, Colorize, and Anime Model
- Remove noise, grain, and compression artifacts from videos for more details.
- Colorize black-and-white videos to restore old videos.
- Supported with multiple video formats
- Easy to use for beginners.
How to Fix Google Photos Video Quality Loss Using 4DDiG
Let us dive into the step-by-step guide to enhance video quality from 4K to 8K.
-
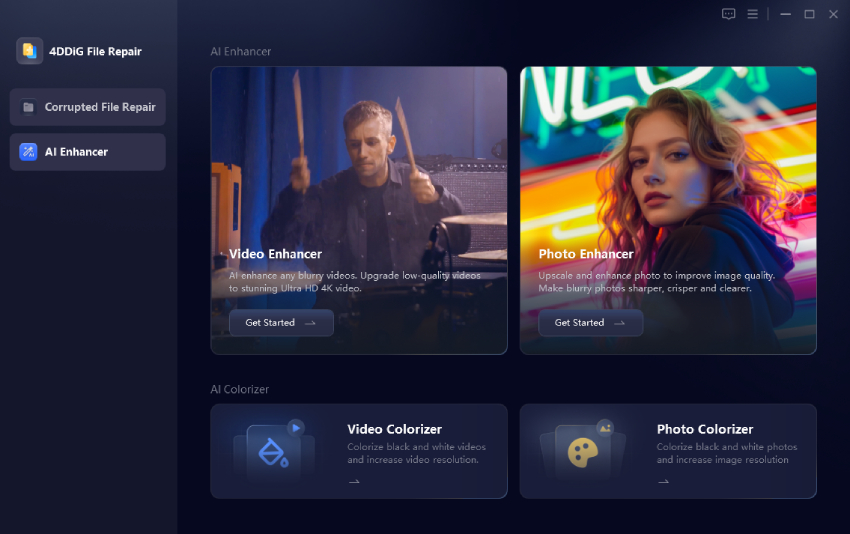
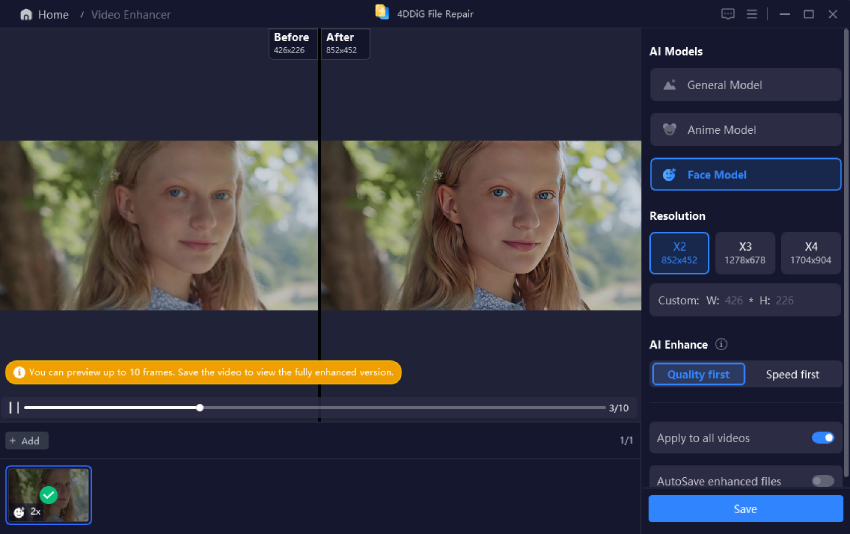
Oopen this AI software. Subsequently, select “AI Enhancer” and then the “Video Enhancer” section.

-
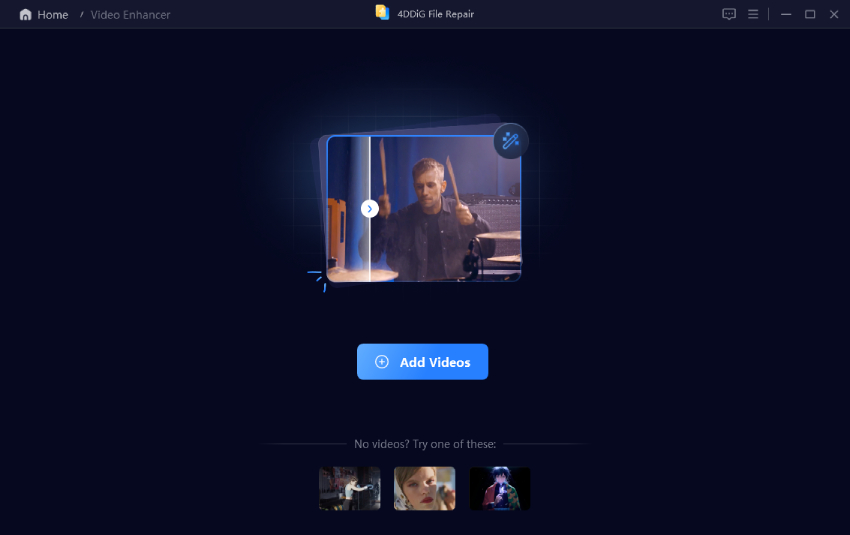
Upload the low-quality videos from Google Photos to this software by tapping "Add Videos".

-
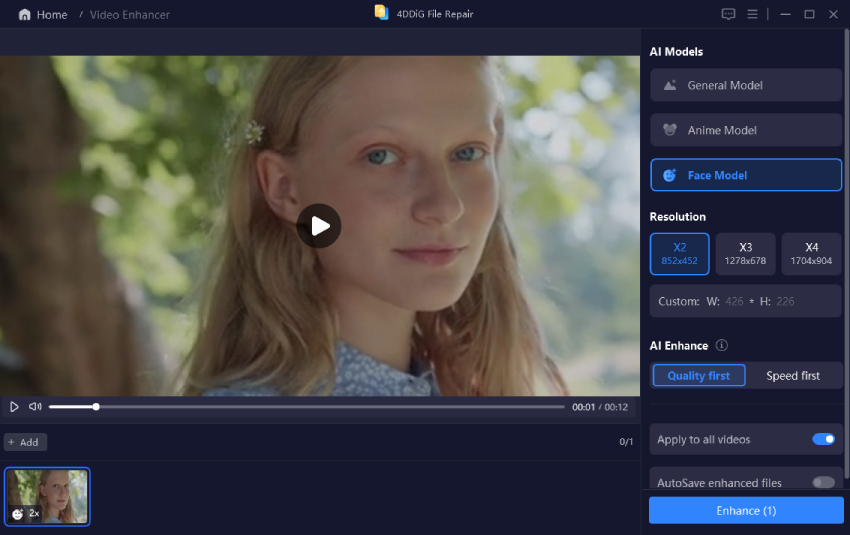
On the new screen, pick an AI model based on your photo style. Later, choose the Resolution as “X4”. You can also resize images without losing quality here.

-
Once done, tap the bottom-right “Enhance” button to proceed. Once the video has been enhanced, you can check the result export it by clicking “Save”.

Part 4. People Also Ask about Google Photos Video Quality
Q1: Does Google Photos reduce video quality?
Yes, it does compress videos when you opt for the 'Storage Saver' setting. This isn't selected by default, and if we select "Original Quality" then the video quality is not affected.
Q2: How do I change the video resolution in Google Photos?
Changing the resolution is out of the hands of Google Photos, but you can re-upload videos at a higher resolution by choosing 'Original Quality' in the backup options.
Q3: Why is video quality poor when uploading?
If you have selected the "Storage Saver" setting, it may result in storing poor-quality videos. Using low-quality videos, or slow internet speeds during playback are also some of the reasons.
Q4: How to upload videos to Google Photos?
To back up the videos, first open the Google Photos app or browser version, tap Upload, and then choose the videos you want to back up on your device.
Conclusion
Our video quality is often lost to storage efficiency from Google Photos, but if you have the right settings and tools, you can keep or restore the original resolution. For uploads always select "Original Quality" and use 4DDiG Video Enhancer to fix and enhance compressed videos.
With these solutions, you’ll be able to preserve your precious memories in the quality they should and never face Google Photos mess up video quality issues.
Secure Download
Secure Download
 ChatGPT
 Perplexity
 Google AI Mode
 Grok
Grok

