6 Ways to Fix VAN 9003 Valorant on Windows 11
Download 4DDiG Windows Data Recoveryto safely recover lost files caused by the VAN 9003 error on Valorant. This guide will show you how to fix the error and protect your data effortlessly. Keep reading!
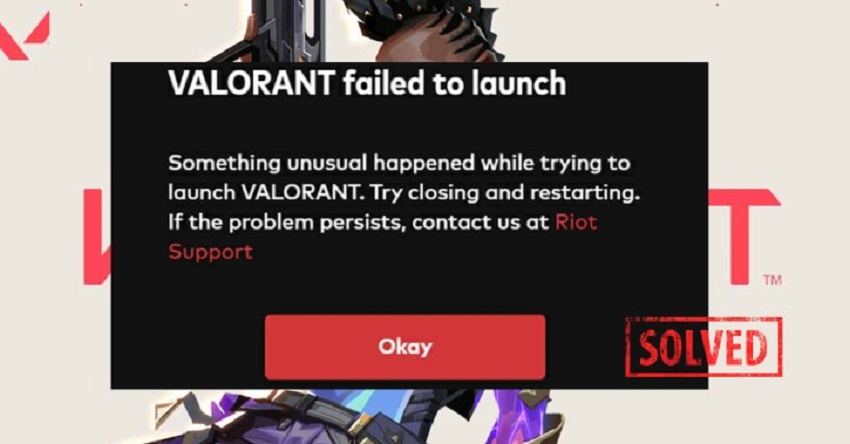
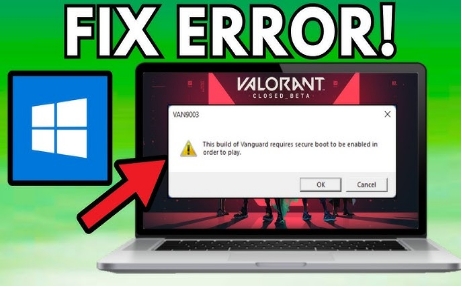
Are you struggling with the frustrating VAN 9003 error in Valorant on Windows 11? This error typically occurs when the game’s anti-cheat system, Vanguard, detects issues with Secure Boot. Valorant, a popular 5v5 tactical FPS game, requires Secure Boot to function properly, but many users encounter errors even after enabling it. If you’re facing messages like “this build of Vanguard requires Secure Boot to be enabled,” you’re not alone. In this guide, we’ll explore six effective methods to fix the VAN 9003 Valorant error on Windows 11 and ensure your system meets the requirements to get back in the game.
- How to Recover Data Lost from VAN 9003 Valorant?HOT
- Way 1: Check the Secure Boot Status
- Way 2: Restart Your Computer and Valorant
- Way 3: Verify Game Files
- Way 4: Update Graphics Drivers
- Way 5: Update Windows
- Way 6: Reinstall Valorant
Part 1:What Causes the VAN 9003 Valorant Error?
The VAN 9003 error in Valorant arises from system misconfigurations that prevent Riot’s anti-cheat software, Vanguard, from functioning correctly. Identifying the root cause is critical to applying the right solution.
Below are the key reasons behind this error:
- Secure Boot or TPM 2.0 Not Enabled: Valorant requires Secure Boot and TPM 2.0 to ensure a secure gaming environment. Without these features enabled, the game cannot run properly.
- Outdated Windows Version: Using an outdated version of Windows may result in compatibility issues with Vanguard, leading to the VAN 9003 error.
- Vanguard Anti-Cheat Conflicts: Vanguard requires precise system configurations and often fails to work on virtual machines or with certain Windows settings.
- Driver or System Incompatibilities: Outdated or incompatible drivers, especially those managing network or security, can disrupt Vanguard’s performance and cause errors.
- Faulty BIOS Settings: Incorrect BIOS settings, including disabled Secure Boot or TPM, are common triggers for the VAN 9003 error.
Attempting fixes on your own may cause further complications or data loss. It’s best to stop using the device and use professional recovery tools like 4DDiG Windows Data Recovery to protect critical data.
Part 2: How to Recover Data Lost from VAN 9003 Valorant?
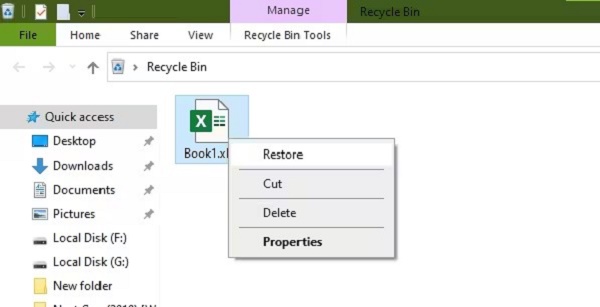
The VAN 9003 Valorant error may result in the loss of important game files or your personal data being stored in the same directory. If you don’t know how to recover these permanently deleted files, it can be frustrating. Luckily, 4DDiG Windows Data Recovery comes in handy.
This tool is designed to recover lost data; files corrupt due to system errors VAN 9003 included. Whether you lost your files because of corrupted game updates, accidental overwrites, or unexpected crashes, 4DDiG guarantees the recovery of your files without altering the integrity of your files.
This Tool works deeply scans its game directories or storage drives, finding even hidden or lost files. For gamers, this means you can restore game settings, configurations, and critical saved data effortlessly.
- Supports Corrupted File Recovery: Recovers damaged or inaccessible files caused by the VAN 9003 error.
- Recover Multiple File Types: Handles a wide range of file formats, including game-related data and system files.
- User-Friendly Interface: Simplifies the recovery process, even for those unfamiliar with data recovery tools.
- Selective Recovery: Allows previewing and choosing specific files to restore, saving time and space.
Secure Download
Secure Download
Here are the usage Steps to Recover Data with 4DDiG:
-
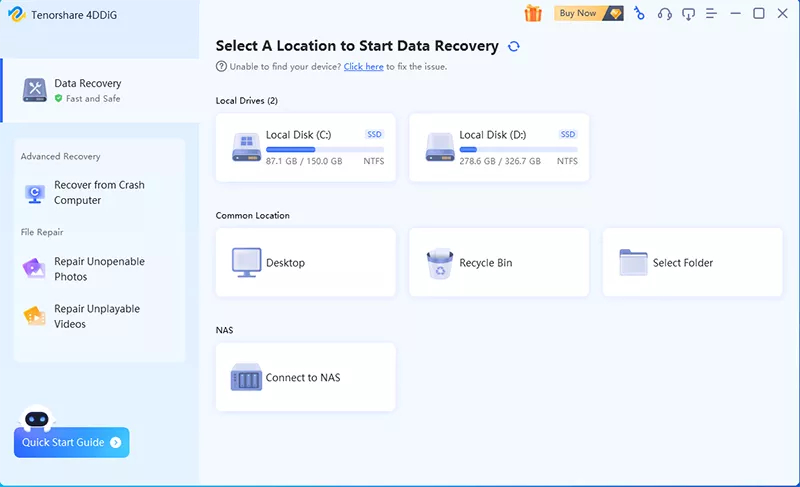
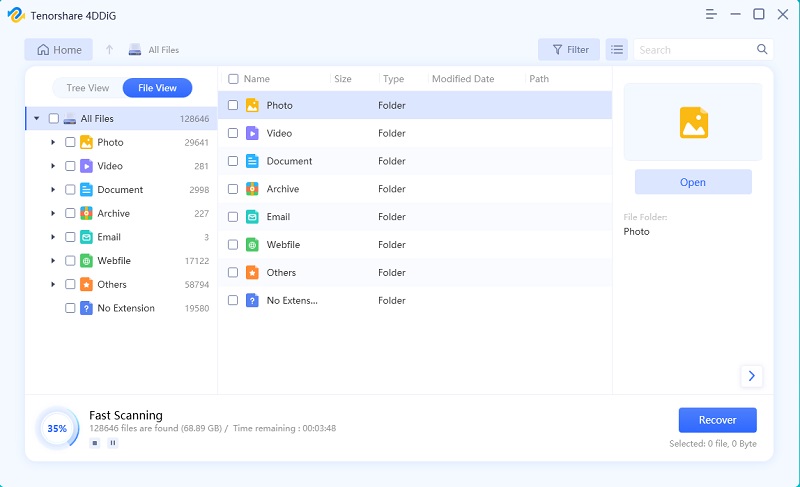
Launch 4DDiG and Select Location
Open the 4DDiG tool and choose the specific drive or folder where your Valorant-related files were stored. Click on the "Start" button to initiate the scanning process.
-
Scan for Lost Files
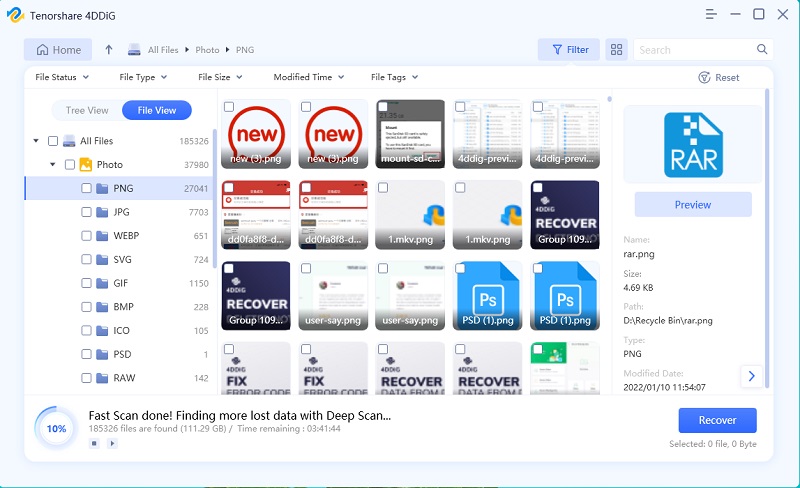
Allow 4DDiG to perform a thorough or quick scan to locate missing files. Review the detected files and filter by file type or date for better accuracy.
-
Recover and Save Files
Select the files you want to restore and click the "Recover" button. Save them to a secure location to avoid overwriting data during the recovery process.

People Also Read:
Part 3: How to Fix VAN 9003 Valorant Windows 11?
The VAN 9003 error on Windows 11 can be quite annoying. The good news is that there are plenty of steps you can take to troubleshoot the problem and get the problem fixed, so you can get back to enjoying your game.
Let’s take a look at these solutions:
Way 1: Check the Secure Boot Status
If you’re facing the VAN 9003 error while playing Valorant, checking the Secure Boot status could help. Secure Boot ensures that only trusted software is loaded during startup, which is essential for Windows 11 to function properly.
-
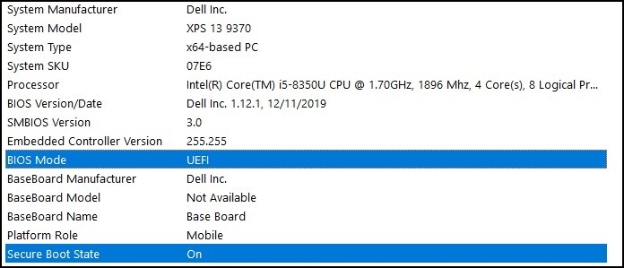
Press Windows key + R to open the Run box. Type msinfo32 and press Enter to open System Information. In this window, locate the BIOS Mode and Secure Boot State fields.

-
Check if BIOS Mode is set to UEFI and Secure Boot State is On. These settings are crucial for Windows 11 to run smoothly. If either of these is incorrect, it might cause issues with the system, including the VAN 9003 error.
-
If the settings are wrong, restart your computer and press the BIOS key (usually F2, Del, or Esc) to enter the BIOS menu. In the Boot or Security tab, enable Secure Boot and set Boot Mode to UEFI. Save the changes and exit the BIOS.
Way 2: Restart Your Computer and Valorant
Sometimes, a simple restart can resolve unexpected errors like VAN 9003. Restarting both your computer and Valorant ensures that any temporary issues or conflicts are cleared, and the game runs smoothly.
-
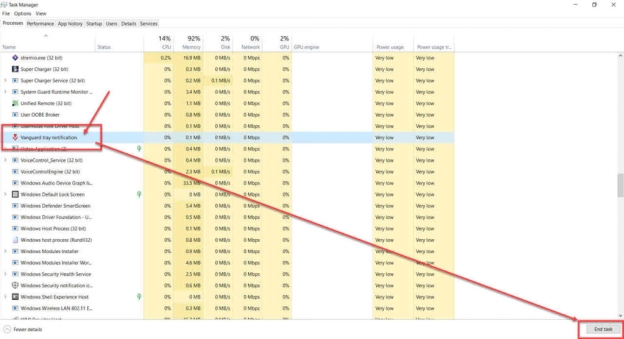
Close Valorant completely by using the Task Manager. Press Ctrl + Shift + Esc to open the Task Manager, find Valorant in the list of running applications, and click End Task.

-
Restart your computer. Click on the Start menu, then select Restart to reboot your PC. This clears up memory and refreshes system processes that may be interfering with the game.
-
Once your PC restarts, launch Valorant again and check if the VAN 9003 error is resolved. This restart allows any pending updates or background processes to be completed, which might be affecting the game’s performance.
Way 3: Verify Game Files
Corrupted or missing game files are a common cause of the VAN 9003 error. Verifying the game files ensures that everything is in place and up to date, resolving any issues with the game’s integrity.
-
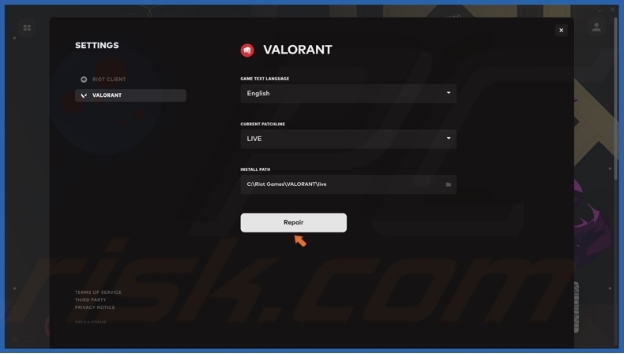
Open the Valorant Launcher. On the main screen, find and click on the gear icon in the top-right corner to access settings.
-
In the settings menu, click on Repair Game Files. The launcher will begin scanning the game files for any issues.

-
Once the scan is complete, the launcher will automatically repair any corrupted or missing files. After the process finishes, restart Valorant and check if the VAN 9003 error is resolved.
Way 4: Update Graphics Drivers
Outdated or incompatible graphics drivers can cause issues with Valorant, leading to errors like VAN 9003. Updating your drivers ensures your system is equipped with the latest performance enhancements and bug fixes.
-
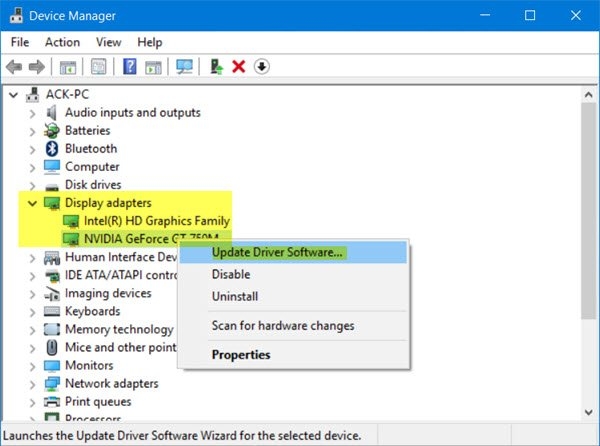
Press Windows + X and select Device Manager from the menu.
-
Expand the Display Adapters section and right-click on your graphics card. Select Update Driver.

-
Choose Search automatically for updated driver software. Windows will search for and install the latest drivers. Restart your computer after the update is complete to apply the changes.
Way 5: Update Windows
Running an outdated version of Windows can cause compatibility issues with Valorant, including the VAN 9003 error. Keeping Windows updated ensures your system has the latest patches and security fixes. It also improves overall performance and game compatibility.
-
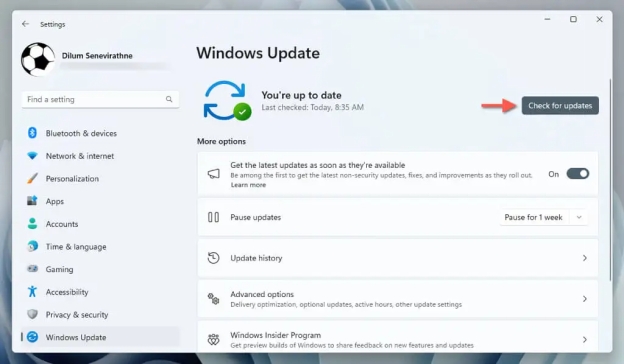
Press Windows + I to open the Settings menu.
-
Click on Update & Security and then select Windows Update from the left panel.
-
Click Check for updates. If any updates are available, install them. After installation, restart your computer to ensure the updates are fully applied.

Way 6: Reinstall Valorant
If none of the previous methods resolve the VAN 9003 error, reinstalling Valorant and its anti-cheat software might do the trick. A fresh installation can resolve corrupted files or settings that may be causing the issue.
-
Open the Start menu and type Add or Remove Programs. Select it from the list.
-
Scroll through the list, find Riot Vanguard, and click Uninstall. This will remove the anti-cheat software.
-
Restart your PC. Then, open the Valorant launcher, which will prompt you to reinstall Vanguard. Follow the on-screen instructions and restart your computer after installation to complete the process.
Frequently Asked Questions
Q: How to enable TPM 2.0 for Valorant?
Ans: To enable TPM 2.0, go to your BIOS settings during startup. Look for TPM settings and ensure it’s enabled for your system to meet Valorant's security requirements.
Q: What Is the VAN 9003 Valorant Error?
Ans: The VAN 9003 error occurs when Valorant’s anti-cheat software fails to load properly. It can be caused by outdated drivers, system settings, or issues with the anti-cheat software itself.
Q: How to fix the Valorant Secure Boot issue?
Ans: To fix the Secure Boot issue, enter your BIOS settings, disable Secure Boot, then enable it again. This can resolve boot-related problems that might cause the VAN 9003 error in Valorant.
Final Words
The VAN 9003 error in Valorant can be frustrating, but here we've discussed various ways to fix this error. Try them and If you’ve experienced data loss during the process, 4DDiG Data Recovery is a reliable tool to recover your essential files. Whether it’s recovering game data or system files, 4DDiG offers a simple and effective solution. Try it now to ensure you don’t lose valuable data while fixing the VAN 9003 error!

 ChatGPT
 Perplexity
 Google AI Mode
 Grok
Grok


