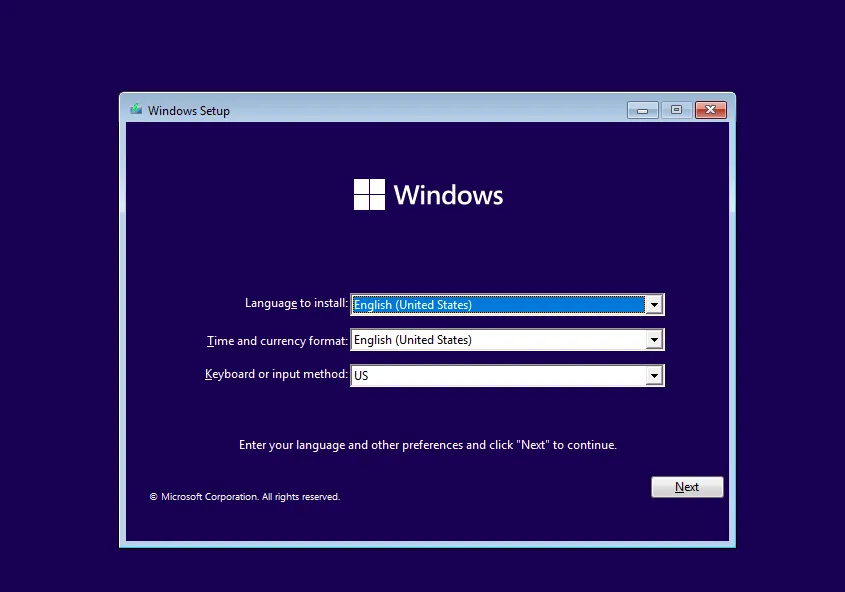
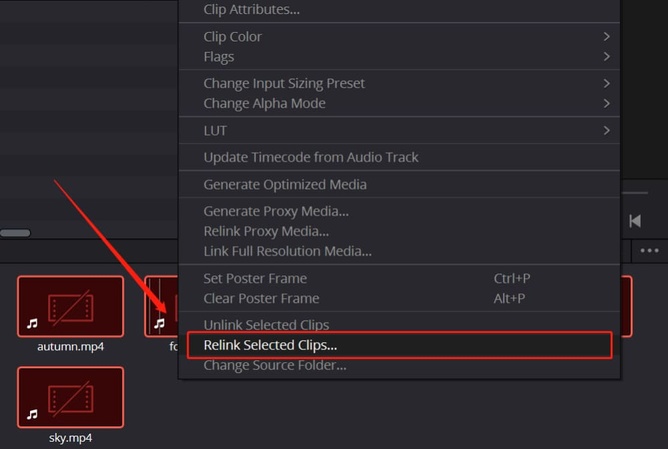
How to Enable TPM 2.0 on Your PC Windows 10/11

5 mins read

Updated on 2025-04-14 17:35:17 to Windows Fix

Chances are that if you are trying to install or upgrade to Windows 11, you have come across a message regarding TPM 2.0. Whether it be a desktop from MSI, ASUS, or Dell, the implementation of enabling TPM 2.0 is often required for compatibility and security within the system. This is an easy guide to how to enable TPM 2.0, check if it’s enabled (or not), and how you can even bypass it if your PC officially doesn’t support it.

Part 1. What Is TPM 2.0 & What Does TPM Do

➤ Definition of TPM 2.0

It is a hardware security feature, which is built into several modern PCs called TPM (Trusted Platform Module) 2.0. It is a secure cryptoprocessor that is designed for the encryption of data, storing credentials and integrity of system protectors.

➤ Benefits of TPM

There are multiple benefits of TPM 2.0 including:

  • Enables secure boot and Windows Hello
  • Encrypts hard drives using BitLocker
  • Prevents unauthorized access to sensitive data
  • Required for Windows 11 installation

Part 2. How to Check If TPM Is Enabled

So, before you get to the BIOS or learn how to turn on TPPM 2.0, you should first check if; TPM is already enabled on your device. This can be done in the following ways:

1. via Windows Security

The easiest method how to check if TPM 2.0 is enabled on your device is through Windows Security and below are the steps you need to follow:

  • Open Windows Settings. Navigate to “Update & Security” > “Windows Security” and choose “Device Security”.

  • Look for “Security processor details”. If you see “Specification Version” is 2.0, that means TPM 2.0 is enabled on your PC.

    check tpm 2.0

2. via Microsoft Management Console

Do you want more ways how to see if TPM is enabled on your computer? Below are the steps that you can follow via Microsoft Management Console on how to check if my pc supports TPM 2.0:

  • Press Win + R, type “tpm.msc”, and hit OK.

    open tpm management on local computer via command
  • A new window titled “TPM Management on Local Computer” will open.

  • Under Status, check if it says “The TPM is ready for use.”

  • Verify the Specification Version below, it should be 2.0.

    check tpm 2 on tpm management on local computer

Part 3. How to Enable TPM 2.0 in Windows 10/11

If you find out that TPM is not enabled on your computer, then you need to enable it with BIOS. Here are specific steps you need to follow for how to enable TPM 2.0 according to your device:

1. Enable TPM 2.0 in BIOS for ASUS

On your ASUS device, you will follow the steps to go into BIOS and enable TPM:

  • Restart your device and enter BIOS by pressing “Del” as soon as the Rog or ASUS logo appears.

  • Go to “Advanced” > “PCH-FW Configuration” to enable “PTT”.

    enable tpm from asus bios
  • Click “OK” and press the "F10" button to save changes and restart your computer.

2. Activate TPM 2.0 in BIOS for MSI

On your MSI computer activating the TPM 2.0 is simple with the following steps:

  • Reboot your MSI system and press Del during startup as the MSI logo appears.

  • Navigate to “Settings” > “Security” > “Trusted Computing”.

  • Set “Security Device Support” to “Enable”.

  • Save and exit then restart the computer.

    enable tpm from msi bios

3. Turn On TPM 2.0 in Dell BIOS

The process to go to BIOS is a little different in Dell computers but the rest of the process is simple and easy with the following steps:

  • Restart your computer and press F2 when you see the Dell logo.

  • Go to the Security section > “TPM 2.0 Security” and check the “TPM On” box.

  • Meanwhile, check the lower “Enabled” option.

    enable tpm 2 from dell bios
  • Save changes and exit then restart your computer.

Part 4. How to Bypass Windows 11 Requirements If Compatible TPM Cannot Be Found/Detected

When TPM options are missing from BIOS, or your system uses outdated hardware you can still proceed with Windows 11 installation using 4DDiG Partition Manager. The lack of options to install Windows 11 does not create an insurmountable situation.

Why Choose 4DDiG Partition Manager

The Windows 11 upgrade process remains accessible through 4DDiG Partition Manager. This tool enables you to check your PC specifications, verifying if your computer meets the Windows 11 upgrade requirements. Most importantly, it assists you in bypassing the TPM check, Secure Boot controls, and unsupported CPU or other hardware to complete the Win 11 update.

FREE DOWNLOAD

Secure Download

✨ What Can 4DDiG Partition Manager Do for You

The upgrade process becomes simpler when using 4DDiG Partition Manager because it offers functions to bypass TPM checks and more.

  • Bypassing TPM/CPU checks, Secure Boot controls, and unsupported hardware.
  • Creating bootable Windows 11 USB drives
  • Backing up important data before the upgrade
  • Downloading official Windows 11 ISO

✨ Bypass TPM Check and Install Windows 11 with 4DDiG Software

Bypassing TPM checks to install Windows 11 on unsupported devices has become very easy since this 4DDiG software enables you to do that. The whole process is quick and simple and does not require any technical experience as you will be only following the steps below:

  • Launch 4DDiG Partition Manager software on your computer and go to the “Windows Download & Upgrade” option to select the “Windows 11 Upgrade” button.

    upgrade win11 with 4ddig partition manager
  • Click the "Detect and Upgrade" button to see which of the requirements are not met by your hardware.

    detect pc specifications for win11 upgrade
  • Now, you will see a list of requirements that can be easily bypassed by clicking “Next” > “Start Upgrading” > “Sure”.

    bypass requirements and start upgrading win11
  • The 4DDiG Partition Manager will now take a few seconds and it will bypass all the TPM and other checks for you for a smooth and successful Windows upgrade. Within a few seconds, the Windows 11 installation screen will appear and now you can follow the on-screen steps to upgrade your windows. Click “Next” and follow the rest of the steps on-screen.

Part 5. People Also Ask about TPM 2.0

Q1: Should you enable TPM 2.0 on your PC?

The security of your system improves after enabling TPM 2.0 alongside providing the requirements for Windows 11-compatible operations. So, if you want to make your computer more secure, you should enable it.

Q2: Do you need TPM for Fortnite?

Yes, Fortnite does require TPM. The Windows-level TPM feature provides OS security and encryption functions as its primary purpose. It will be required for both your Windows upgrades and games like Fortnite do require TPM to ensure that fair players are participating in the tournaments.

Q3: Why is the TPM option not showing in BIOS?

The TPM function cannot run on your motherboard because it lacks support or because the installed firmware version needs an update. Users should check the manufacturer's website for product updates.

Q4: Why can't I activate TPM?

Sometimes, the manufacturer prevents modification of BIOS settings through factory lock restrictions. TPM module does not exist in physical form inside some desktop systems (in some desktop builds). However, 4DDiG Partition Manager serves as a tool that allows you to install Windows 11 without TPM if you are unable to activate TPM on your system.

Conclusion

TPM 2.0 needs to be active because it brings out comprehensive security features for Windows 10 and 11 systems during Windows 11 installation. This guide on how to enable TPM 2.0 provided instructions for checking TPM status along with BIOS-based TPM activation steps as well as alternative options for unsupported PCs among users of MSI ASUS and Dell desktop models.

The software tool 4DDiG Partition Manager enables you to safely upgrade devices that do not match the Windows 11 requirements. This single application enables you to get Windows ISOs as well as produce bootable media while it allows data retention during the upgrade process.

FREE DOWNLOAD

Secure Download

Ehtsham Ahmed (senior editor)

Ehtsham Ahmed, the content writer for 4DDiG, is dedicated to offering workarounds for Windows Data Recovery, Windows Troubleshooting, iDevices System Repair, etc.

(Click to rate this post)

You rated 4.5 ( participated)