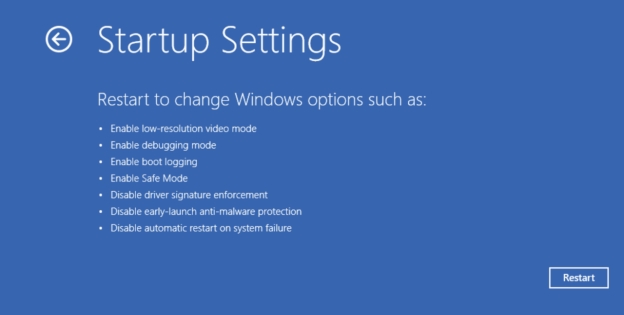
A Detailed Guide for Windows 11 24h2 BSOD Fix
Windows 11 version 24H2 introduces new features, delivers impressive performance improvements, and contains vital security updates. However, users have reported having to brute-force their way through BSOD errors that disrupt productivity and system reliability.
In this guide, you will learn what caused the issue of the Windows 11 24H2 BSOD and how you can actually fix it. We'll show you how to fix everything from updating your drivers to rolling back updates.
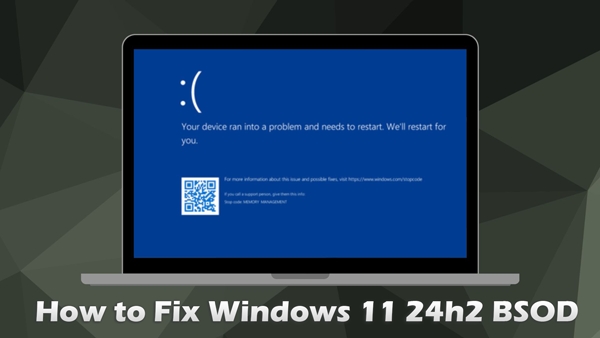
Part 1. What Causes Windows 11 24H2 BSOD Issue❓
Before fixing the issue, it is better to learn the scenarios and common reasons on Windows 11 24H2 causing BSOD. Below we have listed the scenarios of Windows 11 version 24H2 Blue Screen of Death and its common reasons:
➤ Common Scenarios
- Windows 11 24H2 Black Screen After Update: Installing the update leads to failures when trying to boot normally.
- Windows 11 24H2 BSOD SSD: Certain SSDs in conflict with this update cause BSOD errors.
- Windows 11 24H2 BSOD Critical Process Died: This critical BSOD issue occurs because system files get corrupted.
- Windows 11 24H2 Causes a Black Screen When Using Alt + Tab: Alt + Tab switching tasks result in screen freezes or crashes.
➤ Common Reasons
Here are some common factors behind Windows 11 24H2 feature update causing BSOD problem:
- Driver Issues: The OS may be newer than the drivers with which it was installed.
- Corrupted System File: The update process might cause corruption of system files.
- Incompatible Firmware: Firmware-related incompatibilities with SSDs.
- Incrorrect Settings: Black screens may occur due to settings that are not correct, or because you are using old display drivers.
- Hardware Problems: Attempting to introduce new features may put a strain on hardware so that it will fail and incur critical errors.
Part 2. How to Fix Windows 11 24H2 BSOD Issue⚒️
We have learn the reasons of “Why does Windows 11 keep getting a BSOD after 24H2 update”. If you are also facing this Windows Blue Screen issue then here are the most effective solutions you can try to fix it:
- 1. Turn Off Game Mode
- 2. Install Windows KB5044384
- 3. Change Registry Editor
- 4. Go Back to Windows 11 23h2
- 5. Check Display/Hardware Connections and Settings
- 6. Update Graphic Drivers
- 7. Delay Windows 11 24H2 Update
1. Turn Off Game Mode
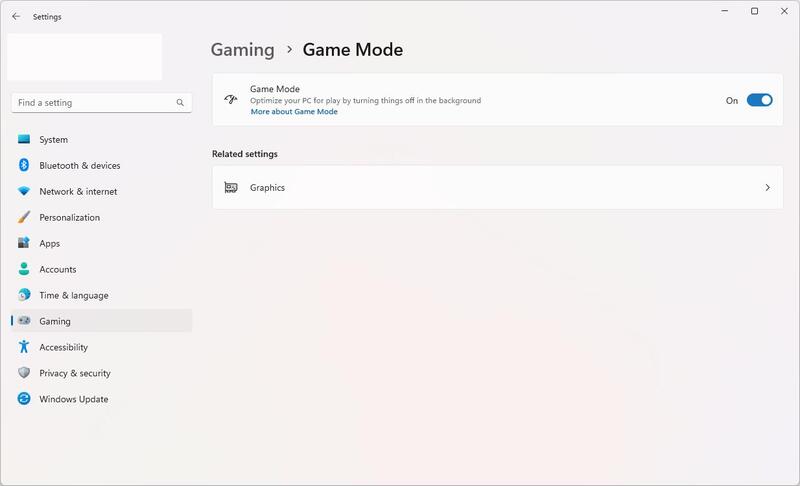
Many users reported that they encountered the blue screen error or freezing on the Windows 11 24H2 version when they tended to switch windows using the Alt+Tab keys. Amid this, disabling Game Mode can stop conflicts between system resources. This has been proven by users on the forum as a temporary solution.
☞ Steps:
Open Windows Settings from the bottom-left Start menu
-
Go to “Gaming” from the left sidebar and tap on the “Game Mode” tab.
-
Toggle off the button of “Game Mode”.

2. Install Windows KB5044384
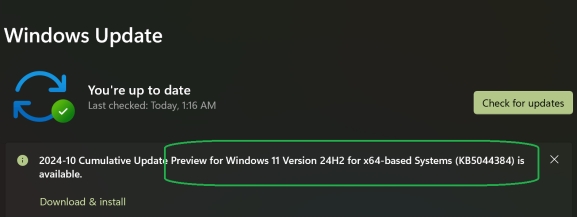
Since increasing discussions about the Windows 11 24H2 blue screen issue, Microsoft had a new KB5044384 patch to fix the main bugs on the new update. Thus, if you have not installed this patch, just try it know.
This update will be gradully rolled out. At present, it is not suitable for all users who have updated to the latest new version.
☞ Steps:
Go to Windows Settings, and then click on “Windows Update”.
Hit the “Check for updates” button.
-
Find the KB5044384 version from the update list and click “Download & install”.

Besides, now KB5053656 has been released as 2025 Cumulative Update Preview for Windows 11 version 24h2 to fix bugs. Read this guide to learn its highlights and issues alongside troubleshoot tips:[Ultimate Guide] Windows 11 KB5053656: Highlights, Issues, and Solutions
3. Change Registry Editor
Using the Registry Editor is a technical walkaround and it requires extreme caution when working with files. However, if you do everything correctly you can achieve success in resolving the Windows 11 version 24H2 BSOD issue. However, this method should be operated with caution and it is not reocmmended.
☞ Steps:
-
Open Regedit: Press Win+R, type regedit on the popup box, and press Enter afterward.

-
Go to the path from the left panel on the Regedit Editor:
HKEY_LOCAL_MACHINE\SYSTEM\CurrentControlSet\Control\StorPort -
If the subkey “HmbAllocationPolicy” does not exist already you need to create it.
-
Once created, set the value of DWORD or QWORD to 0 (that is “disable HMB”) or 2 (that is 64MB).
Restart your computer now and it will fix the issue.
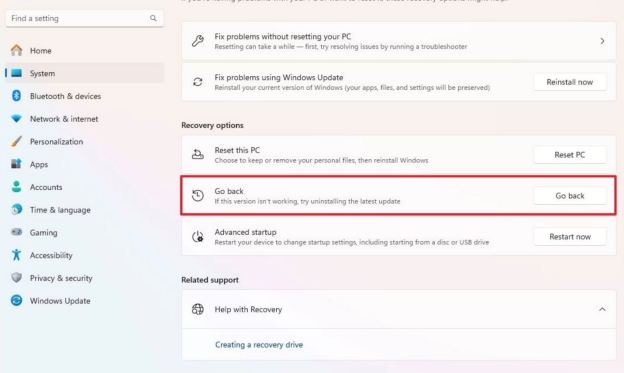
4. Go Back to Windows 11 23h2
If the Windows 11 24H2 update blue screen persists after trying the above workarounds, then it is recommended to roll back to the last 23h2 version of Windows 11. You can update the 24H2 version till the hardware and software are updated to be compatible with it.
☞ Steps:
-
On Windows Settings panel, navigate to the left “System” section and > click on “Recovery”.
-
Under the “Recovery Options” label, click “Go back” to proceed.

-
Now click “Next” > “Next” to proceed when 2 prompts pop up.
Choose “No Thanks” when it asks you to check for updates.
-
Finally, tap “Next” > “Next” > “Go back to ealier build” to finish the process.
This is only available within the 10 days after the update.
5. Check Display/Hardware Connections and Settings
Sometimes, Windows updates can sometimes change or overwrite display drivers, leading to compatibility issues. On the other hand, incompatible or outdated computer’s firmware or hardware is also a primary culprit behind Windows 11 24H2 Blue Screen of Death.
Thus, it is necessary to ensure that your display drivers are correctly installed and hardware or firmware is compatible with the latest update.
☞ Steps:
Inspect all cables and reseat the hardware.
-
Open Display Settings and make sure that everything is set to default/normal.
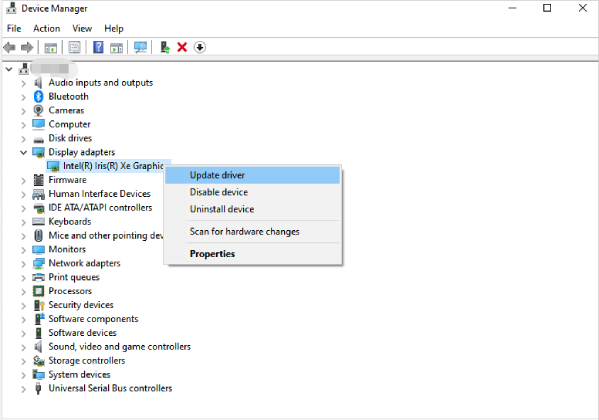
6. Update Graphic Drivers
Compatibility issues may arise from outdated graphics drivers, leading to Windows 11 version 24H2 BSOD error. Therefore, updating them will fix the issue for you.
☞ Steps:
-
Select and run Device Manager from the Start menu at the bottom right of Windows 11.
Navigate to and expand the “Display Adapters” folder.
-
Right-click on your GPU. Choose “Update driver” from the popup.

7. Delay Windows 11 24H2 Update
One way to stay safe from this issue is by staying on your previous version of the firmware update. This is possible if you have not already updated to the 24H2 update or you have rolled back to the previous version.
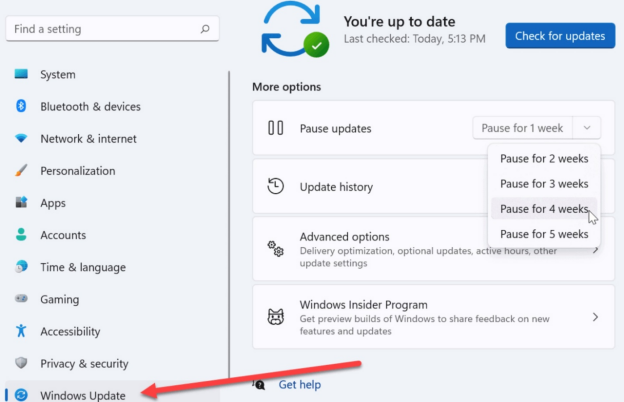
If you are on the previous version, pause future updates till the firmware or hardware on your computer gets updated. Alternatively, untick the Automatic Updates option to get the latest system version and make it stay at 23h2.
☞ Steps to Untick Update:
-
Touch on “Windows Update” from the left sidebar in Windows 11 Settings.
-
From the right side, select “Pause for 5 weeks” from the drop-down box of “Pause updates”.
-
Or, you can proceed to press the “Advanced options” below and untick all selections under the "Update options" label.

☞ The blue screen issue may affect the operation of Windows Security. If you cannot open it, please refer to Fix Windows Security Not Opening
Part 3. How to Backup Data Before Windows 11 24H2 Update
It is a necessary step to back up all your important data before you start Windows update to avoid data loss. Windows built-in backup settings may cost a long time and is a little bit difficult. In this case, it is encouraged to resort to a reliable backup or disk clone software. Fortunately, 4DDiG Partition Manager is such an excellent tool that can cater to our needs.
4DDiG Partition Manager can manage storage, clone disks as well as backup data. Whether you are updating the system, troubleshooting a BSOD error, or formatting drives, this software guarantees data safety while continuing to occur in a smooth system. Its intuitive interface, and robust features, all constitute an essential solution for all storage management needs.
Secure Download
What Can 4DDiG Partition Manager Do
- Clone data disk to a new drive or easily create full disk backups.
- Safely transfer Windows OS to SSD or other drives without system reinstallation
- Can resize, merge, extend, shrink, split, create, delete, or format partitions.
- Create bootable disks without Media Creation Tool for backup from non-bootable computers
- Effortlessly repair, recover, and restore missing, corrupted, or deleted partitions.
- Able to format drives to NTFS, FAT32, exFAT, and more
- Resolve partition troubles that trigger BSOD or potential errors.
Steps to Backup Data Before Update
-
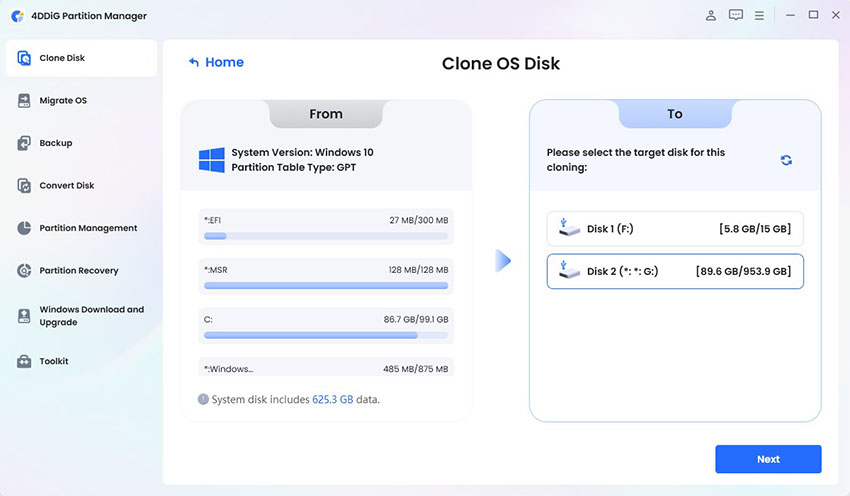
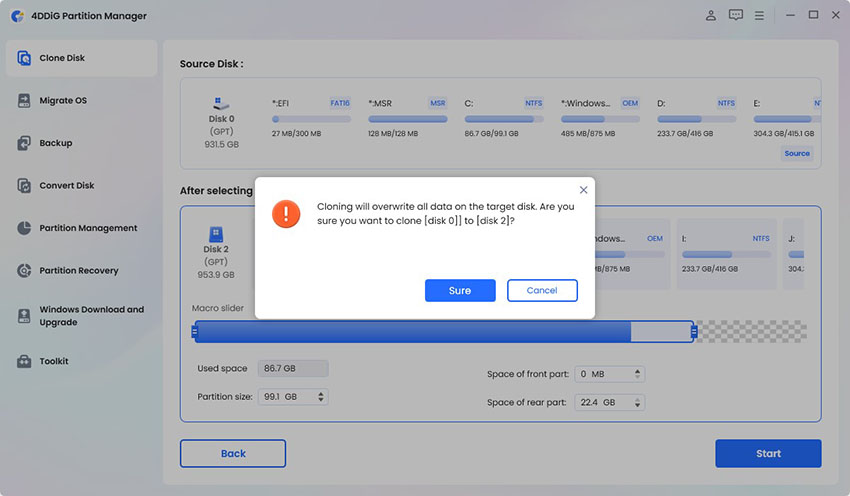
Open 4DDiG Partition Manager and select “Clone Disk” from the left panel. Now click “Clone OS Disk” or “Clone Data Disk”.

-
Select the target disk and click “Next” then be sure to begin disk partition management.

Note :
All data files on the target disk will be overwritten during cloning. Please select a blank or new drive as the targe disk.

-
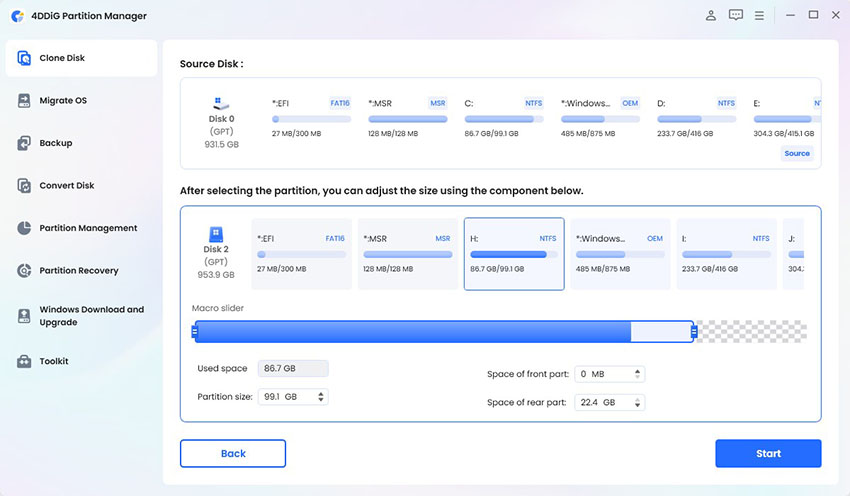
Now you can preview the effect of cloned disk and manage the partition size as per requirements. Then press “Start” to begin data backup.

-
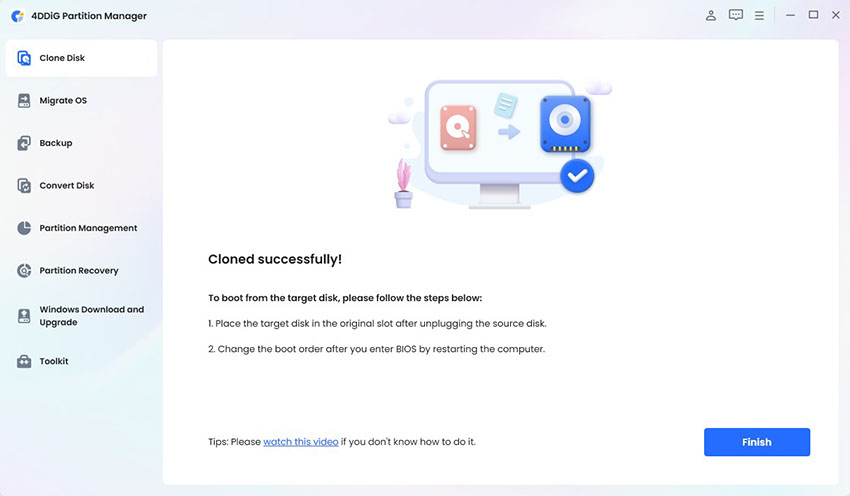
Wait the clone process to finish. Once the backup is successful you can click Finish and close the tool.

Part 4. People Also Ask about Windows 11 24H2
Q1: Should I upgrade to Windows 11 24H2 from 23h2?
If your computer supports this update and meets the minimum requirements then you can get vital feature improvements in this upgrade.
Q2: Will my computer run Windows 11 24H2?
If your computer is currently on a 23h2 version of Windows 11 then you can easily update to 24H2 and it will run effortlessly.
Q3: How to remove 24H2 from Windows 11
Within ten days of the update, use the Go Back option in Recovery settings.
Q4: What is the Windows 11 update for October?
The October update is Windows 11 version 24H2, it has new features, bug fixes, and performance improvements.
Final Thoughts
Windows 11 24H2 BSOD can halt productivity but it can be dealt with by using the effective solutions. Disabling Game Mode, updating, and rolling back to the previous version is possible. 4DDiG Partition Manager is highly recommended if you want accurate data backup and easy troubleshooting.
The advanced features make data safe while keeping complicated matters simple. With 4DDiG you prepare your system so that no interruptions and performance can be improved during the updates.
Secure Download


 ChatGPT
 Perplexity
 Google AI Mode
 Grok
Grok

