How to Download Windows 11 24H2 ISO File

Microsoft significantly upgraded the Canary and Dev Channels on February 8, 2024, with build 26052. This marked the first official release of Windows 11 24H2.
We are getting extremely close to the public release of Windows 11 version 24H2, this year’s major feature upgrade. More individuals may wish to upgrade to the most recent version rather than wait for it to be released publicly. If you are one of these users, here’s how to download and install Windows 11 version 24H2.
Windows 11 24H2 introduces several new features, including Sudo for Windows. It also delivers AI, Wi-Fi 7, energy savings, and other features to the Windows environment. The most recent version is now available for Windows Insider Program participants to download. You can download it directly from the Updates tab. If you are experiencing compatibility difficulties or failures due to the latest version, you can clean install Windows 11 24H2. This article provides a thorough approach for performing a clean install of Windows 11 24H2.
Part 1: Windows 11 24H2 ISO Download from Microsoft
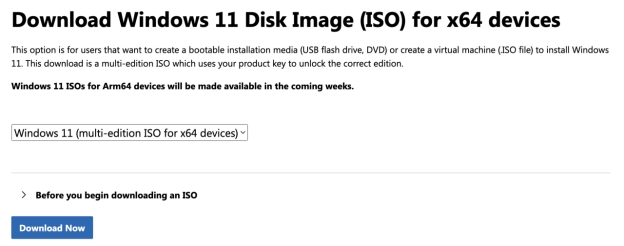
Download Windows 24H2 Disk Image File
You may upgrade to Windows 11 24H2 offline by downloading the ISO file from Microsoft. After downloading the ISO file, you may update your Windows operating system or install Windows 11 from scratch. Here’s how to get the Windows 11 24H2 ISO from Microsoft for offline upgrade.
-
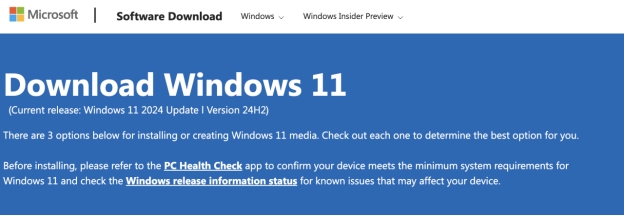
Visit the Windows 11 download page

-
Scroll down the page to “Download Windows 11 Disk name (ISO),” then click on Download.

-
Select the language and location and click Confirm.

-
Click 64-bit Download to get the Windows 11 24H2 ISO file.

Download & Create Windows 11 24H2 Installation Media
The Windows 11 Media Creation Tool allows you to download the Windows ISO file, reinstall Windows, and generate an ISO name of your operating system. This tool will download the most recent Windows 11 ISO file version and generate a bootable USB. Here’s how.
-
Visit the Windows 11 download page. Click Download Now under “Create Windows 11 installation media.”

-
Open the ISO file and run the setup.exe program.
-
In the Install Windows 11 box, click Next.
-
Click Accept for the applicable notifications and licensing conditions.
-
Select the Windows language and edition, then click Next.
-
Select the ISO file and click Next.
-
Select where you want to download/save the Windows 11 24H2 ISO file and click Save. It will start downloading.
-
When completed, the Tool will display a notice stating that “the ISO file has been downloaded” or “the bootable USB is ready.” To leave the Tool, click Finish.
If you fail to install the ISO file and the 24H2 version, explore feasible solutions from this guide: 7 Proven Ways to Fix Windows 11 24H2 Not Installing
Part 2: Preparation Before Installing Windows 11 24H2
1. What are the System Requirements for Windows 11 24H2?
Before downloading the Windows 11 24H2 ISO file, check the Windows 11 24h2 system requirements to ensure a smooth and secure download.
-
One gigahertz (GHz) or a faster CPU with two or more cores on a suitable 64-bit processor.
-
The backup storage device should be at least 64 GB.
-
A good Internet connection for smooth backups and Windows 11 installation.
The ISO file for Windows 11 24H2 is around 8 GB in size. Therefore, you should have enough space on a PC, USB, or external hard drive to save the ISO file.
2. Backup Computer Before Windows 11 24H2 Installation
A clean install removes compatibility and system configuration concerns. However, it also deletes all data on the primary disk as well. If you wish to retrieve files, programs, or data after reinstalling Windows 11, backup your system before installing Windows 11 24H2. This way, you can avoid data loss due to Windows update difficulties or a fresh/clean install of Windows 11.
There are many tools available to use to back up your computer easily. One such software is 4DDiG Partition Manager. This free backup program can help you back up the entire system, including files, applications, data, and directories.
Backing up the system to another drive is a critical step that cannot be stressed enough. Here, we’ll look at how to backup a computer to an external hard drive in Windows 11/10, the benefits of backing up, the different sorts of backups, and a comparison of 4DDiG Partition Manager and Backup and Restore as means of backing up the operating system.
Backup Computer with 4DDiG Partition Manager
Here are all the steps to back up your computer to an external hard drive.
Secure Download
-
Have the external drive you’ll use to copy your data on hand and then plug it into the computer.
-
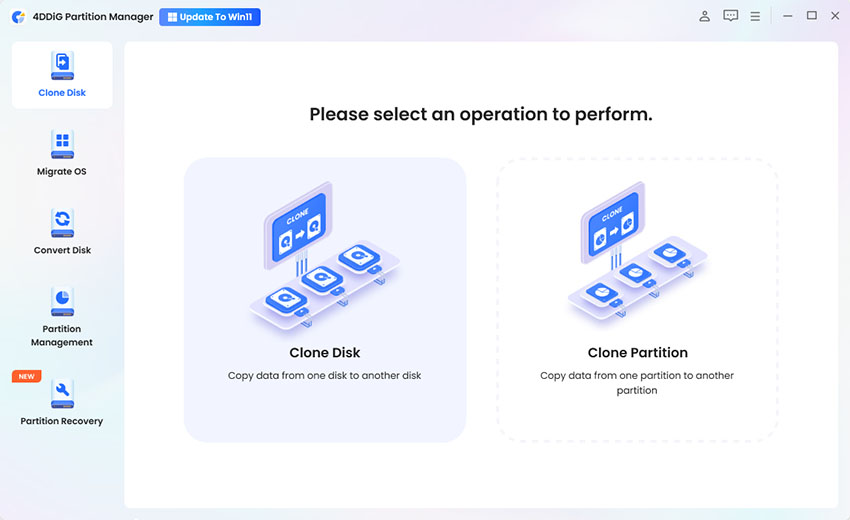
Then, download and launch 4DDiG Partition Manager, then select the “Clone Disk” option from the left bar.

-
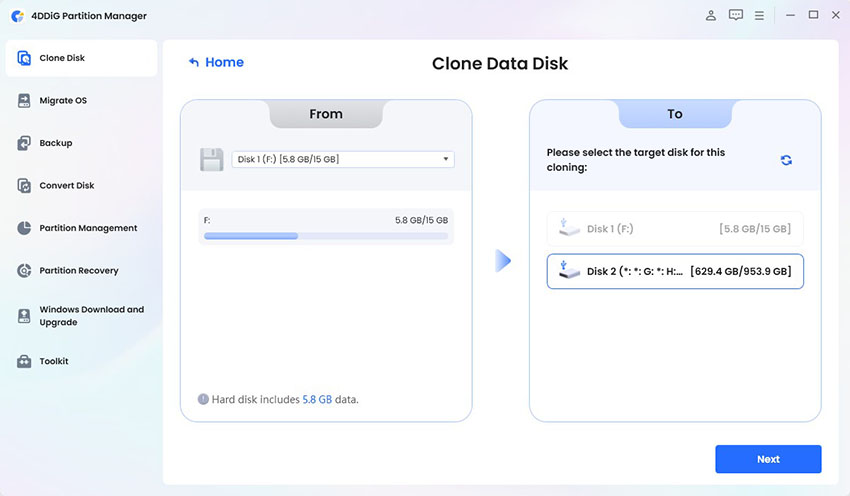
Now, choose a target disk from the possibilities. This disk will receive data from your computer (source disk). Hence, it should be the external disk you attached to the PC.

-
A preview interface will appear, displaying the results of the cloning. If you’re confident that this is right, click “Start.”
-
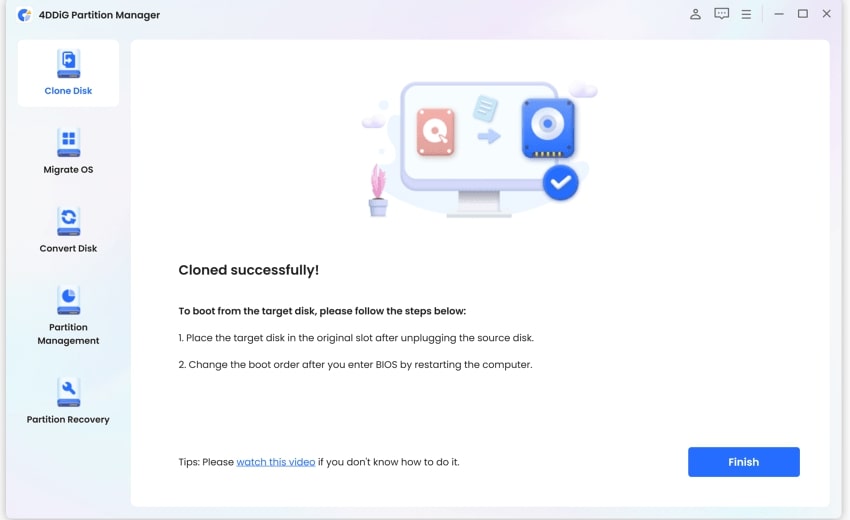
Ensure that no other operations are taking place on the device while it is being cloned. The operation itself might take some time, depending on the size of the source drive.

Once this is done, you can begin your download Windows 11 24H2. There are several methods for downloading the Windows ISO file. We will share two simple methods.
☞ How to Backup Computer to Google Drive [3 Easy Ways for Beginners]
Part 3: Clean Install Windows 11 24H2
1. Create Windows 11 24H2 Bootable USB
If you want to update your PC or debug a problem, you must know how to generate a Windows 11 bootable USB. This portable program allows you to effortlessly replace or repair your operating system without using a physical installation disk.
You must make a bootable USB device using the Windows 11 24H2 ISO file. First, burn the ISO to a USB drive to get the new Windows version’s contents. You can use Rufus, a Windows 11 24H2 download offline installer, to create Windows installation disk. Or burn the ISO to USB with 4DDiG Partition Manager “Create WinPE” feature.
Steps to Create Bootable USB Drive with Rufus
Follow these steps to create a Windows 11 bootable USB drive with Roofus. Start by connecting a USB flash drive with at least 8GB of space.
-
Visit the Rufus website and navigate to the “Download” section. Then, click the latest version link.
-
Double-click the downloaded executable file to launch Rufus.
-
Select your USB flash drive from the Device dropdown menu in Rufus.
-
Under Boot selection, click the down-arrow button to the right and choose the Windows 11 24H2 ISO.
-
Select GPT as Partition scheme and choose UEFI under Target system.
-
Click Start.
Once the process is complete, use the bootable USB flash drive to install Windows 11 as a clean installation or an in-place upgrade.
2. Install Windows 11 24H2 from USB
You must access the BIOS and switch the boot order to a bootable USB device. Find your PC’s BIOS key (usually F1, F2, F10, F12, Del) and set USB as the top priority. To do a clean installation of Windows 11 24H2, change the boot order and proceed with the procedures below.
Boot the PC from the Windows 11 24H2 USB device.
Configure the configuration according to your needs.
-
Select Install Windows 11. Windows displays a notification stating that everything on the machine will be wiped. Choose “I agree everything will be deleted, including files, apps, and settings.”
-
Since Windows requires a product key, input it now. If you run a clean install or reinstall, choose “I don’t have a product key,” and the computer will activate immediately.
-
Select the Windows 11 edition for your license key and click Next.
-
Select the partition where you want to install Windows 11 24H2, then click Next.
-
Select Install and Configure Windows 11 once everything is ready.
Conclusion
This article offers simple methods for downloading Windows 11 24H2 ISO files. Windows 11 24H2 is the most recent version with many intriguing innovations, particularly AI. Additionally, if you are dealing with compatibility difficulties and system faults, we also covered how to clean install Windows 11 24H2 on your PC.
To save time and effort, you should utilize professional software like 4DDiG Partition Manager to back up your files and generate a Windows 11 bootable USB.


 ChatGPT
 Perplexity
 Google AI Mode
 Grok
Grok


