Windows 11 Installation Assistant: What It Is & How to Use It
Updating your computer to Windows 11 may be challenging for those just getting started. However, Windows 11 Installation Assistant makes a difference for switching from Windows 10 to Windows 11, making the process simpler. This guide explains how to use the Installation Assistant, covering what it is, what is needed, how to get and set it up, tips for running into issues and troubles with hardware.
Part 1. What Is Windows 11 Installation Assistant & Its Requirements
The Installation Assistant from Microsoft is used to help users upgrade their Windows 10 computers to Windows 11. Microsoft Windows 11 Installation Assistant looks at your device to check the device's specifications, prepares the necessary files, and steps you through the installation process. Users who prefer simple upgrade steps without having to create installation files find this tool very helpful.
What Are the Requirements for the Windows 11 Installation Assistant?
Before you get started with the Windows upgrade, here is the complete list of requirements for the Windows 11 installation assistant to work.
- System
- Requirements
- OS
- Version 2004 or higher of Windows 10
- Processor
- 64-bit processor with minimum 2 codes and 1GHz speed
- RAM
- Minimum 4gigabytes
- Storage
- At least 64 Gigabytes; additional 9 GB for download
- Firmware
- Secure Boot and UEFI capable
- TPM
- TPM 2.0 support
- Graphics Card
- DirectX 12 compatible with WDDM 2.0 driver
- Display
- Minimum 720p display
- Internet
- Stable internet connection
- Processor Architecture
- x64 processors only (Arm-based PCs not supported)
Should I Use Windows 11 Installation Assistant
Users with PCs that meet the given requirements and who choose an in-place upgrade should use the Installation Assistant. If you don’t have a TPM 2.0 device or a supported CPU, the Installation Assistant will not start the process. Sometimes you must use alternate ways, for example, the Media Creation Tool or special software.
So, if you have no issues, then you must use but if you face restrictions like Windows 11 installation assistant unsupported CPU, then you will need to use third-party tools like 4DDiG Partition Manager to bypass these Windows 11 requirements.
Part 2. How to Download Windows 11 Installation Assistant & Use It
If you plan to go with the Windows 11 installation, you must know how to use Windows 11 Installation Assistant. So, in this section, we will discuss step-by-step how to download and then use the assistant for a seamless Windows 11 installation experience.
-
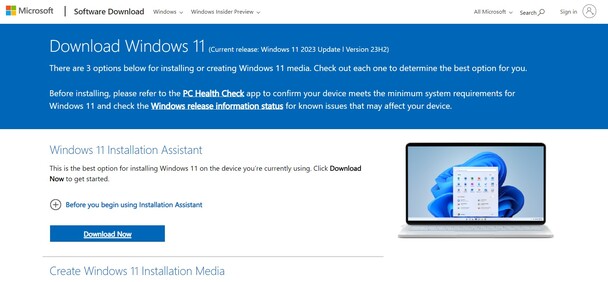
Go to the Microsoft official website to download Windows 11 Installation Assistant. After the file downloads, you can run it and follow the on-screen steps to install it.

-
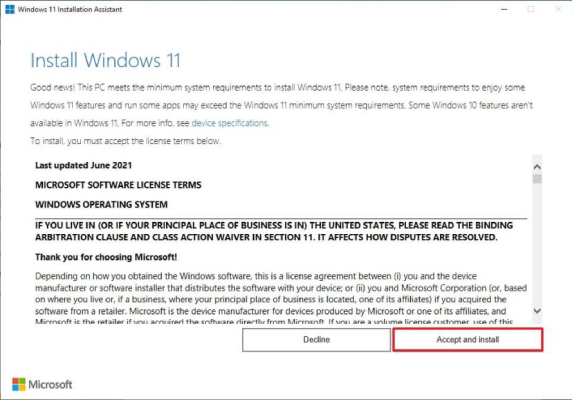
Run the installation assistant and click “Accept and Install” to begin the process.

-
Now, leave the tool running while it downloads your Windows 11 files. Once the download is complete, you will need to click “Restart Now” to begin the installation process. From here, the assistant will take care of everything, and you do not need to do anything manually.

Part 3. More Details & FAQs about Microsoft Windows 11 Installation Assistant
Q1: Does the Windows 11 installation assistant delete everything?
The upgrade will keep your files, apps, and most of your settings safe with the help of the Windows 11 Installation Assistant, which is not on the C Drive. Nevertheless, before beginning, you should save any important information somewhere else so that you can perform a clean installation if required by future problems.
Q2: How long does Windows 11 Installation Assistant Take
Depending on what hardware and network speed you have, installing the app usually takes somewhere between 30 minutes and an hour. If your device is up to date, you may finish the upgrade in less time than on older models. Make sure your computer stays on and connected for the entire process to succeed.
Q3: Is Windows 11 installation assistant safe?
The Windows 11 Installation Assistant is a tool provided directly by Microsoft. The update is meant to assist users in updating their systems without issue. Never download it from anywhere except Microsoft to ensure you get the safe, genuine version.
Q4: Windows 11 installation assistant vs installation media. What are the differences?
This assistant replaces your current system and keeps your files undamaged. Using the Media Creation Tool, you can install Windows fresh on a USB or DVD. Installation media is for a new start or when transferring to a new computer.
Q5: Where can I download the Windows 11 Update Assistant?
The Windows 11 Installation (or Update) Assistant can be obtained from Microsoft’s new Windows 11 download page. Choose the right package for your operating system to avoid compatibility or installation issues.
Q6: How to stop the Windows 11 installation assistant?
If you wish to stop the installation, just close the window where Installation Assistant is shown. If the installation is already taking place, you’ll either have to restart your PC or end the installation by hand. Yet stopping it suddenly could cause certain problems, so you should act with caution.
Part 4. Issue Fix: Windows 11 Installation Assistant Stuck at 0/99? Fixed!
Sometimes, the OS starts to update but never finishes and stays at 99%. Or, it can just give errors and never save. Other people are dealing with this too. These problems are bothersome, but they can be solved using reliable ways.
Method 1. Shutdown & Restart Your PC
Usually, a simple restart is all it takes to resolve the issue. Many users have reported success with this quick fix.
-
Hold the power button of your PC for around 10 seconds to shut it down completely and restart it.
Now, launch the Windows 11 Installation Assistant again.
This is a simple fix that will restart the whole hardware of your computer, and the bug that is causing the assistant to fail or get stuck will be resolved with ease.
Method 2. Install Windows 11 by Bypassing Windows 11 Installation Requirements
If the Installation Assistant continues to fail, the Windows 11 installation Assistant is stuck at 0, stuck at 99, can’t create files, or your PC doesn’t meet Windows 11’s hardware requirements, consider a smoother route.
Using 4DDiG Partition Manager, you can install Windows 11 without compatibility errors or data loss. Specifically, it helps your PC circumvent requirements (including TPM 2.0 check, Secure Boot, unsupported CPU or other hardware, etc.) to install the Windows 11 latest version in just several clicks.
Secure Download
Steps To Bypass Requirements and Upgrade to Windows 11 On Unsupported PC Using 4DDiG
The process of installing Windows 11 without TPM and Secure Boot is extremely simple when you use the 4DDiG software. Below are the steps you can follow to easily upgrade your Windows version.
-
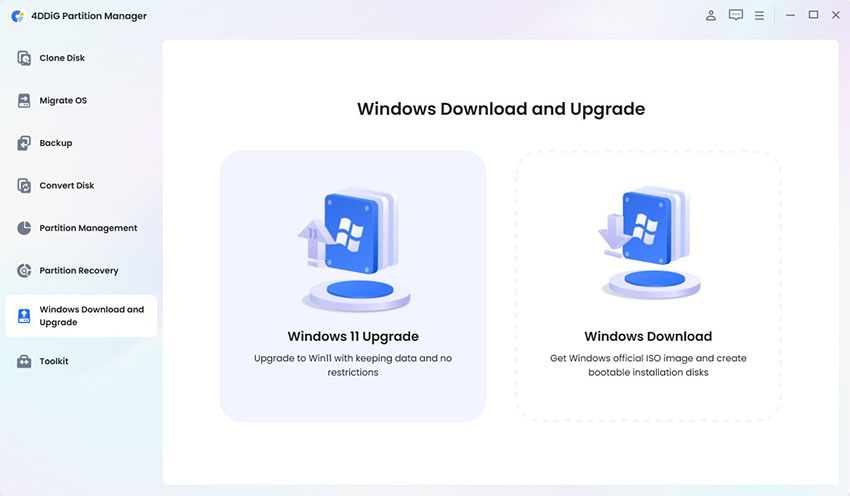
Launch 4DDiG Partition Manager software on your computer. Click "Windows Download and Upgrade" to select the "Windows 11 Upgrade" button.

-
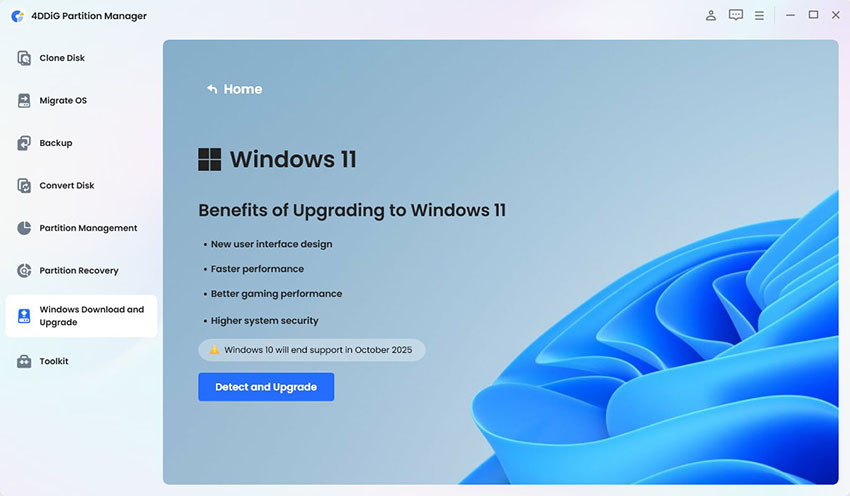
Here, click the blue “Detect and Upgrade” button and let 4DDiG check if your system meets the minimum requirements for Windows 11.

-
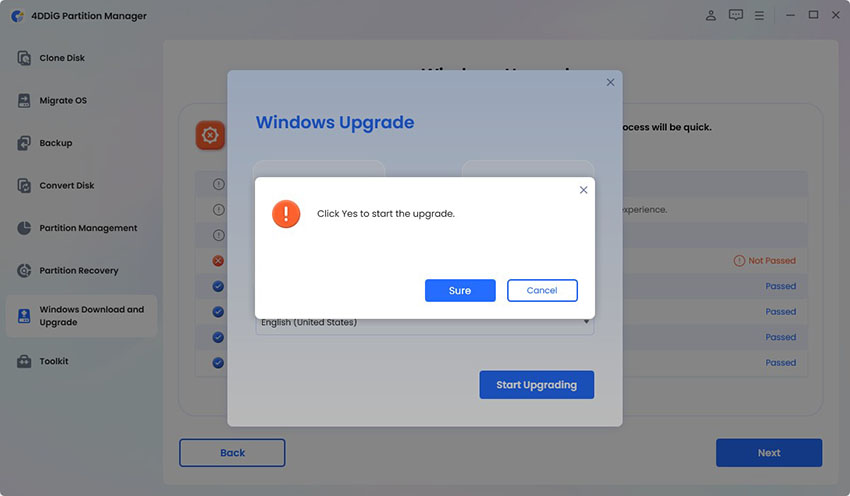
Now to bypass Windows 11 installation assistant requirements, click “Next” and then choose the Windows 11 along with your desired language. Click “Start Upgrading” to proceed and “Sure” to start the process.

-
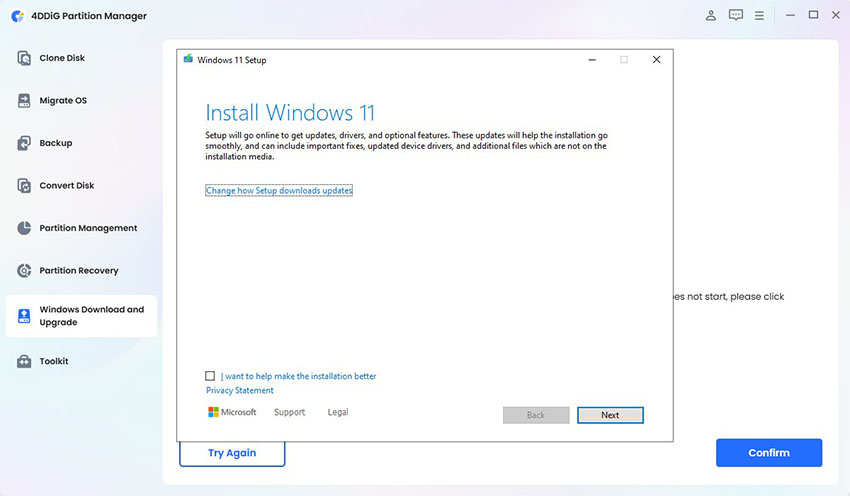
4DDiG will take some time for Windows 11 installation assistant skip PC health check and bypass other requirements. After that, you will have the Windows 11 installation setup screen. Click “Next” and follow on-screen steps for a seamless windows installation.

Conclusion
The Windows 11 Installation Assistant lets you easily upgrade from Windows 10 to Windows 11, maintaining your important information along the way. On the off chance you face issues, or your drives use hardware not supported by Windows, helpful tools like 4DDiG Partition Manager can handle these issues. Always copy all important data before you apply any major changes to your system.
Secure Download
💡 Summarize with AI:
You May Also Like
- Home >>
- Windows Fix >>
- Windows 11 Installation Assistant: What It Is & How to Use It

 ChatGPT
 Perplexity
 Google AI Mode
 Grok
Grok


