4 Methods to Fix “Windows 11 Install Has Failed”
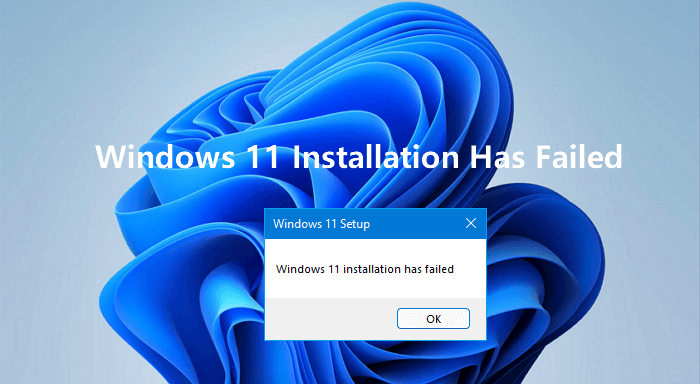
When you choose to upgrade to Windows 11 you will experience better features and improved functionality though the transition might not always proceed without problems. The Windows 11 install has failed error appears frequently for users who find themselves unable to continue their upgrade process without knowing their next steps. Many users encounter this widespread problem yet it should not prevent their progress.
In this article, we’ll guide you through four practical methods to fix the problem and get your Windows 11 installation up and running. Whether you’re a tech novice or an experienced user, these solutions offer clear, actionable steps to overcome this hurdle.
Part 1: Why Get Windows 11 Installation Has Failed Error
Several factors can trigger the “Windows 11 installation failed” error, stopping the upgrade in its tracks.
- Insufficient System Requirements: Beyond hardware, Windows 11 demands specific system conditions. If upgrading from Windows 10, it must be a supported version and activated.
- Corrupted Installation Files: Windows 11 requires totally intact and complete installation files to function properly.
- Software Conflicts: The pre-existing software which includes antivirus tools together with third-party drivers and background applications generates software conflicts.
- Disk Partition Issues: UEFI systems running Windows 11 need a partition style based on GPT (GUID Partition Table) rather than MBR (Master Boot Record) which was used previously.
- BIOS/UEFI Settings: Proper firmware configuration is critical. Secure Boot must be enabled, and the boot mode should be UEFI for GPT disks.
✅ MBR2GPT Cannot Find Room for the EFI System Partition: Why & How to Fix It?
Part 2: How to Fix Windows 11 Install Has Failed
Tackling the “Windows 11 install has failed” error starts with understanding its origins, but knowing how to fix it is what gets you back on track.
The following methods offer straightforward ways to address compatibility issues, remove specific error codes, adjust your disk setup, and eliminate software interference. With tools like 4DDiG Partition Manager and simple system tweaks, you’ll find a solution that works for your situation.
Method 1: Check PC Compatibility
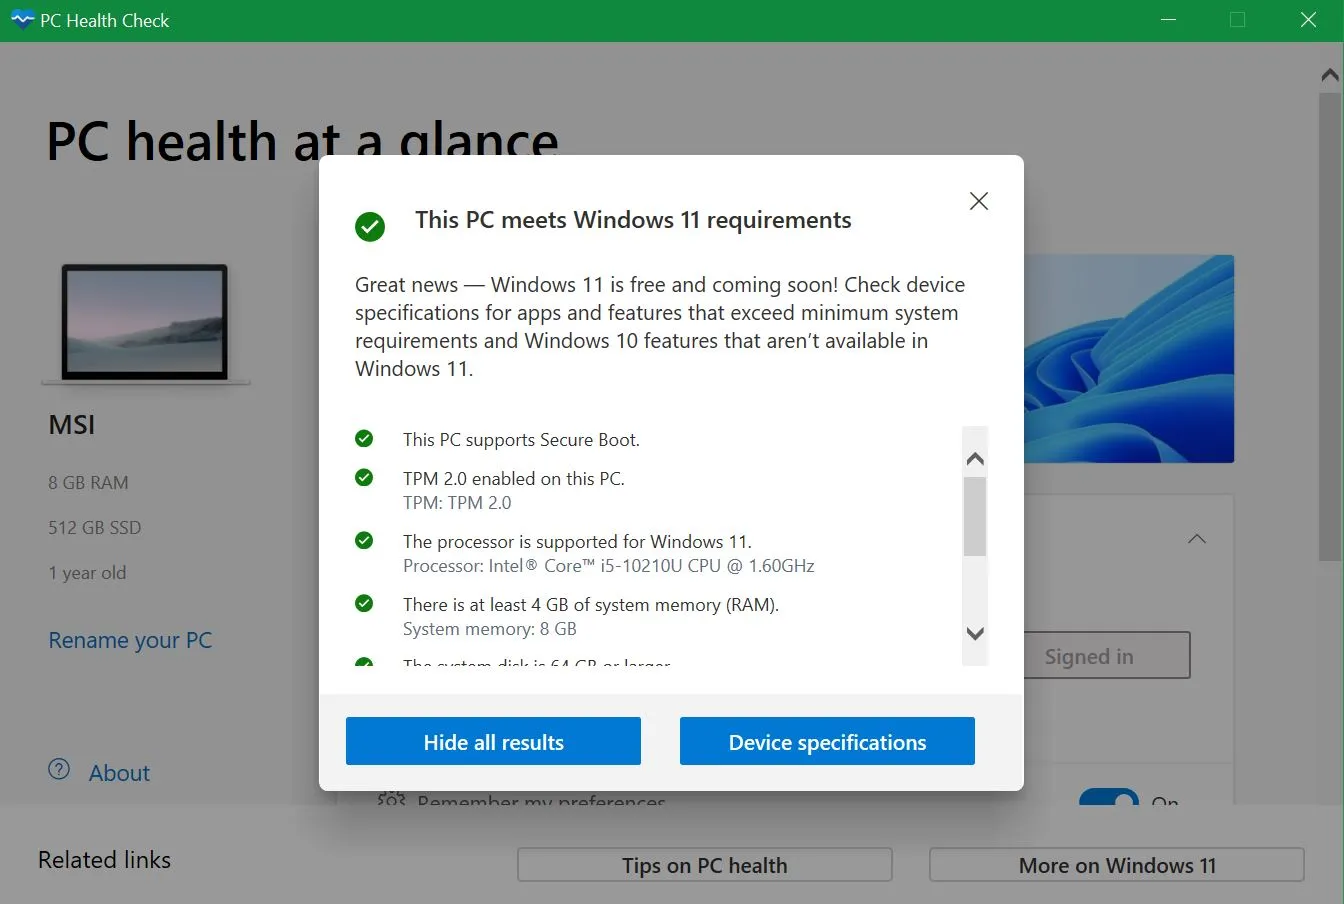
Your computer needs Microsoft’s minimum specifications check as your first step toward Windows 11 installation. A PC's hardware compatibility with Windows 11 stands as the primary installation failure cause so checking it at the beginning prevents unnecessary time and resources from being wasted.
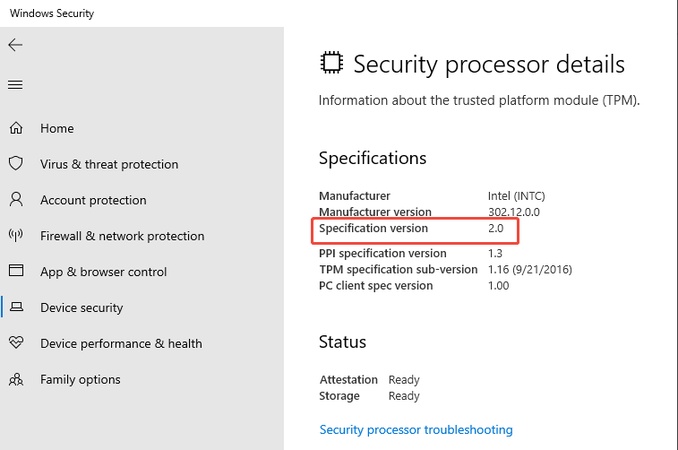
The system demands from Microsoft include a 64-bit processor and 4 GB of Random Access Memory and TPM 2.0 support and other specifications. Running this test lets you discover weak points so you can take action before moving forward.
-
Go to the official Microsoft website and find the Windows 11 system requirements page.
-
Download and run the PC Health Check tool from Microsoft to scan your computer’s hardware.
-
Review the results; if your PC falls short, upgrade components like RAM or enable TPM 2.0 in the BIOS if possible.

Method 2: Remove 0xC1900101
The 0xC1900101 error code emerges during Windows 11 installation processes because it detects conflicts involving drivers or system hardware. A driver or hardware conflict might be the cause behind this problem which can originate from old graphics drivers, insufficient RAM or faulty BIOS configurations. The successful upgrade requires systematic solutions to these elements which will eliminate the error from occurrence.
-
Disconnect all external devices, such as USB drives or printers, from your computer to avoid conflicts.
-
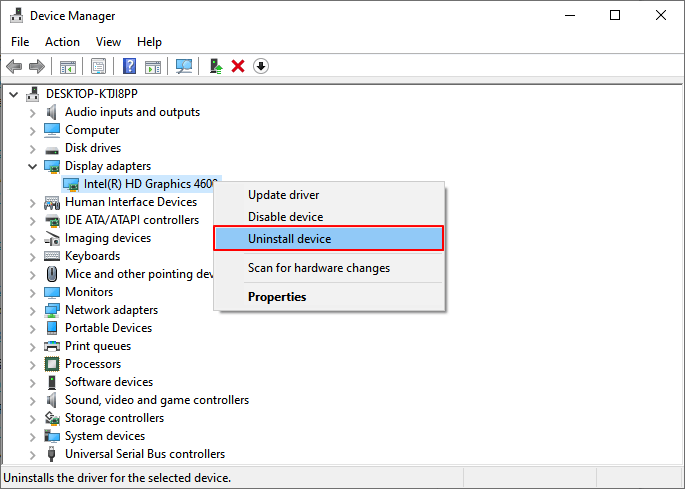
Remove the GPU driver by opening Device Manager, expanding “Display adapters,” right-clicking your graphics card (e.g., Intel(R) UHD Graphics), and selecting “Uninstall device.” Follow the prompts to finish.

-
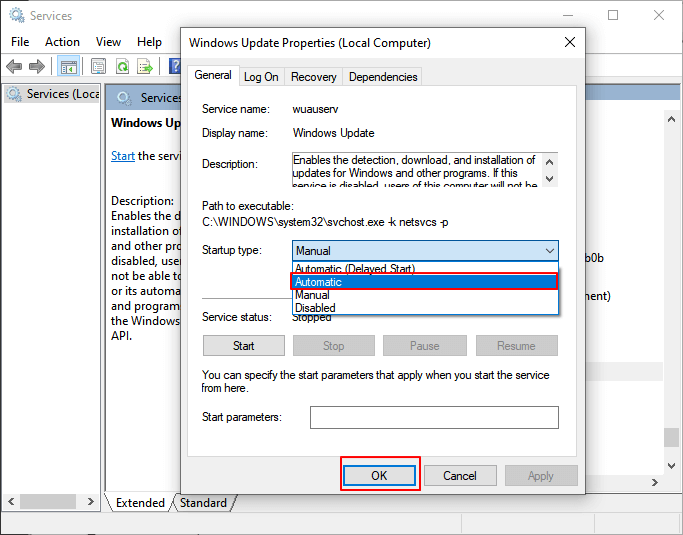
Improve startup settings by pressing Windows + R, typing “services.msc,” and hitting Enter. Locate Background Intelligent Transfer Service (BITS), Windows Update Services, and Cryptographic Service. Right-click each, choose “Properties,” set the Startup type to “Automatic,” and click “OK.”

-
Check your RAM; if it’s below 4 GB, add more memory to meet the requirement.
-
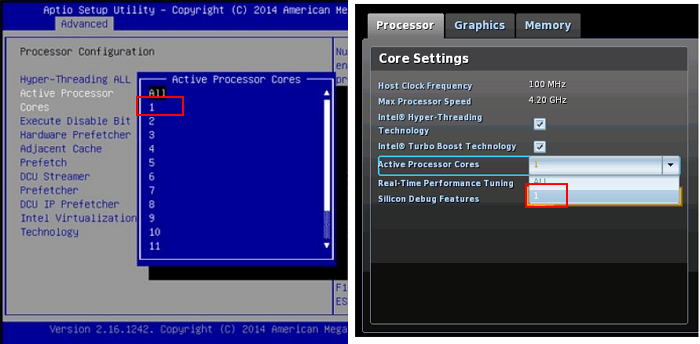
Adjust BIOS settings by restarting your PC and entering the BIOS (usually via F2, F10, or Del). Find “Active Core Settings,” change the active processor cores to 1, then save and exit.

Method 3: Convert MBR to GPT
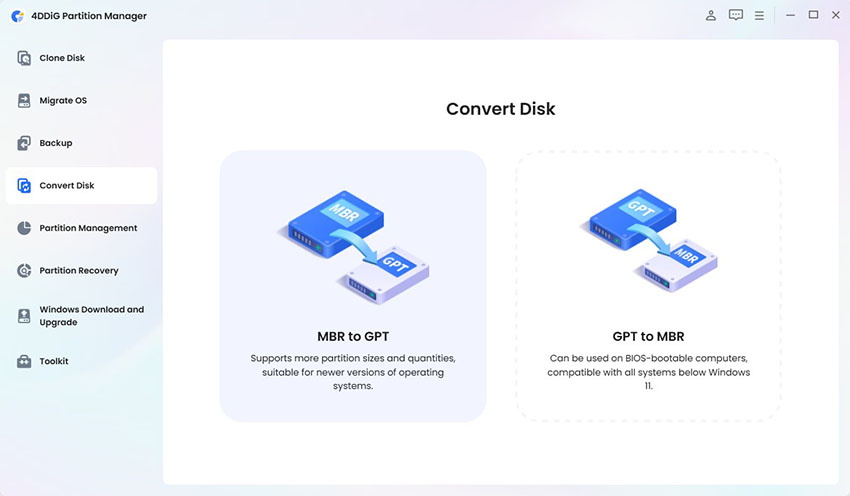
The installation of Windows 11 requires disks to use GPT partition format so MBR partitioned systems will not progress. The conversion from MBR to GPT through manual methods may delete all data however using 4DDiG Partition Manager creates a secure pathway for the shift. The tool permits file preservation during transitions through a convenient conversion process. This becomes an effective solution to resolve the installation issue.
Secure Download
-
Download and install 4DDiG Partition Manager from its official website onto your computer.
-
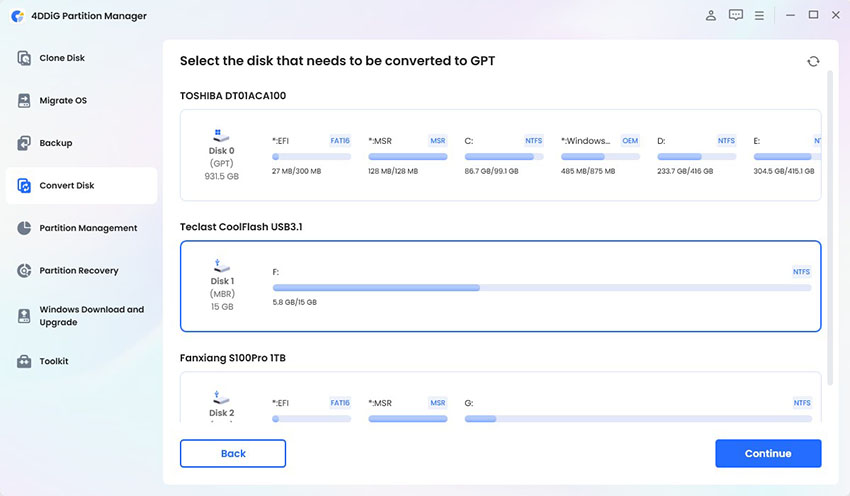
Open the software, select “Convert Disk” from the left panel, and click “Convert MBR to GPT” to start.

-
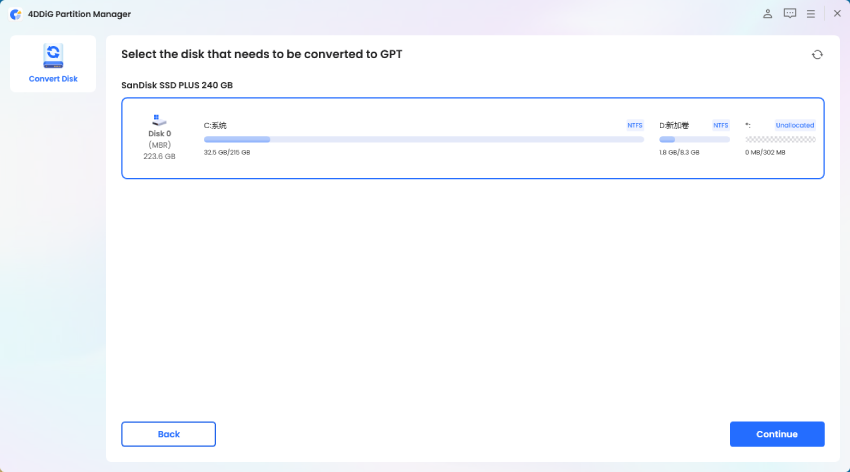
Choose the disk you want to convert from the list, then click “Continue” to move forward.

-
If it’s your system disk, the program downloads a PE component; save any open files and ensure a stable power supply.
-
In the PE environment, select “Convert MBR to GPT” when the software loads. Pick the disk again and click “Continue” to begin the conversion process.

-
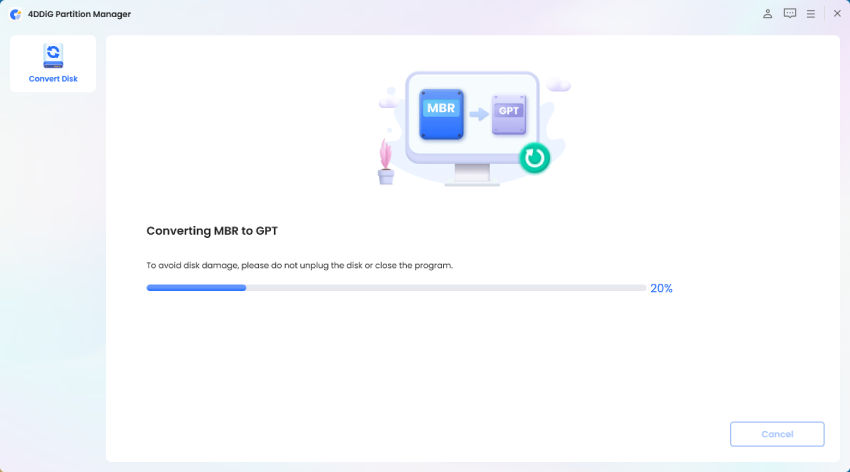
Wait as 4DDiG Partition Manager converts MBR to GPT; the time depends on your disk’s partition count.

-
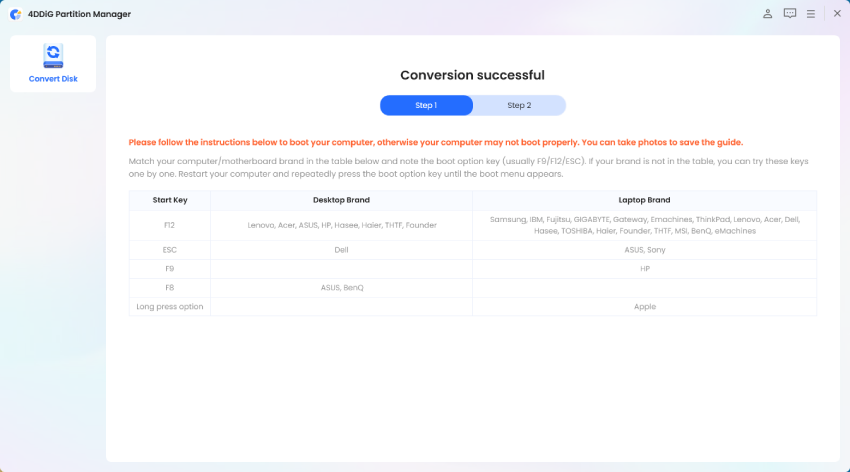
Once finished, follow the on-screen instructions to ensure your computer boots correctly after the change.

Method 4: Run a Clean Boot Installation
Windows 11 installation may fail because background programs and services run during the process. A system clean boot requires only necessary system services while booting up because it minimizes boot-up interferences. Clean boot allows you to detect what could be causing software complications that prevent installation.
-
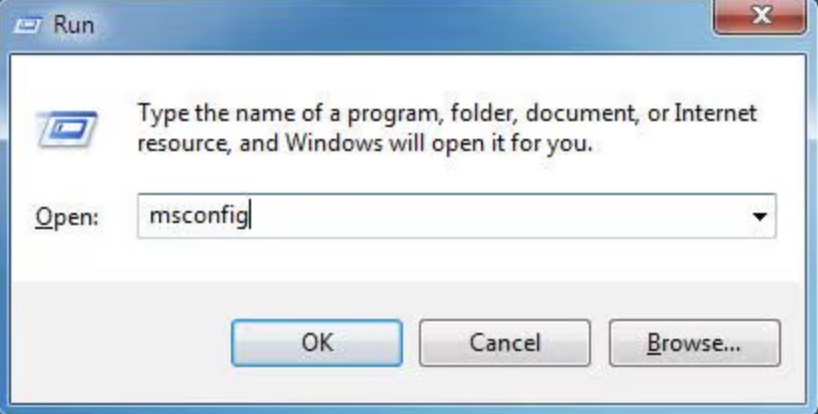
Press Windows + R to open the “Run” dialog box on your computer.
-
Type “MSCONFIG” and press “OK” to launch the System Configuration window.

-
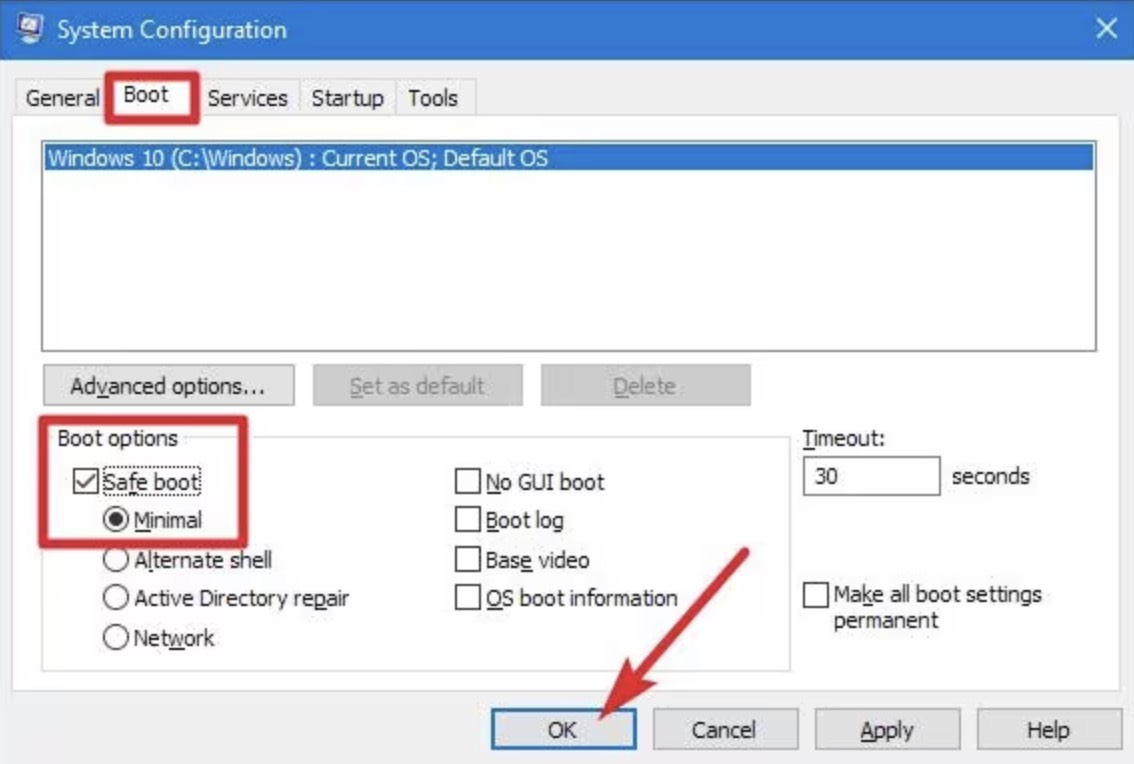
Click the “Boot” tab and uncheck “Safe Boot” if it’s selected.

-
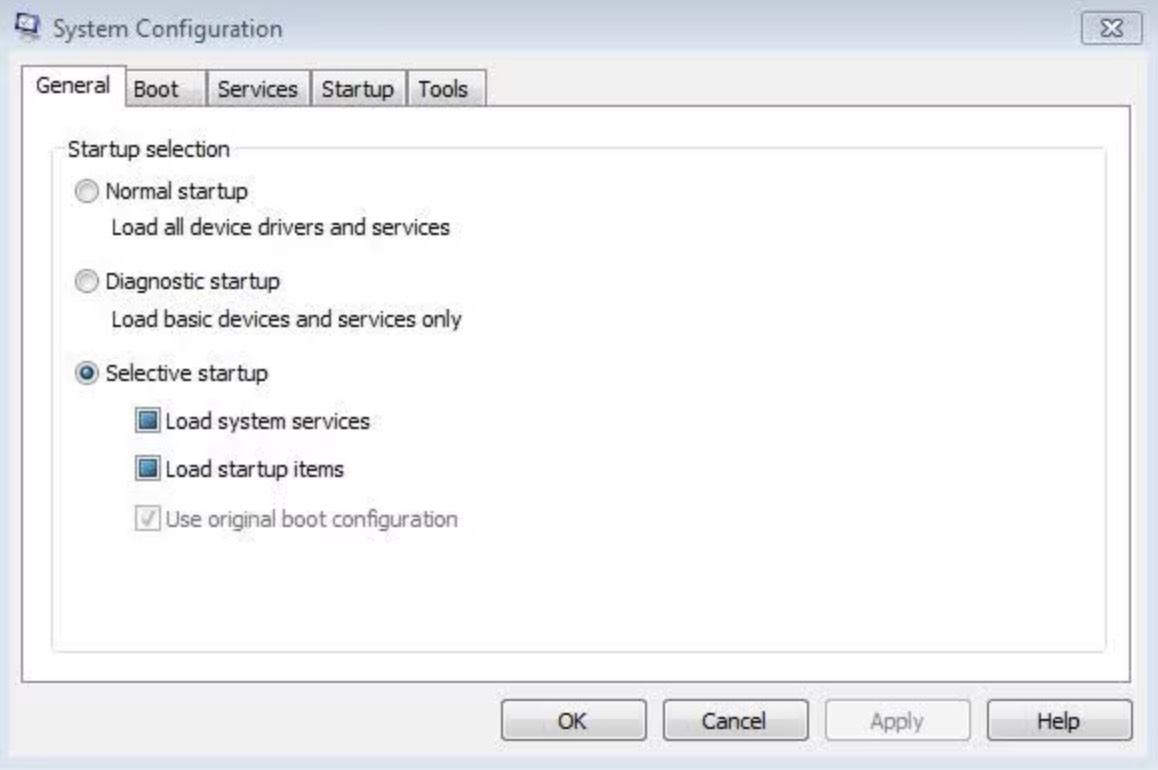
Switch to the “General” tab and select “Selective startup” from the options. Uncheck the “Load startup items” box to disable non-essential startup programs.

-
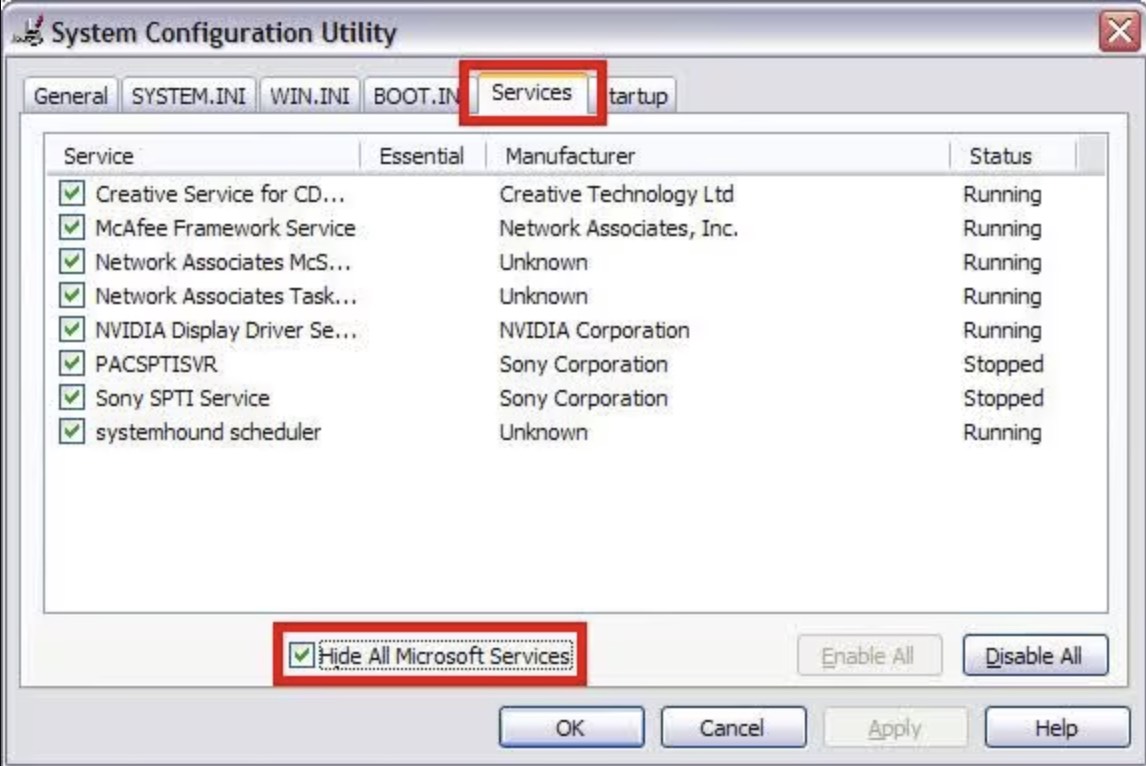
Go to the “Services” tab and check “Hide all Microsoft services” to protect core system functions.
-
Click “Disable all” to turn off remaining third-party services.

-
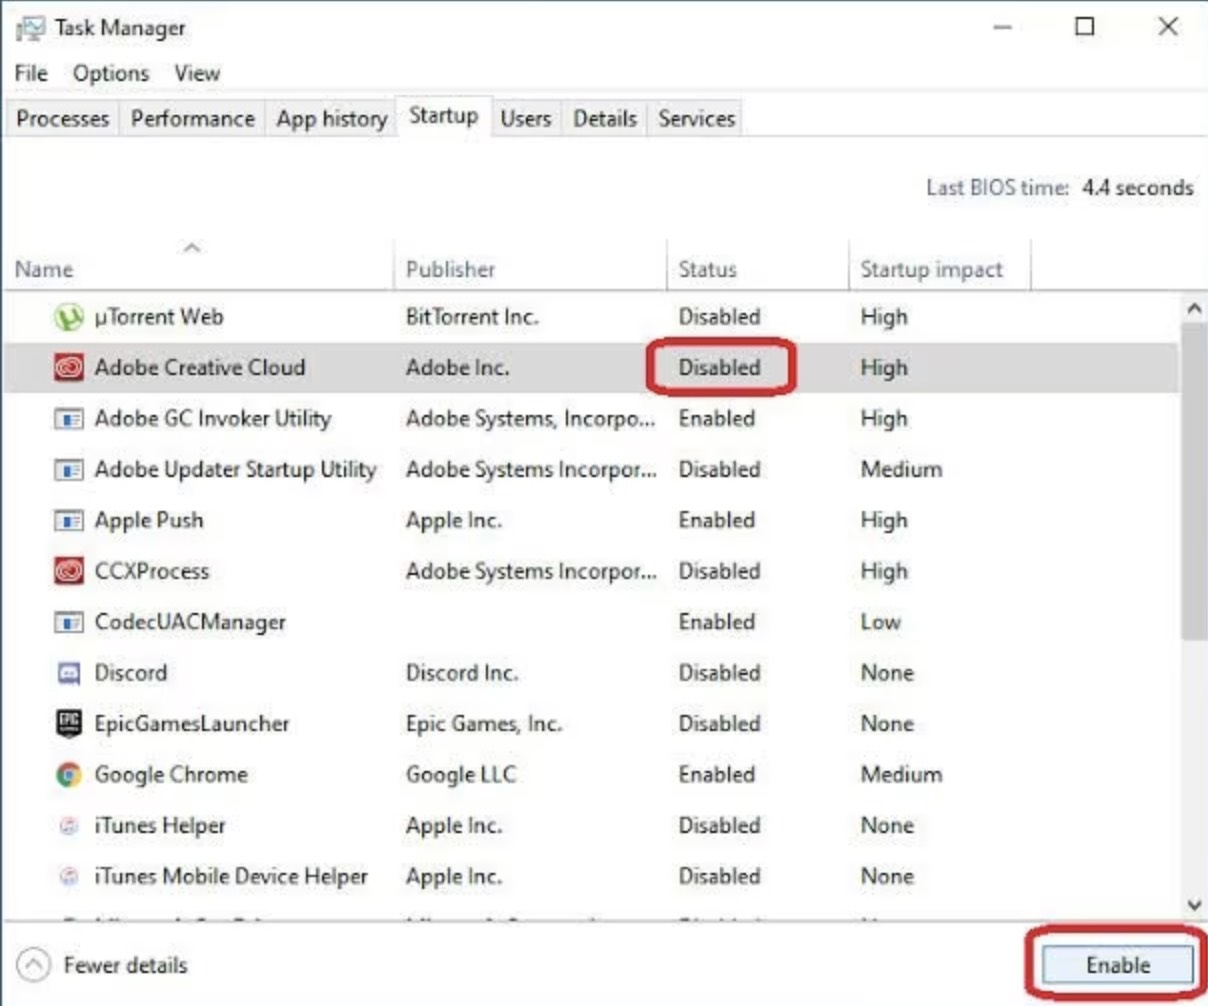
Navigate to the “Startup” tab, click “Open Task Manager,” and disable each enabled item by right-clicking and selecting “Disable.”
-
Enable each item one by one, click “OK” in System Configuration, and restart your PC.

Bonus: Backup System Before Clean Install
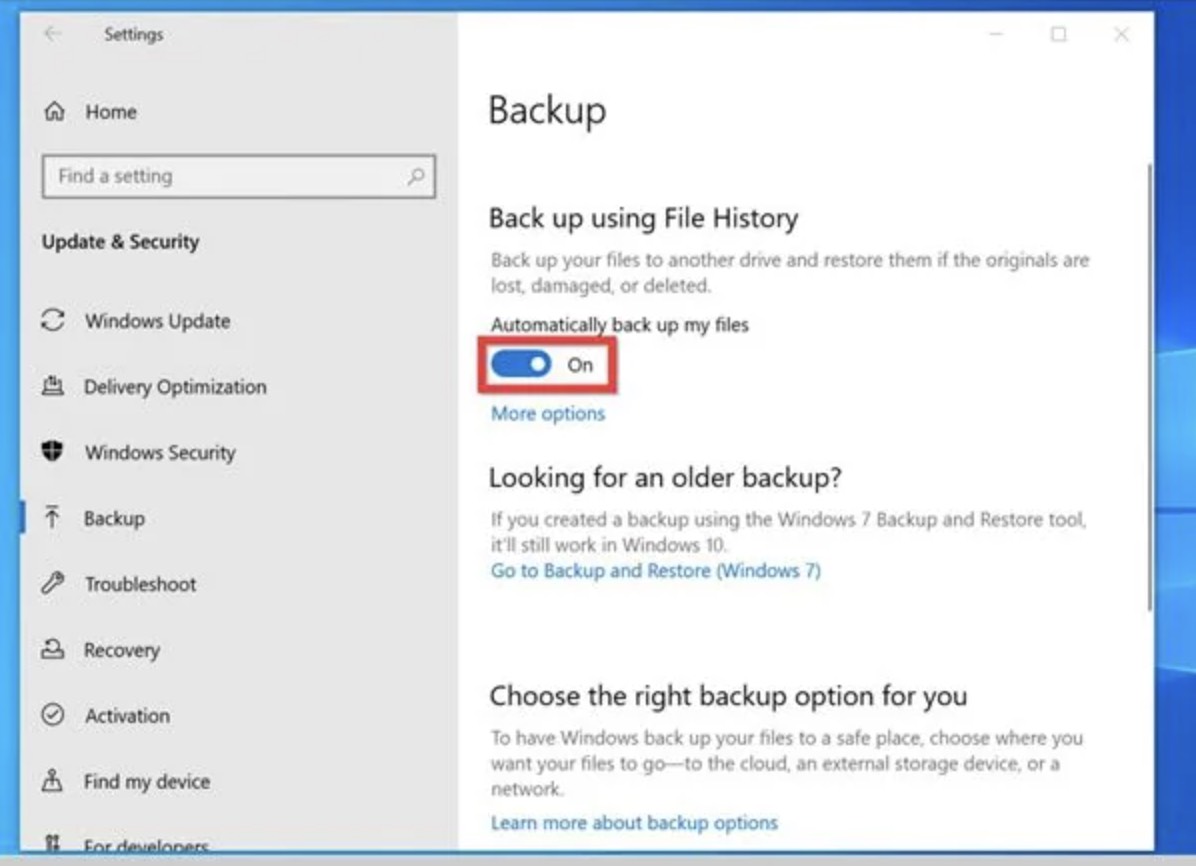
A clean install of Windows 11 wipes your drive, so backing up your system beforehand is a wise move. The 4DDiG Partition Manager offers a handy cloning feature to copy your entire disk, keeping your data safe. This step ensures you can restore everything if the installation hits a snag.
Disk cloning through 4DDiG Partition Manager functions as a perfect duplication of your device configuration. Your files together with your programs and system settings will be protected through this process before you proceed with a clean installation. The method provides both data protection and auto-backup against data loss before a system failure occurs.
Features of 4DDiG Partition Manager
- Migrate Windows OS to an SSD with one click, no reinstallation needed.
- Clone your entire hard drive to back up data or upgrade to a larger disk without losing anything.
- Create a WinPE bootable disk to clone or repair a drive on a non-bootable PC.
- Repair, recover, and restore partitions from your computer or external storage.
- Check if your PC qualifies for a free Windows 11 update and bypass requirements easily.
- Back up files with one click for quick data restoration.
Steps to Backup Your System
-
Connect your target SSD to your computer and open 4DDiG Partition Manager.
-
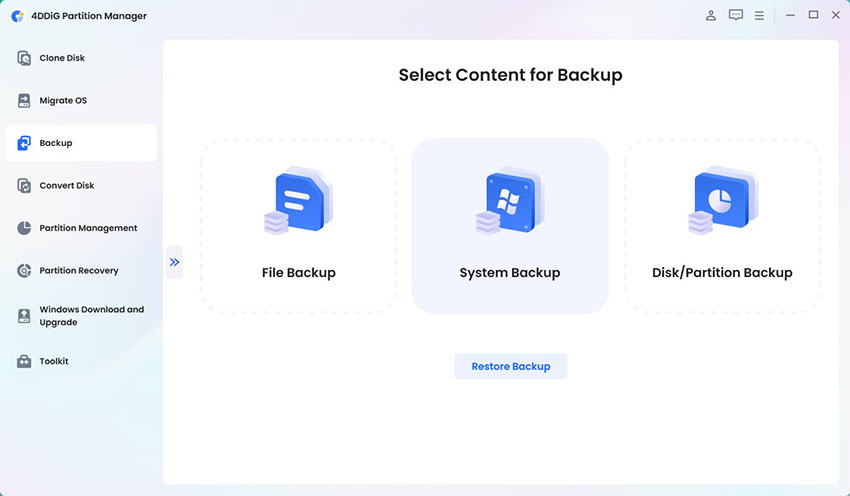
Select “Backup” from the main interface, click System Backup to create a backup task.

-
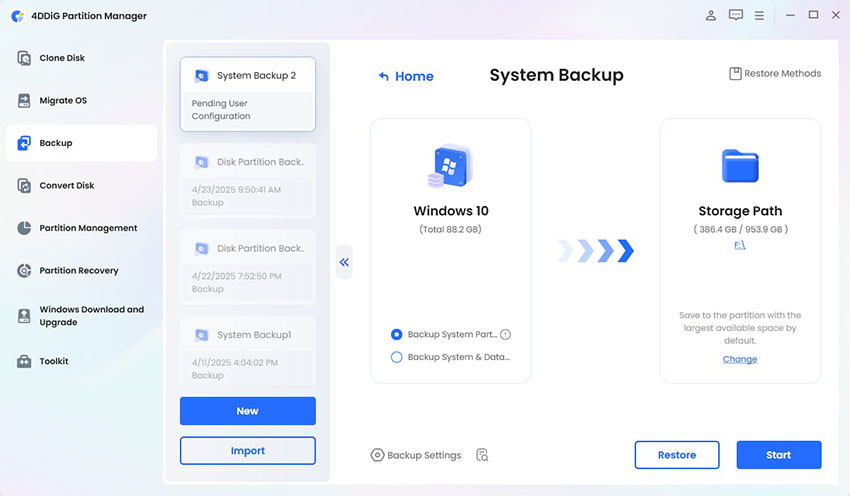
Choose what you want to backup, sysytem partition or all the data, and where you want to store the backup file. Click Start.

-
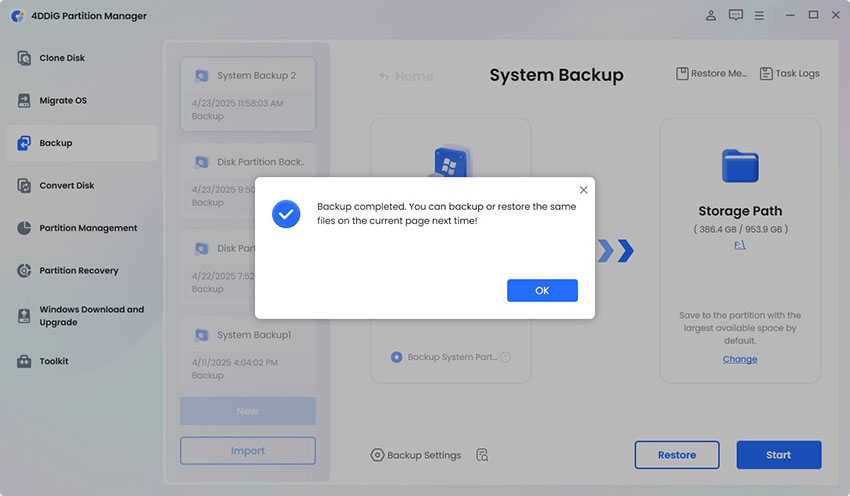
Later, the backup will be completed, and you can find the backup file in the target path.

Conclusion
The ‘Windows 11 failed to install’ can seem like a big obstacle yet you can solve this problem using suitable tools alongside essential steps. Your PC compatibility check verifies hardware readiness and 0xC1900101 error cleanup helps resolve driver-related problems.
Converting your disk to GPT with 4DDiG Partition Manager fixes partition issues, and a clean boot eliminates software conflicts. Backing up your system beforehand with the same tool adds an extra layer of security. These four methods, combined with careful preparation, equip you to install Windows 11 successfully and enjoy its benefits without delay.
 ChatGPT
 Perplexity
 Google AI Mode
 Grok
Grok

