[Solved] How to Fix Hdmi Port not Working on Laptop?
HDMI port not working on your Laptop can be problematic, especially when connecting external objects like projectors need to be displayed. It can happen due to wrong display settings, expired or misguided drivers, or some hardware issues. In this guide, you will see a series of ways to troubleshoot and fix this HDMI port issue. The ultimate goal is to get your HDMI connection back and running normally.
Part 1: The Preparations to Fix the Issue
The preparations that need to be done before troubleshooting the HDMI port include:
- Look for any physical damage to the cable. Make sure it is connected securely to the Laptop and the external device.
- Try to restart your system. It often resolves these tiny issues related to accessibility. Temporary glitches are easily resolved with a restart.
- You can look for any driver's update if available. If the drivers are outdated or missing, they can cause the port issues.
- Try testing your HDMI port with another system.
It is important to create a backup of your data before applying any fix to it.
Part 2: How to Recover the Files Lost In Windows 10/11?
Now you know why the HDMI is not working on your laptop issue. Some more than recognition of the problem is needed; you need a rapid solution. Whether files were lost, deleted permanently, corrupt, or for any other reason, you need them back. 4DDiG Data Recovery tool is advanced in recovering data from complex situations. It can effectively repair corrupt files and recover them. 4DDiG provides competitive results and achieves a high success rate.
Let's see how to recover files lost in Windows 10/11 with the 4DDiG Windows data recovery tool.
Easiy recover deleting the MSR partition.
-
Perform the data recovery process in 3 steps.
-
Data Recovery from hard drives , SSDs, flash drives.
Secure Download
Secure Download
-
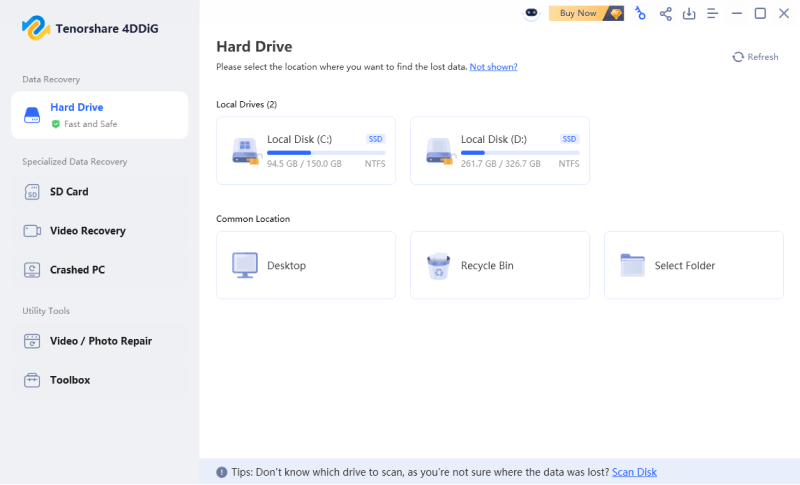
Select the drive of your Windows 10/11
You can see all the connected drives, folders, partitions, and disks on the homepage. You can select the one from which the files are required back. Click on start
-
Scan the selected drive for lost files
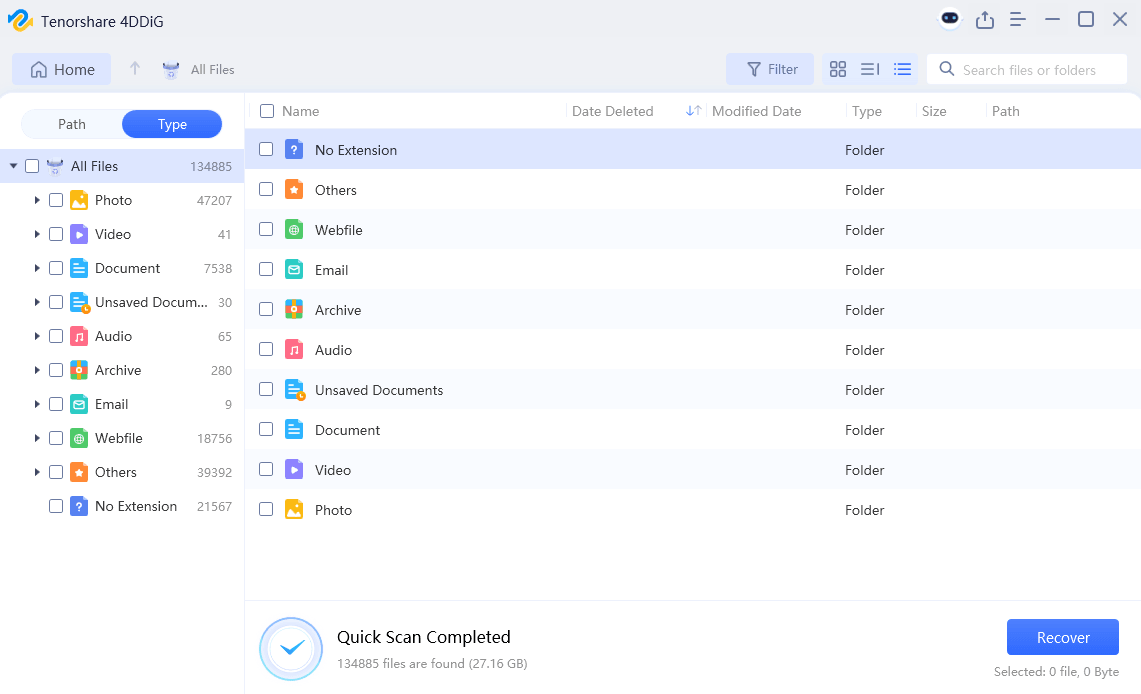
As you click on the start button, it will begin the scanning for lost files. You will see all the files on your screen. You can terminate the scan anytime when the necessary files are found.
-
Preview and recover the found files
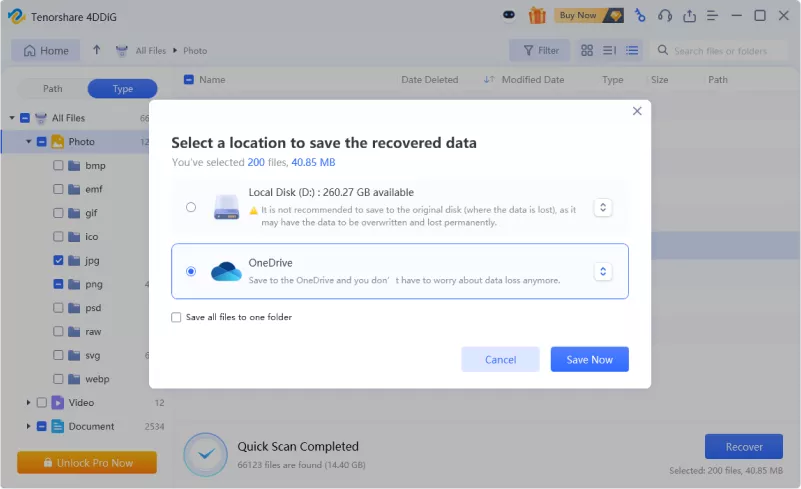
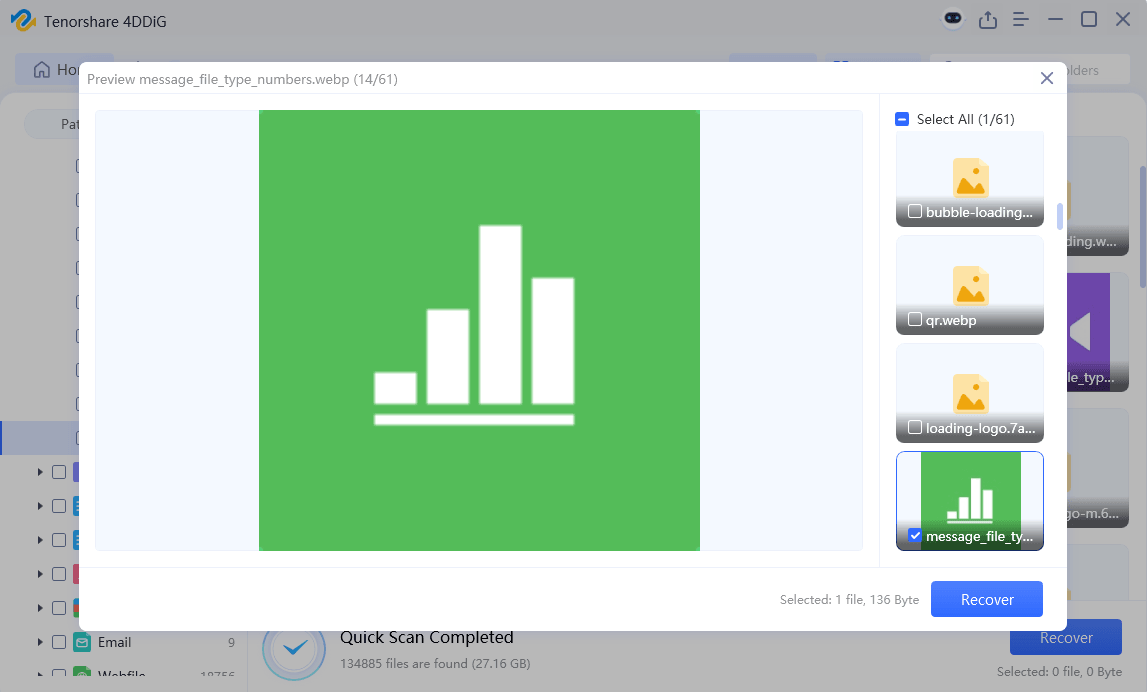
In the next phase, you can preview the files and verify their quality when the scanning is complete. Select the files and click on Recover. Choose a different location to restore the files to avoid overwriting.
To protect data loss again, you can also choose to save the recovered data to cloud
Part 2: How do I fix the HDMI port not working on my Laptop?
Now that the issue and the potential causes are clear, it's time to see how you can resolve this issue. You need to follow a sequential approach to resolve this issue. It will help you troubleshoot the cause quickly and resolve it. The process will ensure the Laptop is back to connecting seamlessly with your external devices. Let’s start the process to fix this issue.
Way 1. Reset the Windows Display Settings
Windows display settings play a pivotal role in display settings and management. If it is not configured well, you might not be able to see the HDMI device.
-
When you are on the home screen of Windows 10/11, you are facing the issue.
-
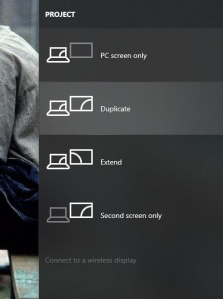
Click Windows + P, and choose a display from the listed one to configure the display correctly.
-
Select the one you want to see if it fixes the issue with HDMI not working on laptop.
Way 2. Reconnect Your Device
The HDMI port not working on the Laptop might be caused by the device not being set to the default.
Set your HDMI as the default device to resolve this issue. To do this, you will need to reconnect your device.
-
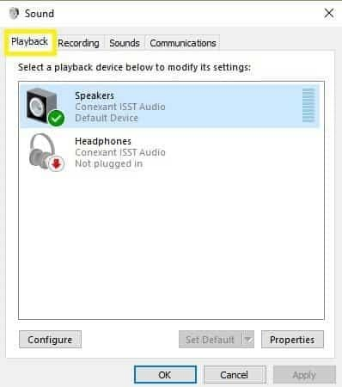
Go to the Volume icon on the Taskbar and right-click.
-
You will see a mini window of sounds.
-
Move to the playback option.
-
Under it, you will find playback devices. It includes all the integrated devices like speakers and HDMI devices.
-
Select HDMI, and make it the default one.
-
Click on OK. Your HDMI will be set as the default HDMI device for Windows 10/11.

Way 3. Use Disk Cleanup to Fix HDMI Port not working on Laptop
Disk Cleanup is a reliable fix for the HDMI port not working on the Laptop. Temporary or junk files can reduce the system's speed and sometimes cause issues in HDMI audio and videos. You can clean those unnecessary files to reduce the impact of that issue.
-
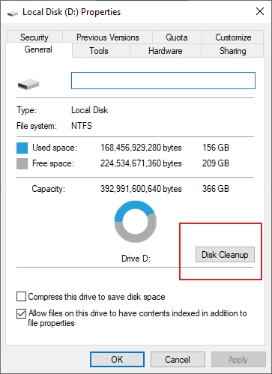
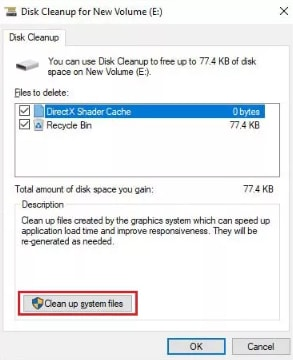
Go to the search bar and type Disk Cleanup. However, if you want Disk Cleanup for a specific drive, go to that drive and move to its properties. Move to the disk cleanup option.

-
Select the files that you want to exclude and proceed with the process.

Once the process is complete, reboot your computer.
Way 4. Use SFC to Scan for System Corruption
SFC (System File Corruption) can also hinder the normal functionality of the HDMI port, which is not working on the Laptop. You can follow the guide to scan SFC for system corruption.
-
Open the command prompt.
-
Run it as administrator.
-
Type a command SFC /scannow and click on enter.

-
Once the scan is finished, restart your computer and see if the issue is resolved.
Tip 5. Update or Redownload Your Graphics Driver
Graphic drivers are an important factor in displaying content. If the drivers are missing or outdated, it's a failure in communication between the HDMI and the system. To resolve the communication issue, follow the given steps.
-
Go to the search panel and open Device Manager.
-
Move to Display Adapters, right-click on your Graphics device, and select Update drivers.
Follow the given instructions and complete the process.
Tip 6. Perform System Restore and Reinstall Windows
There are multiple methods defined in this guide; you can see if no other works perform a system restore. Follow the given steps to fix the system.
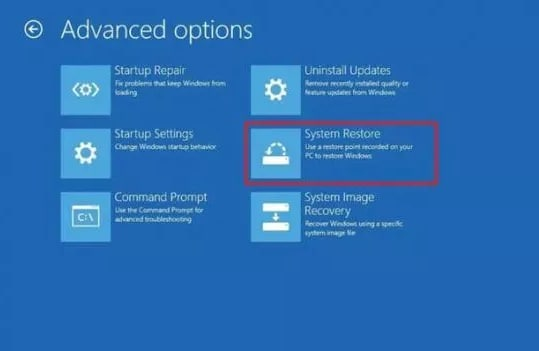
Power off your system and reboot it. Once you see the Windows logo, shut it down again until you see the Automatic Windows repair interface.
-
Click on advanced options.
-
Navigate to system restore.

-
Hit the next button.
-
Choose a new restore point from the given options.
-
Scan for the affected program option and check it.
-
Click on Next, and then let the process finish.
FAQs about HDMI port not working on Laptop
1. Why is the HDMI port not working on my Laptop?
Multiple reasons can cause the Dell laptop HDMI port not working . The potential causes include:
-
Outdated, corrupt, or missing drivers.
-
Wrong display settings.
-
Broken or faulty cable.
Physical damage to the port.
Whenever you face such a connectivity issue, consider checking all these points.
2. How do I enable the HDMI port on my Laptop?
To enable the HDMI port in your Laptop:
-
First, connect it with both ends of the Laptop and device.
-
Click on Windows +P to open the display options and choose the desired mode.
-
If the port isn’t working, look for any driver updates.
-
Moreover, check your display settings on the control panel as well.
3. How do I reset my HDMI on my Laptop?
Resetting the HDMI can often resolve the issue of connectivity. If you want to reset your HDMI connection on your Laptop, follow the given steps:
-
Remove the cable from both ends, the computer and your external device.
-
Restart your system (See if the port starts displaying).
-
Click on Windows + P; it can help you choose display mode.
-
Move to display settings and manually detect the external display.
Conclusion
If you are facing an issue with the HDMI port not working on your Laptop , you can resolve it with multiple troubleshooting methods. No matter whether the problem arises from missing or outdated drivers, correct display settings, or faulty cables, the guide covered six different tips to find and solve this issue. You need to ensure the system is updated, check all physically connecting devices, and make the required adjustments to the display. This will help you to restore the HDMI port to its original state. However, you can opt for the 4DDiG Data Recovery tool if the issue is unresolved. It is an advanced option for situations where the HDMI gets corrupt or faulty. It has the capability to repair and recover our important data.
Secure Download
Secure Download

 ChatGPT
 Perplexity
 Google AI Mode
 Grok
Grok

