How to Fix Camera not Working on My Laptop? | 5 Methods
You might be worried about the problem, camera not working on my laptop. Let me tell you, it is a prevalent issue and does not have much danger. Multiple ways exist to fix this issue and get the camera working properly. The causes may include wrong settings preferences, driver's incompatibility, and hardware issue. There may be some malicious virus that is attacking the camera and breaching its security. This guide will discuss different methods of resolving camera issues and ways to recover the data in case of hardware issues.
Part 1: Why Is My Camera Not Working on My Laptop?
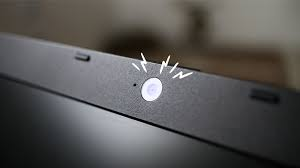
Facing issues with a laptop's camera during online meetings, virtual sessions, or when talking with friends on FaceTime can be highly troublesome. What are the reasons behind "Why is my Camera not working on my laptop? This problem is expected to arise for various reasons, such as software settings and permissions or antivirus programs. Let us explore the causes and discuss various fixes to resolve this issue.
Part 2: How to Recover Lost Data on My Laptop?
It is not always possible to resolve the camera not working on my laptop issue. Sometimes, it's essential to get the media of that camera. It may be due to an important meeting that is just going to start. You always need to have options for getting the data back in case of a not working camera. Here is an excellent recommendation: 4DDiG Windows Data Recoveryis a great tool to recover lost data from your laptop.
- With 4DDiG, you can recover data from almost every location of your laptop
- You can recover even if the drive is lost, corrupt, formatted, or permanently deleted.
- It ensures the quality of recovered media is good.
- You can recover your media directly from your cloud storage, such as One Drive and Google Drive
Secure
Download
Secure
Download
Let's look at the basic steps to recover your lost data with 4DDiG
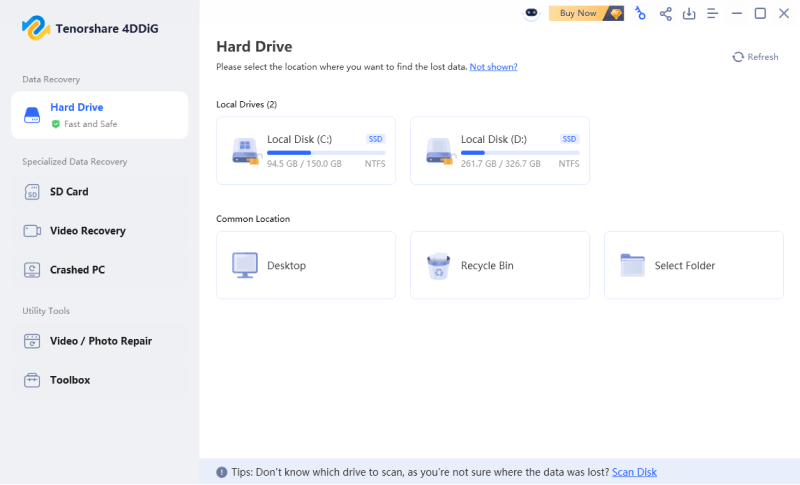
Download the 4DDiG Windows data recovery tool from its site and follow the on-screen instructions to install it. Once the installation is done, launch the app and open its home page.
-
It has an extremely easy interface. All the drives and linked drives are displayed on the screen. Choose the associated drive. Suppose your camera data is stored in "Downloads." You must select that folder from the corresponding drive. After you choose the drive, click on Start.

-
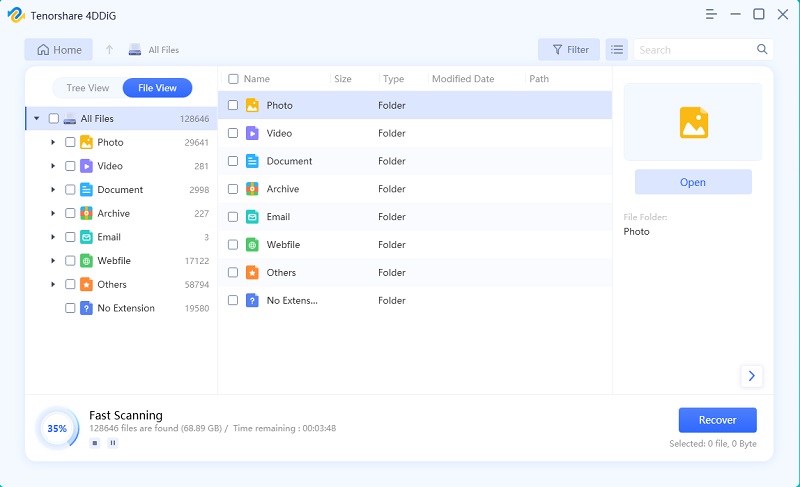
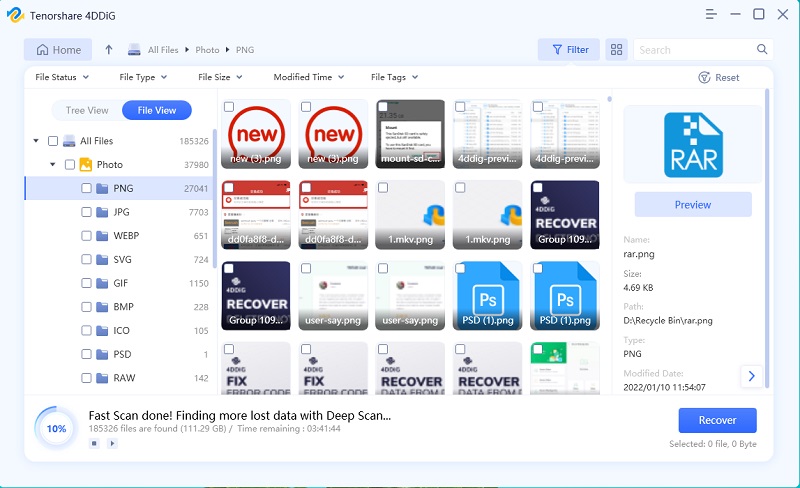
When you click Start, 4DDiG will look for your media in the particular folder. The results will be displayed as long as they are found. You will see them directly on your screen. If you get the desired ones, stop the scan immediately. If you need all the data, let the scan finish.

-
Now, you can see all the data on your screen. Basically, you only need to select the files and hit the Recover button. 4DDiG allows you to preview the items before you recover to confirm that the given quality is the same as the file quality it was before. Once you feel satisfied with the given quality, select them and click on Recover to get them restored at your selected location.

Part 3: How to Fix Camera not working on My Laptop?
It is essential to follow a systematic approach to resolving the issue my camera on my laptop is not working. Once you know the actual cause of the problem, the next step is to fix it properly. This helps recover the camera's functionality to its previous state. Let us discuss solutions to resolve this issue to get the camera back to its normal action.
Method 1. Give Permission to Fix Camera not working on My Laptop
Normally, when people encounter the issue of camera not working on their laptops, the absolute reason behind it is limited permissions. You can reconsider the camera permission and make it allow the user to use the camera services.
To turn on the permissions, follow these basic steps:
- Go to Start and open settings.
- In the search bar, type Webcam.
- Click on Camera privacy settings.
Ensure the option Allow apps to access your camera is on and choose apps to get access to your camera.

Method 2. Update Your Software
Most people encounter issues with the camera not working on their laptops when their software is not updated. When new updates are available, you must complete them to avoid issues with your software's overall working. In your case, if you want to check the updates for your software, follow the given steps:
- Go to the device manager directly by clicking the Windows and X keys.
- Navigate to imaging devices and open it.
- You will see laptop camera drivers; right-click on them.
Click on "Update Driver".
Further, you can choose to search automatically for updated driver software and then hit the option let me pick from the list.
Then, choose a USB video device and restart your laptop.

Method 3. Roll Back Your Camera Driver
Drivers play a vital role in the functionality of every software. If you recently updated the drivers on your laptop, you may see the Camera not working on my laptop issue. The incompatibility between the software and drivers causes this issue. To get rid of this issue, you can roll back the driver to their previous version.
- Open Device Manager from the search box at the Start.
- Click on the Imaging device. You will see your Webcam over there.
Right-click on it and open Properties.
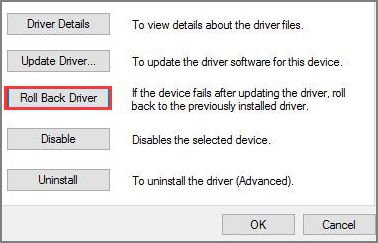
Go to drivers and hit the rollback driver option. It will roll back the previous drivers before the updates happen.

It will ask you why you are rolling back. Simply select your relevant reason and click on Yes. After that, restart your laptop.
Method 4. Apply Troubleshooting to Fix Camera not working on My Laptop
Windows provides a fantastic troubleshooting options to identify and resolve various issues.
You can access it to fix the camera not working issue.
Go to the control panel.
Scroll down and select troubleshooting.
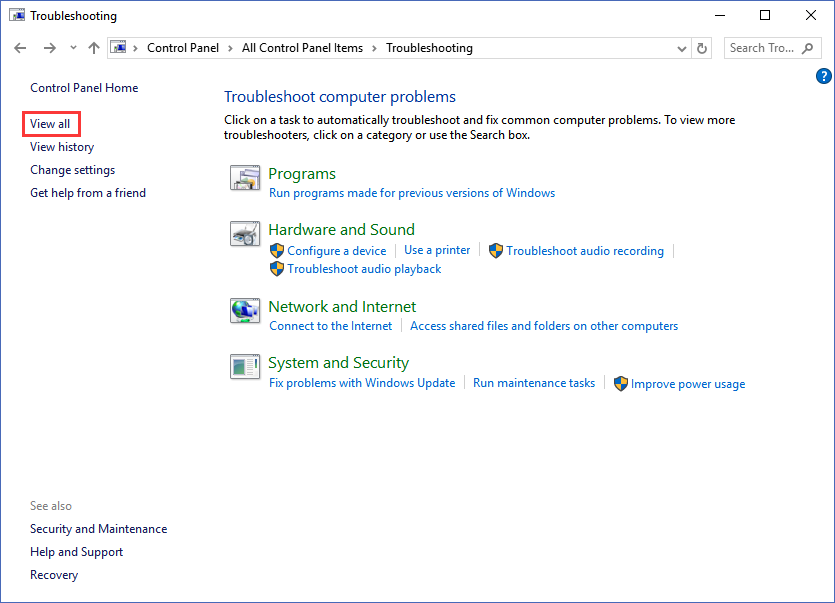
From the left pane, click on View All.

Click on Hardware and Devices and hit the next button.

It will ask you why you are rolling back. Simply select your relevant reason and click on Yes. After that, restart your laptop.
Method 5. Reinstall the Laptop Camera
If you have tried updating the drivers and all other options to fix the issue, the problem persists. You can reinstall the laptop camera by simply removing it first.
Go to the device manager.
Find and open imaging devices and right-click the webcam driver on it.
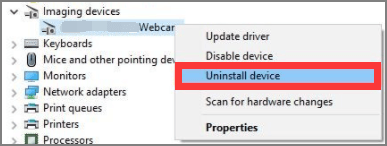
Click on Uninstall device.

It will open the uninstall device window; click on delete the driver software and complete uninstall.
Open the action tab and scan for hardware changes.
After that, the laptop will reinstall the camera driver. Hopefully, this will resolve the issue, and your camera will work properly.
Part 4: FAQs about Camera not working on My Laptop
1. How do I reset my Camera on my laptop?)
Resetting your camera means resetting all the recent updates to its settings. It will move your camera to its default stage. Resetting can resolve driver issues, setting preferences, and much more.
To reset camera on your laptop:
Go to settings
Click on apps and select the option Apps and features.
Find the camera app in the list of apps.
Click on advanced options.
Scroll and click on the Reset button to confirm it.
2. How do I enable my Camera on my laptop?
Enabling Camera on a laptop is straightforward. You need to check the camera privacy settings.
Open the settings and navigate to privacy settings.
Click on the camera.
Turn on the allow apps to access the camera toggle.
Further, Scroll down and check whether the specific software that is facing an issue is allowed for camera access.
3. How do I make my Camera visible on my laptop?
If your camera is not working or visible on your laptop, you can manually do it quickly.
From settings, open camera privacy settings
Open camera settings and enable camera access.
You can also update the camera drivers or troubleshoot the laptop to identify the main issue.
Restarting your laptop can sometimes resolve such issues. You must also check that there are no hardware issues.
Final Words:
Once you have tried all the mentioned fixes and still worried why my camera on laptop is not working, you can definitely be depressed. Remember to try all the given methods. It is possible that not all the methods work for you, but the right one will fix the issue. Identify the issue first and then choose a method to fix it. However, if no method fixes the issue, there may be a hardware issue, and now you need professional assistance to resolve it. Moreover, if you’re not getting access to your camera, you still need to get the lost data back. It is highly recommended to use the 4DDiG Windows data recovery tool 4DDiG Windows data recovery tool to recover your lost data from various devices. Above all, the recovery through 4DDiG is safe and extremely easy to perform.

 ChatGPT
 Perplexity
 Google AI Mode
 Grok
Grok

