How to Burn ISO to USB on Multiple Devices
Burning an ISO file to a USB is crucial when you need to install a new operating system, create a rescue disk, or simply back up your data. That's why so many users ask: " How to burn ISO to USB? ".
The process is straightforward but requires different tools depending on your operating system. Just take it easy! This guide will help you navigate these steps on Windows, Mac OS X, or Linux/Ubuntu.
What Is ISO & Benefits to Burn ISO to USB Drive
What Is ISO
An ISO file, also known as an ISO image, is a single file that perfectly represents an entire CD, DVD, or BD. In simple terms, it’s like a zip file, containing all the data from an optical disc. However, it’s designed specifically to replicate the disc’s structure. When you burn an ISO file to a USB drive, you essentially create a clone of the original disc that you can boot from.
Benefits of burning ISO to USB
- Portability: USB drives are more compact and portable compared to DVDs or CDs.
- Speed: USB drives typically offer faster data transfer rates, which speeds up installation processes.
- Durability: Unlike optical discs, USB drives are less prone to scratches and physical damage.
- Versatility: USB drives can be reused for other purposes after formatting.
By using an ISO burner to USB , you can create a bootable USB drive that allows you to install operating systems, run live environments, or carry essential software with you.
Can I Burn an ISO to a USB Flash Drive?
Yes, you can burn an ISO image or file to a USB flash drive. The process involves writing the ISO image directly onto the USB drive, making it bootable if the ISO is designed for that purpose. This is especially useful for creating installation media for operating systems like Windows, Linux, or even recovery tools.
The key is to ensure that the USB drive is formatted correctly and that you use a reliable tool like 4DDiG Partition Manager to handle the burning process.
How to Burn ISO Image/File on Windows [Easy for Beginners]
It is not easy for users especailly beginners to burn ISO files or images to USB on Windows using the Microsoft official guide. We’d better get help from an ISO burner to USB - 4DDiG Partition Manager, which is also an expert in disk and partition management. This software features many robust functionalities and excels to burn ISO image to USB non bootable or bootable.
Secure Download
Features of 4DDiG Partition Manager
- Burns ISO to USB: Supports both bootable and non-bootable ISO images.
- User-friendly Interface: Easy to navigate, even for beginners.
- High Compatibility: Works with various file systems and operating systems.
How to Burn ISO to USB on Windows 10/11 Using the Manager
- Click the above Download button to get the 4DDiG Partition Manager installed. Also, please insert your USB drive into the computer.
-
Then open the 4DDiG tool and choose “Toolkit” from the left sidebar. After that, select the “Create WinPE” option.

-
Choose the ISO file you want to burn from the middle drop-down menu by clicking on the “More...” tab.

-
Select your USB drive from the list of available drive and make sure data is backed up. Please read also: How to Clone USB Drive for Backup . Once confirmed, please tap “Sure”.

-
The software will handle everything, from formatting the USB drive to writing the ISO image. When it shows “Burning successful”, you have finished the burning process and have a bootable USB drive ready for use.

So easy, Right? Even though we are not tech-savvy, 4DDiG Partition Manager endows us with a simple experience to complete the ISO to USB burning with only several clicks. As we can see, it also allows us to easily finish other things that should have been difficult. For instance, it can migrate OS to SSD or HDD, clone disk, convert disk between MBR and GPT , etc.
How to Burn ISO to USB on Mac
Burning an ISO to USB on a Mac is slightly different from the process on Windows. Mac OS X comes with a built-in tool called Terminal that can be used to accomplish this task. While there are third-party tools available, using Terminal provides a quick and reliable method.
Steps to Burn ISO to USB Mac
- Insert your USB drive into the Mac.
-
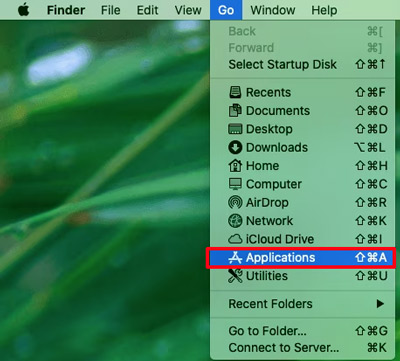
Open “Terminal” by clicking Go > Applications > Utilities > Terminal.

-
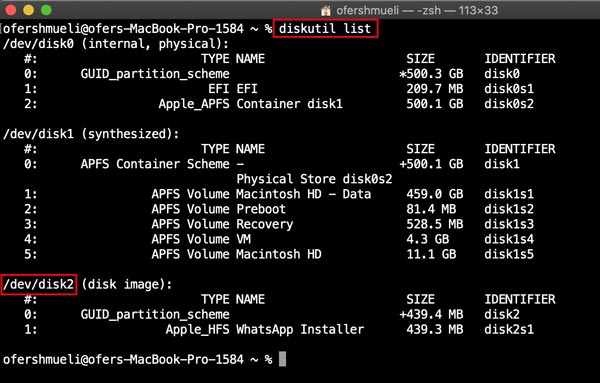
Convert the ISO to DMG format (if necessary) using the command: diskutil list. Then look for your USB drive in the pop-up list (such as /dev/disk2)

- Unmount the USB drive by typing: diskutil unmountDisk /dev/diskX. Replace X with the number of your USB drive.
- Burn the ISO to USB with the command: sudo dd if=/path/to/your.iso of=/dev/rdiskX bs=1m. Replace X with your disk number again and replace path/to/your.iso with the path of your ISO.
- Eject the USB drive once the process is complete: diskutil eject /dev/diskX
By following these steps, you can successfully burn an ISO image to a USB drive on a Mac, creating a bootable or non-bootable USB as required.
How to Burn ISO to USB Linux/Ubuntu
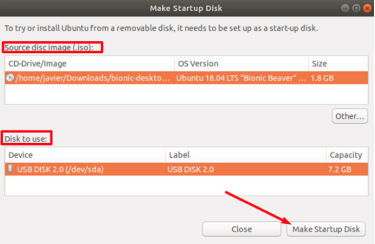
For Linux users, particularly those using Ubuntu, burning an ISO to a USB drive can be done using either a graphical tool like Startup Disk Creator or through the command line. Here are the steps to burn ISO to USB on Linux/Ubuntu:
Method 1. Using Startup Disk Creator
Insert your USB drive into the computer.
Open Startup Disk Creator from the Applications menu.
-
Select the ISO file and the target USB drive from the interface.

-
Click “Make Startup Disk” and wait for the process to finish.

Method 2. Using the dd Command
Insert the USB drive to Linux and Open Terminal.
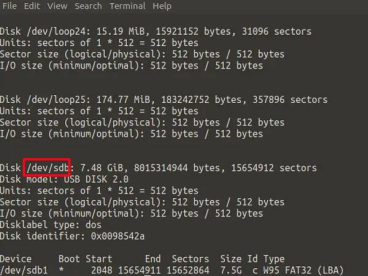
List all storage devices with: lsblk
Find you USB drive with: /dev/sdb or /dev/sdc
-
Unmount the USB drive with: sudo umount /dev/sdX1. (/dev/sdX1` is the partition of your USB drive.)

-
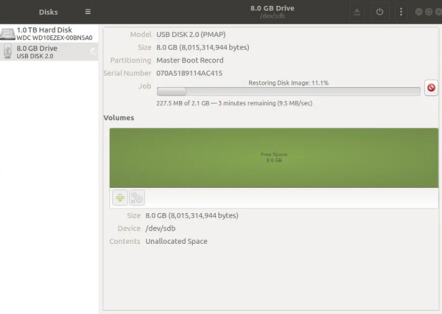
Burn the ISO to USB using: sudo dd if=/path/to/your.iso of=/dev/sdX1 bs=4M status=progress.
“if=” is followed by the path to your ISO file.
“of=” is followed by
the device name of your USB drive
“bs=4M” sets the block size to 4MB, which can speed up the writing
process.
“status=progress” will display progress information
These methods allow you to create a bootable USB drive from an ISO file on Linux/Ubuntu, whether you prefer a graphical interface or command-line operations.
Conclusion
Here is all about how to burn ISO to USB on Windows, Mac, or Linux. The process can be made simpler with the right tools and instructions. Amid this, 4DDiG Partition Manager stands out as a robust option for Windows users, providing an easy-to-use interface and reliable performance. By following the steps outlined in this guide, you’ll be able to burn ISO to USB across all major platforms with confidence.
Secure Download


 ChatGPT
 Perplexity
 Google AI Mode
 Grok
Grok

