How to Format SDXC to FAT32 on Windows 11/10/8/7? Easy & Safe!
Just download 4DDiG Partition Manager to format SDXC to FAT32 easily and safely!
Sometimes, it is necessary to convert an SDXC (Secure Digital eXtended Capacity) card to the FAT32 file system. It is essential when dealing with various devices or software requirements. What if I told you that Windows (11, 10, 8, and 7) has built-in tools to help you complete this task? However, their compatibility can be hit or miss, potentially causing problems with your storage medium. To ensure a guaranteed and successful conversion, it's essential to follow effective methods. How?
We have compiled 4 easy methods to format SDXC to FAT32. Follow the step-by-step guide to convert your SDXC card to FAT 32. It will help maintain compatibility and optimal performance across a variety of devices and applications. Keep reading!
Part 1: Why Format SDXC to FAT32?
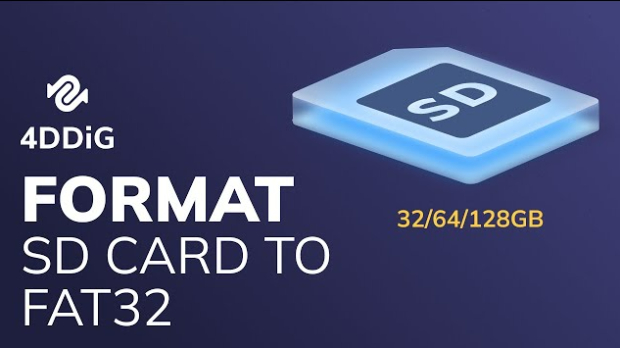
The SDXC card is formatted to exFAT by default. But sometimes, we need to convert it into FAT32 to increase the compatibility. What is FAT32 format? It is an older file system that offers broad compatibility with a wide range of devices, including older hardware like cameras, game consoles, and some audio players. For example, PlayStation 3 and Xbox 360 do not support exFAT. Additionally, specific software applications might demand FAT32-formatted storage.
FAT32 also simplifies data transfer between operating systems like Windows, macOS, and Linux. Additionally, FAT32's straightforward file recovery capabilities can be useful in case of data loss.
Part 2: The Easiest Way to Format SDXC to FAT32 on Windows 11/10/8/7
Are you looking for a smooth method to format SDXC to FAT32? It is best to use third-party software to do the work without hassle. Using 4DDiG Partition Manager, you can convert your SDXC to FAT32. The tool offers the easiest way to format SDXC to FAT32 and use the maximum space for storage. The features of 4DDiG Partition Manager include:
- Format any size of SDXC card, including (32/64/128 GB or Larger).
- Easy to use for novice.
- Delete all data from the partition without deleting the partition.
- You can cab-format the partition to a new file system, including NTFS, exFAT, and FAT32, according to the needs.
Follow the step-by-step guide to use 4DDiG Partition Manager to format SDXC to FAT32.
-
Download and Install
First, download and install the 4DDiG Partition Manager to your PC/laptop. Make sure the SD card is connected to the computer. You can use a card reader or adapter to connect it. Launch the application and select the Partition Management option from the left side. Now Click on Format.
FREE DOWNLOADSecure Download

-
Set The Requirements
Reset the file system to FAT32, choose the volume label, and hit “OK.”

-
Confirm The Settings
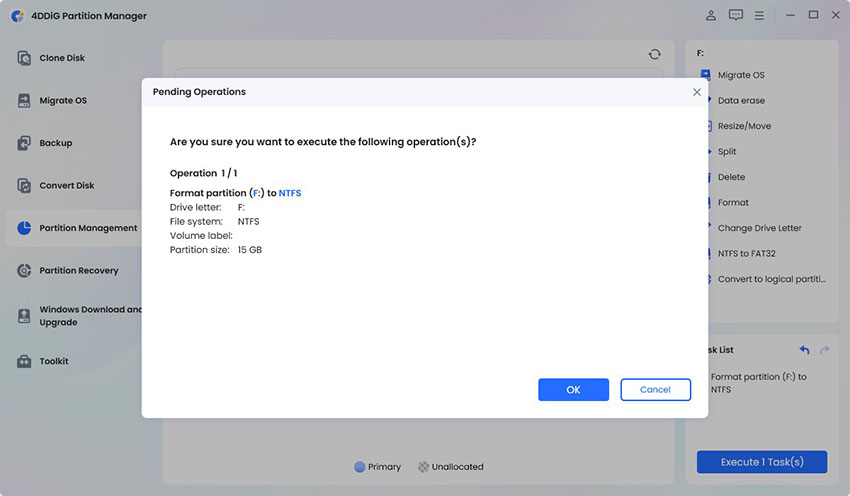
You can review the settings to make sure everything is correct. Now hit “OK” to start the formatting.

-
Finish The Process
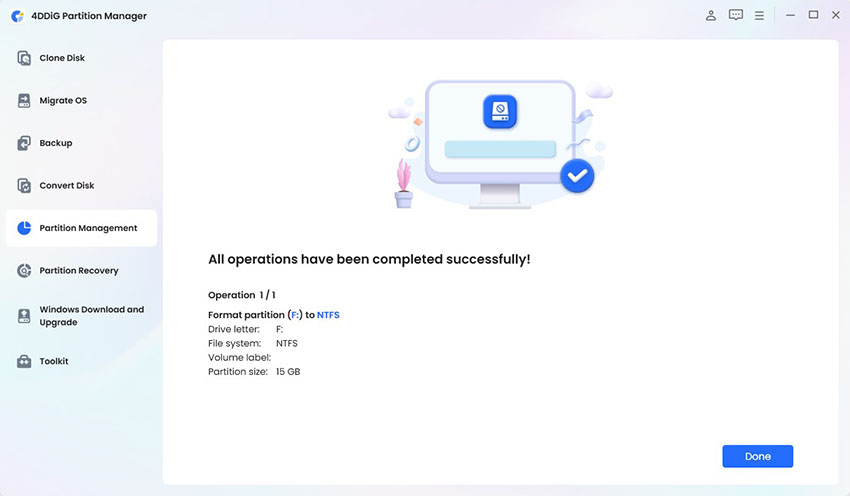
Now wait for a while to finish the process. Your SD card will be converted into FAt32.

Part 3: Other Ways to Format SDXC to FAT32 on Windows 11/10/8/7
Way 1. Format SDXC to FAT32 with Windows File Explorer
As we mentioned before, Windows has a default system to format SDXC to FAT32. Have a look at how to use Windows File Explorer to get the FAT32 format on your SDXC card.
-
Insert your SDXC card into your computer. Open Windows File Explorer by pressing the Windows key and 'E' on your keyboard or clicking on the File Explorer icon in the taskbar.
Find your SDXC card in File Explorer. It should appear under "This PC" or "Computer" with a drive letter (e.g., E: or F:).
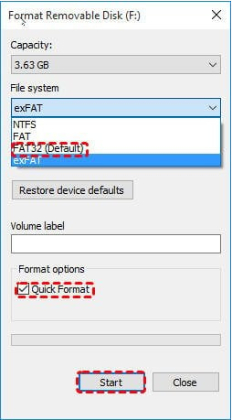
- Right-click on the drive corresponding to your SDXC card. This will open up a new menu. Select "Format." Choose "FAT32" as File System In the Format window, find the "File system" dropdown menu and select "FAT32" from the list.
-
You can choose the "Quick Format" option if you want the process to be faster. Click the "Start" button to begin the formatting process.

- Confirm Formatting A warning message will appear, confirming that all data on the card will be deleted. If you're sure, click "OK" to proceed. Wait for the process to finish; this duration may vary based on the card's size.
Way 2. Format SDXC to FAT32 Using Disk Management
Windows Disk Management is another default tool to format SDXC to FAT32. Here's a step-by-step guide on how to format an SDXC card to FAT32 using the Disk Management in Windows:
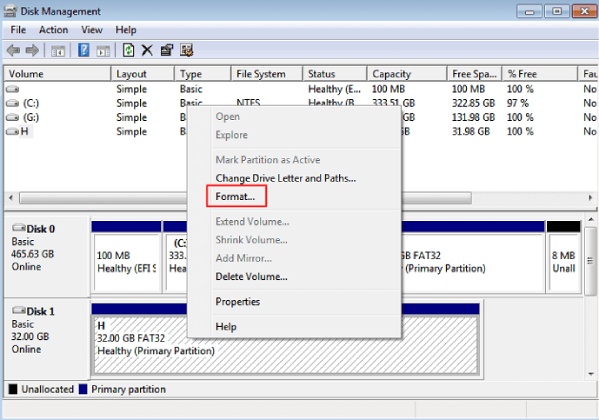
- First of all, open Disk Management by right-clicking on "This PC" or "My computer." Select "Manage" from the context menu that appears. In the Computer Management window, you'll see a list of options on the left. Click on "Disk Management." In the Disk Management window, you will see a list of all the storage devices connected to your computer. Look for your SDXC card among the listed drives.
-
Right-click on the SDXC card that you want to format. Select "Format." In the Format window, you'll see a "File system" drop-down menu. Select "FAT32" from the list. You can also rename the volume if desired. Once you've configured the options, click "OK" to initiate the formatting process.

- A confirmation dialog will appear, notifying you that all data on the SDXC card will be deleted. If you're certain, click "OK" to proceed. Windows will start formatting the SDXC card to the FAT32 file system. The duration of this process may vary based on the card's size.
Way 3. Format SDXC to FAT32 with Diskpart
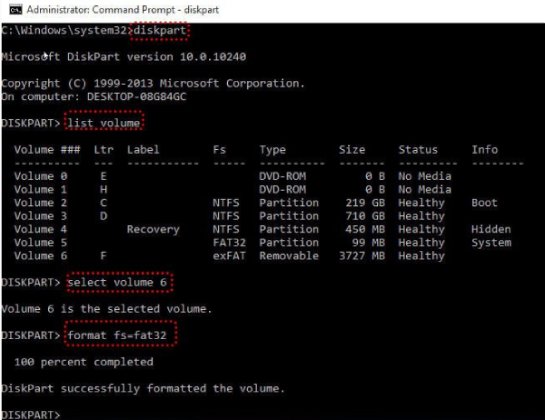
You can utilize the Windows command prompt to format SDXC to FAT32. The method is best for the advanced users. You have to write a few prompts to do the work. Here is how to format SDXC to FA32 with Diskparkt
-
Open Command Prompt as Administrator
Press "Win+R" simultaneously to open the Run dialog box. Type "cmd" and press Enter. Make sure to run the Command Prompt as an administrator.
-
Launch Diskpart
In the Command Prompt window, type the command "diskpart" and press Enter. To identify your SDXC card's volume number, type "list volume" and press Enter. This will display a list of all volumes on your computer.
Identify your SDXC card's volume number in the list (make sure it's the correct one), and type "select volume n" (replace 'n' with the actual volume number of your SDXC card). Press Enter to select the SDXC volume.

-
Format to FAT32
After selecting your SDXC card volume, type "format fs=fat32" and press Enter. The Diskpart utility will begin the formatting process. Wait until it's finished. The time required depends on the card's size.
Once the formatting is complete, you'll see a message in the Command Prompt. Your SDXC card is now successfully formatted to FAT32.
[TOP 5] SD Card Formatter FAT32 | Which One Should You Choose?
Conclusion
You can follow any of the methods to format SDXC to FAT32. If any of the methods do not work for a particular SDXC card, try another. If your SDXC card is corrupted, you may encounter difficulties changing the partition format using Windows File Explorer. In such cases, using a software solution like 4DDiG Partition Manager is the easiest way to format an SDXC card to FAT32. This SD card formatter simplifies your work. You can format large SDXC such as 64Gb, 128 GB, or even large according to your needs. So, give it a try today!


 ChatGPT
 Perplexity
 Google AI Mode
 Grok
Grok

