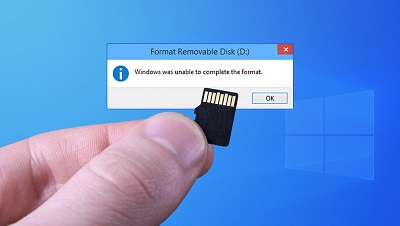
[2026 Tutorial] How to Format SD Card For Camera?
How to format SD card for camera? Just download 4DDiG Partition Manager to format it quickly and safely.
The SD (Secure Digital) card has become an invaluable companion for photographers and videographers, acting as the principal storage medium for their cameras. Whether you're a seasoned expert or an amateur enthusiast, learning how to format SD card for camera is a crucial skill that may prevent data loss, assure optimal performance, and maintain the general health of your camera's storage solution.
Formatting an SD card can be done through both your personal computer and your camera itself. This guide will walk you through the essential steps about how to format a SD card for camera. Whether preparing a fresh card for use, erasing old data, or troubleshooting issues, understanding the process is crucial to keeping your camera running smoothly.
Get reading!
Part 1: How to Format SD Card For Camera on PC?
Way 1: Use Professional SD Card Format Tool
Understanding how to format SD card for camera on PC is a simple process that can be stimulated using a professional tool like 4DDiG Partition Manager. Due to its comprehensive feature set, user-friendly design, and reliable performance, 4DDiG Partition Manager is one of the best SD card format tools.
Follow the below key features:
- SD Card Formatting Made Simple: Partition Manager makes SD card formatting easier with a user-friendly interface that walks you through each step.
- Support for Various File Systems: The software supports various file systems, including FAT32, exFAT, and NTFS. And you can choose the format that works best with your camera.
- Quick and Full Format Options: 4DDiG Partition Manager offers quick and full format options. Quick format erases the file system metadata, while a full format scans for bad sectors, ensuring a more thorough cleansing of your SD card.
- Partition Management: This tool also allows you to create, delete, resize, and manage partitions on your SD card. This option comes in helpful when you need to set aside a specified amount of storage space for images, videos, or other material.
- Data Recovery: If you format the SD card by accident or lose data for other reasons, this tool has a data recovery module that can assist you in retrieving lost files.
- Compatibility: 4DDiG Partition Manager is compatible with various Windows operating systems, ensuring you can use it on most PC configurations.
Follow the below steps that can help how to format a SD card for camera using 4DDiG Partition Manager:
-
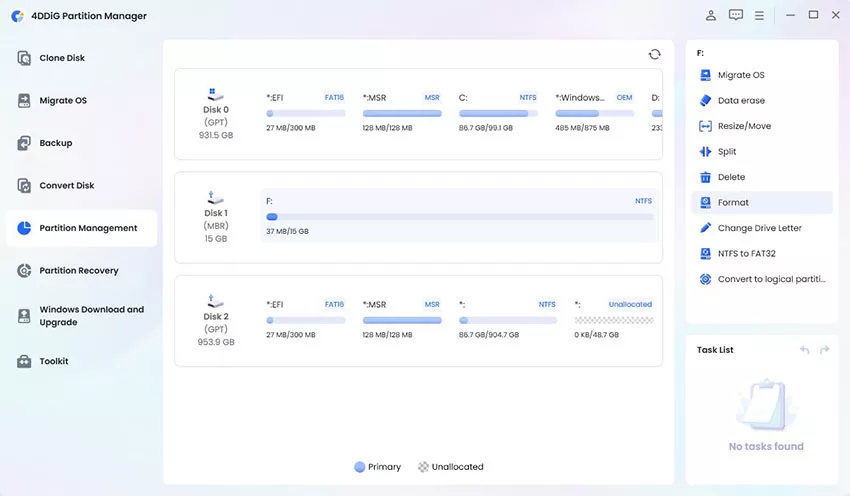
Download and launch 4ddiG Partition Manager on your computer. Make sure that your SD card is connected to your PC. Then, under "Partition Management," right-click the SD card partition you wish to format and choose Format.
FREE DOWNLOADSecure Download

-
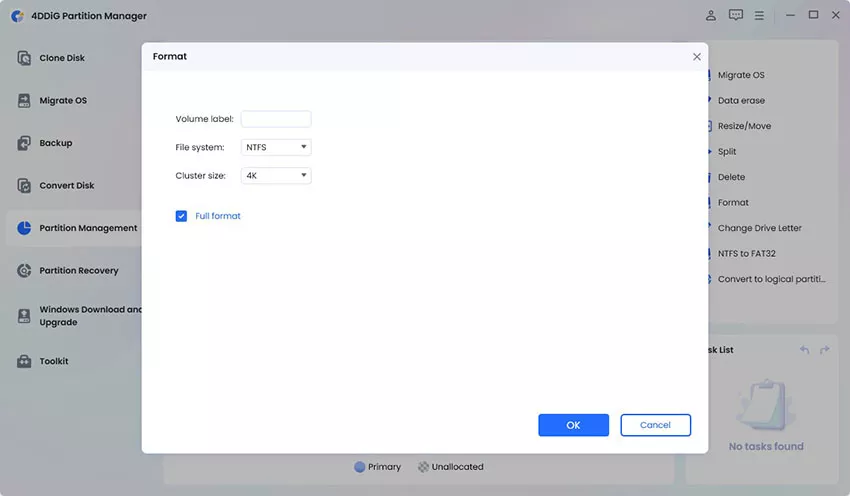
Choose the file system (such as FAT32 or exFAT) and the volume label.

-
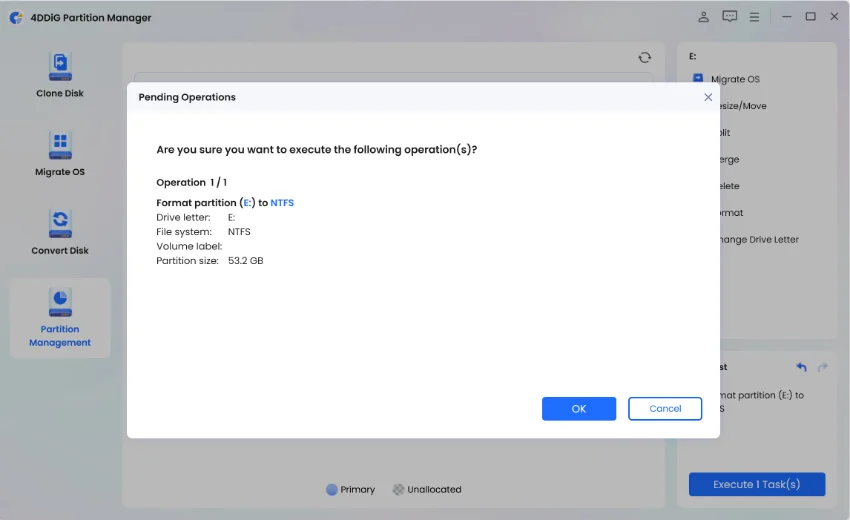
Examine the formatting options and click "OK" to begin formatting.

-
Wait for the process to finish, and your SD card will be formatted appropriately.

You can confidently format your SD card for your camera on your PC with 4DDiG Partition Manager, ensuring it is in the best possible condition for reliable storage and capturing priceless memories. Whether preparing an SD card for a new project or troubleshooting a problem with an existing one, this versatile tool simplifies the process. It helps the performance and longevity of your camera's storage device.
Way 2: Use Windows File Explorer
Another convenient way to explore how to format SD card for camera on PC is by using the built-in Windows File Explorer. This method is straightforward and doesn't require any third-party software. Here's how to do it:
- Use a card reader or adapter to connect the SD card to your computer.
- Go to This PC in File Explorer.
- After that, you need to right-click the SD card and choose Format.
- Select FAT32 from the File System drop-down selection in the format dialogue box.
-
Check the Quick Format box and then press the Start button.

- When the format is finished, click Close.
- Eject the SD card from your computer safely to confirm the formatting is completed and the camera is ready.
Remember to select the correct file system and consider a Full Format if your SD card has problems. This process ensures that your SD card is ready for use in your camera, providing a fresh start for your photography or other activities.
Part 2: How to Format SD Card For Camera on Mac?
You can learn how to format SD card for camera on Mac with a straightforward process that involves using the built-in Disk Utility application. This method allows you to prepare your SD card for optimal use in your camera. Follow the below steps:
- You can start your process by inserting an SD card into the appropriate card slot on your Mac or using an external card reader to connect it to your computer.
- Then, launch Disk Utility, and this can be accessible via the "Applications" > "Utilities" folder.
-
Select the SD card from the list of devices on the left side of the Disk Utility window. Then, select the "Erase" tab. Finally, you must click the "Erase" button to format the SD card successfully.

In short, you can format your SD card for your camera on a Mac by following the above steps in Disk Utility. This process ensures that your SD card is in the proper format, allowing it to work with your camera and store your photographs and videos.
Part 3: How to Format SD Card on Camera?
For Nikon Camera:
Undoubtedly, formatting is essential for maintaining the card's performance and reliability, primarily if it has been used extensively or if you encounter any issues. You can learn how to format SD card for Nikon camera. Follow the below steps:
- Switch on the camera and hit the Menu button on the back.
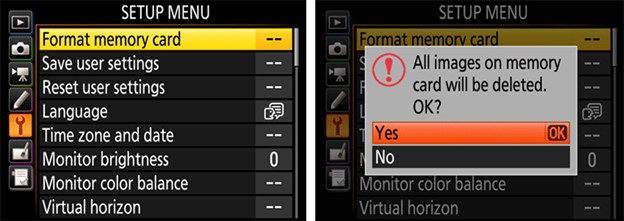
- You need to scroll down to the wrench icon or Setup Menu.
- After that, choose Format Memory Card and press the OK button.
- Select Yes from the popup menu, then click OK.
-
Your SD card is now successfully formatted and ready to be used in your Nikon camera.

For Canon Camera:
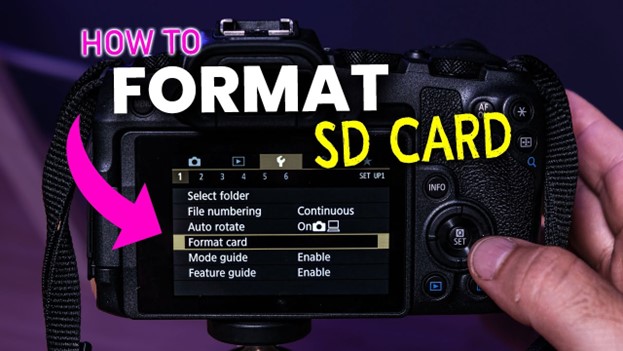
Follow the below steps to explore how to format a SD card for camera Canon:
- Turn on the camera and press the MENU button.
- Choose the wrench sign and then the card you wish to format.
- Select Format and then press the Set button.
-
To execute a quick format, choose OK and click the Set button. If you wish to perform a full format, first press the INFO button to checkmark Low level format, then select OK and press the Set button. The quick format deletes data, whereas the full format makes data unrecoverable.

Since formatting your SD card on the camera will erase all data on the card, you need to create a backup of any important files before proceeding. Fortunately, 4DDiG Partition Manager can help you to create a backup easily and safely.
Conclusion
In short, understanding how to format SD card for camera is essential for photographers and videographers. Correct formatting guarantees that your storage medium is in the best possible condition for shooting and keeping your priceless memories, whether you're formatting on a PC or a Mac or directly on your Nikon or Canon camera.
Indeed, you can format your SD card on a PC using a professional tool such as 4DDiG Partition Manager (for Windows) or the built-in Disk Utility (for Mac). We have mentioned the above-proven methods that enable you to select the best file system format for your camera's compatibility.
Learning how to format a SD card for camera is essential for reliable performance and data integrity, preventing potential issues during photography or videography sessions. You should regularly format your SD card and maintain it in good condition, making your camera ready to capture that perfect shot. So, whether you're a professional or an enthusiast, mastering the art of SD card formatting is a valuable skill for any photographer.



 ChatGPT
 Perplexity
 Google AI Mode
 Grok
Grok

