How to Recover Unsaved Voice Recording in Samsung
How to recover unsaved voice recording in Samsung? Losing unsaved voice recordings can be a frustrating experience, especially if those recordings contain valuable information or memories. Whether it's due to accidental deletion, software issues, or hardware malfunctions, finding ways to recover these recordings is essential. How to recover discarded voice recording? In this comprehensive guide, we will explore three effective methods to recover unsaved voice recordings in Samsung devices. From utilizing specialized data recovery software to leveraging backups and dedicated recovery tools, you'll discover reliable solutions to retrieve your lost audio files and ease your worries.

Part 1: Can I Recover Unsaved Voice Recordings?
The answer is yes, you can recover them using various techniques and tools. Even if you haven't saved the recordings manually, there are ways to retrieve them through data recovery processes, backups, or specialized software designed for such purposes. However, the success of recovery depends on factors like the time elapsed since deletion, the device's storage conditions, and the methods used for recovery.
Part 2: How to Recover Unsaved Voice Recordings in Samsung
Now that we've established the possibility of recovering unsaved voice recordings, let's delve into three effective methods to achieve this goal. Each method offers distinct advantages and caters to different scenarios, ensuring you have multiple options to recover your valuable audio data.
Way 1: Recover Unsaved Voice Recordings via 4DDiG Windows Data Recovery
When it comes to recovering unsaved voice recordings on your Samsung device, 4DDiG Windows Data Recovery emerges as a powerful and reliable solution. This specialized software is designed to recover various types of data, including audio files, from a wide range of storage devices, such as SD cards and external hard drives. Its intuitive interface and advanced scanning algorithms simplify the recovery process, making it accessible to users of all levels.
Tenorshare 4DDiG Windows Data Recovery gives you the ability to recover data from a variety of loss scenarios, including deletion, formatting, RAW, and more, on Windows PCs and Windows-based devices including USBs, SD cards, and external devices. It also has a higher success rate. The instructions in the guide below will help you repair photos and videos as well as recover data from crashed computers, external drives, lost partitions, Recycle Bin, and bitlocker encrypted drives. Installing 4DDiG Windows Data Recovery on your computer is the first step.
Secure Download
Secure Download
-
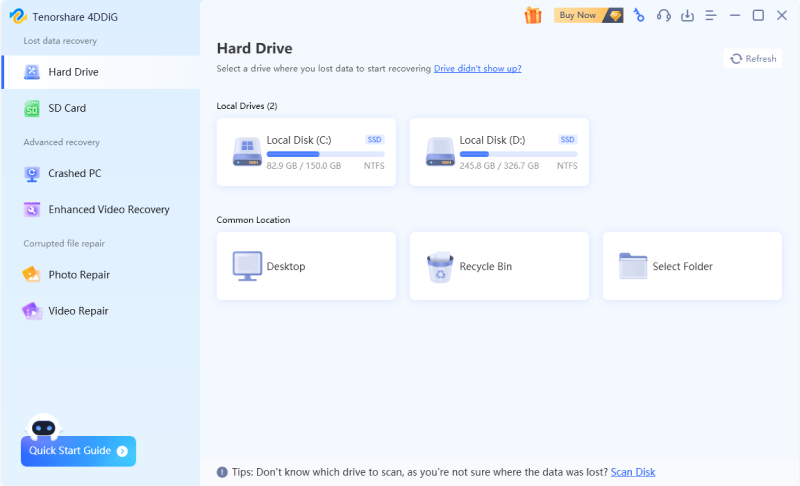
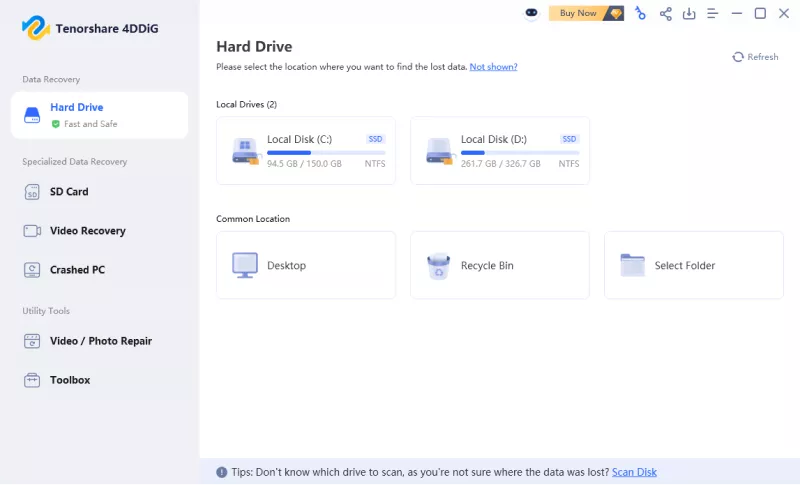
Choose a Local Disk
After installing and launching Tenorshare 4DDiG Windows Data Recovery, you'll encounter the home interface, displaying options for Data Recovery and Advanced Options. In our scenario, select the local disk where your data loss occurred from the list of hard drives. Then, click on "Start" to initiate the scanning process. Alternatively, you can specify target file types in the upper-right corner before scanning begins.
-
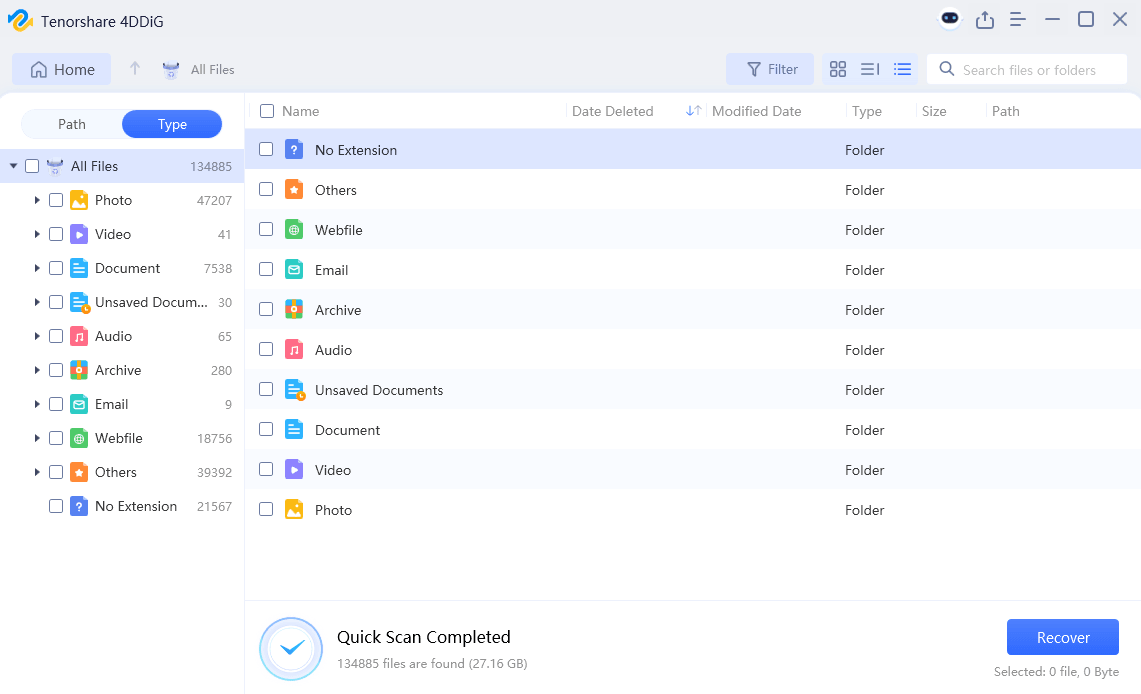
Initiate a Scan on the Local Disk
4DDiG promptly conducts a thorough examination of the chosen drive to locate missing data. You have the flexibility to pause or stop the search at any point if you've already identified the files you wish to recover. The software categorizes the found data into various sections such as Deleted Files, Existing Files, Lost Location, RAW Files, and Tag Files within the Tree View.You can also switch to File View to browse through specific file types like Photos, Videos, Documents, Audio, Emails, and more. Additionally, utilize the search function or apply filters on the right side of the panel to refine your search criteria.

-
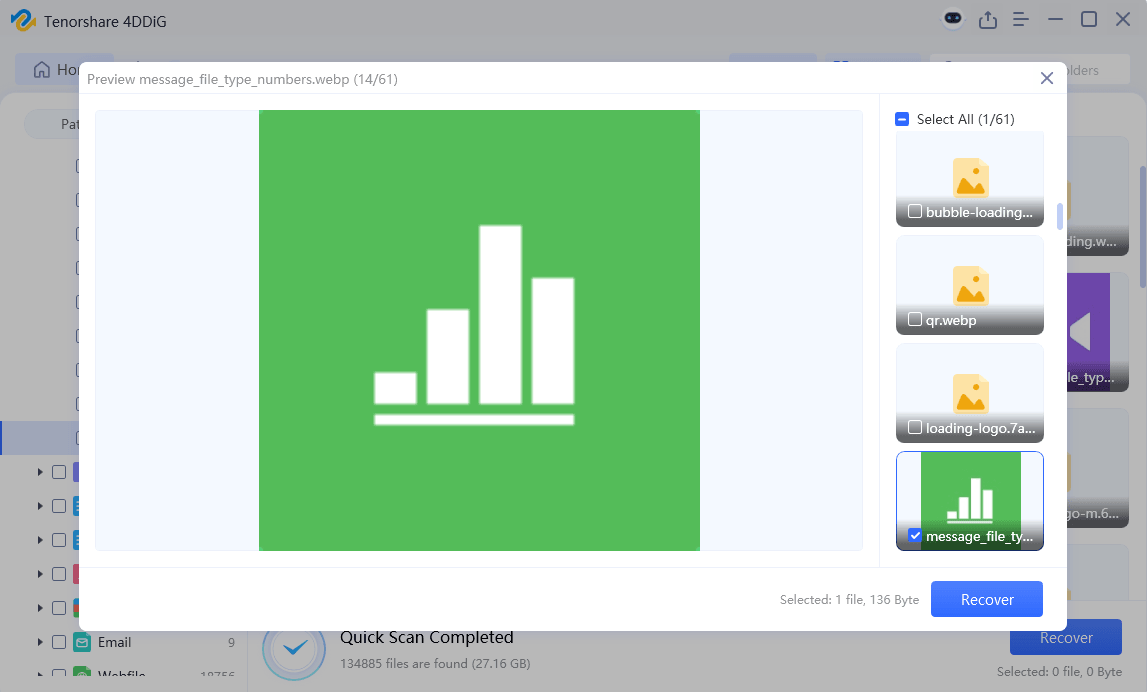
Preview and Retrieve Files from the Local Disk
Once the desired files are identified, preview them to ensure they are indeed the ones you need to recover. Proceed to recover them to a secure location to prevent the risk of disk overwriting and permanent data loss. Avoid saving them to the same partition where they were lost to maintain data integrity.
Way 2: Recover Unsaved Voice Recordings in Samsung with Backup
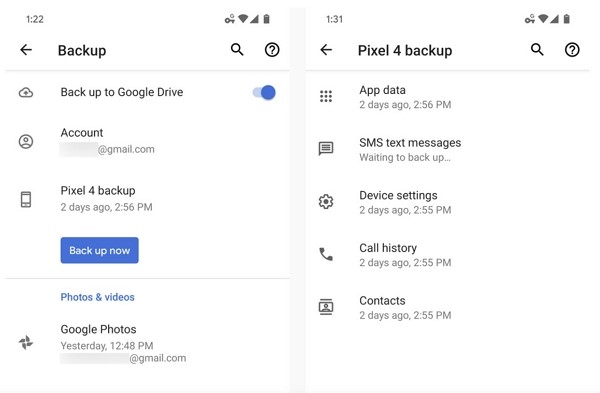
How to recover deleted voice recordings from android phone without pc? Backing up your Samsung device regularly is a proactive approach to safeguarding your data, including important voice recordings. If you've previously backed up your device using Samsung's built-in backup feature or a third-party backup solution, you can easily restore your lost audio files from the backup. Here's how to do it:
- Start by accessing the backup service or software you used to back up your Samsung device. This could be Samsung's own cloud service, Google Drive, or a third-party backup solution like Dropbox or OneDrive.
- Once you're logged into the backup service, locate the latest backup that contains the voice recordings you want to recover. Most backup services organize backups by date, so look for the most recent backup to ensure you're retrieving the latest version of your data.
- Follow the instructions provided by the backup service or software to initiate the restoration process. This typically involves selecting the backup file you want to restore and confirming the restoration action. Depending on the size of the backup and your internet connection speed, the restoration process may take some time.
-
Once the restoration process is complete, verify that your voice recordings have been successfully recovered. Navigate to the location where the recordings were originally stored on your Samsung device and check to see if they're now available.

Tips: Keep in mind that restoring from a backup will overwrite any data that's currently on your device, so ensure that you're comfortable with potentially losing any new data since the time of the backup. Additionally, it's a good idea to regularly back up your Samsung device to prevent data loss in the future. You can often automate backups to occur regularly, providing peace of mind knowing that your data is consistently protected.
Way 3: Recover Unsaved Voice Recordings in Samsung via Tenorshare UltData for Android
For a comprehensive solution to recover unsaved voice recordings on Samsung devices, Tenorshare UltData for Android stands out as a versatile and powerful tool. This software allows you to recover data directly from iOS devices, iCloud, and iTunes backups, providing multiple avenues for data retrieval. With its hot feature set, including selectively retrieving over 35 data types, such as photos, messages, and even third-party app data like Instagram messages and attachments, UltData offers a new level of flexibility in data recovery.
-
To recover data using UltData Recovery, start by launching the software on your computer and selecting "Recover Lost Data" Connect your device via OEM USB cable., and the software will recognize it automatically.

-
Next, choose the types of data you want to recover and click "Scan." The software will quickly scan your device to locate the selected data types.

-
Once the scan is complete, preview the recovered data and select the items you wish to recover. Click "Recover" to start the recovery process. UltData-Android Recovery ensures swift and secure data retrieval, preserving the original quality of your files throughout the process.

Part 3: FAQ about Unsaved Voice Recording Recovery
Q1: How to recover deleted voice recordings from an Android phone without a PC?
You can use specialized Android data recovery apps available on the Google Play Store to recover deleted voice recordings directly on your Android phone without needing a PC.
Q2: How do I recover files from the sound recorder?
Depending on the device and the sound recorder app used, you can typically recover files from the sound recorder by accessing the app's settings or storage location and restoring deleted files from there.
Q3: How to recover deleted files from the Olympus voice recorder?
To recover deleted files from an Olympus voice recorder, you can use data recovery software compatible with the device or connect it to a computer and utilize file recovery tools to retrieve the deleted files.
Conclusion
Losing unsaved voice recordings on your Samsung device can be distressing, but it's not the end of the road. By employing the methods outlined in this guide, you can effectively recover your lost audio files and regain peace of mind. Whether you opt for data recovery software like 4DDiG Windows Data Recovery, utilize backups, or leverage dedicated recovery tools like Tenorshare UltData, there's a solution tailored to your needs. Remember to act promptly to maximize the chances of successful recovery and always keep backups of your important data to prevent such incidents in the future. With the right approach and tools at your disposal, you can overcome the setback of lost voice recordings and preserve your valuable audio memories.


 ChatGPT
 Perplexity
 Google AI Mode
 Grok
Grok

