How to Install macOS Tahoe 26 on an Unsupported Mac?
Upgrading to the latest update of Apple may be a dead end for many users, in case you receive the sad news that your Mac is not eligible. Luckily, it is possible to install macOS Tahoe on unsupported Mac devices with special tools and techniques.
This guide will discuss how to install macOS Tahoe on unsupported Mac, the pros and cons of various methods of installation, and the safe, reliable steps to use.
How to Install macOS Tahoe on an Unsupported Mac Without USB?
The official version of macOS Tahoe is restricted to the more recent models, although older Mac computers can still run it with workarounds. A large part of the users would like to install Tahoe on unsupported Macs since their computers remain powerful enough to perform daily tasks.
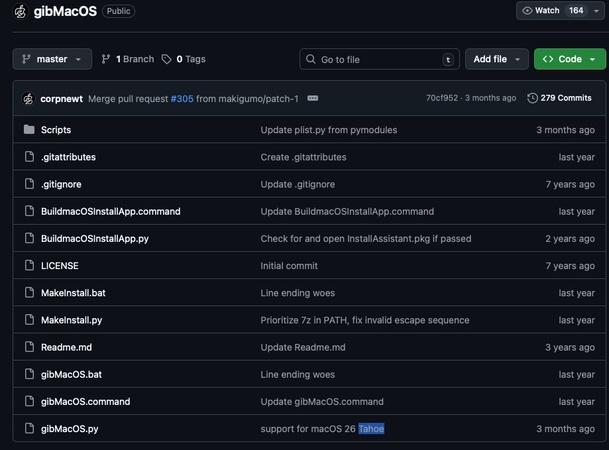
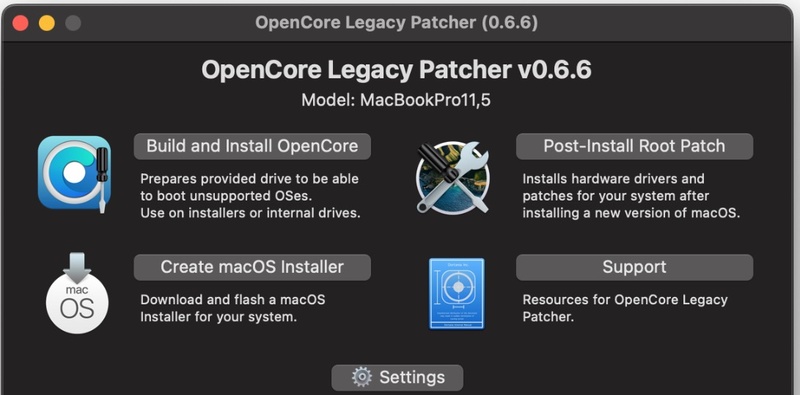
This is where tools such as gibMacOS and OpenCore Legacy Patcher (OCLP) are used. Instead of relying on a bootable USB, you can use gibMacOS to download the installer and OCLP to install Tahoe on unsupported Mac. Let’s sew how to do.
-
Download “gibMacOS” from GitHub and use it to fetch the official macOS Tahoe installer.

Run “OpenCore Legacy Patcher (OCLP)” on your Mac.
-
Build and install OpenCore on your system drive.

-
Reboot your Mac, then run the Tahoe installer directly without creating a USB to install macOS 26 on unsupported Mac.
-
After installation, re-run OCLP to apply post-install patches.
While this method allows you to get macOS Tahoe on unsupported Mac, it carries risks such as instability, driver incompatibility, or a lack of official Apple support.
How to Install macOS Tahoe on a Supported Mac?
Apple provides various means of installing Tahoe, and, depending on the purpose, i.e., whether you need to update it quickly or make a fresh installation, you can choose the one that will fit you best.
The two safest methods, which are updating through System Settings and a clean install that features a bootable installer, will be discussed below. We will also emphasize the fact that using 4DDiG macOS Installer simplifies this procedure even more, whereby users desiring a guided and error-free setup can do so.
1. Get Tahoe on Mac via System Settings
The easiest and most convenient method of installing macOS Tahoe is when you meet the requirements and your Mac is running on a supported processor model.
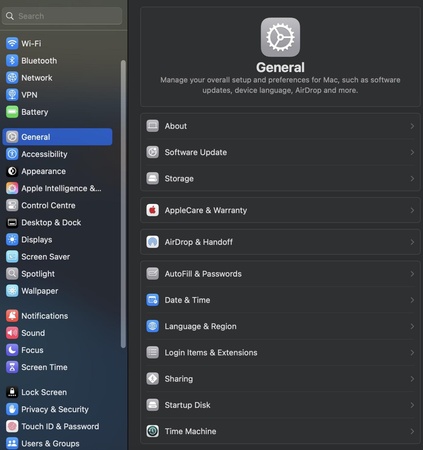
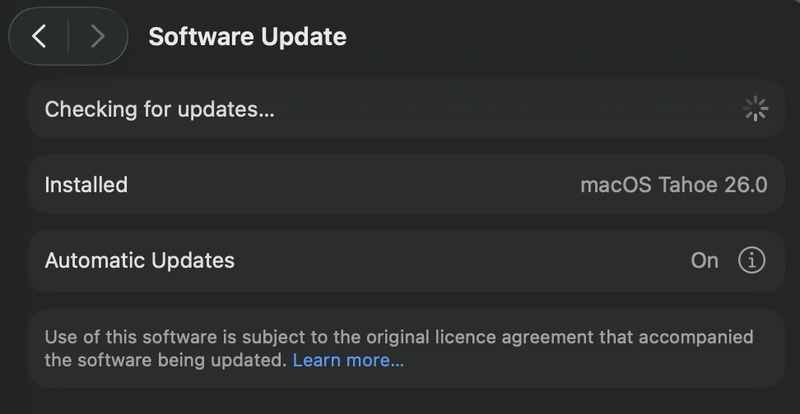
Apple automatically updates itself, so there is no need to install any additional programs. It is only necessary to go to System Settings and look for Software Update, and, seeing the macOS Tahoe 26, to press Download and Install.
The process will take place automatically as your Mac will automatically reboot once the installer is completed. The technique is fast, secure, and does not need much work.
-
Open “System Settings" on Mac and go to “General”, then click "Software Update”.

-
Check if macOS Tahoe 26 appears, and download and install the available updates.
-
Wait for your Mac to reboot and complete the installation. Authenticate if it asks for your permission to reboot, because that's when the process begins.
2. Download and install macOS Tahoe with a Bootable Installer
In case of a clean installation or failure to update using System Settings, the best option is to utilize a bootable installer. Conventionally, this is achieved by developing an installer in Terminal that can be difficult to use for non-technical users. Fortunately, tools like 4DDiG macOS Installer make it easier.
It can create a bootable USB with only a couple of clicks, fix installation mistakes, and reinstall macOS on supported Macs. The tool would be very useful when you have already had such an experience as Mac won’t install macOS 26. This method is safer, cleaner, and doesn’t require advanced command-line knowledge.
Features of 4DDiG macOS Installer:
- Installs or reinstalls macOS within 4 simple clicks.
- Repairs installation errors that stop macOS updates.
- No command-line knowledge required.
- Works for both supported and partially supported Macs.
- Easy-to-use for even beginners who are new to the Mac system.
Secure Download
Secure Download
Steps to use Tenorshare 4DDiG macOS Installer:
-
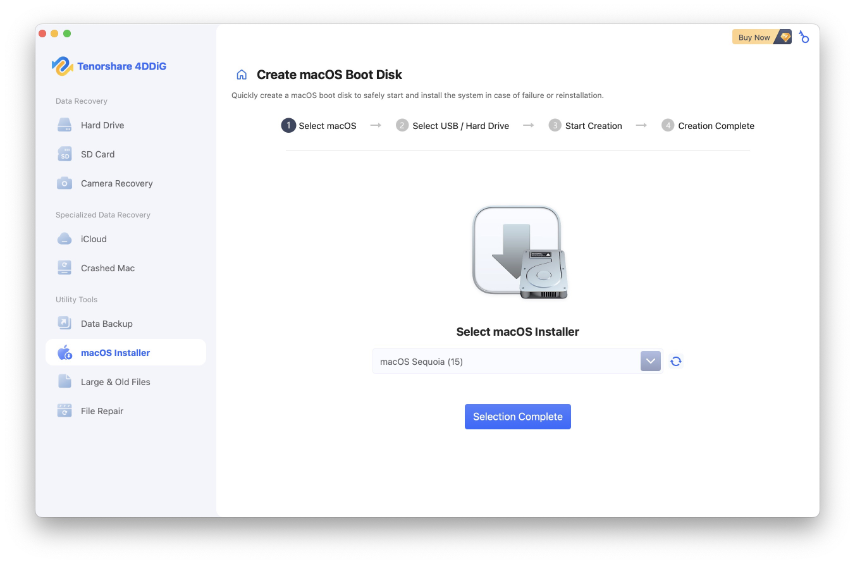
Download 4DDiG Data Recovery software for Mac on your computer and install it. After successful installation, you can launch the tool and click "macOS installer" from the left side menu. Now, click "Start Creation”.

-
Click the "Dropdown menu" and choose macOS 26 from here, and click "Selection Complete". 4DDiG will now create a bootable installer according to your requirements.

-
Connect your USB to your Mac that has at least 19GB of free storage available and click "Create Now" in the 4DDiG software. Click "Format" to begin this process.

-
After the bootable disk process is successful, you can click "Complete" and close everything.

Turn off your Mac and hold the power button until you see the bootable volumes. You may boot to Tahoe from your external drive by following the on-screen macOS Tahoe installation steps.
Comparison Table of Three macOS Tahoe Installation Methods
In the case of updating or installing macOS Tahoe, the appropriate option will depend on the compatibility of your Mac, your level of comfort with the technical process, and either a fast update or a complete clean installation.
An example of these is the System Settings, which is easy but only supported on the compatible Macs. Bootable installers have greater control but need additional steps. Alternatively, gibMacOS + OCLP can be used to unlock Macs that are not supported, but it involves risks and a complex configuration.
Lastly, 4DDiG Installer Mac OS is another gap solution allowing users to have a guided solution that is simple to use on both supported and semi-supported devices.
- Method
- Device Compatibility
- Difficulty
- Risks
- Best For
- gibMacOS + OCLP
- Unsupported Macs
- High (technical knowledge needed)
- High (instability, unsupported drivers)
- Advanced users with old Macs
- System Settings Update
- Supported Macs only
- Very Easy
- Low
- Users with officially supported Macs
- 4DDiG macOS Installer
- Supported & semi-supported Macs
- Easy
- Low
- Users who want a safe, guided installation
✅ You May Also Like: How to Install macOS 26 Beta on Windows PC: Complete Guide
FAQs About Installing macOS Tahoe on Old Mac
Q1: What are the risks of installing macOS Tahoe on an unsupported Mac?
When Tahoe is run on an unsupported Mac, it may be unstable, lack drivers, and have lower performance. Such features as Wi-Fi or GPU can be partially incompatible, and Apple will not officially update them when you install macOS Tahoe on an old Mac.
It is handy in adding new features, but the disadvantages surpass the advantages for those who are less tech-savvy.
Q2: Do I need a USB drive to install Tahoe on an unsupported Mac?
Not always. gibMacOS and OCLP have a direct USB-free installation. Nevertheless, a USB bootable installer provides a backup in case the installation fails. To do it with ease on supported models, such applications as 4DDiG macOS Installer can make it easier and do not necessarily need to create USB manually.
Q3: Is macOS Tahoe stable on unsupported Macs with OCLP?
Stability depends on the Mac model. It seems that many users experience a lack of performance in their daily activities, though some of the advanced features, such as hardware acceleration, can break.
In case you get macOS Tahoe on unsupported Mac through OCLP, you will see some glitches frequently in contrast with compatible Macs. It works, but not perfectly.
Q4: Will my unsupported Mac slow down after installing macOS Tahoe?
It depends on your hardware. The Macs that have SSDs and have enough RAM tend to run Tahoe without facing multiple problems, but older or lesser models might slow down.
Once installed, you can make some adjustments, such as turning off animations to increase speed. There won’t be performance comparable to supported Macs, but it can be used.
Conclusion
It is not that impossible to install the latest update on older Macs. The use of gibMacOS + OCLP, the official update by Apple, or a bootable installer makes it possible, and each has its advantages and disadvantages.
In the cases of most users, though, the least complicated and safest one is still Tenorshare 4DDiG, which makes the process easier and risk-free.
In case you want to install macOS Tahoe on unsupported Mac or even an approved one, 4DDiG is going to make it a smoother and more reliable experience.
Secure Download
Secure Download


 ChatGPT
 Perplexity
 Google AI Mode
 Grok
Grok

