How to Factory Reset or Restore MacBook Air
This article is a complete guide on how to restore MacBook air. This will provide deep insight regarding the factory reset MacBook air. MacBook Air is generally a robust machine with high reliability, but sometimes things can go wrong, and you might need to free up space on MacBook air. For this reason, you may feel the need to reset the device to its factory settings.
Often, factory reset comes in handy when you want to sell your device, whereas other times, wiping a MacBook air is a wise move before handing it over to a friend or family member. Whatever the case may be, after reading this article, you will have a detailed understanding of factory resetting, restoring, and recovery MacBook air.
Part 1: Should I Restore MacBook Air to Factory Settings?
Sometimes, you will question yourself, should I restore MacBook air to its factory settings? The answer is yes! There are times when people see the need to erase MacBook air data. The reasons can vary from being technical or personal. A few technical reasons that require you to restore MacBook air to factory settings are:
- Your MacBook air is not working correctly or is increasingly slow
- You are unable to turn on your MacBook air
- Your MacBook is facing overheating issues
- The pink screen on MacBook air
- Apps freezing
All these technical issues demand a factory reset that does wipe a MacBook air clean and reinstall a better and faster version of macOS. Personal reasons that demand a factory reset of MacBook air include:
- Protection of personal information before selling it
- Temporary exchange of your MacBook Air with a fellow
- Prepare your MacBook air for a New Owner
Part 2: Things to do before Factory Settings
Before performing a factory reset MacBook air, there are some protocols to accomplish that are mentioned below.
1. Back up MacBook Air before Factory settings
It is effortless to back up your data in MacBook air. It is integrated into their designs; all you have to do is opt for a method and set it up.
Method 1: Back up MacBook Air with Time Machine
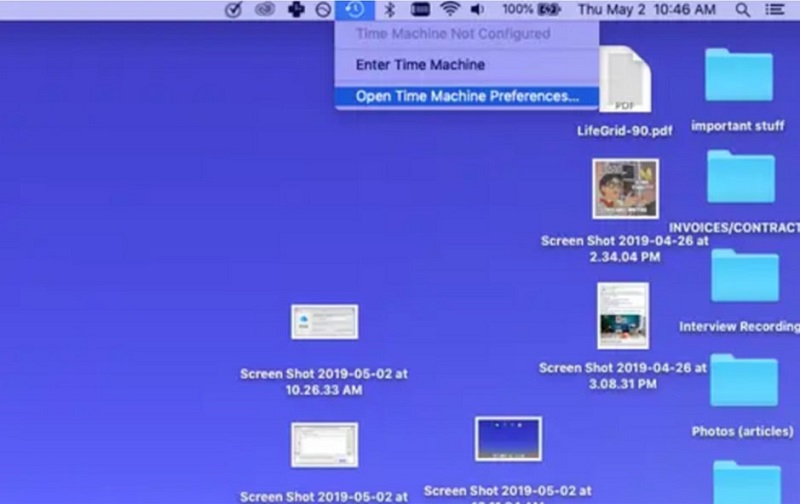
Time machine is a method that works with external storage and makes digital copies of your Mac. To perform a backup via Time Machine, follow the steps mentioned below:
-
Click on the Time Machine symbol in the top toolbar and select "Open Time Machine Preferences".

- Click "Select Backup Disk".
- Now select your external drive and click "Use Disk".
Method 2: Back up MacBook Air with iCloud
iCloud is a wireless syncing that allows you to access your mac apps from any Apple device. Make sure to follow the steps precisely for a complete, safe, and secure backup.
- Navigate to the Apple menu bar in the upper left corner of your screen and select "App Store"> "Updates" to make sure your MacBook air is fully updated.
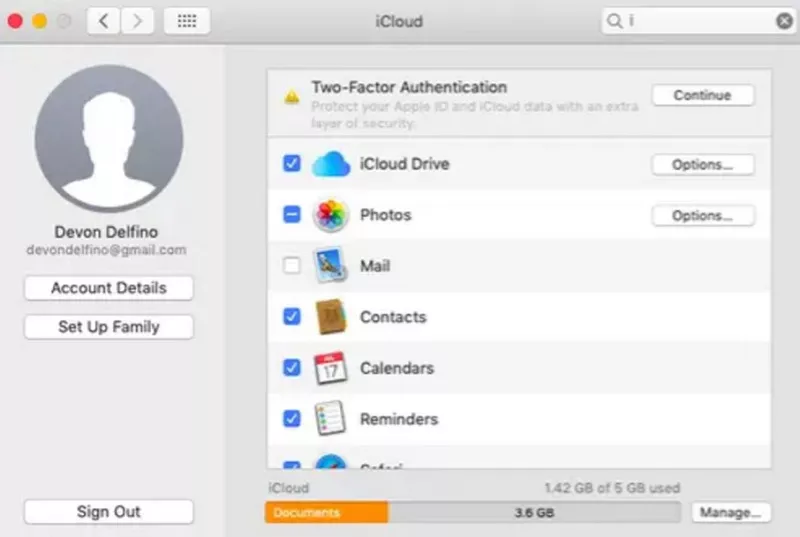
- Go back to the Apple menu and select "System Preferences"> "iCloud".
- Use your Apple ID to log in.
- Choose the Option you are considering, i.e., "Use iCloud for your documents and data" or "Use Find my Mac".
From now on, as records alter and evolve, the specified information will be automatically modified. Besides, you can access your stored data from any other device.
2. Sign out of everything before Factory Settings
It is mandatory to sign out from wherever your personal information is linked to avoiding future software issues.
Sign out of iTunes/Music Apps
- Open iTunes on your MacBook Air.
- Navigate to the menu bar and click "Account".
-
Select "Sign out".

Sign out of iMessage
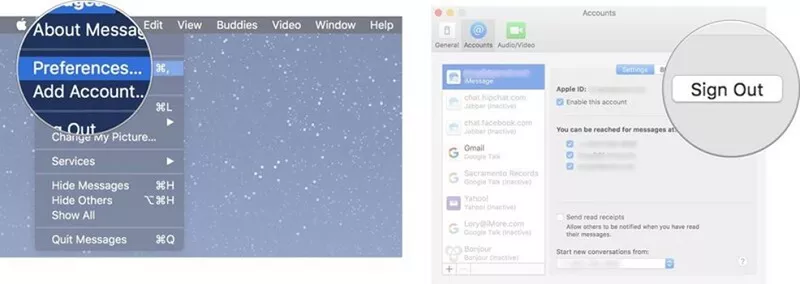
- Open Messages on your MacBook air.
- Select Messages > Preferences.
- Select your iMessage account.
-
Click on Sign out.

Sign out of iCloud
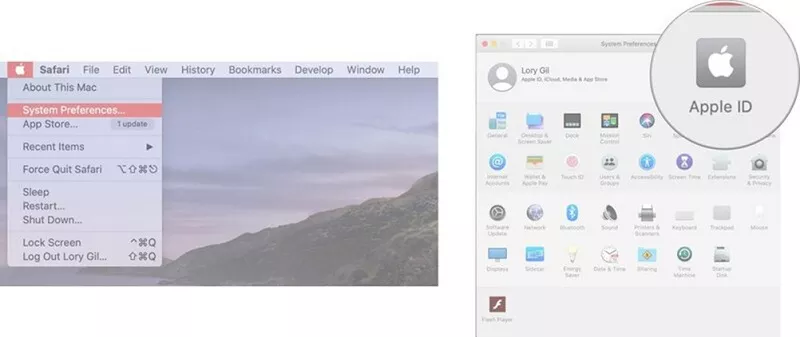
- On the upper left corner of your Macbook air screen, click on the Apple logo.
- Select System preferences from the drop-down menu bar.
-
Select Apple ID.

- Untick the "Find My Mac" box.
- Enter your system passcode.
- Under your Apple ID, click on "Overview".
- Click on Sign out.
- Untick all the boxes containing a copy of your MacBook air.
- Click Continue.
Part 3: How to Factory Reset a MacBook Air?
Once you have made up your mind to wipe MacBook air, then follow these steps to perform a factory reset MacBook air quickly and efficiently.
- Turn off your device and on it; immediately press Command (⌘) + R. Do not leave it until you see an Apple icon or a spinning globe animation appeared on the screen.
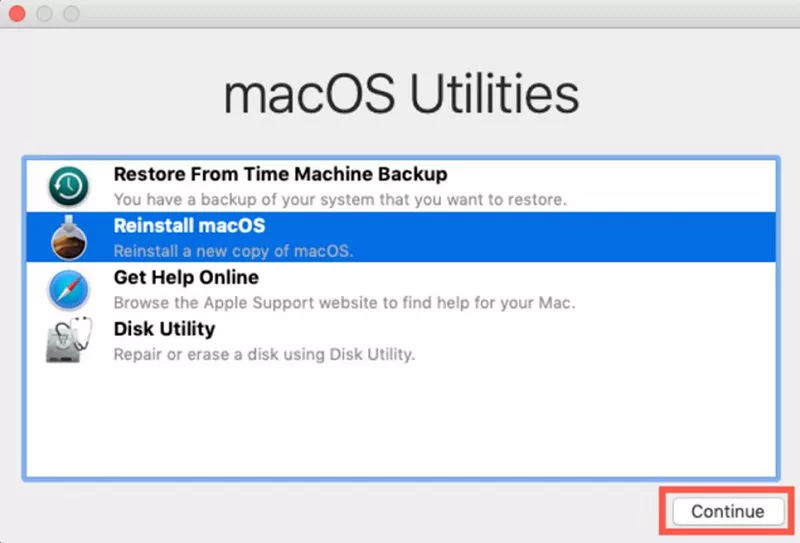
- A few moments later, the macOS utility window will show up – termed as Recovery Mode.
-
Select "Disk Utility" and click "Continue".

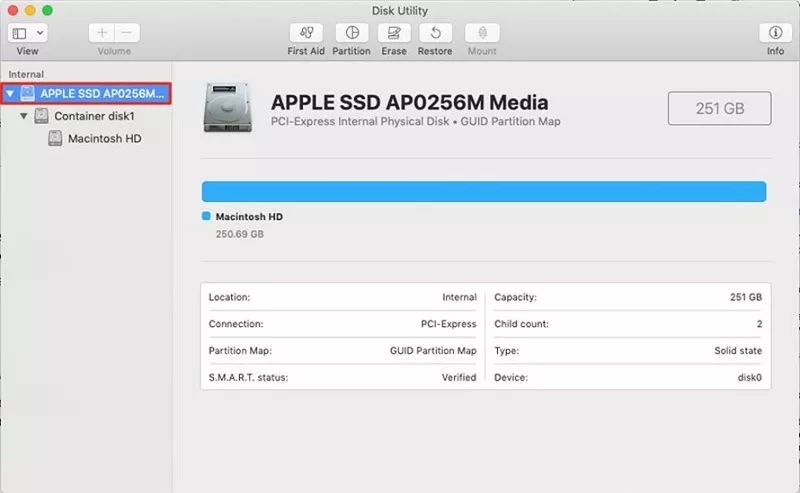
- Navigate to the menu bar and select View > Show All Devices.
-
In Disk Utility's sidebar, select the drive you want to erase from the list.

-
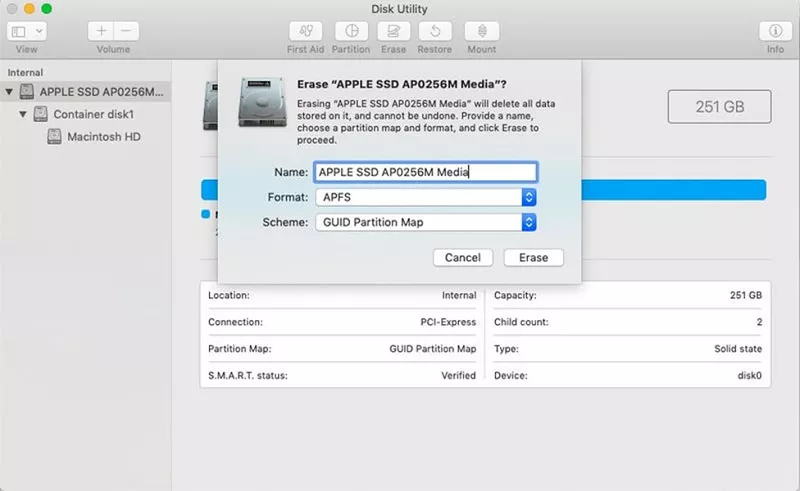
Click on the “Erase” button at the top of the screen. A window will pop up with some fields to fill.
Fill in the disk name.
Select the format.
Choose the scheme if required.
-
Click "Erase".

- The disk removal will take a few minutes. Once it is completed, click the Apple icon in and select "Quick Disk Utility".
Part 4: How to Reinstall macOS after Factory Settings?
Resetting and restoring your macOS gives your MacBook air a fresh start. The quickest and easiest way of reinstalling macOS is by utilizing macOS Recovery mode. Given below is a step-by-step guide on how to reinstall and restore MacBook air using macOS recovery mode.
- Make sure a stable internet connection.
-
MacBook Air is M1 Mac, therefore:
Turn off your MacBook air.
Press and hold the power button until you see the recovery mode appeared on the screen (for details, see part 3).
Click "Options" and "Continue". a)To reinstall the latest macOS version compatible with your MacBook air from the internet; Press and hold Command + Option + R; b)To reinstall the same macOS version that came with your device; Press and hold Shift + Command + Option + R; C)To reinstall the macOS version stored on your built-in recovery disk; Press and hold Command + R.

- Once you see an Apple icon, a spinning globe, or the utility window, release these keys.
- Enter the passcode.
- Select the Reinstall macOS option.
- Follow the instructions mentioned on the screen and select a disk to reinstall the OS.
When you resintall macOS, you may get an error "The Recovery Server Could Not Be Contacted", you can fix it easily and continue your reinstall process.
Part 5: How to Recover Lost Data after Factory Reset on Mac?
What if you lost data after factory resetting Mac? Tenorshare 4DDiG Mac Data Recovery is a professional program which can recover any data on Windows/Mac lost in scenarios such as deletion, RAW, formatting, etc. It is a highly efficient, user-friendly, and reliable software with a higher success rate. Some of its prominent features include:
- Supports macOS Monterey, macOS Big Sur, macOS 10.15 (Catalina), macOS 10.14 (Mojave), macOS 10.13 (High Sierra), macOS 10.12 (Sierra) and lower version.
- Supports recovery of over 1000 file types.
- It retrieves data from all mediums, including flash drives, memory cards, digital cameras, etc.
- Ensures data integrity.
- It provides a quick scan coupled with a free preview.
- It is 100% safe and keeps the files from being overwritten.
- It possesses one of the highest data recovery success rates in the industry.
Secure Download
Secure Download
-
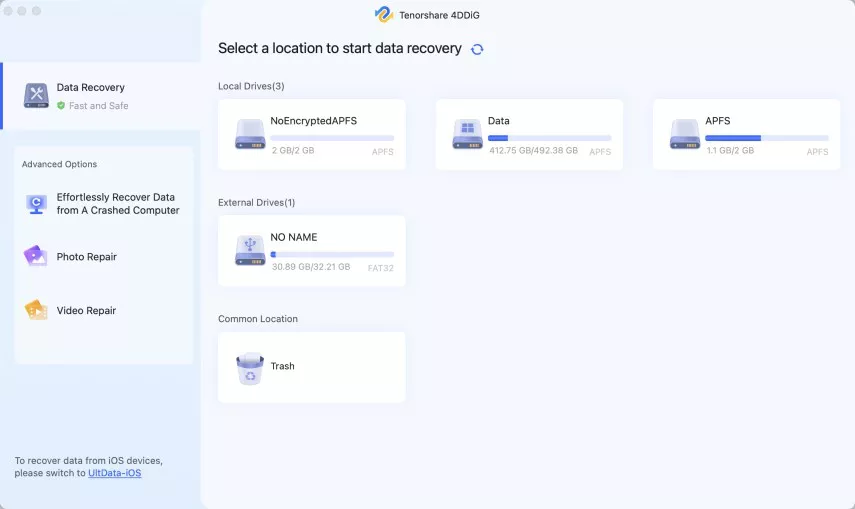
Select a Loaction
After installing Tenorshare 4DDiG on your computer, run the program and select a location where you lost data and then click Scan to proceed.

-
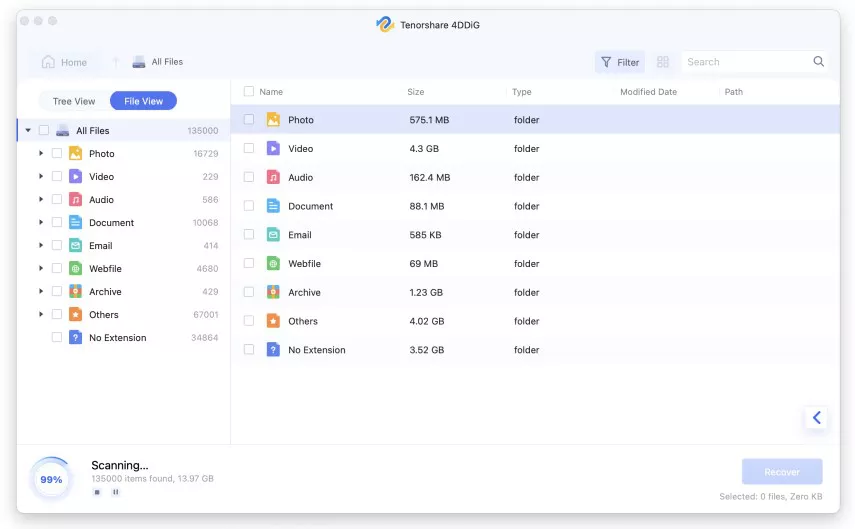
Scan and Preview
Once the scanning result generates, you can tap on each file type to preview more details inside of it.

-
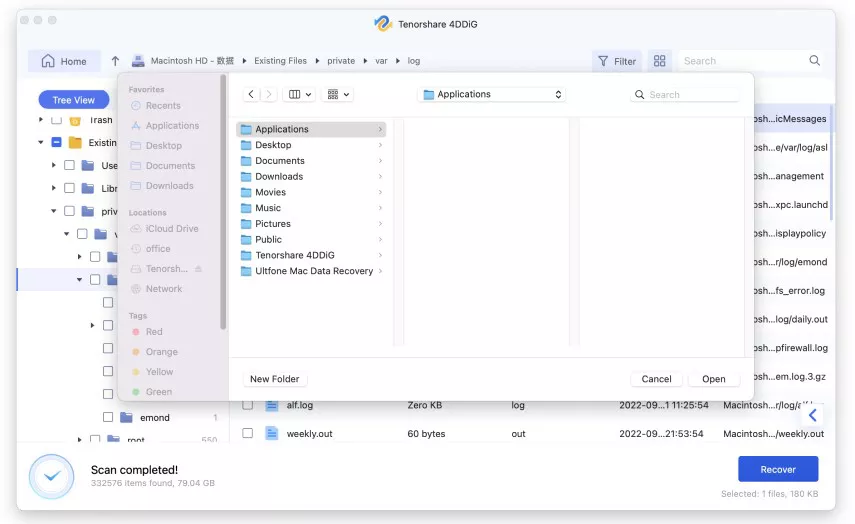
Recover Lost Data from the Drive
Select a file and snap the "Recover" button to select a location for the discovered files. Saving the files back to the partition where you lost them may cause permanent loss of it.

Conclusion:
Next time you want to perform recovery of your MacBook Air, this complete guide to factory reset MacBook air and how to restore MacBook air data will act as a savior. After reading it, you now have a complete understanding of resetting, restoring, and reinstalling. Make sure to wipe MacBook air for safety purposes if you are willing to sell or trade it or face any technical issues. The most important thing to take away from this guide is to use 4DDiG Data Recovery Software the next time you face any data loss. It is easy, fast, and reliable and will solve your data loss problem in no time.


 ChatGPT
 Perplexity
 Google AI Mode
 Grok
Grok


