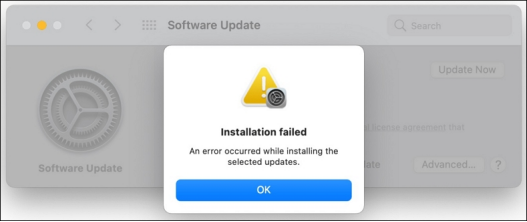
How to Recover Missing Files after macOS Sequoia Update ?
Experiencing issues with missing files after the latest macOS Sequoia update ? You’re not alone. While updating your Mac should be a smooth experience, it can sometimes lead to unexpected behavior, like the disappearance of important documents, photos, or other important data. To help you, we will explore 12 reliable solutions to help you recover missing files after the macOS Sequoia update. So let’s get started!

Part 1. What Causes Missing Files After macOS Sequoia Update?
Before we start looking into the solutions or the fixation steps, it’s better that you first understand the reasons that are causing these issues. Let’s look at the root causes for the missing files after the macOS Sequoia update.
- Incomplete Update Process:
The update process is sometimes interrupted or incomplete, leading to corrupted or missing files. This can occur due to power failure, interrupted downloads, or other technical issues.
- File System Errors:
The update may introduce errors in the file system, causing some files to be misplaced, hidden, or corrupted. This can make your files appear missing even though they are still on the disk.
- Compatibility Issues:
Some third-party apps and older files may not be compatible with the new macOS Sequoia, leading to deletion or relocation during the update.
- iCloud Sync Problems:
If you use iCloud Drive, syncing errors during the update can cause files to temporarily disappear, especially if they haven't been fully uploaded or downloaded.
- User Profile Corruption:
Sometimes, the user profile can become corrupted during the update, causing data linked to that profile, such as documents and settings, to go missing.
Part 2. 12 Solutions to Recover Missing Files After macOS Sequoia Update
Now that you know the root causes of missing files after macOS Sequoia Update, let’s look into their fixes.
Fix 1: Recover Missing Files with Tenorshare 4DDiG
4DDiG Mac Data Recovery is a powerful tool specifically designed to help recover lost or missing files on Mac, including after major updates like macOS Sequoia. It supports various file types and offers an intuitive, user-friendly interface.
Features of Tenorshare 4DDiG Mac Data Recovery:
- Recover data from macOS crashes, formatting errors, and system upgrades.
- Supports all file types, including documents, photos, videos, and emails.
- Offers a quick scan and deep scan mode for thorough data recovery.
Secure
Download
Secure
Download
Steps to Recover Missing Files Using 4DDiG:
Select a Location
Open the software and select the drive or folder where the files were located before the update.

Scan for Missing Files
Click on “Scan” to start the recovery process. The software will perform a deep scan to locate lost or missing files.

Preview and Recover
Once the scan is complete, preview the files and select those you want to recover. Click “Recover” to save them to a secure location on your Mac.

Fix 2: Recover Missing Files from Recently Deleted
If you have accidentally deleted some files, you can simply recover them from the recently deleted. Here’s how you can do it:
- Open Finder. Go to Finder and click on “Recently Deleted” under the sidebar.
- Search for Missing Files. Browse through the deleted files to see if any of your missing documents, photos, or other data are present.
- Recover Files. Select the files you want to restore and click “Recover” to move them back to their original location.
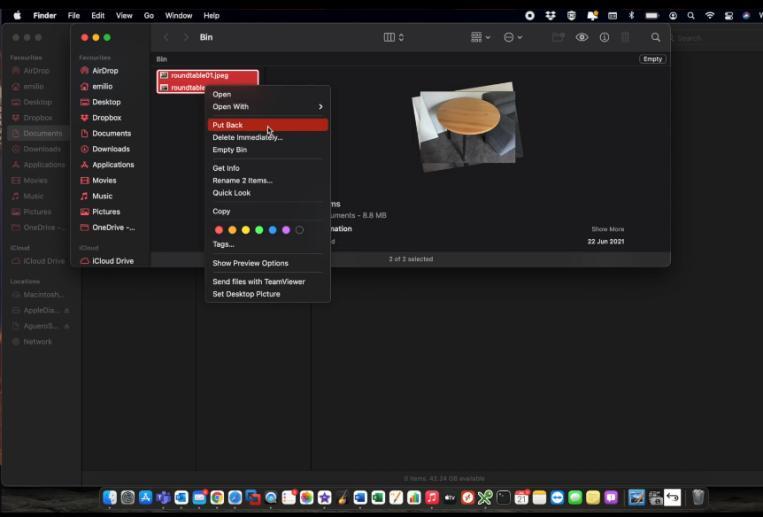
Fix 3: Look for Missing Files After macOS Sequoia in Trash Folder
There is a chance that your missing files might have been moved to the Trash folder. Don’t worry, you can easily restore them. Here’s how:
Open Trash. Click on the Trash icon in your Dock to open it.

Locate Missing Files. Search through the Trash for any files that may have been mistakenly deleted.

Restore Files. Right-click on the desired file and select “Put Back” to return it to its previous location.

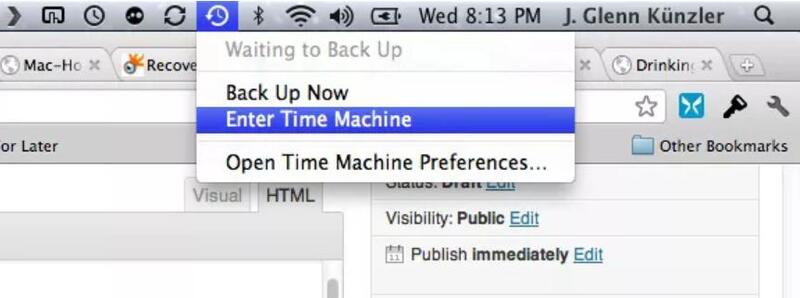
Fix 4: Recover Missing Files by Using Time Machine
Time Machine backups are lifesavers for recovering missing files after an update.
Open Time Machine. Connect your Time Machine drive and open the Time Machine app.

Navigate to File Location. Use the timeline on the right side to find the point before the update where your files were intact.

Restore Files. Select the missing files and click “Restore” to recover them.

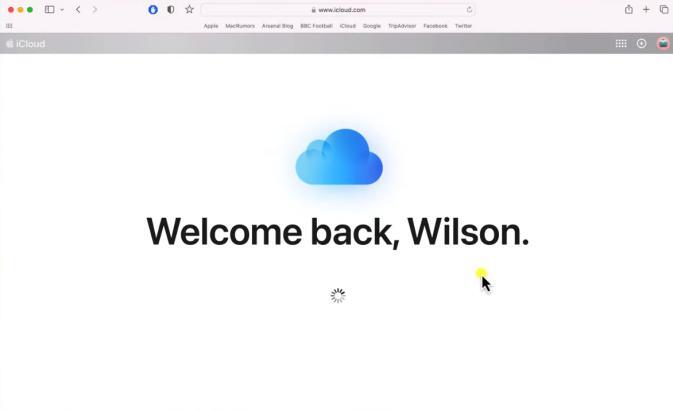
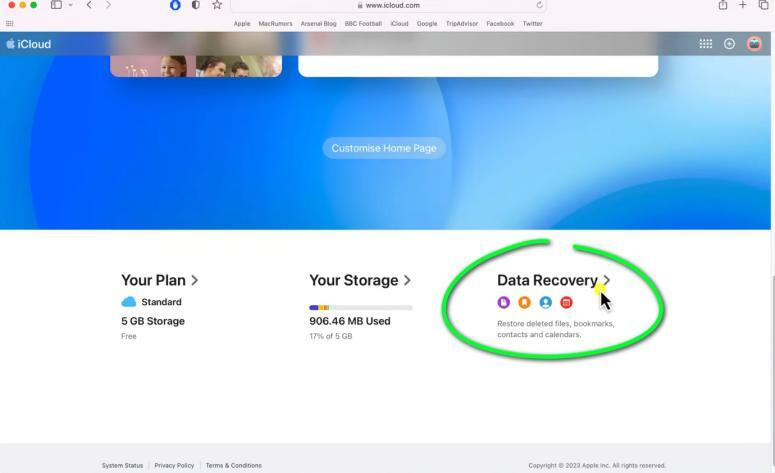
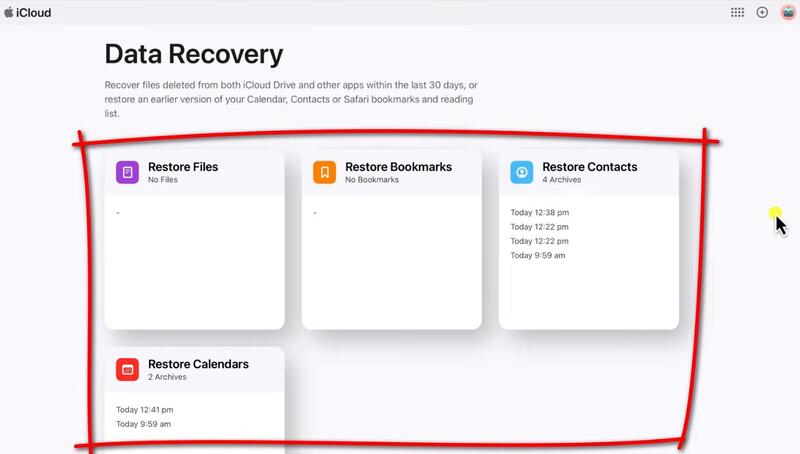
Fix 5: Use iCloud to Recover Missing Files After macOS Sequoia Update.
If you have synced your files to iCloud and accidentally deleted them from your local host, you can easily retrieve it back from your iCloud. Let’s have a look at how you can do it:
Open iCloud Drive. Go to Finder and select “iCloud Drive” under the Locations section. Or you can even search it up on your browser.

Go to the Data Recovery Option. Scroll to the bottom of the page, there you can find the data recovery option.

Download Files. Drag and drop the missing files back onto your desktop or preferred folder.

Fix 6: Recover Missing Files After macOS Sequoia Update with macOS Recovery
macOS Recovery can help recover missing files by reinstalling the macOS without affecting personal data. Just follow these simple steps:
Restart Your Mac. Hold Command (⌘) + R during startup to enter Recovery Mode.
Reinstall macOS. Choose “Reinstall macOS” from the menu to reinstall the system software without erasing your files.
Check for Files. After the reinstallation, check if your missing files have reappeared.
Fix 7: Use Terminal Commands to Recover Missing Files
Some simple terminal commands can also help you recover those missing files, just follow these simple steps:
Open Terminal. Go to Applications > Utilities > Terminal.
Run Search Commands. Use commands like find or locate followed by the file name to search your entire drive.
Recover Found Files. If the files are found, move them back to their intended locations.
Fix 8: Change to a Different User Account to Log In
There’s a possibility that you might have logged into a different User Account, that’s why you can’t see your files. You can easily revert to your User account by following these simple steps:
Log Out. Click on the Apple logo and select “Log Out”.
Log In as a Different User. Choose another user profile to log into.
Check for Files. Look for the missing files in this profile’s directories.
Fix 9: Stop Saving Files on iCloud Drive
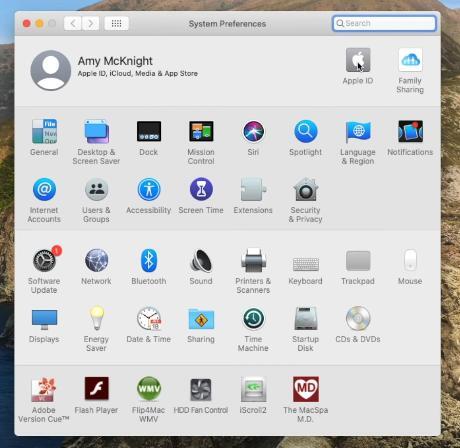
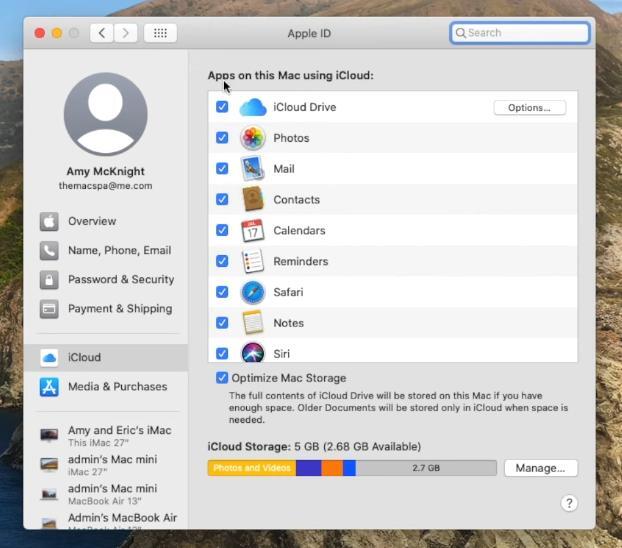
Turning off iCloud Drive can prevent syncing issues during updates. To turn it off, follow these steps:
Go to System Preferences. Go to the System Preferences and then click on the Apple ID.

Deselect iCloud Drive. Uncheck the box for iCloud Drive to stop saving files automatically.

Check Local Storage. Your missing files might now appear locally on your Mac.
Fix 10: Reinstall macOS
Reinstalling macOS can fix any underlying software issues that cause files to disappear. You can easily do it by following these steps:
Restart in Recovery Mode. Use Command (⌘) + R during startup.
Select Reinstall macOS. Choose the option to reinstall the current version of macOS Sequoia.
Follow the Prompts. Complete the reinstallation and check if the files are restored.
Fix 11: Revert to the Previous Version
Going back to the previous macOS version can undo changes that led to missing files. Just follow these simple steps:
Open Time Machine. Enter Recovery Mode using Command (⌘) + R.
Select Restore from Time Machine. Choose the option to reinstall the current version of macOS Sequoia.
Complete Restoration. Follow the instructions to restore your previous macOS version.
Fix 12: Ask Apple Support for Help
If all else fails, Apple Support can offer professional assistance. You can reach out to them by doing the following:
Contact Apple Support. Visit Apple Support and initiate a chat or call.
Explain the Issue. Detail the problem with missing files and what you’ve tried.
Follow Their Guidance. Apple technicians can offer specific solutions or recovery methods.
Tips: How to Prevent Missing Files After Mac Update?
- Backup Regularly
Use Time Machine or other backup solutions to keep copies of your files.
- Check Compatibility
Ensure your software and files are compatible with the new macOS.
- Monitor iCloud Sync
Verify that iCloud Drive is correctly synced before updating.
Conclusion
Losing files after a macOS Sequoia update can be frustrating, but it doesn’t have to stay that way. You can use built-in Mac tools or professional recovery solutions to get your files back. Tenorshare 4DDiG is a great choice for easy and effective data recovery. Don’t let missing files slow you down—try Tenorshare 4DDiG and take control of your recovery. Also, remember to keep regular backups to protect against future issues.
FAQs
Q1. How to recover lost files after a Mac update?
To recover lost files, try using data recovery software like Tenorshare 4DDiG, or check the Trash, Recently Deleted folder, and backups.
Q2. Why did my files suddenly disappear on my Mac?
Files may disappear due to interrupted updates, file system errors, or syncing issues with iCloud.
Q3. Where did all my documents go on my Mac after the update?
Your documents might be in the Trash, Recently Deleted, or temporarily unsynced with iCloud.
Q4. Does macOS update delete files?
Generally, macOS updates do not delete files, but errors during the process can cause data loss.
Q5. How to find missing files on Mac?
Check the Trash, Recently Deleted folder, Time Machine backups, or use recovery software to locate missing files.
💡 Summarize with AI:
You May Also Like
- Home >>
- Mac Recovery Solutions >>
- How to Recover Missing Files after macOS Sequoia Update ?




 ChatGPT
 Perplexity
 Google AI Mode
 Grok
Grok


