How to Recover Missing Files After macOS Tahoe Update?
The upgrade to the latest macOS will probably enhance performance and security, yet it can introduce some unforeseen issues. It is found that files disappear or are unavailable in many cases when installing the new version.
The positive thing is that it has solutions that have been proven. You will find out in this guide how to recover missing files after macOS Tahoe update with the help of simple and advanced techniques.
Why Are Files Missing After macOS Tahoe Update?
It is frustrating when files disappear after macOS Tahoe update. This is not an uncommon problem, as you may imagine. The update procedure in Apple may move, hide, or even erase files on a temporary basis based on changes in the system.
The most frequent reasons are the following:
- Files Relocated: MacOS tends to relocate files that do not fit into a new system structure and place them in a folder called Relocated Items after updates.
- Files Not Updated Regularly: Documents and desktop items do not update correctly at times.
- Corrupted Update: Mistakes in the update process may cause files to be lost after the upgrade to Tahoe MacOS.
- Wrong Operation: Accidentally deleting or moving files during or after the update process.
The result of these problems may be files missing after upgrading to macOS Tahoe or losing whole folders. Fortunately, most of the information is not lost forever.
How to Get Back Missing Files After macOS Tahoe Update? [5 Basic Methods]
If you are unable to find your files after updating your Mac to the latest Tahoe update, here are some basic methods you can try to locate your files.
1.Check for Missing Files with Spotlight Search
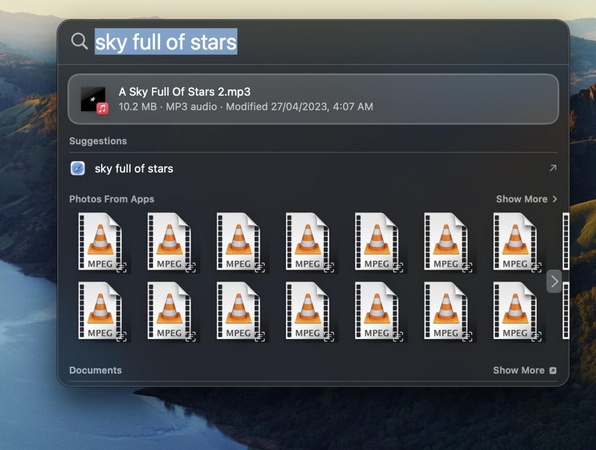
The easiest approach for you is to find the file using the Spotlight Search feature. It will easily find out any files that are available on the storage.
-
Press the "Command" and "Space" keys together on your Mac to open the Spotlight Search feature.

-
Type the name of your file, and review the results. If your file exists on the storage, you will find it here.
2. Find Lost Files in Trash Bin
Sometimes our files get accidentally deleted, but they stay in the Bin. Using this method, you can search for missing files in the Trash Bin and may find some.
-
Move the cursor on your Mac to the Dock and click on the "Bin" icon usually present on the rightmost.

-
To find the files missing after upgrading to macOS Tahoe, you can manually check the contents of the bin. This method helps find files that were deleted but are present in the Bin.
3. Look in the Relocated Items Folder for Missing Files
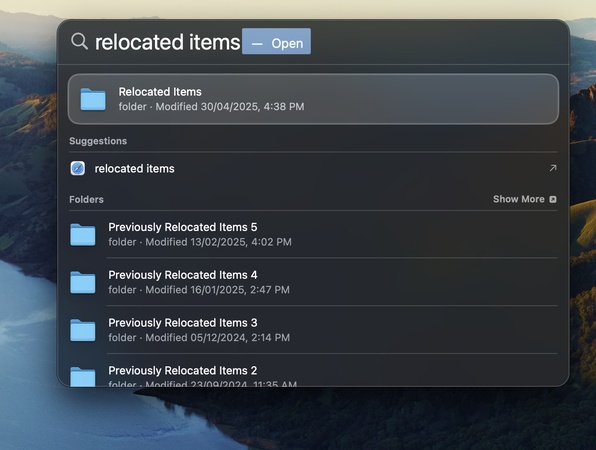
When macOS finds incompatible files during updates, it moves them to Relocated Items.
-
If your files disappeared after the macOS Tahoe update, you need to open the “Relocated Folder” by searching for it in “Spotlight Search”.

-
Open the folder by double-clicking it and find your missing files here.
4. Get Back Disappeared Files in the Recently Deleted Folder
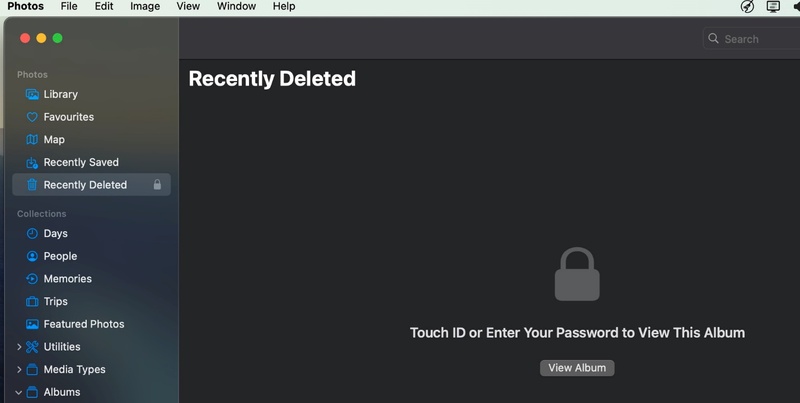
Sometimes files are deleted from specific apps like Notes, Photos, Mail, etc. In that case, we need to check the Recently Deleted folder within that app.
-
Open the app where you lost files after mac update, and go to the "Recently Deleted" folder, like in the Photos App.

-
Check the files available and select the desired files, then click "Recover" to get them back.
5. Recover Missing Files in iCloud Drive
If you lost files after mac update, but you have enabled the iCloud backup feature or manually created backups, then this method can be a savior for you.
-
If you have your desktop files missing after macOS Tahoe update, then you can recover them from iCloud Drive if you have this feature already enabled by going to the iCloud website and logging in.

-
Locate the files in "Drive" and click the "Options" button, then click "Download a copy" to get the file back on your offline storage.
How to Recover Missing Files After macOS Tahoe Update? [7 Advanced Solutions]
Sometimes the basic methods fail to help you recover the missing files. In this case, you need some advanced solutions, and here we have the 7 options you can try:
1. Recover Missing Files with 4DDiG Data Recovery Software
When your files went missing after updating to the latest macOS Tahoe version, the safest and most reliable method is to get back all your files by using 4DDiG Mac Data Recovery.
Unlike the basic troubleshooting methods, it’s specifically built for scenarios like recovering missing or deleted files due to accidentally formatting, lost partitions, corrupted systems...
Key Features of 4DDiG:
- Recovers over 1000 file types (documents, photos, videos, emails).
- Works on internal and external drives.
- Supports recovery after macOS updates, system crashes, or formatting.
- Simple, beginner-friendly interface.
Secure Download
Secure Download
Steps to recover missing files using 4DDiG:
-
Download and install the 4DDiG Mac Data Recovery Software and then launch it. Select the location where you want to recover the files missing after upgrading to macOS Tahoe from and click “Scan All File Types”.

-
Now, 4DDiG will automatically detect all the available files, and you can recover them by manually selecting the ones you need. Search for files based on their "Name”, "File Type", and other filters available at the top.

-
After finding a file, you can click it to get a quick preview and click the "Recover" button to recover the file.

-
Finally, select the location where you want to save the file and click the "Save Now" button. Now your file will be saved to your offline storage.

2. Retrieve Lost Files Using Time Machine
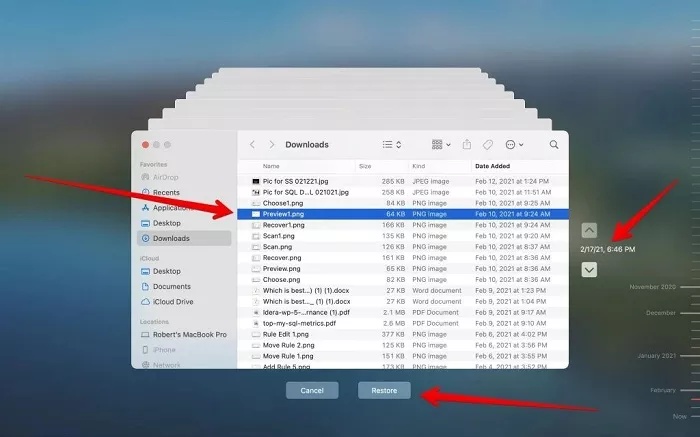
Some users set up Time Machine to create data backups on their Mac. If you are one of them, then use the steps below to restore lost files with Time Machine.
-
Connect the hard drive with your Time Machine backup to your Mac. If you have saved the backup on a local drive, then you can simply open the "Time Machine" app on your Mac.

-
Search for the files disappeared after macOS Tahoe update in the Time Machine backup. When you find a file you need, click to select it and click "Restore," and it will be back in your storage.
3. Restore Disappeared Files with Recovery Options
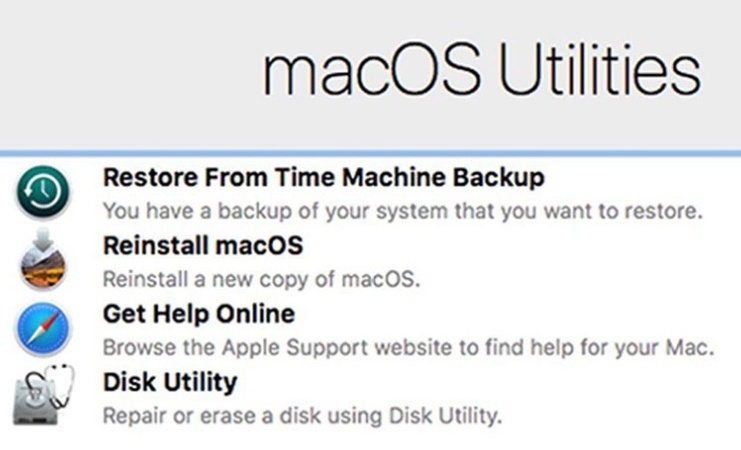
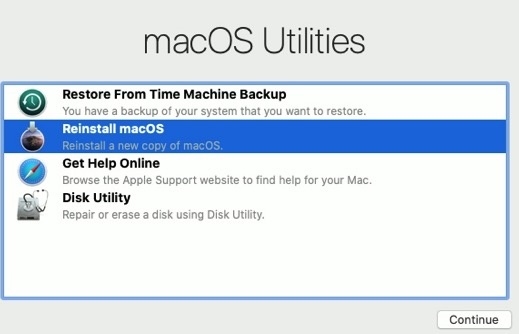
The built-in recovery tool from macOS Utilities can be useful to get your files back. This involves booting into the recovery mode and following the steps below:
-
Restart your Mac, and when it starts booting, hold the "CMD" and "R" buttons together. It will take you to the macOS Utilities menu.

-
Now, select the “Restore from Time Machine Backup” option. This will perform a recovery of the latest available data, and if you lost files after Mac update due to system errors, those files will be recovered.
4. Use Terminal Commands to Recover Missing Files
For advanced users, Terminal commands can locate hidden files. This method involves using commands, so you need to be careful to type in the commands perfectly:
-
Open the Terminal app on your Mac and execute the "cd .Trash” command.
-
Now, run the command “mv file_name../” and you need to replace “file_name” with the real name of the file you are missing.

-
The final step to how to recover missing files after macOS Tahoe update is opening “Finder” and searching for the file name in the search bar.
5. Reinstall macOS
If your files are missing due to system errors and nothing else is working, then you may try to reinstall your macOS as it may resolve those system glitches.
-
This method on how to get back missing files after macOS Tahoe update involves going to macOS Utilities by restarting the Mac and holding "CMD + R”.

-
Now, select the “Reinstall macOS" option and click "Continue," then follow the on-screen steps to complete the OS installation.
6. Downgrade to the Previous Version
Sometimes there are issues with the latest updates. To get your files back, you may downgrade the macOS with your Time Machine backup.
-
Restart your Mac and hold the "CMD + R" buttons to go into macOS Utilities.
-
Now, click “Restore from Time Machine Backup” and click “Continue” then “Continue” again.
-
Choose the Time Machine backup that was made on an older macOS version and proceed with the installation.
This method of downgrading your macOS version ensures that you make safe downgrades with only the supported OS versions for your machine.
7. Get Help from Apple Support
If all else fails, contact Apple Support. They may assist with advanced diagnostics and recovery options. This will eventually help in recovering your missing files.
How to Prevent Missing Files After Upgrading to macOS Tahoe?
Before the upgrade, it's suggested to back up your Mac to ensure the safety of all data. Besides, the easiest to keep your files safe between updates is by taking the right precautionary measures, as listed below:
- Use 4DDiG Data Recovery or Time Machine before updates.
- Ensure your files are fully synced before upgrading.
- Keep your Mac plugged in and connected to a stable internet during updates.
- Verify and repair disks to avoid corruption.
- Install Apple’s minor updates that fix bugs from major releases.
Conclusion
File loss after macOS updates can be stressful, but recovery is possible. We have discussed some easy and complex ways of how to recover missing files after macOS Tahoe update.
The Tenorshare 4DDiG for Mac is the quickest, most reliable, and convenient among them. When your files disappeared after macOS Tahoe update, you will be able to recover them within a few clicks. You can be sure that your data is safe before the next update with the help of 4DDiG.
Secure Download
Secure Download







 ChatGPT
 Perplexity
 Google AI Mode
 Grok
Grok


