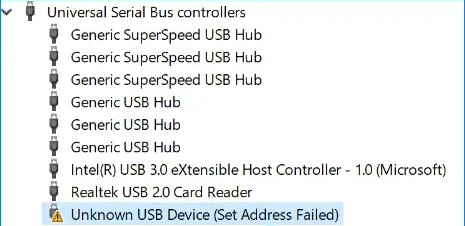
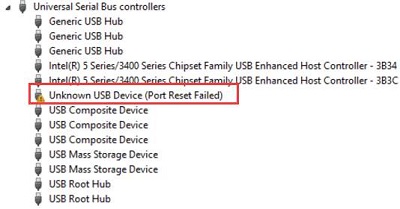
How to Create a Bootable USB on mac

5 mins read

Updated on 2024-04-30 01:41:54 to Mac Tips

Whether you’re running a PC or Mac, your device is always prone to bootable issues and you might find your computer ends up not booting up some day. For Mac, just like any other operating system, you can create bootable USB mac for an easy OS installation.

If you’re willing to make a bootable USB mac, then this article is just for you! In this article, we’ll walk you through the entire process of creating a bootable USB mac.

create bootable usb mac

Part 1: Why Do You Need to Create a Bootable USB on mac?

There are several reasons why one would need to create a bootable USB drive mac. We are listing some of the most common reasons to help you understand the importance of having a mac OS bootable USb software ready at all times.

  • Installation or Reinstallation: By the way, Macs are known for their stability and smooth operation, but there are times when you need to quickly set up your Mac without waiting on Wi-Fi downloads. Or you might be facing some unknown software related errors and malfunctions on your mac, this is where you would probably need a bootable USB mac.
  • Troubleshooting a Malfunctioned Mac: If your Mac is malfunctioned or isn’t responding properly, you should troubleshoot the unknown problems with a quick and easy Mac bootable installer.
  • Install the Latest version of macOS: If your mac didn’t get any notification for the newly launched updates for some reason, you can easily install the latest version of macOS through a bootable USB flash drive.

Part 2: How to Create a Bootable USB on mac

Mac acting up? Don't panic! Sometimes, a simple solution like a bootable USB can save the day. Let’s walk through the five ways to create this handy rescue tool and keep your Mac running smoothly.

But before we get into the intricate steps, you must know that your data will definitely get lost when you install a fresh macOS on your Mac. And if you have no backups, you might think you’re doomed, but stay frosty! We’ve got your back already.

Bonus Tip: How to Recover Data from Unbootable Mac

Tenorshare 4DDiG Mac Data Recovery is surely capable of restoring your lost data on Mac. Its user-friendly interface lets you interact with the tool in the most smooth way. Whether it’s your photos, videos, audio files, docs, or whatever, Tenorshare 4DDiG Mac Data Recovery will recover it for you!

If your Mac is stuck and there’s no other option except installing a fresh macOS, then your data is going to get lost, and you will be in need of powerful data recovery software to recover your lost data from a stuck / frozen Mac. 4DDiG Mac Data Recovery is exactly what you need in such scenarios.

FREE DOWNLOAD

Secure Download

FREE DOWNLOAD

Secure Download

Here’s how to use it.

  • Install 4DDiG-Mac and launch it. Now, select a location from which you want to recover Mac data. Hover your cursor over that location, you’ll see Scan option, click Scan to initiate the recovery process.

    select location
  • Wait until it scans all the lost files. Once it’s done, you can preview the files that you want to recover. You can also preview them by their type.

    preview
  • Now you can click on the Recover button to recover your lost files. Choose a destination where you want to save your recovered files. Try not to choose the partition/drive where you lost them earlier, it may result in permanent data loss.

    save recovered files

Way 2: Create Bootable USB Mac Installer via Terminal

In order to create bootable USB mac, you need to use Terminal and follow the steps mentioned below. There are a few things that you need to keep in mind before you start with the process of creating a bootable USB mac.

  • Make sure the external USB flash drive has no data on it, because once you make it bootable, all the data will be erased.
  • The following steps are only for the macOS Maverick and later versions.
  • Type the right command in Terminal, there must be no spelling mistakes.

Now, let’s get started with the steps.

  • Connect the USB flash drive to your Mac device.
  • From the Dock, open Finder. Once the Finder is opened, click on the Applications from the left side. Now, open Disk Utility. You can also access Disk Utility by pressing Command + Spacebar, the Spotlight search will open up. Type in Disk Utility and open the program.

    open finder
  • Now select the USB flash drive from the Sidebar. Select Erase, now in the prompt window, click on the dropdown box against Format and select Mac OS Extended (Journaled) for the Scheme, select GUID Partition Map. Click Erase.

    click erase
  • Once the progress bar starts, wait until it finishes and make a bootable USB mac. Click Done.

    make a bootable usb mac
  • It is time to launch the Terminal from Utilities folder in Applications, (the same window from where you just accessed Disk Utility).

    launch the terminal
  • Now, from the following datasheet, copy the code that suits your mac system requirements. You have to make sure you’re copying the right code for your specific macOS version. Note that each command has the word “MyVolume” in it, you have to replace it with your drive’s name.

    • Different macOS versions
    • The createinstallmedia Commands
    • Big Sur
    • sudo /Applications/Install\ macOS\ Big\ Sur.app/Contents/Resources/createinstallmedia --volume /Volumes/MyVolume

    • Catalina
    • sudo /Applications/Install\ macOS\ Catalina.app/Contents/Resources/createinstallmedia --volume /Volumes/MyVolume

    • Mojave
    • sudo /Applications/Install\ macOS\ Mojave.app/Contents/Resources/createinstallmedia --volume /Volumes/MyVolume

    • High Sierra
    • sudo /Applications/Install\ macOS\ High\ Sierra.app/Contents/Resources/createinstallmedia --volume /Volumes/MyVolume

  • Once you have copied the right command, paste it in the Terminal and hit Return.
  • You’d have to provide the admin password to proceed.

    provide the admin password
  • A text will prompt “To continue we need to erase the volume at /Volume/Untitled”. Press Y and hit Return. You’ll see the progress in %, wait until it gets to 100%.

    hit return
  • Once Erasing is finished, Terminal will initiate copying macOS installer files on your USB flash drive. Once it’s finished, you’ll see a Copy Complete message.

Part 3: How to Get macOS Installer Files

Having macOS installer files is necessary to create an ISO to USB mac bootable flash drive. It’s very convenient with the following provided links for High Sierra, Big Sur, Mojave, and Catalina.

  • Click on the macOS version you’re currently running. It will redirect you to the respective webpage where you can proceed with downloading the macOS installer files. Here are the links for each macOS version: macOS Big Sur, macOS Catalina, macOS Mojave, macOS High Sierra bootable USB.
  • A prompt will appear asking you to Open App Store to download the installer files.

    open app store
  • Once you’re in the App Store, click on the Get button to install your desired macOS version. Wait until it gets downloaded. Do not proceed with the installation process if installer files open up after the download finishes.

Part 4: Use the Created Bootable USB Drive to Boot the Mac

To boot your Mac, you need to know what type of Mac you’re using. The method for M-chip Macs and Intel-based Macs are different.

For M1 Mac or Apple Silicon

  • Connect the bootable USB flash drive with the Mac. Turn on your Mac and keep pressing the power button until you see the Startup Options windows.
  • Select your bootable USB flash drive from the bootable volumes list and Continue.
  • Follow the on-screen instructions and you’re done.

For Intel-based Macs

  • Connect the bootable USB flash drive with the Mac.
  • Turn on the Mac and immediately press and hold the Option key “⌥”.
  • Keep holding until you see a list of bootable volumes on a dark screen.
  • Continue with the on-screen instructions.

Part 5: How to Create Mac Bootable USB from Windows

  • On your Windows computer, open Command Prompt. Run it as administrator.

    command prompt
  • Type in “diskpart”. Enter.
  • Now type “list disk”.
  • Type ‘select disk 1’. Now, instead of 1, you’ll write the Disk number your Command Prompt is showing you.

    type select disk 1
  • Type ‘clean’. Then type ‘convert GPT’.
  • Type ‘create partition primary’.

    create partition primary
  • Download TransMac from the internet. Also, download macOS DMG files by searching ‘download os x dmg’ on the browser and visit a safe website.
  • Run TransMac as administrator. Run the program.
  • Right click your USB flash drive from the sidebar, click ‘Restore with disk image’.

    restore with disk image
  • Click Yes. Browse the macOS DMG files and open the Mac Disk Image File.

    mac disk image file
  • Select OK, and click Yes. It will format your USB drive.
  • Once formatting is done, TransMac will restore the disk image on your USB drive and you’ll have your very own bootable USB flash drive for Mac.

Part 6: FAQ

Q 1: Can Rufus create Mac bootable USB?

No, Rufus does not support Mac and it isn’t developed for macOS. So if you’re looking for Rufus for Mac or your recent searches include words like Rufus Mac download, you’re searching for the wrong tool for the wrong job. Rufus macOS isn’t a thing, you use TransMac to make your USB flash drive bootable.

Q 2: How to create macOS bootable USB without Mac?

You can use TransMac, install it on a Windows computer and create bootable USB Mac. Or you can also use any other third party software like Etcher, UNetbootin.

Q 3: How to create bootable USB Windows 10 on Mac without BootCamp?

There are three different ways to create bootable USB Windows 10 on Mac without BootCamp. First, you can use any of the software available online; PassFab, UUByte ISO Editor, or UNetbootin. Secondly, you can use Terminal in Mac and use the required commands (mentioned above in the article) to boot the USB. Thirdly, you can use Disk Utility to burn an ISO image file on a USB flash drive.

Concluding Thoughts

Creating a bootable USB Mac isn’t that difficult if you follow all the steps right. We learnt that in order to create bootable USB Mac, you need to use Terminal with the right codes for your specific macOS version. But the biggest problem most of the users complain about is that they are left with lost data on their computer after installing a fresh macOS through bootable USB mac. If you’re the one worried about your data loss on Mac, Tenorshare 4DDiG Mac Data Recovery has got your back - don’t worry. It’s so simple and convenient to use 4DDiG Mac Data Recovery that it only takes 3-clicks to restore your data. And guess what? You don’t even have to disable SIP! Check out more about 4DDiG Mac Data Recovery to make full use of this power-house. It really is a power-house when it comes to Mac data recovery.

William Bollson (senior editor)

William Bollson, the editor-in-chief of 4DDiG, devotes to providing the best solutions for Windows and Mac related issues, including data recovery, repair, error fixes.

(Click to rate this post)

You rated 4.5 ( participated)