How to Speed Up macOS Sequoia/Sonoma? 6 Quick Fixes!
How to speed up macOS Sequoia/Sonoma? Discover 6 easy and quick ways to speed up macOS Sequoia/Sonoma and recover your lost data with 4DDiG Mac Data Recovery.
The latest version of Apple's powerful operating system is macOS Sequoia/Sonoma, which promises a smooth and efficient user experience. However, even the most powerful software can occasionally experience performance issues, irritating users with sluggishness and delays. You don't need to worry if you have macOS Sequoia/Sonoma issues related to performance and speed.
This article will go through six easy and secure ways to speed up your macOS Sequoia/Sonoma, allowing you to restore the lightning-fast performance you've come to expect from an Apple computer. Whether you're an experienced Mac user or freshly acquired to macOS, these simple solutions will fix macOS Sequoia/Sonoma bugs quickly. So, let's get started with these proven methods for optimizing your macOS Sequoia/Sonoma experience and enjoying a faster, more efficient computer.

Part 1: Why is Mac Running Slow After macOS Sequoia/Sonoma Update?
After excitingly updating your Mac to the latest macOS Sequoia/Sonoma, you may have encountered macOS Sonoma problems that reduce your computer's speed. While inconvenient, this slowness is typical following a significant operating system update. Follow the several causes that could be responsible for your Mac's poor performance:
- Resource Demands: Newer macOS versions often introduce enhanced features and graphical improvements, which can place increased demands on your computer's hardware. You may notice slower performance if your Mac's hardware isn't up to par.
- Incompatible Software: Sometimes, older software applications may need to be compatible with the recent macOS version. This can lead to macOS Sequoia/Sonoma bugs such as compatibility issues, crashes, and reduced performance.
- Background Processes: MacOS runs various background processes, some of which may intensify after an update. These processes can consume system resources and slow down your Mac.
- Startup Items: Applications set to launch at startup can significantly impact boot times and overall system speed.
- Storage Capacity: Insufficient free disk space can hinder your Mac's performance. If your storage is nearly complete, it can slow down the system.
Part 2: How to Speed Up macOS Sequoia/Sonoma?
Now that we've explored why Mac is running slow after macOS Sonoma update, let's learn six easy and safe fixes to help restore your computer's speed and efficiency:
Fix 1: Update Applications
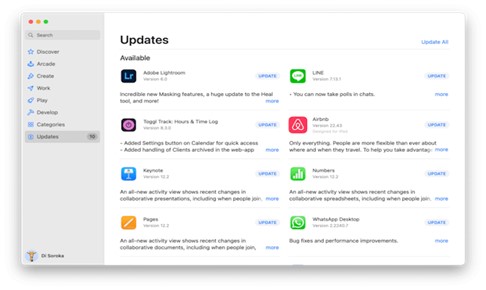
Outdated applications can be a common reason for macOS Sequoia/Sonoma issues that can slow down Mac. Developers frequently release updates to improve compatibility with the latest macOS versions and enhance overall performance. If you haven't updated to the most recent version of the apps you use, your Mac may run slower. You can update the app via the App Store Updates area. Open the app, click the name menu, and select Check for Updates.
Fix 2: Stop the Resource-Hungry Process
One of the reasons you have encountered macOS Sequoia/Sonoma bugs that can slow down your system after an update. This is due to resource-intensive processes running in the background. These processes can consume CPU and memory, causing overall system sluggishness. Here's how to identify and stop them:
- You must launch "Activity Monitor" by searching for it in Spotlight.
- In the Activity Monitor window, you must click the "CPU" tab to view the list of running processes.
-
After that, identify any processes that use a significant amount of CPU, especially those you don't recognize or don't need.

- Select a resource-hungry process and click the "X" button in the window's upper-left corner to quit it.
Fix 3: Free Up Mac Space
When your storage is nearly full, it can lead to macOS Sequoia/Sonoma problems, including reduced system responsiveness and slower overall operation. One effective way to free up space on your Mac is by removing duplicate files, which can accumulate over time. The recommended tool is 4DDiG Duplicate File Deleter, which has a user-friendly interface designed explicitly for Mac applications to identify and delete duplicate files. This tool offers efficient duplicate file detection, safe deletion, customizable scanning, preview files feature, easy cleanup, and more.
Fix 4: Close Browser Tabs and Extensions
Web browsers are among the most regularly used apps on Macs, and they can have a significant influence on computer performance, particularly if you have multiple tabs open or resource-intensive extensions loaded.
Firstly, you should close unused tabs because each open browser tab consumes memory (RAM) and processing power.
Secondly, you must review your installed extensions and disable or remove those you don't need. For Google, you should click the three dots on the top right>Extensions>Manage Extensions>Remove unused extensions. These actions may significantly fix macOS Sequoia/Sonoma bugs quickly. If the issue persists, go for the following method.
Fix 5: Disable Startup Items via System Settings
Startup items are applications and processes that launch automatically when you log in to your Mac. While some of these items are essential, others may not be necessary and can contribute to a slow startup and reduced system performance. You need to disable unnecessary startup items that can help speed up your Mac. Follow the below guide that helps to disable startup items via system settings:
- Firstly, you should click on the Apple Menu to select System Settings.
-
Now, go for the General and Login Items, where you can disable unnecessary startup items easily.

Fix 6: Update macOS Sonoma Beta to macOS Sequoia/Sonoma
Suppose you are experiencing macOS Sequoia/Sonoma issues on a Mac that runs the beta version of macOS Sonoma. In that case, it's essential to understand that beta software can have bugs and compatibility issues that affect performance. You must leave the beta program and install the macOS Sequoia to resolve these issues. Then, you will receive regular and stable updates. After successfully updating to macOS Sequoia/Sonoma, you can use your backup to restore your data, apps, and settings.
Bonus Tip: What to Do If You Lost Data after macOS Sequoia/Sonoma Update?
Losing important data after macOS Sequoia/Sonoma update can be a frustrating and stressful experience. Whether due to an update-related issue or accidental deletion, it's crucial to have a reliable data recovery solution. One tool that can help you recover lost data on your Mac is 4DDiG Mac Data Recovery
Key Features of 4DDiG Mac Data Recovery:
- Comprehensive Data Recovery: 4DDiG Mac Data Recovery is a versatile tool that can recover lost data, including documents, photos, videos, music, emails, etc. Whether your data was lost due to deletion, formatting, or other reasons, this software can help retrieve it.
- User-Friendly Interface: The software has an innovative and user-friendly interface for beginners and professional users. You don't need to be tech-savvy to use it effectively.
- Multiple Recovery Modes: This software has multiple recovery modes, such as recovering accidentally deleted files, raw files recovery, and partition files recovery.
- Support for Various Storage Devices: You can recover data from various storage devices, including external drives, USB flash drives, Mac hard drives, memory cards, and more.
- High Success Rate: This tool has a high data recovery success rate and employs advanced scanning algorithms to effectively locate and recover lost files.
- Safe and Secure: 4DDiG Mac Data Recovery ensures the safety of your data throughout the recovery process. It won't overwrite or damage your existing data.
- Compatibility: It's compatible with macOS Sequoia/Sonoma and previous macOS versions, ensuring you can use it on your up-to-date Mac system.
Follow the below steps that help how to use 4DDiG Mac Data Recovery to restore data from hard drives:
-
Select a Location:
After installation, launch 4DDiG-Mac and choose a destination, such as your local disks, to begin Mac data recovery. Move your mouse to the targeted spot, and a Scan icon will appear in the lower right corner. Then, click Scan to begin searching for all missing files.FREE DOWNLOADSecure Download
FREE DOWNLOADSecure Download

-
Scan and Preview:
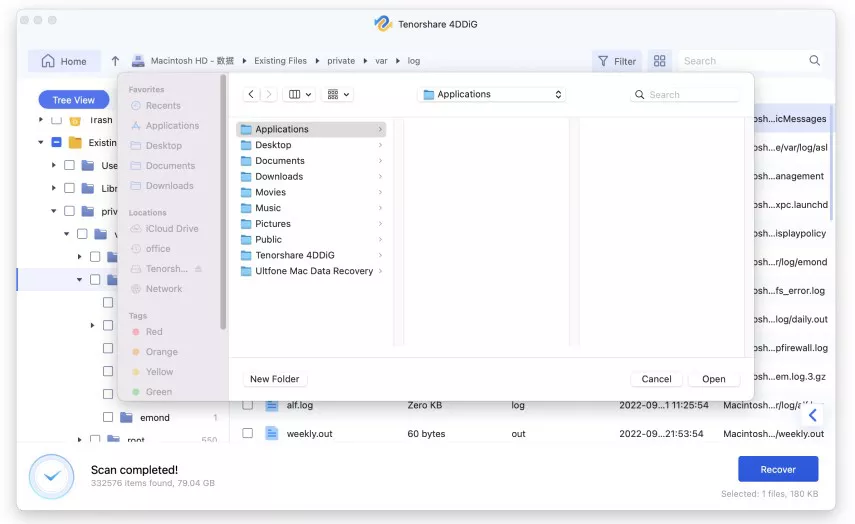
Scanning all deleted files takes some time. Once the scanning result has been created, you can inspect more details by clicking on various file types.
-
Recover Mac Files:
Click "Recover" button and select a location to save files. It is not suggested to save the recovered files to the partition where they were lost. This could result in permanent data loss.
Final Thoughts
Ultimately, optimizing the performance of your Mac running macOS Sequoia/Sonoma can be simple. Indeed, the six straightforward solutions above can help you resolve frequent macOS Sequoia/Sonoma issues. These methods provide an in-depth guide to reviving your Mac's speed and responsiveness, whether dealing with outdated software, resource-hungry processes, limited storage space, browser clutter, startup items, or transferring from a beta version.
Moreover, with the help of 4DDiG Data Recovery, you can quickly recover lost data after macOS Sequoia/Sonoma update. As you implement these proven strategies, remember that regular maintenance and proactive management are crucial to maintaining peak performance in the ever-evolving world of macOS. With these easy and safe steps, your Mac can once again provide the efficient and seamless experience you've come to expect from Apple's cutting-edge technology.


 ChatGPT
 Perplexity
 Google AI Mode
 Grok
Grok

