How to Clean Install macOS Tahoe with & Without a USB?
When your Mac starts slowing down or you want a fresh start without leftover files, knowing how to clean install macOS Tahoe is often the best solution. A clean install restores the disk and installs a new copy of macOS, forcing an improvement in performance, a reduction in errors, and compatibility with the latest features.
In this guide, we will discuss how to prepare, install via USB, and even perform a clean install without USB.

What to Do Before Clean Installing macOS Tahoe?
Before doing a clean install macOS Tahoe, there are several important steps to follow to ensure that you are prepared for the install.
-
Back Up Your Data: Back up valuable documents, pictures, and system settings using Time Machine, iCloud, or third-party applications. In case of any malfunction, you can recover your files.
-
Check Device Compatibility: macOS Tahoe does not work on all Macs. Go to the official lists of supported models on Apple to ensure that your device is compatible with this version.
-
Ensure Sufficient Power: During installation, you should have your Mac plugged in to prevent any interruption. In the case of a laptop such as MacBook Air or Pro, the installation might get corrupted by a sudden shutdown.
-
Manage a Stable Internet Connection: The installation packages have a size of several gigabytes. A good internet connection ensures that downloading is successful without corruption.
-
Make a Bootable USB Drive: If you want to install macOS using a USB, it is important to have at least 16 GB of storage available on it and make it bootable for macOS.
These steps will reduce the risks and get your clean install on Mac done easily.
How to Clean Install macOS Tahoe from a USB?
For many users, creating a bootable USB is the most reliable way to clean install macOS. It enables you to wipe the disk and reinstall the system without any relation to the existing system. This can be done in three major ways:
1. Clean Install macOS with a Bootable USB
This is the traditional method Apple recommends. Though the process requires using the terminal command, it’s still worth trying.
-
Insert a USB drive with at least 16 GB capacity. Open “Disk Utility” and format the USB as Mac OS Extended (Journaled).

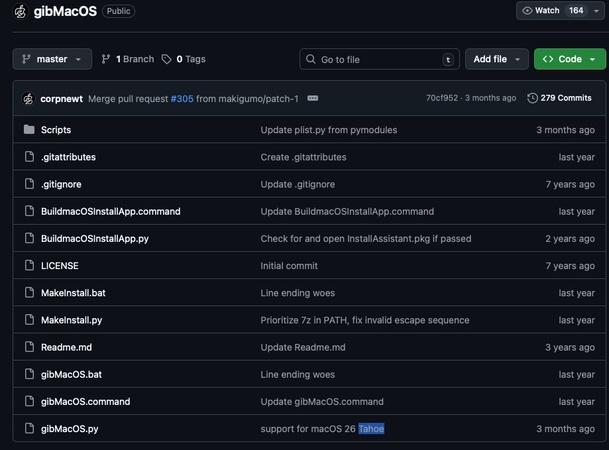
Download the macOS Tahoe installer from a reliable source.
-
Open Terminal and run the command provided by Apple one by one:
- hdiutil create -o /tmp/tahoe -size 20000m -volname TahoeISO -layout SPUD -fs HFS+J
- hdiutil attach /tmp/tahoe.dmg -mountpoint /Volumes/TahoeISO
- sudo /Applications/Install\ macOS\ Tahoe.app/Contents/Resources/createinstallmedia --volume /Volumes/TahoeISO
- hdiutil detach /Volumes/Install\ macOS\ Tahoe
- hdiutil convert /tmp/tahoe.dmg -format UDTO -o ~/Desktop/Tahoe
- mv ~/Desktop/Tahoe.cdr ~/Desktop/Tahoe.iso
-
Restart your Mac and hold the “Power button” until you get to startup options.
-
From macOS Utilities, choose “Disk Utility” and erase your startup disk.
-
Return to the installer window and follow the on-screen instructions to clean install macOS Tahoe.

This method requires some Terminal use but gives you full control over the installation.
2. Fresh Install macOS with 4DDiG Bootable Installer
If you are not comfortable with Terminal commands because it’s too complex or time-consuming, the 4DDiG macOS Installer is an easier and safer alternative to get a clean installation. It makes the process of making a bootable installer very easy and lets you reinstall or clean install macOS without needing to type any commands.
Key Features of 4DDiG macOS Installer:
- Instant macOS Setup:One click to create a bootable USB for macOS Tahoe.
- Universal Mac Support:Works with both Intel and M-series Macs.
- Repair Startup Issues:Can repair failed installations and startup errors.
- Beginner-Friendly:No need for command line knowledge.
Secure Download
Secure Download
Steps to Make a Bootable Installer with 4DDiG:
-
Download and install the 4DDiG software on your Mac and launch it. Now, select the "macOS Installer" feature from the left menu and click "Start Creation".

-
Use the dropdown list to choose the desired “macOS Version” and click “Selection Complete” once you have selected the right version.

-
Get a USB drive with at least 19GB of free space on it and connect it to your Mac. Once the drive appears in 4DDiG, select it and click the "Create Now" button to make it bootable.

-
4DDiG will start creating your bootable USB, and in no time, you will see the success screen. Click the "Complete" button to finish the process.

-
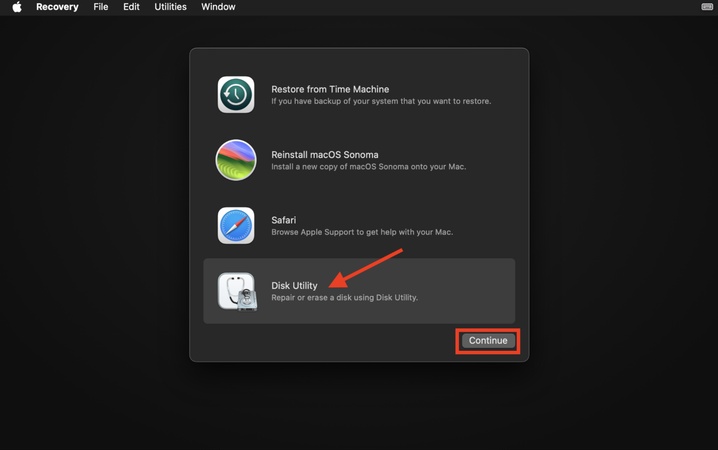
Remove your USB from the Mac and shut it down. Hold the "Power Button" to get to "Startup Options" and click "Options. Choose "Disk Utility" and click "Continue”.

-
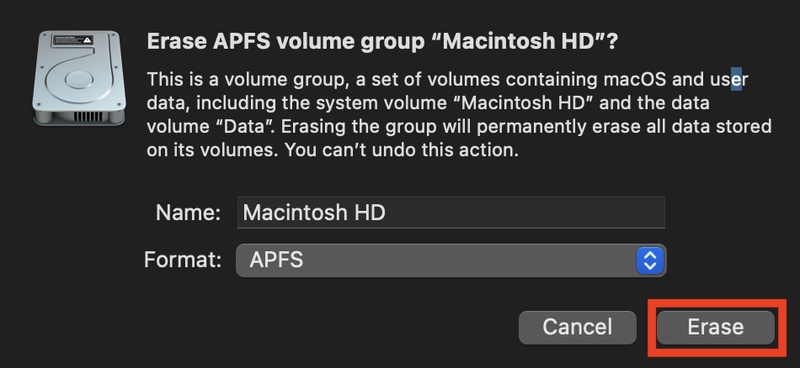
Now, choose your internal drive and click "Erase", then choose "APFS" format and click "Erase" again for a clean install macOS Tahoe.

-
Shut down the Mac and plug in your USB. Hold the power button to see "Startup Options" and choose your USB, then click Continue. The macOS installer will begin now, and you can follow the on-screen steps to finish the process.
3. Clean Install macOS via Settings
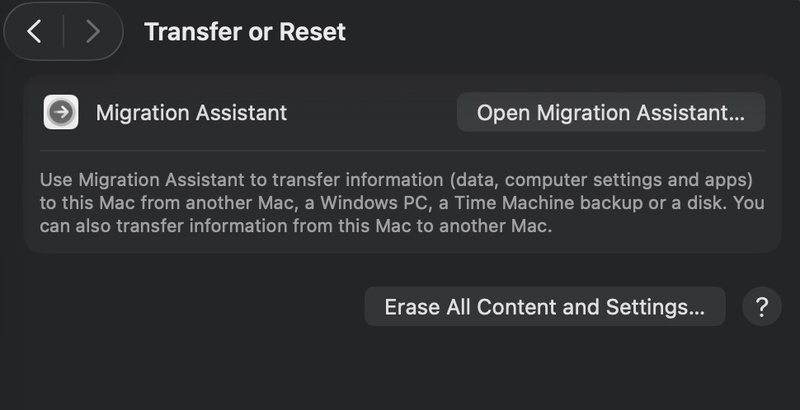
On macOS Monterey and later versions, Apple added the “Erase All Content and Settings” option, as on iOS. This will enable you to clean install and not boot a USB.
-
Open Mac Settings and go to “General". Now, locate the “Transfer or Reset” option and click the “Erase All Content and Settings” option.

-
Authenticate with your credentials when asked and let the Mac Reset.
-
After the reset is complete, a clean install macOS will be performed on your Mac. You will be welcomed with the activation screen after fresh installing macOS.
How to Clean Install macOS Tahoe Without a USB?
Not everyone has an extra USB drive, and there are occasions when you simply need a normal reformat. Luckily, you may do a clean install macOS Tahoe without a USB using Recovery Mode.
-
Reboot your Mac by holding the "Power Button" until you see the startup options on Apple Silicon Macs and click “Options”. On Intel-based Macs, you can hold the "CMR + R" buttons until you see the Apple logo.
-
Select "Disk Utility", then click "Continue" and select the internal disk of your Mac, then click "Erase" and choose APFS format to erase your disk for a clean install macOS Tahoe without a USB.

-
Now, close Disk Utility and select "Reinstall macOS," then click "Continue" to begin. Follow the on-screen instructions for installing macOS Tahoe, and you will be done with how to fresh install Mac after installation is complete.
Comparison of Fresh Installing macOS Tahoe with or Without USB
Different methods suit different users. Here is a side-by-side look at the options:
- Method
- Difficulty
- Internet Needed
- Speed
- Best For
- Bootable USB (Manual)
- Moderate
- Only for initial download
- Fast
- Users who are comfortable with Terminal
- Bootable USB (4DDiG)
- Easy
- Only for initial download
- Fast
- Beginners who want a guided setup
- Erase from Settings
- Very Easy
- Yes
- Moderate
- Users on supported Macs already running macOS Monterey or above
- Recovery Mode
- Easy
- Required
- Slower
- Users without a USB drive
This table helps you choose whether a USB or USB-free method is better for your situation.
Why Do I Need to Clean Install macOS?
Some users wonder, “Is it better to do a clean install macOS?” The answer is yes in most cases because of the benefits you get. While upgrades keep your data, they may also carry over problems.
Here are the top benefits you can get from doing a clean install:
- A clean install removes junk files, caches, and hidden data that drain the performance of your Mac.
- It wipes off all applications, settings, and garbage to leave you with a new system environment.
- The frequent crashes, glitches, or malware can be resolved by reinstalling macOS.
- Some apps need the new macOS capabilities. Fresh system guarantees legacy-bug-free compatibility.
- New systems eliminate previous vulnerabilities or improperly configured settings.
A clean install macOS Tahoe is therefore not always essential; however, this is the best option when your computer is problematic or when you require the highest possible performance.
Conclusion
There are various ways to clean install macOS Tahoe. Any of the above bootable USBs, the 4DDiG macOS installer, or Recovery Mode is capable of getting your Mac booted and running on a clean hard drive. Preparing in advance with backups and the right actions helps to avoid data loss.
In general, Tenorshare 4DDiG is the easiest and safest way to clean install without using the complicated commands. Select the way that fits your needs and have a faster and cleaner Mac experience.
Secure Download
Secure Download


 ChatGPT
 Perplexity
 Google AI Mode
 Grok
Grok


