How to Recover Deleted iMessages on Mac
Mistakenly deleted or lost your precious iMessages on your Mac? No worries! Download Tenorshare 4DDiG and recover your deleted iMessages on Mac even without backup.
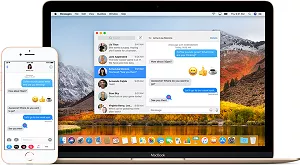
Macs are usually very efficient computers but sometimes, for some ungodly reasons, accidents happen. Like iMessages getting deleted, for example. Apple introduced iMessages as a free instant messaging service. iMessage's primary function is to send text messages. On top of that, you can use iMessages to send photos, videos, and contacts for free to other Apple users anytime, anywhere in the world. Sometimes, while using iMessages, you might want to get rid of the older messages or free up some space. In doing so, you can accidentally delete something significant to you.
We can guess that you are here because you intentionally or unintentionally deleted iMessages, and now you are wondering how to recover deleted iMessages on Mac? The good news is that there are some ways you can restore deleted iMessages.

Part 1: Where are iMessages Stored on Mac?
To restore deleted iMessages, you first need to know where iMessages stored on Mac. By 2016, all iMessages on macOS Sierra and earlier were, by default, stored on the hard drive. It was adjusted to fit your preferences because of concerns regarding space usage. However, if you are using macOS High Sierra/Mojave/Catalina, you can decide whether you want to save iMessages on iCloud or the hard drive. If the operating system is released after Sierra OS, then you need to see if iMessages are stored on the hard drive. Your best bet is to go to the Messages folder to recover your chat history and restore deleted iMessages.
- iMessage app allows you to choose where to store iMessages on Mac. Go to the iMessage app, and then go to Preferences > General.
- Confirm that you have checked the option, "Save history when conversations are closed." If checked, your iMessages will be in ~/Library/Messages by default.
-
To directly open the messages folder, open the Finder box and add the ~/Library/Messages path. Now press the Go button..

-
This folder has three subfolders: Attachment, Archive, CloudKitMetaData, and chats history file in chat.db format.
The attachment folder contains the photos, audios, and video files you received in your iMessages chat.
The archive folder is the mirror of your data.

Part 2: Restore iMessages Using Time Machine
Things You Should Know before Starting
Even though you can restore both regular SMS messgaes, iMessage texts, and attachments from Messgaes app, but it do have some limitations while you retrieving data, and you can learn the following limitions before you start to recover data:
- Only Mac with macOS Ventura or later version allowers you to recover deleted messages.
- Deleted messages can't be restore after deleted 30 days.
- Only the whole messgae thread can be recover, while data recovery from conversation's individual messages is impossible.
One of the best ways to get back deleted iMessages is by using the Time Machine tool. Your Mac computer has an in-build automatic backup system that allows the recovery of various types of files. You cannot pick or choose which messages to recover, as it restores the entire database.
For newly deleted messages, it is not much of a difficulty. But if you are looking for how to undelete iMessages on Mac from a long time ago, you will recover many unwanted messages along with the ones you need. You can delete these unnecessary messages later.
Here is a guide on how to recover deleted iMessages on Mac using the Time Machine tool.
- To run this process smoothly, Sign out of all your iMessages accounts and shut down the iMessages application.
- On your Mac device, open the Time Machine tool. Open the finder box, hold down and press the Option key, and select 'Go'> 'Library'.
- Find a file (which is a copy of the deleted iMessages) with chat.db extension, in the library section. It was created the day before the messages were deleted.
- To start the recovery of your iMessages, select the "Restore" option.
-
The Time Machine will reset your data to the previously saved version. Any newer messages that the Time Machine did not back up will be lost.

Part 3: Get Back Deleted iMessages on Mac Using iCloud
Another way to restore deleted iMessages is through iCloud. It is cloud-based storage provided by Apple appliances that back up your files. It saves storage memory on physical devices, and assessing lost data through cloud storage is effortless.
Follow these simple steps to restore your backed-up iMessages from iCloud:
- Sign out of all the iMessages apps and accounts for the safe recovery of your data. Close the iMessages application. This will allow the iCloud to overwrite the messages in your app.
- Select "Go" in the finder app to access your iCloud library.
- In the iCloud backup, find a file named messages from the day before the files were deleted.
- Restore the backed-up iMessages from the message file.
Part 4: Recover Deleted iMessages on Mac from an iPhone or iPad
Generally, Apple users who have a Mac computer also possess other Apple devices such as iPhones or iPads. It can help with the data recovery because all these devices are interlinked because of the same Apple ID.
If your other device is on and connected to Wi-Fi, your iMessages will appear on other devices as well. Check your iPad or iPhone to see if the accidentally deleted messages are on these devices.
Part 5: Recover iMessages on Mac with 4DDiG Even without Backup
The options mentioned above work only when you have already backed up your iMessages. But what to do if you haven't backed up your data? Your best bet on how to recover deleted iMessages without backup is to use third-party software. There are some software in the market that will help you recover the iMessages that are not backed up.
One such professional and easy-to-use software is Tenorshare 4DDiG Mac Data Recovery. It can restore any files on your Mac hard drive or an external drive, including photos, audio, videos, documents, etc.
Can you undelete iMessages on Mac? Here is how you can do it using 4DDiG:
- The software offers full control over formatted, corrupted, or lost data on Mac, and supports 1000+ file types.
- It supports recently lost data on Mac's hard drive and other connected external storage devices.
- Whether you need to recover a Word document due to software failure or a virus attack, the 4DDiG Mac Data Recovery can retrieve documents.
- Aside from Word documents, the software also retrieves lost photos, videos, audios, emails, web files and others.
- The software is also 100% secure and supports several devices like cameras, iPod, Memory cards, SD/CF cards, music player and more.
- 4DDiG Mac data recovery software allow you recover data from Mac withou need to disable SIP.
Steps to Recover a Deleted iMessages with 4DDiG
Secure Download
Secure Download
Select the Location:
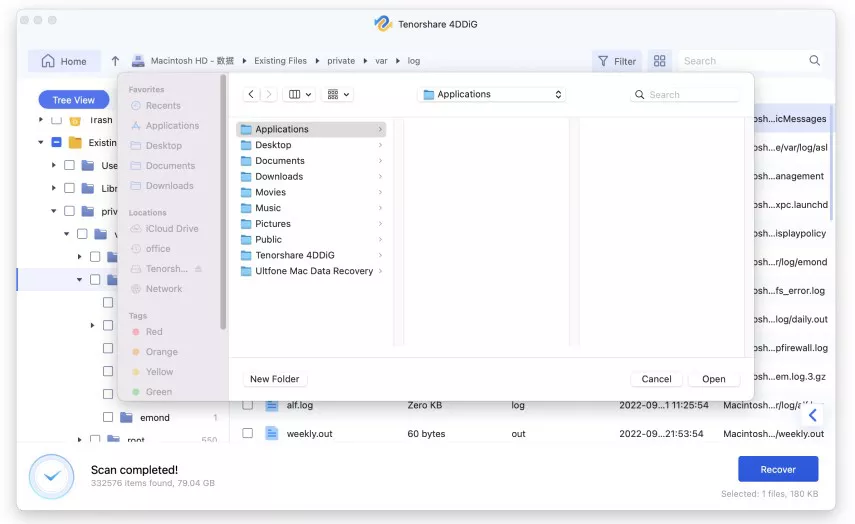
Install 4DDiG on your Mac and launch. Select the location where the files were lost, such as the hard drive. Select the scan button to find the files.

-
Scan and Preview:
4DDiG will look for the deleted files and might take some time. You can check the individual files after the scanning is complete.

-
Recover Mac Files:
Find a location to save the restored data by clicking the "Recover" button.

Do not save the files in the same partition from which they were lost. This can lead to permanent data loss.
Conclusion:
It's annoying to lose precious data. But that's a fact of life, and we must find ways to deal with it. There are various methods to recover deleted iMessages on Mac if they get deleted. Tenorshare helps you restore deleted iMessages successfully with a 100% rate. You don't need to be tech-savvy about it.


 ChatGPT
 Perplexity
 Google AI Mode
 Grok
Grok


