Recuva Deep Scan Stuck? How to Tell and Fix It Safely

5 mins read

Updated on 2026-08-17 18:59:58 to Windows Recovery Solutions

A Recuva deep scan stuck at 0%, 83%, 97%, or even 100% can make it difficult to know whether the recovery process is still running. Recuva community reports describe scans where the percentage stays unchanged while the remaining time continues increasing.

This guide explains how Deep Scan works, how to determine whether it is actually frozen, why this happens, and what you can safely do without risking further data loss.

recuva deep scan stuck

What Is Recuva Deep Scan?

Recuva Deep Scan is an advanced recovery mode that searches a storage device more thoroughly for traces of deleted files. Unlike a regular scan, it can search file structures and file signatures across the drive, making it useful when normal scanning cannot locate the required data. Recuva describes Deep Scan as a way to find difficult-to-locate deleted files.

Another feature that generally appears with Deep Scan is Quick Scan, also called the normal scan. Understanding Recuva deep scan vs normal scanning helps you decide whether a long-running scan is necessary.

Recuva Quick Scan vs. Deep Scan

Aspect Quick Scan Deep Scan
Best for Recently deleted files that still have usable file-system information. Hard-to-find deleted files, including files whose original names or paths are no longer available. Deep Scan can search unallocated areas by file signatures, including headers and footers.
Scan method Uses available file-system information to locate deleted files. Performs a much more extensive search across the storage device and uses file signatures to identify recoverable data.
Scan speed Usually faster. Much slower because it examines substantially more storage information.
When to use Start here when files were recently deleted and are not in the Recycle Bin. Use it when a normal scan cannot find the required files or when the drive has been formatted, or its file-system information is damaged.

A Deep Scan can find more than a normal scan because it does not depend entirely on the original file-system records. However, the results can include files without their original names or folder paths, and some recovered files may be incomplete.

How Long Does Recuva Deep Scan Take?

There is no reliable fixed duration for a Deep Scan. The time depends on the drive’s capacity, connection speed, number of files, file-system condition, and overall health of the storage device.

For example, community reports describe Deep Scans that remained at a particular percentage for hours or even days on large or problematic drives. Recuva’s own support documentation also notes that Deep Scan can take much longer than a normal scan, potentially hours.

Therefore, a high percentage alone does not prove that Recuva has frozen.

Is Recuva Deep Scan Really Stuck?

Before stopping the scan, check whether the program is still processing the drive. A percentage that does not change is not enough to determine that Recuva has stopped responding.

Check Recuva's CPU and Disk Activity

Open Task Manager with Ctrl + Shift + Esc and find Recuva under the Processes list. Check whether its CPU or disk activity changes over time.

If Recuva continues using the CPU or reading data from the target drive, the scan may still be active. A low percentage does not necessarily indicate a problem, especially when the drive contains difficult-to-read areas.

Check Whether the File Count Is Still Increasing

Look at the number of files Recuva has found. If that number continues to increase while the progress percentage remains unchanged, the scan is still discovering data.

This is particularly important near 83%, 97%, or 100%, where the remaining work may involve sections that take much longer to process.

Check the Drive Activity and Transfer Speed

Watch the target drive’s activity in Task Manager. If the disk shows periodic read activity, Recuva may still be working.

For an external drive, also check its activity indicator if it has one. A flashing activity light does not prove that recovery is progressing, but combined with changing file counts or disk activity, it is a useful sign.

Signs That Recuva May Be Frozen

The scan is more likely to be genuinely stuck when several indicators remain unchanged for an extended period:

  • CPU usage remains near zero.
  • Disk activity remains at zero.
  • The file count does not increase.
  • The progress percentage does not change.
  • The estimated remaining time keeps increasing without other activity.
  • Recuva stops responding to normal interface actions.
  • Windows reports that the application is not responding.

A single sign is not conclusive. Check several indicators before terminating the scan.

Why Does Recuva Deep Scan Get Stuck?

A long pause can result from the storage device or scanning conditions rather than Recuva itself. The most common causes include the following:

  • The drive is large or contains many files: Deep Scan needs to examine more sectors and file structures, so it may slow down significantly near the end.
  • The USB connection is slow or unstable: A damaged cable, loose connection, or unreliable USB port can reduce scan speed or cause repeated read attempts.
  • The drive has bad sectors or is failing: Damaged areas can make Recuva spend a long time trying to read the drive.
  • The file system is damaged or corrupted: When file system information is unreliable, Deep Scan may need to scan more raw storage data.
  • Recuva or Windows lacks sufficient resources: Limited memory, heavy background tasks, or system issues can affect long-running scans.

How to Fix Recuva Deep Scan Stuck?

Do not immediately force-close Recuva when the percentage stops moving. Start by determining whether the drive is still being read. If the scan has genuinely stopped, use the following methods in order.

Method 1. Wait If Recuva Is Still Reading the Drive

This method is suitable when CPU usage, disk activity, or the number of found files is still changing. A slow section of the drive can make the progress indicator appear unchanged even though recovery is continuing.

  • Open "Task Manager" with "Ctrl + Shift + Esc" and find "Recuva" under the Processes list.

    check recuva in task manager to decide
  • Check its CPU and disk usage and watch the number of files found in Recuva.

  • Wait if these values continue changing and avoid opening or modifying files on the target drive during the scan.

  • Allow the process to continue until activity stops completely or the scan finishes.

Do not use the target drive for other tasks while recovery is running because new writes can overwrite deleted data.

Method 2. Stop the Scan and Check the Files Already Found

If Recuva appears inactive for a long period, stopping the scan can be reasonable. Recuva community reports indicate that users can stop a scan and review files found up to that point rather than necessarily losing all scan results.

For additional discussion from the Recuva community, see the Recuva discussion about recovering files from a corrupted drive.

  • Return to the Recuva scan window and click "Cancel" or "Stop", depending on the interface shown.

    cancel the recuva scan directly
  • Wait for Recuva to finish stopping the scan and review the files already identified.

  • Filter the results by file type if necessary and select the files you need.

  • Click "Recover" and save the recovered files to a different healthy drive.

If the required files are not among the results, you can try another recovery method rather than repeatedly scanning the same problematic drive.

Method 3. Restart Recuva and Reconnect the Drive

A connection problem can make an external drive appear to stop responding. Restarting the recovery application and reconnecting the device can help rule out a temporary USB communication problem.

  • Stop the current Recuva scan, then close Recuva.

  • Safely eject the external drive if Windows allows it and disconnect the USB cable.

  • Wait several seconds, then connect the drive to another USB port and, if possible, try a different compatible USB cable.

    restart recuva
  • Open Recuva again and select the correct drive.

  • Run a normal scan first or use Deep Scan only if the required files are still missing.

Avoid repeatedly reconnecting a drive that makes clicking sounds, disconnects frequently, or reports an incorrect capacity. Those signs can indicate hardware failure.

Method 4. Update Recuva and Run It as Administrator

An outdated application or restricted access can interfere with scanning. Updating Recuva and launching it with administrator privileges helps rule out software-version and permission problems.

  • Open Recuva and go to "Options," then in the "General" tab click "Automatically check for updates to Recuva" and install any available updates.

    update recuva and reopen it
  • Close Recuva and open the "Start" menu to search for "Recuva".

  • Right-click the application and select "Run as administrator".

  • Click "Yes" if Windows displays a User Account Control prompt.

  • Select the drive containing the lost files and start a scan again.

You can also check the official Recuva download page for the current available version.

Method 5. Use a Recuva Alternative

If Recuva Deep Scan remains stuck or takes too long to complete, trying another data recovery tool can help you continue the recovery process. Here is a comparison of several popular recovery tools scanning the same drive on the same computer.

  • Feature
  • Recuva
  • 4DDiG Data Recovery
  • Disk Drill
  • Stellar Data Recovery
  • ⏱️ Scanning Time
  • > 1h
  • 27min
  • > 1h
  • 40min
  • 📁 Files Found
  • 104,587 files
  • 832,451 files
  • 2,468 files
  • 398,215 files
  • 📄 Supported File Types
  • Limited
  • 2000+ types
  • 400+ types
  • 300+ types
  • 🔌 Supported Devices
  • Hard drives, USB drives, memory cards
  • HDD, SSD, USB drives, SD cards, external devices
  • HDD, SSD, USB, memory cards
  • HDD, SSD, external drives
  • 🔍 Deep Scan
  • Available, but may slow down on large drives
  • Advanced deep scan
  • Available
  • Available
  • 👁 Preview Before Recovery
  • Limited
  • ⚡ Recover During Scan
  • Limited
  • 📈 Recovery Success Rate
  • Moderate
  • High
  • High
  • High
  • 💬 Technical Support
  • Community
  • 24/7 Online Support
  • Email
  • Email/Phone
  • 💻 Operating Systems
  • Windows
  • Windows, macOS
  • Windows, macOS
  • Windows, macOS

As shown above, different recovery tools may perform differently when scanning the same drive. If Recuva repeatedly stops during Deep Scan, 4DDiG Data Recovery can be a reliable alternative to try. It supports HDDs, SSDs, external drives, USB drives, and memory cards, helping recover deleted, formatted, or lost files with a deep scanning mode.

FREE DOWNLOAD

Secure Download

FREE DOWNLOAD

Secure Download

Unlike Recuva, 4DDiG allows you to preview found files before recovery and select the files you need. You can also pause the scan process and recover files to another location to avoid overwriting the lost data.

Follow steps to recover important files with 4DDiG advanced scan:

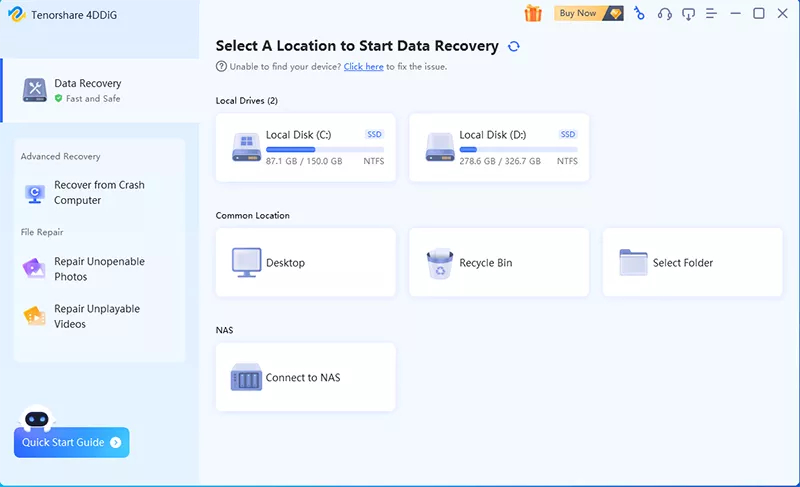
  • Install 4DDiG on a working Windows computer and connect to the drive containing the lost files. Launch thr program, then select the affected hard drive, partition, USB drive, or other detected storage device.

    launch 4ddig and enter interface
  • Start the scan automatically and allow 4DDiG to search for deleted and lost files. Use Type, Filter, or Search to narrow the results.

    click type to see all files 4ddig
  • Preview files when the scan is complete by double-clicking them and see the results. Select the files you want to restore and click "Recover".

    preview and recover the files
  • Choose a different healthy drive as the destination and confirm the recovery by clicking "Save Now".

    save the recovered files

The recovery destination should not be the same drive from which the files were lost. Saving recovered data there can overwrite other recoverable files.

Conclusion

A Recuva deep scan stuck at 83%, 97%, or another percentage does not automatically mean the program has frozen. Check CPU, disk activity, and the number of files found before stopping the scan. If activity continues, waiting may be safest.

If the process has genuinely stalled, restart the connection, update Recuva, or use an alternative such as 4DDiG, which is good at running a deep scan as well.

William Bollson (senior editor)

William Bollson, the editor-in-chief of 4DDiG, devotes to providing the best solutions for Windows and Mac related issues, including data recovery, repair, error fixes.

(Click to rate this post)

You rated 4.5 ( participated)