How to Enable Secure Boot: Guide for Windows 11 & 10
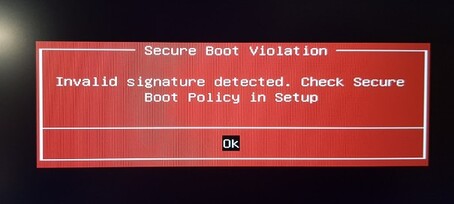
If you’re trying to install Windows 11 or access some security features and see the error “Secure Boot is not enabled," don’t worry, as you’re not alone. Secure Boot is one of the most misunderstood but essential PC features for protecting against unauthorized software during startup. This guide will walk you through everything you need to know, like checking whether Secure Boot is enabled and how to enable secure boot.
1.What Does Secure Boot Do?
Secure Boot is a UEFI security standard developed to protect your computer from malware that loads before Windows starts. When enabled, it ensures that only trusted, signed software can boot on your system, making it harder for malicious programs to take control.
It acts like a digital gatekeeper between your motherboard and operating system, verifying that everything loaded at startup is legitimate and secure. Secure Boot has become especially crucial since Windows 11 requires installation and system integrity.
2. How to Check If Secure Boot Is Enabled?
Before enabling Secure Boot, it’s important to check whether it’s already turned on. Depending on your setup, you can confirm this through System Information, PowerShell, or directly within the BIOS/UEFI interface.
Method 1: Use System Information
If you want to know how to check if secure boot is enabled, the easiest way to check is through Windows’ built-in System Information tool.
-
Press “Win + R”, type “msinfo32”, and press “Enter”.
-
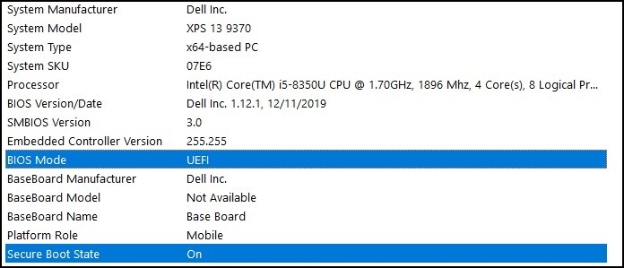
In the “System Summary”, look for “Secure Boot State".

If it shows On, Secure Boot is enabled.If your Secure Boot State reads “Off,” proceed to the next section to learn how to enable it safely.
Method 2: Use PowerShell
PowerShell offers a fast and precise way on how to see if secure boot is enabled. This method is especially useful for IT professionals or anyone managing multiple Windows devices.
-
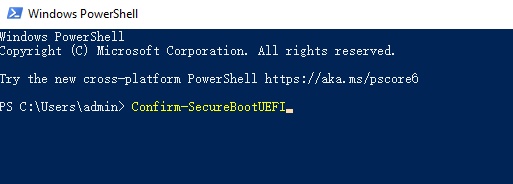
Press “Win + X” then choose “Windows PowerShell (Admin)” and run the command: “Confirm-SecureBootUEFI”.

-
If the output is True, Secure Boot is enabled; if False, it’s disabled.
Method 3: BIOS/UEFI visual check
If you want the most accurate method to check if secure boot is enabled, checking directly inside your BIOS or UEFI firmware is the best approach. It’s also the perfect opportunity to adjust related settings before enabling Secure Boot later.
Restart your PC and press “Del, F2, or F10” to enter BIOS.
-
Go to “Boot” or “Security” tab (varies by manufacturer) and look for “Secure Boot”. The current state will show as Enabled or Disabled.
If Secure Boot is disabled, you can now proceed to enable it for full compatibility with Windows 11.
3.How to Enable Secure Boot on Windows 11?
If your system shows “Secure Boot is not enabled”, you’ll need to enable it manually. The process is similar across most motherboard brands like ASUS, MSI, Gigabyte, and Dell.
Let’s go through it step-by-step on how to enable secure boot Windows 11.
Step 1: Restart and Enter BIOS/UEFI
To enable Secure Boot, you’ll first need to access the BIOS menu. The BIOS gives you control over boot configuration, storage, and system security settings.
-
Restart your computer and while it boots, press the correct key “Del, F2, or F10” as per your manufacturer and model.
-
Once in BIOS, use the arrow keys to navigate to the “Security” tab.
Bonus: How to Switch to UEFI Smoothly?
Before enabling Secure Boot, your system must be using UEFI mode instead of the older Legacy BIOS. However, many users discover their disk is still formatted as MBR, which prevents Secure Boot from being activated.
Converting the disk to GPT is essential to switch to UEFI mode successfully. Manually doing this can be risky with data loss. Fortunately, 4DDiG Partition Manager offers a safe, one-click way to convert MBR to GPT with no data loss and no command line required.
Secure Download
-
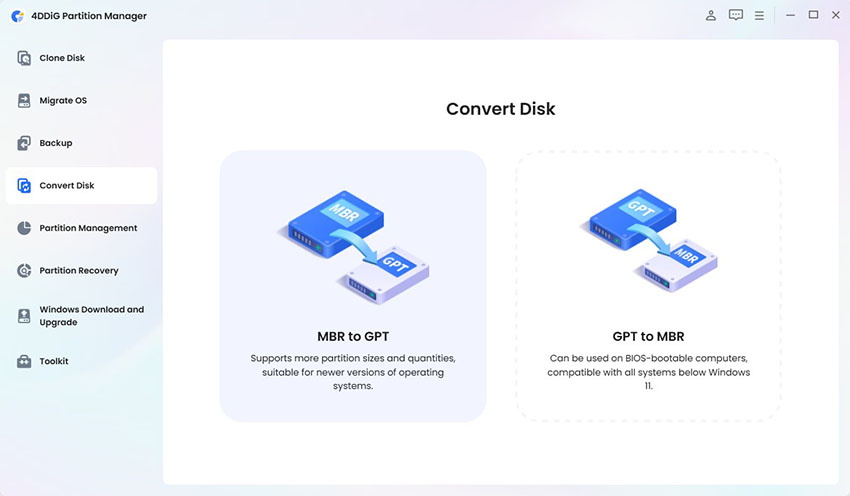
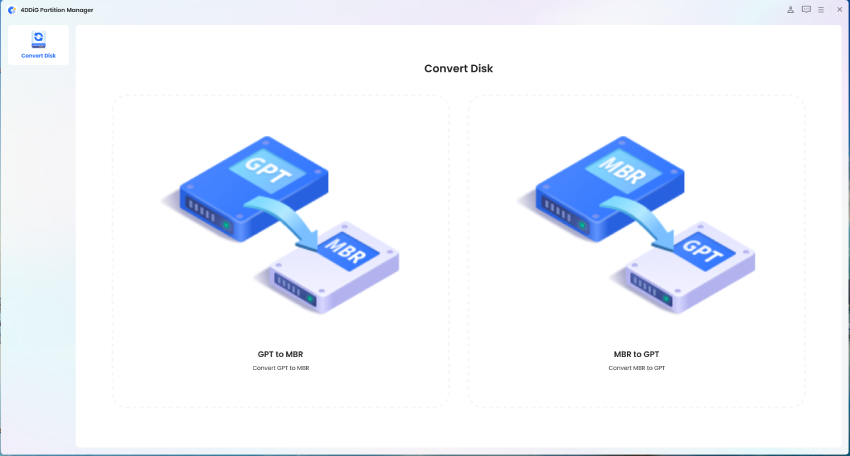
Launch the 4DDiG Partition Management on your PC, and select the "Convert Disk" option and click "MBR to GPT”.

-
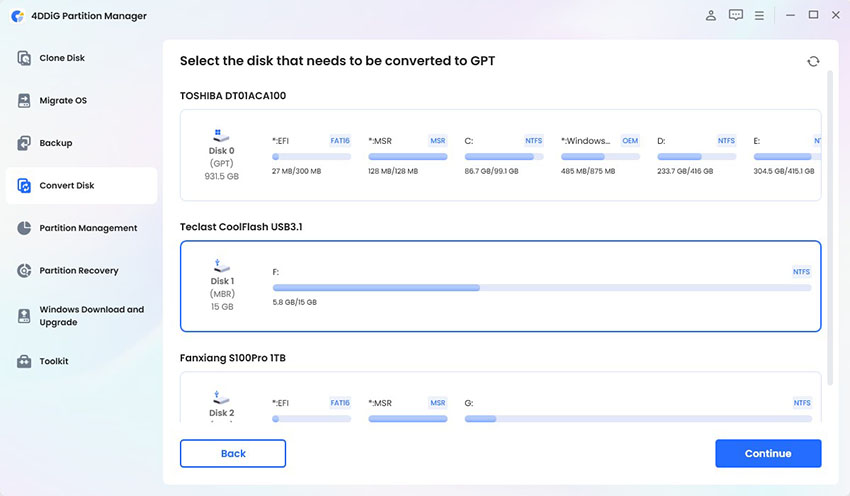
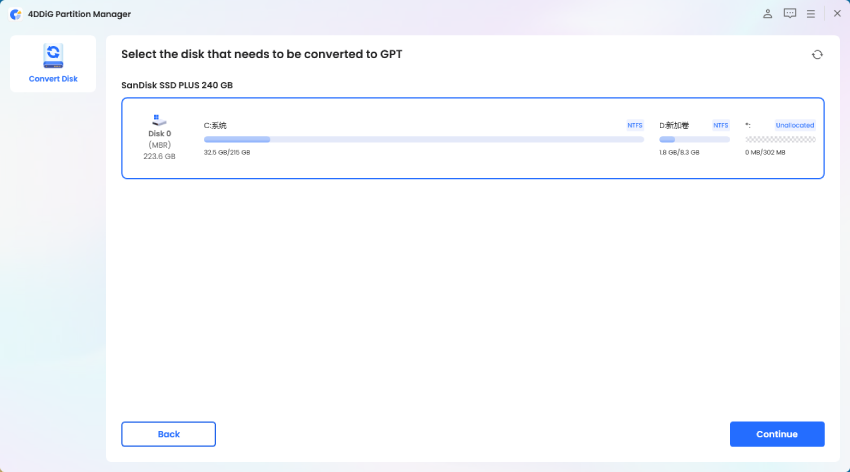
Now, select the disk that you want to convert to GPT and click “Continue” and “Sure” in the pop-up window.

-
In the next screen, you need to click "MBR to GPT" again as the tool opens in the PE environment.

-
Click “Continue” to begin the conversion and track the progress on the screen.

-
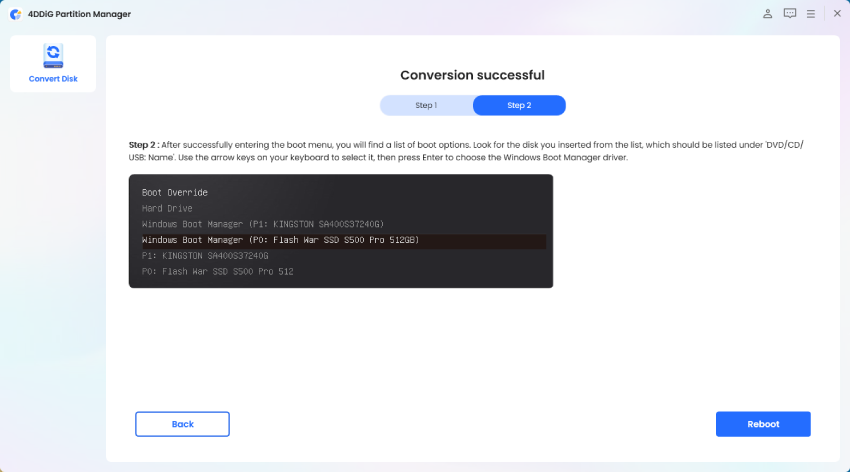
Once the conversion is successful, follow the on-screen instructions and click "Reboot”.

Using 4DDiG Partition Manager ensures a safe, one-click MBR-to-GPT conversion and allows enabling Secure Boot without data loss.
Step 2: Enable Secure Boot in BIOS
Now that your system is in UEFI mode, you can enable secure boot. The option may appear slightly different depending on your motherboard brand (e.g., ASUS, MSI, or Gigabyte).
Below are the steps you need to follow if you are wondering how to enable secure boot on my PC Windows 11:
-
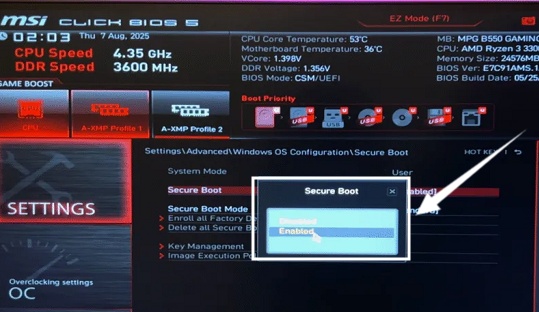
Then scroll down to find Secure Boot, and select “Enabled” after pressing Enter. Remember to save your change, so the secure boot is enabled.

After restarting, Secure Boot will be active, ensuring your PC meets Windows 11’s security standards and blocking unauthorized software at boot.
More FAQs about How to Enable Secure Boot
Q1: How to enable Secure Boot EA?
Some games or anti-cheat systems like those from EA require Secure Boot to prevent tampering. You can enable it through BIOS by following the same steps above.
Q2: Can I enable Secure Boot without going to the BIOS?
No, Secure Boot must be toggled from BIOS/UEFI settings. 4DDiG Partition Manager can help prepare your system by switching the disk format to GPT before BIOS configuration.
Q3: How do I know if UEFI Secure Boot is enabled?
Check using System Information (msinfo32) or PowerShell. If it says, “Secure Boot State: On,” your system is fully protected.
Conclusion
Secure Boot is one of the simplest yet most powerful defenses against unauthorized startup software and malware. Here, you learned how to enable secure boot by using the BIOS method. With this method, you not only meet Windows 11 requirements but also ensure your system runs securely under UEFI.
For users who need to switch from MBR to GPT before they need the Secure Boot enabled, 4DDiG Partition Manager provides an effortless, data-safe way to prepare your PC for full security compliance.
Secure Download
 ChatGPT
 Perplexity
 Google AI Mode
 Grok
Grok

