Control Resonant PC Requirements: Minimum & Recommended Specs

5 mins read

Updated on 2026-09-16 09:49:41 to game

Wondering whether your PC is ready for CONTROL Resonant? The game scales across several performance targets, so the answer depends on more than whether it can simply launch. Your graphics card, available VRAM, target resolution, preferred frame rate, and whether you plan to use advanced lighting features can all affect the experience.

This guide breaks down the official CONTROL Resonant PC requirements, explains what the minimum and higher-spec tiers are designed to deliver, and helps you prepare enough SSD space before installation.

control resonant pc requirements

Control Resonant PC Requirements: Minimum Specs

Component Minimum requirement
Operating system Windows 10 or Windows 11, 64-bit
Processor Intel Core i5-8500 or AMD Ryzen 5 3500
Memory 16 GB RAM
Graphics NVIDIA GeForce GTX 1070, AMD Radeon RX 5600 XT, or Intel Arc A580
Storage 120 GB available space on an SSD

These specifications describe an entry point, not a promise of maximum settings. If your system sits near the minimum, begin with conservative graphics options rather than copying settings from a high-end PC. Actual performance depends on the scene, resolution, driver, and selected effects.

The Control Resonant SSD requirement also matters independently of capacity. A hard drive with hundreds of gigabytes free does not satisfy a specification that calls for an SSD.

Control Resonant PC Requirements: Recommended Specs

Recommended hardware should not be read as an unrestricted "everything on" preset. Ray tracing, output resolution, and upscaling can change the workload substantially. When comparing your PC with a performance chart, read its graphics and upscaling conditions alongside the GPU name.

Component Recommended requirement
Operating system Windows 10 or Windows 11, 64-bit
Processor Intel Core i7-10700 or AMD Ryzen 7 3700X
Memory 16 GB RAM
Graphics NVIDIA GeForce RTX 3060 Ti, AMD Radeon RX 6700 XT, or Intel Arc B580
Storage 120 GB available space on an SSD

There is also no storage discount for choosing low settings. Both tiers require the same available SSD capacity. If the hardware already meets your target, resolving a storage shortage may be the only preparation you need. The following methods address three different causes: unwanted data, uneven partition sizes, and a physically undersized drive.

⚡ How to Prepare 120 GB of SSD Space for Control Resonant?

Leave additional room for installation work and future updates instead of treating 120 GB as an ideal long-term limit. That extra margin is a practical precaution, not a separate official requirement.

Choose the method that matches your situation. Cleanup recovers occupied space; resizing reallocates capacity within a disk; replacing the SSD adds physical capacity. You do not need to perform all three.

Method 1: Remove Unused Apps and Junk Files

Start with applications you no longer use, especially old games. They can occupy far more space than temporary files.

  • Open Settings > Apps > Installed apps; in Windows 10, use Settings > Apps > Apps & features.

  • Sort by size where available, select an unwanted app, and uninstall it. Remove launcher-managed games through their launcher when appropriate.

    uninstall app
  • For a deeper cleanup instead of deleting files manually, 4DDiG Partition Manager can scan for removable junk files, caches, logs, and other unnecessary browsing data. Allowing you to review the results before deletion, so you can reclaim space for CONTROL Resonant without accidentally removing important files.

  • Download 4DDiG Partition Manager. Open Windows Clean and choose the categories to scan and click Start Scan.

    Free Up Space

    Clean deeper, free up more space

    windows clean
  • Then inspect the results and exclude anything you need. Click Clean button.

    select items to clean
  • Once complete, recheck the target drive in File Explorer.

    clean successfully

Method 2: Extend Your Game Partition

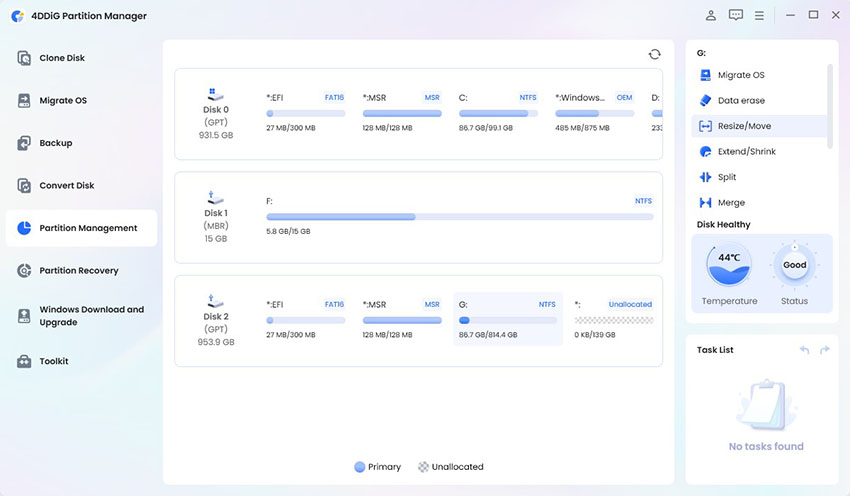
If cleanup do not produce enough room. You can use 4DDiG Partition Manager to resize or move the intervening partition to reorganize the disk layout, then extend your drive without relying on the unallocated space already being in the required position.

  • Launch 4DDiG Partition Manager. In Partition Management, select your game partition and click Resize/Move.

    Extend Drive

    Reclaim unused space for your drive

    resize partition
  • In the pop-up window, resize the selected partition by dragging either edge of its partition bar. You can also type in the exact size you want in GB. Review the preview of the new disk layout, and click OK once you are satisfied with the changes.

    extend partition
    Note:

    To move a partition, drag the entire partition bar into the available unallocated space. Alternatively, manually set how much unallocated space should appear before or after the partition.

  • Review the pending operation and confirm that the selected partition and new size are correct. Click OK to continue.

    click ok
  • The partition resize operation will begin. Wait for the process to finish. Once the partition has been resized successfully, click Finish.

    complete extending partition

Afterward, verify that the game drive now has sufficient free space and select it in the launcher

Method 3: Upgrade to a Larger SSD

If you are running out of room on a small SSD or you are still installing games on an HDD, a larger SSD is the more lasting option. Cloning drive is useful when you want to retain existing data instead of rebuilding the drive from scratch.

Note:

Confirm that the new drive matches your computer's supported interface and physical size before purchasing or connecting it. And back up the destination first: cloning overwrites it.

  • Connect the replacement SSD and choose the appropriate Clone OS Disk or Clone Data Disk option in 4DDiG Partition Manager.

    Clone to SSD

    Upgrade your drive without reinstalling Windows

    clone disk
  • Here select the source disk you want to clone and select the target disk to receive cloned data. Then click Next.

    choose target and source disk
  • The partitions on the source disk will occupy the entire target disk by default, so you can adjust the destination layout, review the overwrite warning, and start cloning.

    adjust partition
  • After completion, verify the copied files before repurposing the original drive.

    clone successfully

After cloning, install or replace the drive as needed and confirm that the larger SSD is detected correctly. If you cloned your system disk, set the new SSD as the boot drive in BIOS/UEFI before starting Windows.

If you cloned a data or game drive, simply check that the copied files are accessible and update your game-library location if necessary. The guide walks through replacing the drive and booting from the cloned SSD step by step.

Conclusion

The Control Resonant PC Requirements combine a defined hardware baseline with a substantial SSD space requirement. Compare your CPU and GPU with the appropriate tier, then make sure the installation partition has at least 120 GB available, plus practical room for updates. Remove unused applications first.

If space is trapped in another partition on the same disk, use 4DDiG Partition Manager to resize the layout. If the entire drive is full, its cloning tools can help with a larger SSD upgrade. Choose the remedy that fits your storage problem, then confirm the final installation location before downloading the game.

FREE DOWNLOAD

Secure Download

William Bollson (senior editor)

William Bollson, the editor-in-chief of 4DDiG, devotes to providing the best solutions for Windows and Mac related issues, including data recovery, repair, error fixes.

(Click to rate this post)

You rated 4.5 ( participated)