How to Fix NVMe SSD Disconnects Randomly?

5 mins read

Updated on 2026-07-02 12:06:26 to Windows Fix

If your NVMe disconnects randomly, the issue can be frustrating, especially if important files are stored on the drive. But don’t worry, as most of these issues can be fixed without replacing the drive. In this guide, we’ll explain why NVMe SSDs disconnect and walk you through several proven solutions to restore stability.

1. Why Does NVMe SSD Keep Disconnecting Randomly?

When an NVMe SSD disconnects unexpectedly, the cause is usually related to hardware, heat, firmware, or system settings. Here are some of the most common reasons:

Overheating

NVMe SSDs generate heat during heavy workloads such as gaming, video editing, and large file transfers. If temperatures become too high, the drive may temporarily disconnect to protect itself.

Loose SSD Connection

An NVMe SSD must be properly seated in the M.2 slot. Even a slightly loose connection can cause the drive to disappear intermittently.

Faulty M.2 Slot

Sometimes the SSD itself is fine, but the motherboard slot is causing communication problems. This can make the ssd keeps disconnecting issue appear randomly.

Outdated or Corrupted Drivers

Storage drivers help Windows communicate with the SSD. If they become outdated or corrupted, the drive may disconnect unexpectedly.

BIOS Compatibility Problems

Older BIOS versions may contain bugs that affect NVMe detection and stability, especially on newer SSD models.

⚡ 2. Before Troubleshooting: Back Up Your NVMe SSD First

Before making hardware changes or updating your BIOS, it’s a good idea to create a backup of your NVMe SSD. 4DDiG Partition Manager is a disk management tool that helps users clone drives, migrate operating systems, manage partitions, and safeguard important data before performing repairs or upgrades.

Here’s how you can back up your NVMe:

  • Connect an external drive to your computer. Open 4DDiG Partition Manager and go to the Clone Disk section. Select Clone Data Disk to start copying data from your NVMe SSD to another drive.

    FREE DOWNLOAD

    Secure Download

    clone data disk
  • Select the NVMe SSD that you want to back up as the source drive. Then choose the external drive or another disk as the destination where the cloned data will be stored. Click Next to continue.

    select source and target disk
  • A preview window will appear showing how the cloned data will be arranged on the destination drive. If needed, adjust the partition size by dragging the edges. Once you're satisfied with the layout, click Start.

    click start
  • The software will warn you that all existing data on the destination drive will be erased. Check that you have selected the correct drive, then click Sure to proceed.

    confirm to proceed
  • 4DDiG will begin cloning NVMe immediately. The time required depends on how much data is stored on the source drive. Keep the computer on and avoid interrupting the process until it is complete.

    clone successfully

Once finished, all data from the source drive will be successfully copied to the destination drive.

3. How to Resolve that NVMe SSD Keep Disconnecting?

Fix 1: Update the Driver

Outdated or corrupted storage drivers can interrupt communication between Windows and the NVMe SSD. As a result, the drive may disconnect unexpectedly or fail to respond properly.

  • Right-click the Start button, select Device Manager, and expand Disk Drives.

  • Right-click your NVMe SSD and select Update Driver.

    update driver
  • Choose Search automatically for drivers and follow the on-screen instructions.

    search automatically
  • Restart your computer after the update.

Updating the driver installs the latest fixes and compatibility improvements, which can help Windows communicate with the SSD more reliably.

Fix 2: Monitor NVMe Temperature During Gaming or Heavy Load

High temperatures can cause an NVMe SSD to become unstable, especially during gaming, video editing, or large file transfers. Monitoring the temperature helps you identify overheating issues, while improving cooling can help keep the SSD operating normally.

  • Install and launch a monitoring tool such as CrystalDiskInfo.

  • Now launch a game or perform heavy workloads.

  • Watch how high the SSD temperature climbs on monitoring tools.

    monitor NVMe temperature
  • If temperatures are excessive, improve airflow inside the case.

  • Consider installing an NVMe heatsink if one is not already present.

Fix 3: Shut Down the PC and Reseat the NVMe SSD

If your NVMe SSD is not making a stable connection with the motherboard, it may disconnect randomly while you're using the computer. Reseating the SSD helps ensure a secure connection between the drive and the M.2 slot, which may stop unexpected disconnects.

  • First, shut down your computer completely.

  • Disconnect the power cable, open the computer case, and locate the NVMe SSD installed in the M.2 slot.

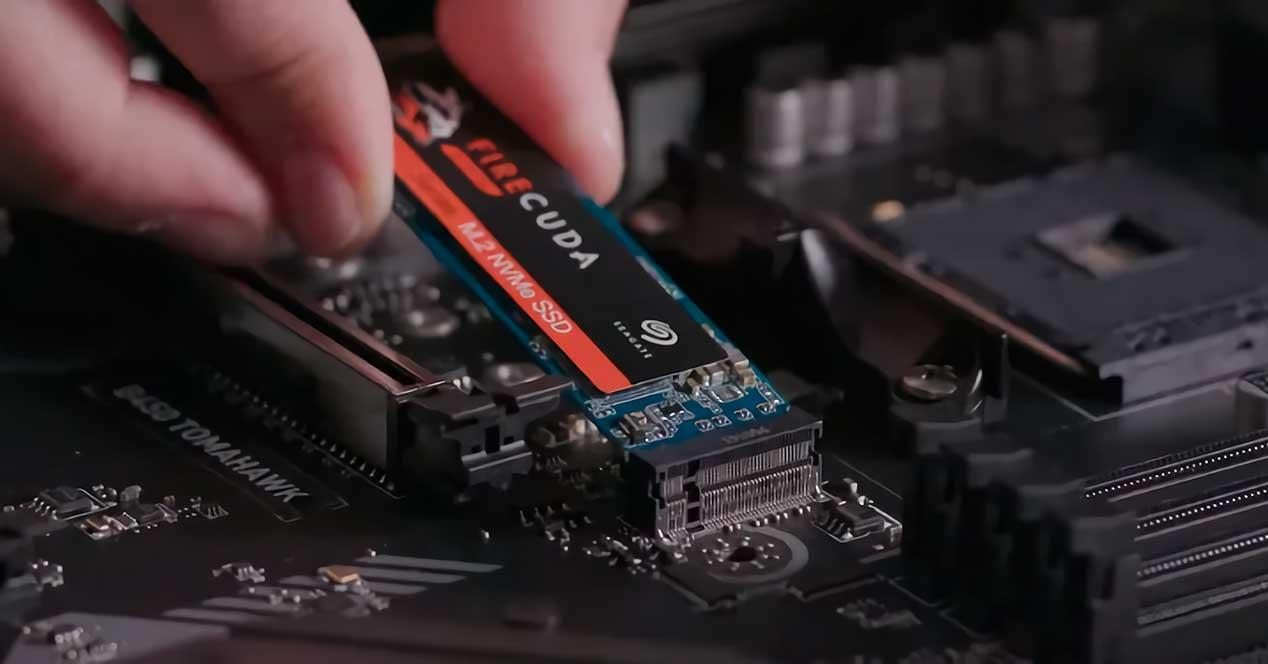
  • Now, remove the retaining screw carefully, and pull out the SSD and inspect the connector.

    pull out ssd
  • Reinsert the SSD firmly into the slot and secure it with the screw.

  • Close the case and restart the PC.

If the NVMe can not be detected after reseating, you can follow this guide to solve the issue.

Fix 4: Try Another M.2 Slot

Sometimes a faulty or unstable M.2 slot on the motherboard can cause connection issues that make the drive disappear randomly. Moving the SSD to another available M.2 slot can help determine whether the original slot is causing the problem and may immediately restore stable performance.

  • Turn off the computer, disconnect the power supply, and remove the NVMe SSD.

  • Now install it into another available M.2 slot and secure the drive properly.

  • Once ready, restart the computer. Use the system normally to check stability.

If the problem disappears, the original slot may be faulty.

Fix 5: Update BIOS

An outdated BIOS may contain bugs or compatibility issues that affect how the motherboard detects and communicates with NVMe SSDs. Updating the BIOS can improve hardware support and help prevent random SSD disconnects caused by motherboard-level problems.

  • First, find your motherboard model number. It should be mentioned on the documents you received with your PC, or you can manually check the model number written inside the PC.

  • Visit the manufacturer’s support website and download the latest BIOS version by matching the motherboard model number.

    download latest bios
  • Install the BIOS update by following the instructions. Then, restart your system after the update completes.

People Also Asked

1How to Know if NVMe is Faulty?

Common symptoms include frequent disconnects, file corruption, unusually slow performance, system crashes, and read/write errors. You may also see SMART warnings in monitoring software. If these symptoms continue even after trying multiple fixes, the SSD could be approaching failure.

2What is the Average Lifespan of an NVMe SSD?

Most consumer NVMe SSDs last between 5 and 10 years under normal use. Actual lifespan depends on factors such as usage patterns, drive quality, and the manufacturer’s TBW (Terabytes Written) rating. For typical home and office use, many NVMe SSDs continue operating well beyond their warranty period.

3Does Windows Fast Startup Affect NVMe SSD Detection?

In some cases, Windows Fast Startup can cause hardware detection issues during boot. Disabling Fast Startup temporarily can help determine whether it is contributing to SSD recognition problems.

Conclusion

If your NVMe disconnects randomly, the problem is often caused by overheating, loose connections, outdated drivers, BIOS compatibility issues, or hardware faults. Working through the fixes in this guide can help identify the root cause and restore stable performance.

Before making major changes, it’s always wise to back up important files in case the SSD is failing. 4DDiG Partition Manager provides a simple way to clone your drive and protect your data before troubleshooting. With the right approach, most NVMe disconnect issues can be resolved without replacing the SSD.

FREE DOWNLOAD

Secure Download

William Bollson (senior editor)

William Bollson, the editor-in-chief of 4DDiG, devotes to providing the best solutions for Windows and Mac related issues, including data recovery, repair, error fixes.

(Click to rate this post)

You rated 4.5 ( participated)