How to Fix NVMe SSD not Detected? | 5 Methods
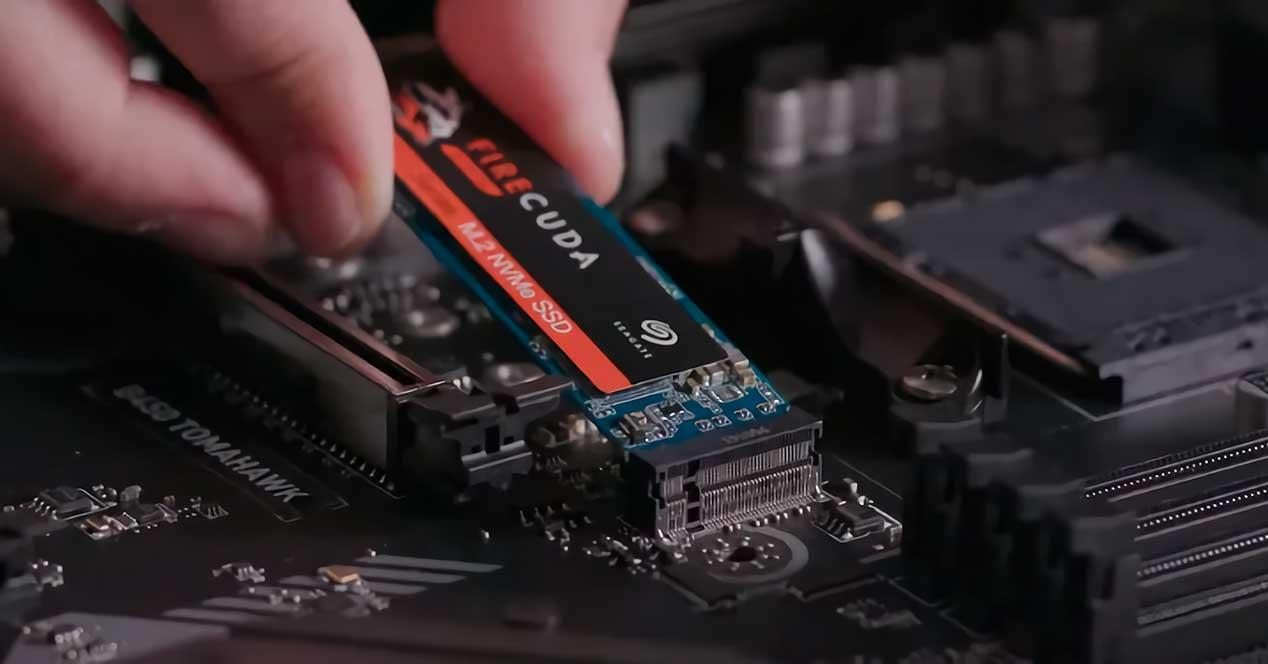
Is your NVMe SSD not showing up? Don't worry, you're not the only one who is facing this problem. Many users face this frustrating issue with their high-speed storage devices. NVMe SSDs are fast storage drives that connect directly to your computer's motherboard. They use PCIe lanes to transfer data quickly, making them much faster than traditional hard drives.
But sometimes, your computer might not detect these speedy drives. This can happen due to various reasons, from BIOS settings to driver issues. In this guide, we'll walk you through several quick methods to fix this problem. We'll cover everything from simple checks to more advanced solutions. If you've lost data while trying to fix this issue, don't panic. We'll also show you how to recover your files using reliable data recovery software. Let's get your NVMe SSD up and running again!
Part 1: What Causes NVMe SSD not Detecting?
There are several reasons this high-speed storage might play hide and seek with your system. Let's explore the common culprits behind this frustrating issue.
Here are the main causes of NVMe SSD detection problems:
Improper connection:Your SSD might not be seated correctly in its slot.
BIOS issues:Outdated BIOS versions or incorrect settings can cause detection failures.
Driver problems:Outdated or corrupted drivers can prevent your system from recognizing the SSD.
Physical damage: Sometimes, the SSD itself might be faulty or damaged.
Compatibility issues: Your motherboard might not support NVMe technology.
Power supply problems: Insufficient power can lead to detection issues.
Operating system glitches: Windows updates or system errors can affect SSD recognition.
Disabled NVMe in BIOS:The NVMe option might be turned off in your BIOS settings.
Understanding these causes is the first step to solving your NVMe SSD detection problems. In the next sections, we'll discuss solutions for each of these issues.
Part 2: How to Recover Data from an NVMe SSD?
If you've tried everything, but your NVMe SSD is still playing hide-and-seek with your system. Don't panic! Even if you can't get your drive detected, there's still hope for your data. This is where 4DDiG Windows Data Recovery . steps in. It's a powerful tool designed specifically for tricky situations like this.
Recovering data from an NVMe SSD can be a complex task due to its high-speed data transfer rates and intricate architecture. Using advanced recovery algorithms, 4DDiG can navigate the NVMe SSD's structure, ensuring a thorough and efficient data retrieval process. Whether you've accidentally deleted files, formatted your NVMe SSD, experienced a system crash, or dealt with physical damage, 4DDiG Windows Data Recovery has you covered.
By meticulously scanning the SSD and reconstructing lost data, 4DDiG ensures that you regain access to your important files with minimal data loss. Its user-friendly interface and powerful recovery capabilities make it an essential solution for NVMe SSD data recovery.
Secure
Download
Secure
Download
Here's how to use 4DDiG Windows Data Recovery in three simple steps:
-
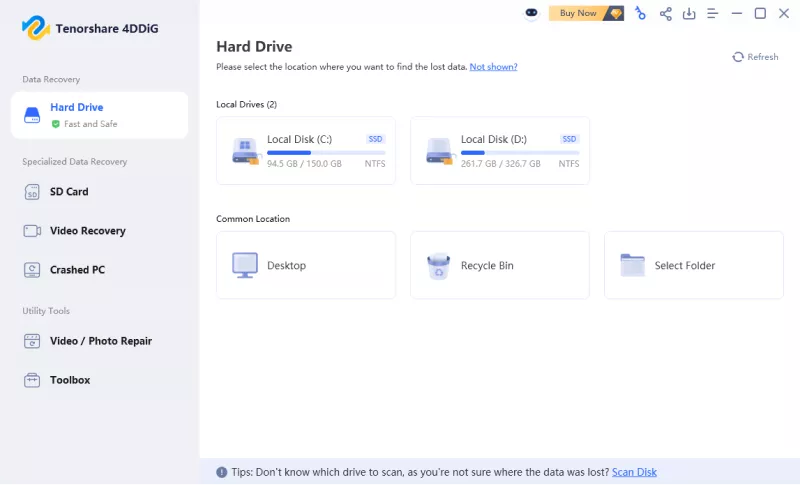
Select Your NVMe SSD
Launch 4DDiG and choose your undetected NVMe SSD from the list of drives. Don't worry if you can't see it; the software has special tricks to find hidden drives.

-
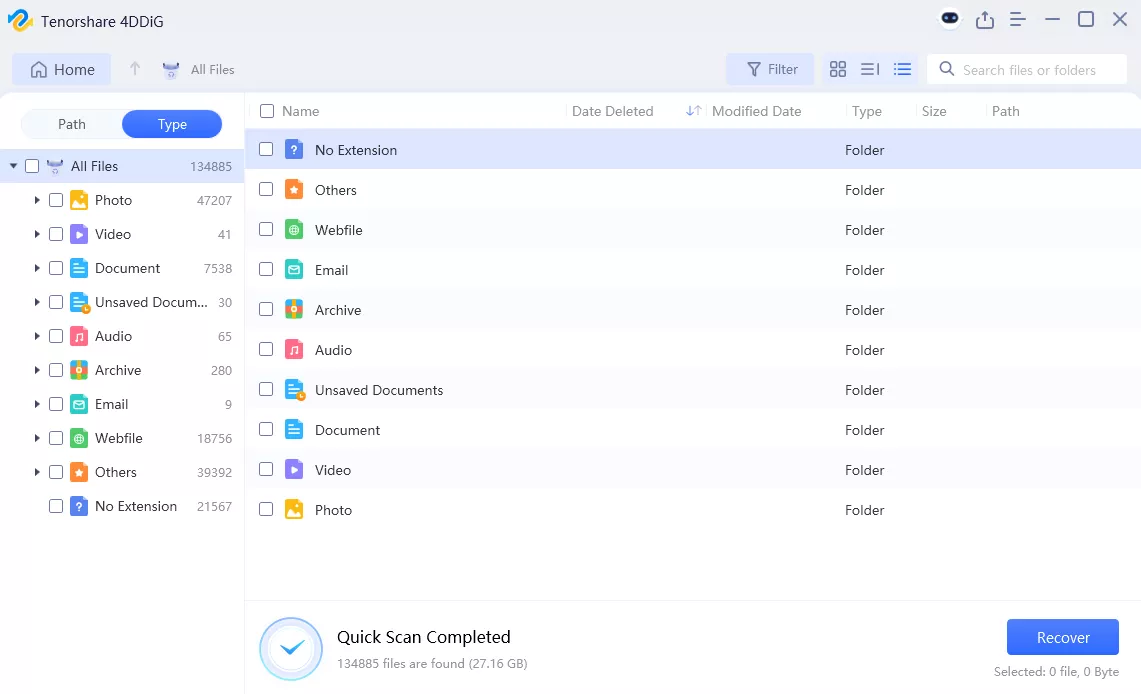
Scan for Lost Data
Click 'Scan' and let 4DDiG work its magic. It'll search every nook and cranny of your NVMe SSD for recoverable files. You can pause or stop the scan anytime if you spot what you need.

-
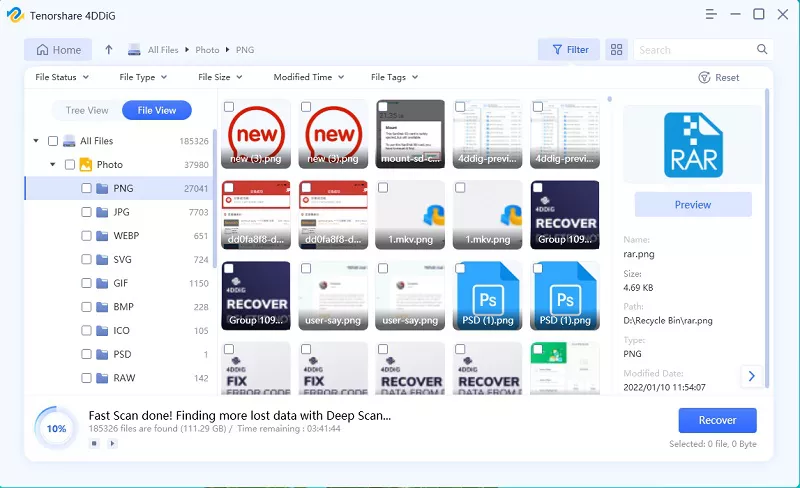
Preview and Recover
Once the scan finishes, preview your found files. Select what you want to keep and click 'Recover'. Choose a safe location on a different drive to save your rescued data./p>

Part 3: How to Fix an NVMe SSD not Detected?
Now that we've covered data recovery, let's focus on fixing the root problem. Here are five effective methods to fix the "NVMe SSD not detected" issue and get your drive back in action.
Method 1. Reinstall the NVMe SSD Driver
Sometimes, a corrupted or outdated driver can cause detection issues. Here's how to reinstall your NVMe SSD driver:
-
Press Windows key + X and select "Device Manager".
-
Expand the "Disk drives" category.
-
Right-click on your NVMe SSD and choose "Uninstall device".
-
Restart your computer. Windows will try to reinstall the driver automatically.
-
If that doesn't work, visit your SSD manufacturer's website.
-
Find and download the latest driver for your specific NVMe SSD model.
-
Install the downloaded driver by following the manufacturer's instructions.
-
Restart your computer again.
-
Check if Windows now detects your NVMe SSD.
This process refreshes your NVMe SSD's driver, often resolving detection issues. If problems persist, don't worry - we have more solutions coming up.
Method 2. Modify the NVMe SSD Settings in BIOS
Your BIOS settings can significantly impact NVMe SSD detection. Here's how to adjust them:
-
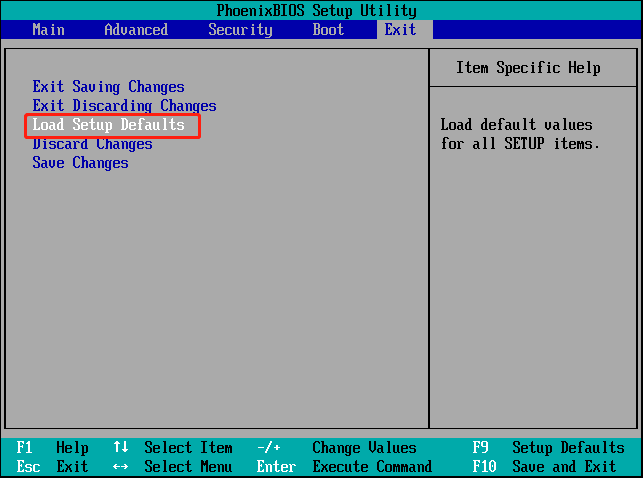
Restart your PC and enter BIOS. Usually, you'll press F2, Delete, or another key during startup.
-
Look for "Storage Configuration" or "IDE Configuration" in the BIOS menu.
-
Find the "Configure SATA As" option. Change it from AHCI to IDE if it isn't already.
-
Locate the "M.2_2 PCIE Storage RAID Support" setting under "Advanced" options.
-
Enable this setting if it's currently disabled.
-
Find the "Secure Boot" option. Try disabling it temporarily.
-
Save your changes and exit BIOS. Your PC will restart.
-
Check if Windows now detects your NVMe SSD.

Remember, BIOS layouts vary between manufacturers. If you're unsure about any settings, consult your motherboard manual. These tweaks often resolve NVMe detection issues by optimizing your system's configuration for this type of drive.
Method 3. Check NVME SSD by Another Device
Sometimes, the best way to diagnose a problem is to change the environment. Here's how to check your NVMe SSD using another device:
-
Power down your PC and carefully remove the NVMe SSD.
-
Find another compatible computer. It could be a friend's PC or a work computer.
-
Install your NVMe SSD in this second device. Follow proper safety procedures.
Boot up the second computer and see if it detects the NVMe SSD.
If it's detected, your original PC might be the issue. Consider updating its BIOS or checking for hardware conflicts.
If the second PC doesn't detect it either, your NVMe SSD might be faulty.
In case of a faulty drive, contact the manufacturer about warranty options.
This method helps isolate the problem. It tells you whether the issue lies with your PC or the SSD itself. Remember, handle your SSD carefully during this process to avoid damage.
Method 4. Update BIOS
An outdated BIOS can sometimes cause NVMe SSD detection issues. Here's how to update it:
-
Find your motherboard model. You can use System Information or check your PC's manual.
Visit the manufacturer's website and go to their support or downloads section.
Search for your motherboard model and download the latest BIOS version.
Read the update instructions carefully. They're usually in a README file.
Create a bootable USB drive with the BIOS update file.
Restart your PC and enter BIOS setup.
Look for a BIOS update option. It might be called "EZ Flash," "M-Flash," or something similar.
Select the update file from your USB drive and start the process.
Wait for the update to complete. Don't turn off your PC during this time!
Once done, your PC will restart. Check if it now detects your NVMe SSD.
Remember, updating BIOS can be risky. Follow instructions carefully and consider seeking professional help if you're unsure. A successful update often resolves compatibility issues with newer hardware like NVMe SSDs.
Method 5. Change NVME SSD Drive Letter
Sometimes, Windows detects your NVMe SSD but doesn't assign it a drive letter. Here's how to fix that:
Right-click on the Start button and select "Disk Management".
Look for your NVMe SSD in the list of drives. It might appear as an unallocated space.
If the drive is unallocated, right-click it and choose "New Simple Volume". Follow the wizard to format it.
For an existing volume without a letter, right-click it and select "Change Drive Letter and Paths…"

Click "Add" if there's no letter, or "Change" to modify an existing one.
Choose a drive letter from the drop-down menu. Avoid letters already in use.
Click "OK" to confirm your choice.
Windows will warn you about programs that rely on drive letters. Click "Yes" to proceed.
Your NVMe SSD should now appear in File Explorer with the new drive letter.
This method ensures Windows recognizes your NVMe SSD as a usable drive. Remember, formatting a drive erases all data, so be sure you're working with the correct drive.
Part 4: Frequently Asked Questions
Q: Why is my NVMe not being recognized?
Ans:Your NVMe might not be recognized due to outdated BIOS, incorrect BIOS settings, or driver issues. Sometimes, a loose connection or faulty hardware can also cause this problem.
Q: How to enable NVMe SSD in BIOS?
Ans:To enable NVMe SSD in BIOS, restart your PC and enter BIOS setup. Look for NVMe or PCIe settings and make sure they're enabled. Save changes and exit BIOS to apply the settings.
Q: Does NVMe need BIOS support?
Ans:Yes, NVMe SSDs require BIOS support to function properly. Older motherboards might need a BIOS update to recognize and use NVMe drives. Check your motherboard's compatibility before installing an NVMe SSD.
Conclusion
Dealing with an undetected NVMe SSD can be frustrating, but it's often a fixable issue. We've explored several methods to get your drive up and running again. You now have a toolkit to tackle this problem. Remember, if you've lost data in the process, 4DDiG Windows Data Recovery . can help you retrieve it. Always handle your hardware carefully and keep your system updated to prevent future issues. With patience and these steps, you'll likely have your NVMe SSD working smoothly in no time. Happy computing!
 ChatGPT
 Perplexity
 Google AI Mode
 Grok
Grok

