How to Fix “Compatible TPM Cannot Be Found” on Windows 11

5 mins read

Updated on 2026-08-10 09:54:50 to Windows Fix

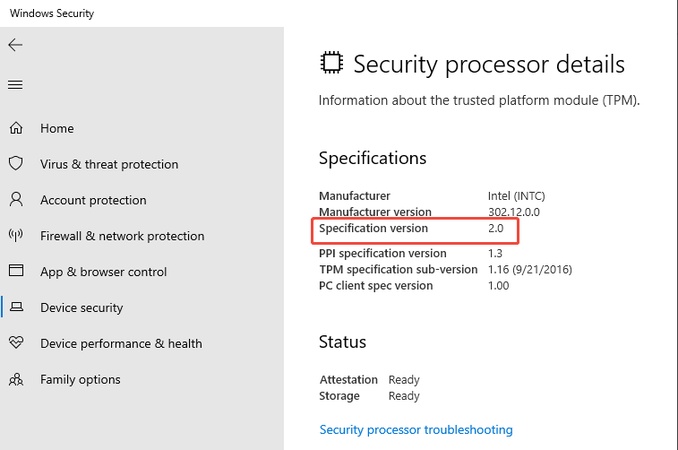
The compatible TPM cannot be found message usually appears when Windows cannot detect a Trusted Platform Module on your computer. You may notice it after running tpm.msc, checking Windows 11 compatibility, or trying to use a security feature that depends on TPM.

This does not always mean your PC lacks TPM 2.0. This guide explains why TPM disappears and provides practical ways to get it detected again on Windows 11.

1. Why Compatible TPM Cannot be Found?

TPM (Trusted Platform Module) provides hardware-backed security functions that Windows uses for features such as BitLocker and Windows Hello. Windows 11 also requires TPM 2.0 as part of its official minimum system requirements.

If you see compatible TPM cannot be found Windows 11, one of the following issues may be responsible.

TPM is Disabled in BIOS/UEFI

A computer may support TPM without having it enabled. Many modern processors provide firmware-based TPM functionality, but the feature can be turned off in BIOS/UEFI. On Intel-based PCs, if this setting is disabled, Windows may report that a TPM cannot be found on this computer.

Your PC Does Not Support TPM 2.0

Older computers may have TPM 1.2 or no TPM support at all. Some desktop motherboards also have a TPM header but no physical TPM module installed. In this situation, seeing no security device found TPM may indicate a hardware limitation rather than a Windows problem.

TPM Driver or Device Has a Problem

Windows normally manages TPM through built-in system components. However, a device or driver problem can prevent the operating system from communicating correctly with the security processor.

BIOS/UEFI Firmware is Outdated

BIOS/UEFI firmware controls communication between Windows and important motherboard features, including TPM. Older firmware may contain bugs or compatibility problems that affect TPM detection, especially after hardware or operating system changes.

TPM Data or Configuration Has a Problem

In some cases, TPM itself is enabled and supported, but its current state is causing Windows to report that TPM is not usable. Resetting the TPM may resolve certain initialization or configuration problems.

However, clearing TPM removes keys stored in it, so this solution should only be used after protecting important recovery information.

2. How to Fix Compatible TPM Cannot Be Found?

Fix 1: Enable TPM in BIOS/UEFI

If your PC supports TPM but Windows cannot detect it, the first setting to check is BIOS/UEFI. TPM may simply be disabled. The exact names and locations of these options vary between PC and motherboard manufacturers.

  • First of all, restart the computer. During startup, repeatedly press your computer’s BIOS key. Depending on the manufacturer, this may be F2, F10, F12, Delete, or Esc.

  • Here, you need to go to BIOS/UEFI Firmware Settings, look under sections such as Security, Advanced, Trusted Computing, or Security Device Support.

    uefi firmware settings
  • Find the TPM-related setting. Depending on your hardware, it may be named: Intel PTT or Intel Platform Trust Technology, AMD fTPM, Firmware TPM.

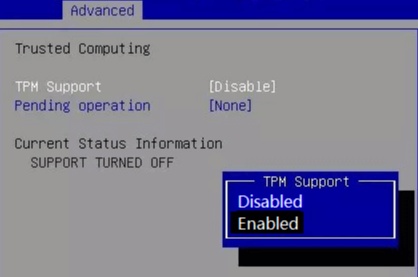
  • Change the appropriate setting to Enabled. Save the changes and exit BIOS/UEFI. The PC should restart.

    enable tpm
  • After Windows loads, press Windows + R, enter tpm.msc, and check whether TPM is now detected.

Fix 2: Update or Reinstall the TPM Driver

If TPM is enabled but Windows still has trouble detecting or using it, refresh the device through Device Manager.

  • Right-click Start and open Device Manager. Expand Security devices.

  • Right-click Trusted Platform Module 2.0 and choose Update driver.

    update tpm driver
  • Select Search automatically for drivers and let Windows check for an appropriate driver.

If updating does not help, you can reinstall the device:

  • Right-click Trusted Platform Module 2.0 again and select Uninstall device.

  • Confirm the action, but do not manually remove unrelated security devices.

  • Restart your computer. Windows should detect the TPM again and reinstall the necessary device support automatically.

Fix 3: Update BIOS/UEFI and Chipset Drivers

  • Start by identifying the exact manufacturer and model of your PC or motherboard.

  • Then visit the manufacturer’s official support page and download only files designed for your exact model and Windows version.

  • For chipset drivers, follow the manufacturer’s installer and restart the PC afterward.

BIOS updates require more care. Follow the manufacturer’s instructions exactly, and never interrupt the system while firmware is being updated. After completing the updates, enter BIOS again to confirm that Intel PTT, AMD fTPM, or the relevant TPM option remains enabled.

How to Update BIOS without USB? Step-By-Step Guide

Fix 4: Clear/Reset the TPM (Only If Needed)

If TPM is detected but has initialization or configuration problems, clearing it may help. However, this should not be your first solution.

Important:

Clearing TPM removes security keys stored in the TPM. If BitLocker or device encryption is enabled, make sure save BitLocker recovery key and back up important data before proceeding.

  • Open Settings, go to Privacy & security > Windows Security.

  • Open Device security, select Security processor details, then open Security processor troubleshooting.

  • Choose Clear TPM and follow the instructions shown by Windows.

    clear tpm
  • Restart the PC if prompted.

After Windows starts again, run tpm.msc and check whether the TPM status has returned to normal. This solution can be useful when TPM is detected but Windows reports configuration-related problems.

⚡ Bonus: An Alternative Way to Upgrade to Windows 11 Without TPM

The compatible TPM cannot be found problem becomes especially frustrating when your main goal is upgrading from Windows 10 to Windows 11. Microsoft officially requires TPM 2.0 for Windows 11, so an unsupported PC may fail the normal compatibility check even if it otherwise performs well.

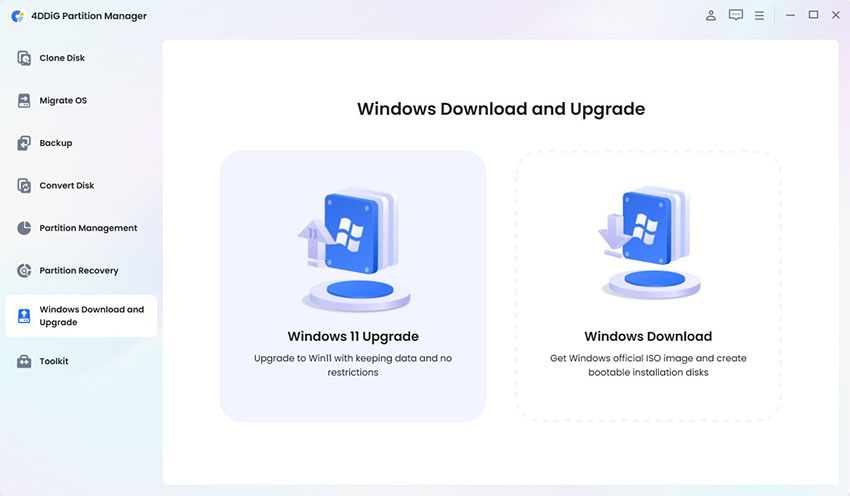
4DDiG Partition Manager includes a Windows 11 Upgrade feature that helps prepare your PC for the upgrade without requiring you to modify complex Windows settings manually.

  • Install and launch 4DDiG Partition Manager. Go to Windows Download and Upgrade, then select Windows 11 Upgrade.

    FREE DOWNLOAD

    Secure Download

    win11 upgrade feature
  • The program will automatically check your computer to see whether its hardware and system settings meet the Windows 11 requirements. After the check is complete, you will see whether your PC is ready for Windows 11.

    check win11 requirements
  • If some requirements are not met, follow the on-screen guidance to create bootable installation media or convert the disk type when required.

    follow guide to update
  • Select your preferred system language and Windows 11 version. Click Start to begin preparing the upgrade, then click Sure when the confirmation message appears.

    choose language and version
  • 4DDiG Partition Manager will begin bypassing the unsupported Windows 11 requirements. This process may take some time, so keep the program running until it finishes. Once completed, you can continue with the Windows 11 upgrade.

    install win11

More FAQs About TPM

1. Can I Add TPM 2.0 to My Old Computer?

Yes, in some cases. If your motherboard has a compatible TPM header, you may be able to install a TPM 2.0 module. Check your motherboard specifications first, as not all TPM modules are compatible. Your PC may also already support Intel PTT or AMD fTPM without additional hardware.

2. Can I Enable TPM 2.0 Without Going into BIOS?

Only in certain situations. If TPM is already enabled but Windows cannot detect it, troubleshooting within Windows may help. However, if Intel PTT or AMD fTPM is disabled, you generally need to enter BIOS/UEFI to enable it.

Conclusion

The compatible TPM cannot be found message does not necessarily mean your computer lacks TPM 2.0. In many cases, TPM is simply disabled in BIOS/UEFI, or Windows cannot detect it because of a driver, chipset, or firmware issue. Start by checking TPM in Device Manager, then enable Intel PTT or AMD fTPM if necessary. Updating drivers and BIOS can also help, while clearing TPM should only be used carefully as a later solution.

If TPM cannot be enabled and your goal is upgrading to Windows 11, 4DDiG Partition Manager also provides a way to bypass Windows 11 upgrade requirements on unsupported hardware.

FREE DOWNLOAD

Secure Download

William Bollson (senior editor)

William Bollson, the editor-in-chief of 4DDiG, devotes to providing the best solutions for Windows and Mac related issues, including data recovery, repair, error fixes.

(Click to rate this post)

You rated 4.5 ( participated)