Top 12 Solutions for macOS Tahoe Not Showing Up Problem
If you’ve been waiting for the latest macOS release but suddenly find macOS Tahoe not showing up, you’re not alone. Many Mac users experience this issue during major systems rollouts, and it can be rather frustrating when the update doesn’t appear as expected.
The good news is that the problem usually comes down to compatibility, settings or even connectivity and there are several proven ways to fix this problem quickly.
Why Is Tahoe Not Available on My Mac?
If you’re asking yourself, why can’t I get macOS Tahoe on my mac, the answer often lies in a few common system or account-related issues. Below are the most frequent reasons why macOS Tahoe not available for you.Your Mac Is Not Compatible: Apple restricts each macOS release to certain hardware models. If your system is older, macOS Tahoe may not show up as expected.
- Apple’s Phased Rollout Strategy: Apple never releases new macOS versions to all users instantly. Instead, macOS updates are delivered in stages across different regions and even device groups.
- Internet and Network Connection Issues: macOS relies on a stable internet connection to check Apple’s servers for updates. If your network is unstable, you will face the issue regarding macOS Tahoe update not found.
- Incorrect Data and Time Configuration: Apple’s update verification depends on accurate system time. If your Mac’s date or time doesn’t march Apple’s servers, the request for macOS Tahoe may be rejected.
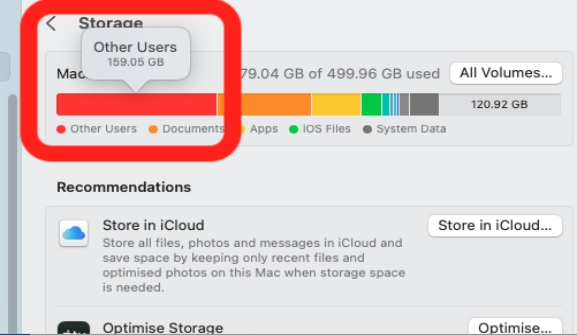
- Lack of Available Storage: macOS Tahoe requires at least 20–25 GB of free storage to download and install. If your Mac is nearly full, the update won’t show as available.
System Cache Errors or Software Update Bugs: Sometimes, the macOS Software Update tool itself fails to refresh properly, even on supported devices.
How to Fix macOS Tahoe Update Not Showing via 5 Simple Methods
If you notice the macOS Tahoe update not showing, it doesn’t always mean that macOS Tahoe not available permanently on your device. In most cases, the issue is related to settings, storage or even connectivity.
Check Device Compatibility
Before trying anything else, confirm that your Mac supports macOS Tahoe. Unsupported Macs will never display the update. You can confirm device compatibility through the steps below:
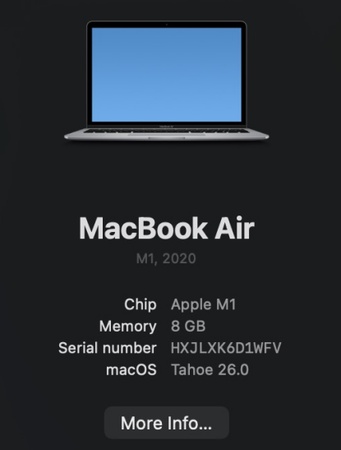
On your Mac, click the Apple logo in the top-left corner.
Select “About This Mac”.
Note your Mac model and year.
Compare it with Apple’s official compatibility list. And macOS Tahoe is only supported on:
- MacBook Pro (2018 or later)
- MacBook Air (2018 or later)
- MacBook (2017 or later)
- iMac (2019 or later)
- iMac Pro (all models)
- Mac mini (2018 or later)
- Mac Studio (all models)
- Mac Pro (2019 or later)
Ensure Stable Network Connection
Sometimes the macOS Tahoe update not showing up is caused by unstable Wi-Fi or blocked servers. Without a strong internet connection, your Mac cannot contact Apple’s update servers.
-
Go to the Wi-Fi menu in the top bar and connect to a stable network.
-
If possible, plug in an Ethernet cable for a direct connection.
Restart your router and modem to clear connection errors.
Check Apple’s System Status
Sometimes, macOS Tahoe not available has nothing to do with your Mac as Apple servers might be experiencing downtime or heavy traffic.
-
Open a browser and go to Apple’s official System Status page.
Look for “macOS Software Update” in the list of services.
If the icon is green, servers are working normally. If it’s yellow or red, the problem is on Apple’s side.
-
Wait a few hours and try checking for updates again.

Verify Date & Time Settings
Incorrect date and time can prevent your Mac from verifying updates, which may explain why Tahoe not available on my Mac.
Click the Apple logo and open System Settings.
Go to “General > Date & Time”.
-
Turn on “Set time and date automatically”.

Ensure the Time Zone matches your location.
Restart your Mac to apply the changes.
-
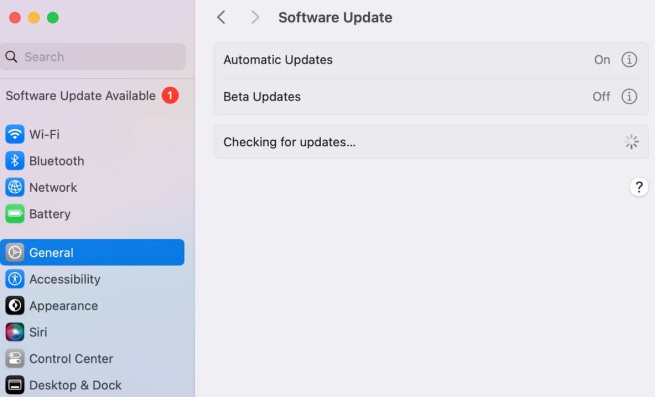
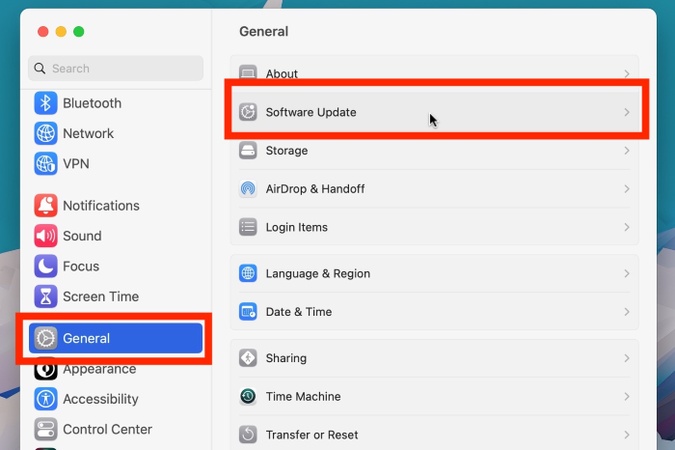
Go to “System Settings > General > Software Update” and check again.
Free Up Storage Space
Even if your Mac is compatible, macOS Tahoe update not showing may occur when there isn’t enough free storage to download and install the update.
-
Open “Apple logo > System Settings > General > Storage”.
-
Check how much free space you have (at least 20–25 GB is recommended).
-
Delete unused applications by going to Applications, right-click the app, and choose “Move to Trash”.
-
Empty the Trash to reclaim space fully.

-
Use “Manage Storage > Recommendations” to delete system junk, cache files, or move files to iCloud.
How to Fix macOS Tahoe Not Showing Up via 7 In-depth Solutions
If the simple methods didn’t work and you still see macOS Tahoe not showing up, it’s time to move on to advanced troubleshooting. These solutions dig deeper into macOS settings and installation tools and the following steps will help you resolve the problem.
Restart Your Mac
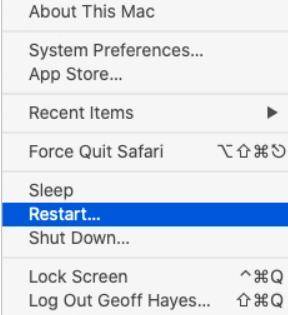
A basic restart can refresh system processes that might be blocking the update.
Click the Apple logo in the top-left corner.
Select “Restart”.
-
After reboot, go to “System Settings > General > Software Update”.
Check if Tahoe appears in the update list.
Many cases of Mac not showing Tahoe update are fixed with a simple restart.
Refresh Software Update Settings
Sometimes the Software Update tool fails to refresh properly, causing macOS Tahoe update not showing in the panel.
Open “System Settings“.
Navigate to “General > Software Update“.
Hold the “Option” key and click “Check for Updates“ again.
-
If Tahoe still doesn’t appear, toggle “Automatic Updates“ off and back on.

Update to the Latest Supported macOS Before Tahoe
If you’re running an older macOS version, you may need to upgrade to the most recent supported system before Tahoe becomes available.
Open “System Settings > General > Software Update“.
-
If another macOS version (like Sequoia or Sonoma) is available, install it first.
After installation, re-check for updates.
Skipping intermediate versions often leads to macOS Tahoe not available errors.
Clear System Cache
Corrupted system caches can prevent your Mac from recognizing available updates.
Open “Finder > Go > Go to Folder" and enter "/Library/Updates/".
Delete the contents of this folder (not the folder itself).
Restart your Mac to check for the update again.
Get macOS Tahoe Using a Bootable Installer
If Mac not showing Tahoe update continues, creating a bootable installer is an effective solution. This allows you to install Tahoe directly from a USB drive.
However, manually creating installers can be tricky. This is where Tenorshare 4DDiG macOS Installer becomes useful. It creates a bootable installer to troubleshoot the update problem and install the latest macOS Tahoe version for you.
Key Benefits of 4DDiG macOS Installer
- Allows you to directly download and create a bootable macOS installer.
- Fixes issues when macOS Tahoe not showing up in Software Update.
- Works even if your system update cache is corrupted.
- Saves time compared to manual Terminal commands.
- No technical skills needed, just a few clicks to build a bootable USB for macOS.
- You can reinstall or repair macOS offline, without depending on internet.
- Works with different macOS versions, allowing downgrades or clean installs.
You can download and install 4DDiG to your Mac first, then move on to see how it works to create a bootable installer for your device.
Secure Download
Secure Download
-
Open 4DDiG for Mac, navigate to “macOS Installer“, and click “Start Creation“.

-
Choose macOS Tahoe from the drop-down menu and confirm by clicking “Selection Complete“.

-
Connect a USB flash drive or external hard drive with at least 19 GB of free space, select it, and click “Create Now“.

-
After the creation process finishes, follow the on-screen instructions to boot from the USB and reinstall macOS Tahoe on your computer.

Use Terminal Commands to Check for Update Manually
If Mac not showing Tahoe update, Terminal can force your Mac to re-check Apple’s servers.
Open Terminal from “Applications > Utilities”.
-
Enter the command: softwareupdate -l.
-
If Tahoe is listed, install it with: softwareupdate -i -a.
Restart your Mac after installation.
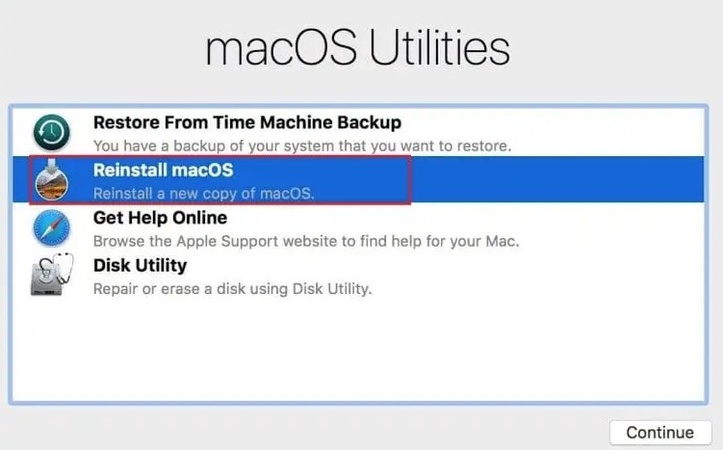
Get macOS Tahoe via macOS Recovery Mode
If none of the above works, Recovery Mode can reinstall the latest compatible version, including Tahoe if your Mac supports it.
-
Restart your Mac and immediately hold “Command (⌘) + R” until the Apple logo appears.
Choose “Reinstall macOS” in the recovery options.
-
Follow the on-screen prompts to download and install the newest version.

This method is a reliable last resort when the problem continues after all other fixes.
FAQs About Mac Not Showing Tahoe Update
Q1: How do I check if I have macOS Tahoe?
Go to Apple logo > About This Mac. If it says “macOS Tahoe,” you’re updated. If not and the macOS Tahoe update not showing, use Software Update or a bootable installer.
Q2: What if my Mac is not compatible with macOS Tahoe?
If macOS Tahoe not available, your Mac is too old. You can only stay on your current system or upgrade to a supported model. Unsupported Macs may not get the update officially.
Q3: Can I manually download macOS Tahoe if it’s not showing up?
Yes. If macOS Tahoe update not found, download it from the App Store, use Terminal commands, or create a bootable installer with 4DDiG macOS Installer. This works when mac not showing Tahoe update in System Settings.
Conclusion
Dealing with macOS Tahoe not showing up can be frustrating, but it doesn’t always mean something is wrong with your Mac.
Most cases are solved by checking compatibility, fixing settings, or using advanced tools. If the update still doesn’t appear, the Tenorshare 4DDiG provides a simple and effective way to create a bootable installer and ensure your system gets the latest macOS without unnecessary delays.
Secure Download
Secure Download




 ChatGPT
 Perplexity
 Google AI Mode
 Grok
Grok

