How to Split Screen on Mac? | 2 Easy Methods
Are you struggling to manage multiple tasks on your Mac? Split screen might be the solution you need. This feature lets you work on two apps side by side, boosting your productivity. Split screen on Mac divides your display into two equal parts. You can view and use different apps simultaneously without switching windows. This setup is perfect for comparing documents, researching while writing, or monitoring multiple tasks. Using a split screen is simple. You can activate it through keyboard shortcuts or the macOS interface. Once enabled, you can adjust the size of each window and even swap their positions. This guide will show you two practical methods to split your screen on Mac. You'll learn how to use this feature effectively, making your workflow smoother and more efficient.

Part 1: How to Split Screen on Mac?
Now let's explore two easy methods to split your screen on mac. These techniques work on recent macOS versions, including Sonoma. Whether you prefer keyboard shortcuts or using your mouse, you'll find a method that suits your style. Let's start with the first method to split your screen on Mac.
Method 1. Split Screen on Mac by Shortcut
Keyboard shortcuts offer a quick way to split your Mac screen. Here's how to use them:
Press "Control + Command + F" on your keyboard.
This shortcut enters full-screen mode for your current app.
Press "F3" to open Mission Control.
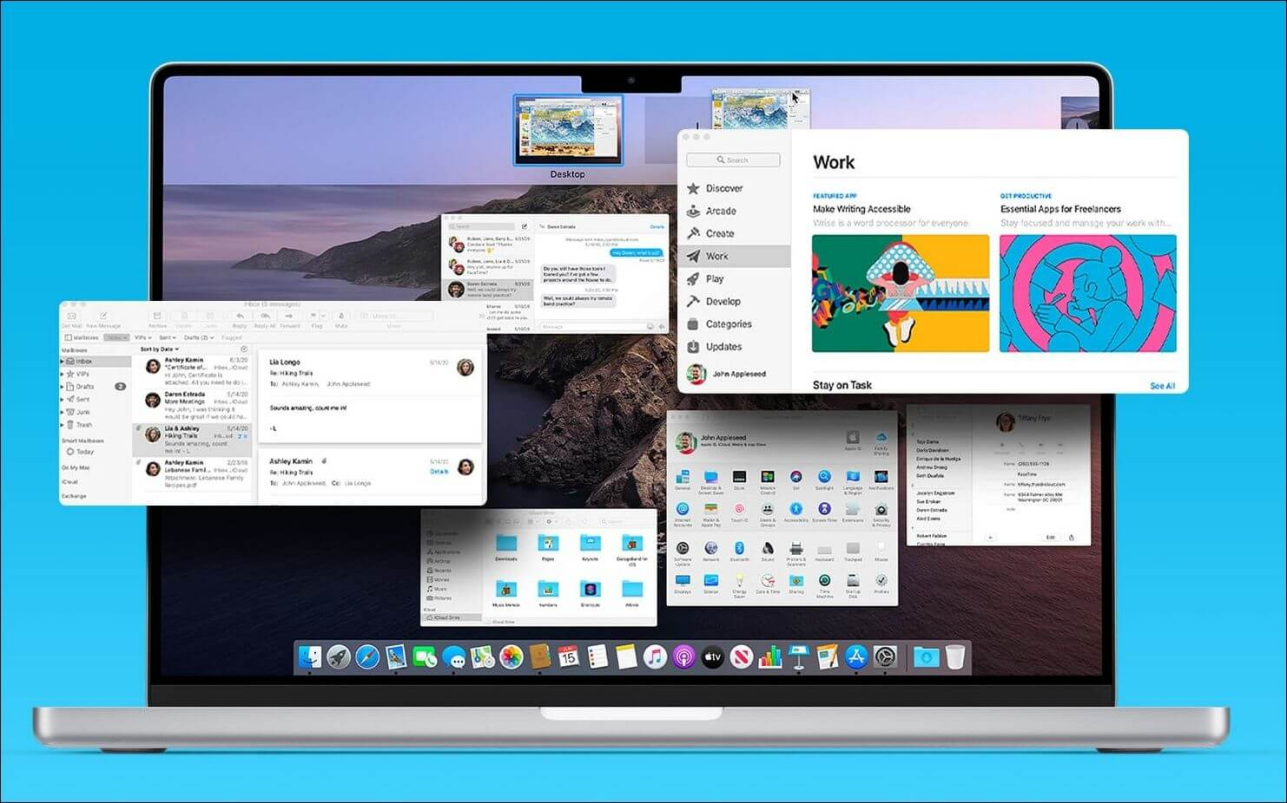
Mission Control shows all your open windows and desktops.
Drag another app onto the full-screen app in Mission Control.
This action will combine the two apps in Split View.
Click on the combined app icon to enter Split View.
You'll now see both apps side by side on your screen.
Adjust the split by dragging the black line between apps.
Move the line left or right to resize the windows as needed.
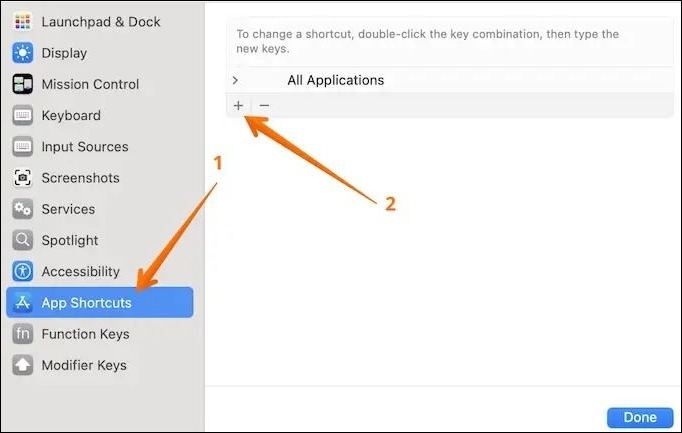
If these steps feel complicated, you can create a custom keyboard shortcut:
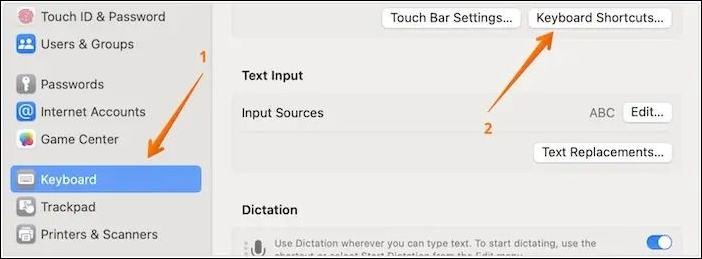
Open "System Preferences" and click on "Keyboard".

Select "Keyboard Shortcuts" and then "App Shortcuts".
Click the "+" button to add a new shortcut for Split View.

This method is faster once you've memorized the shortcuts. It's ideal for power users who prefer keyboard controls. You can even create custom shortcuts in System Preferences if you want.
Remember, these shortcuts work on most recent macOS versions. Practice a few times to get comfortable with the process. Soon, you'll be splitting your screen effortlessly, boosting your productivity.
Method 2. Use the Split View on MacOS Sonoma
Split View is a powerful feature that lets you work with two apps side by side on your Mac. Here's how to use it:
- Open the first app you want to use in a split screen.
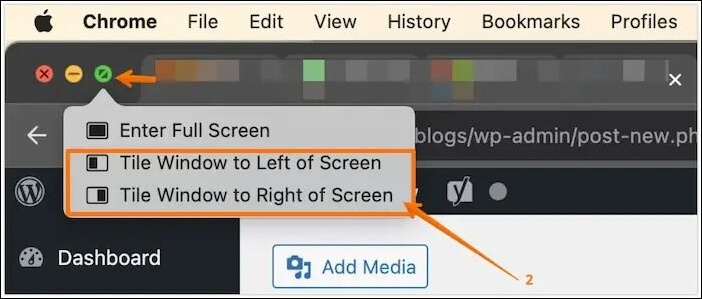
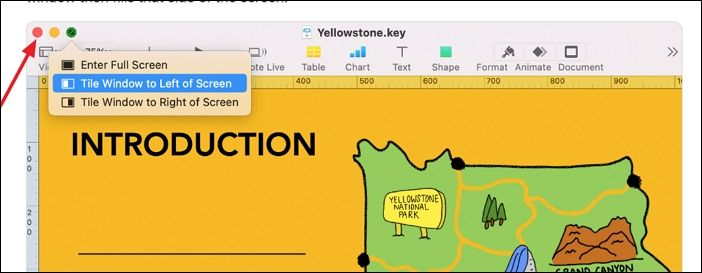
- Find the green full-screen button in the top-left corner of the app window.
- Click and hold this green button. You'll see a dropdown menu appear.
Choose "Tile Window to Left of Screen" or "Tile Window to Right of Screen" based on where you want this app to appear.

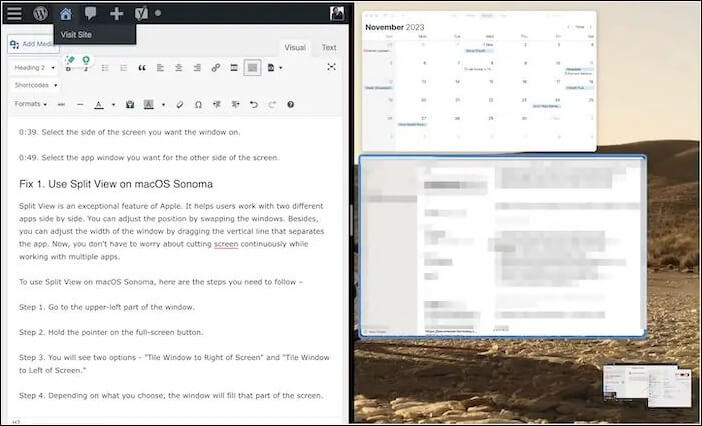
- The first app will now occupy half of your screen. You'll see other open apps on the other half.
- Click on another app to fill the remaining space. Your screen is now split.
- To adjust the size of each window, click and drag the black line between them.
If you want to switch the positions of the apps, simply drag one app to the other side.

This method is great for comparing documents, referencing information while writing, or monitoring multiple tasks at once. It works seamlessly on recent macOS versions, including Sonoma.
Remember, you can use any two apps in Split View, making it a versatile tool for various tasks.
Part 2: Bonus Tip: How to Recover Unsaved Files After Sudden Exit?
What if you accidentally close a window while using split screen? Imagine losing an unsaved Word document you've been working on. Don't panic. 4DDiG Mac Data Recovery is here to help.
This expert data recovery software can help you recover unsaved documents after sudden exits or system crashes. It's designed to retrieve lost, damaged, or corrupted data from your Mac or MacBook with a high success rate, even without a backup.
4DDiG supports recovery from various scenarios, including accidental deletion, formatting, and system crashes. The software offers both quick and deep scan options to locate your lost files efficiently. You can preview files before recovery to ensure you're restoring the correct ones. 4DDiG is compatible with the latest Mac systems, including those with T2 chips, M1 processors, and macOS Sonoma. To recover your unsaved files using 4DDiG Mac Data Recovery, follow these three simple steps:
Secure
Download
Secure
Download
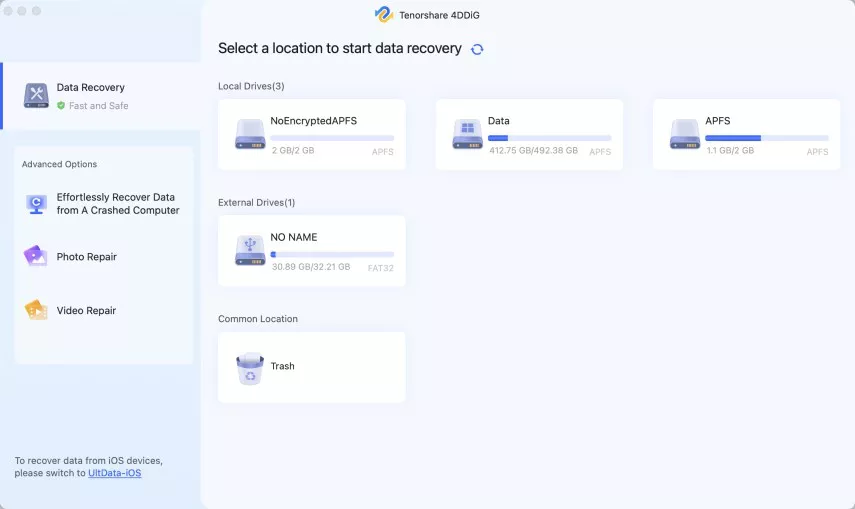
Select the location
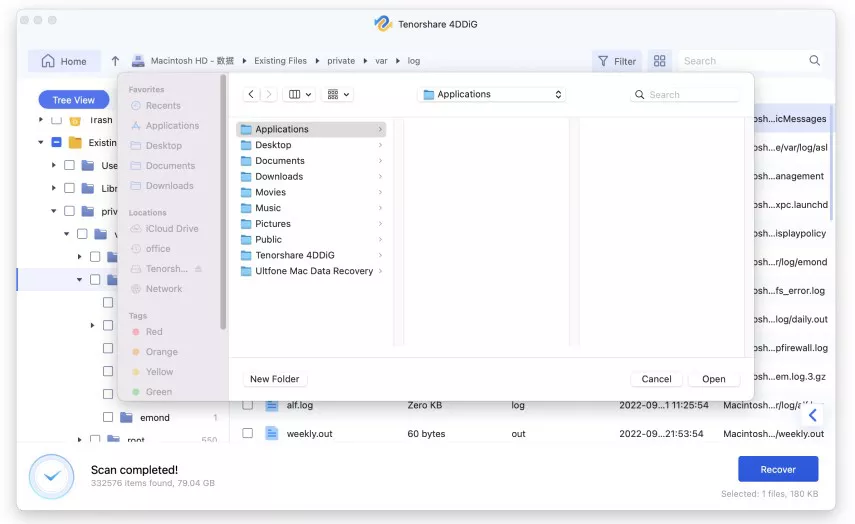
Launch 4DDiG Mac Data Recovery and choose the drive where your unsaved document was located. This could be your Mac's internal drive or an external storage device.

Scan for lost files
Click 'Scan' to start searching for your lost files. The software will perform a thorough scan of the selected location. You can pause or stop the scan at any time if you spot your file.

Preview and recover
Once the scan completes, preview the found files to ensure you're recovering the correct document. Select your unsaved file and click 'Recover' to save it to a safe location on your Mac.

Part 3: How to Exit from Macbook Double Screen?
So now you finished your work and want to exit the split screen? Let’s learn how you can do it. Exiting a split screen on your Mac is a straightforward process. You can choose from two methods to end your split-screen session.
Method 1: Using window controls
- Move your cursor to the top of the screen to reveal the menu bar.
- Locate the red and green buttons in the top-left corner of either window.
- Click the red button to close the app entirely.
Alternatively, click the green button to exit the split screen while keeping the app open.

Method 2: Using Mission Control
- Press the F3 key on your keyboard to open Mission Control.
- You will see all open windows and desktops displayed.
- Find the split screen window you want to exit.
- Click on it to bring it to the foreground.
Use the green button to exit split screen mode.

After exiting split screen, one app may remain in full-screen mode. To return it to a regular window, click the green button once more.
These methods allow you to efficiently switch between split screen and regular views on your Mac. Practice both to determine which suits your workflow best.
Part 4: FAQs
Q 1: What is the shortcut to split screen in two Mac?
Ans: To split screen, press Control + Command + F to enter full-screen mode. Then press F3 for Mission Control. Drag another app onto the full-screen app to create a split view.
Q 2: How do I use two screens on my Mac?
Ans: Connect your second display to your Mac using the appropriate cable. Your Mac should detect it automatically. Go to System Preferences > Displays to adjust settings. Arrange screens by dragging them in the Arrangement tab.
Q 3: How do I open two windows of the same app on my Mac?
Ans: Open the app and go to File > New Window. Alternatively, use Command + N shortcut. You can then use these windows in split screen mode or arrange them side by side manually.
Final Words
Splitting your screen on Mac is a powerful way to boost your productivity. Whether you prefer using Split View or keyboard shortcuts, you now have the tools to multitask efficiently. Remember, if you accidentally lose unsaved work, 4DDiG mac Data Recovery . can help recover your files. Practice these methods to find what works best for your workflow. With a split screen on Mac, you can compare documents, research while writing, or monitor multiple tasks simultaneously. Master this feature to streamline your work and make the most of your Mac's capabilities. Happy multitasking!
Secure
Download
Secure
Download

 ChatGPT
 Perplexity
 Google AI Mode
 Grok
Grok

