How to Stop Disk Not Ejected Properly Notifications on Mac?
Seeing a repeated alert such as, disk not ejected properly on Mac can be frustrating, especially when it keeps appearing even though you haven’t touched your external drive. This issue is more than an annoyance as it can lead to data corruption if left unresolved.
In this guide, we’ll explain what the warning means, why it happens, and how you can stop these pop-ups for good. We’ll also show you how to recover lost files if the error has already caused data loss.
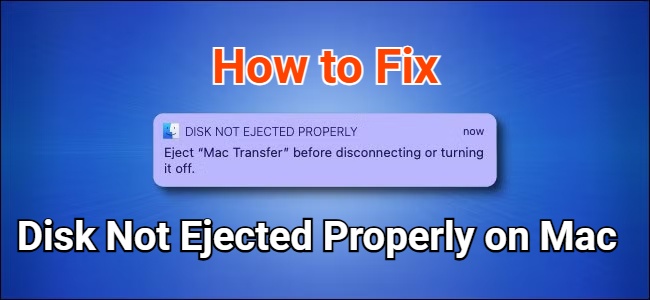
What Does Disk Not Ejected Properly Mean?
When you see a disk not ejected properly notification on Mac, it means the system detected an unexpected disconnection of your external drive. Normally, macOS expects you to eject a disk safely so it can complete background read/write processes. If the connection drops suddenly, the system cannot finalize data operations, leading to potential file corruption.
Aside from physically unplugging the drive, several other situations can trigger this notification, including loose cables, insufficient power to the external disk, unexpected sleep mode behavior, macOS settings that suspend hardware, failing USB hubs, and even damaged drives.
Understanding these causes helps you prevent future interruptions and ensures stable long-term disk health.
How to Fix the Disk Not Ejected Properly on Mac Issue?
If the disk is not ejected properly on a Mac, warnings will keep appearing; the solutions below will help stabilize your drive and remove the pop-ups.
1. Try a Different Cable
A worn-out or unstable cable is one of the most common reasons a drive disconnects unexpectedly. Even minor cable damage or looseness can cause momentary power or data interruptions, triggering the warning. Switching to a high-quality USB-C, USB-A, or Thunderbolt cable often restores a stable connection immediately.
2. Test with Another Power Supply
Some high-capacity external drives require more power than the Mac’s USB port can provide. If the drive cannot receive stable power, it may disconnect randomly. Testing with a powered USB hub or using the drive’s original power adapter ensures the disk receives consistent energy, preventing unexpected ejection.
3. Adjust System Settings
Sometimes macOS power-saving features interfere with external drives, especially when the Mac sleeps. Tweaking these settings prevents the system from pausing or powering down hardware unexpectedly.
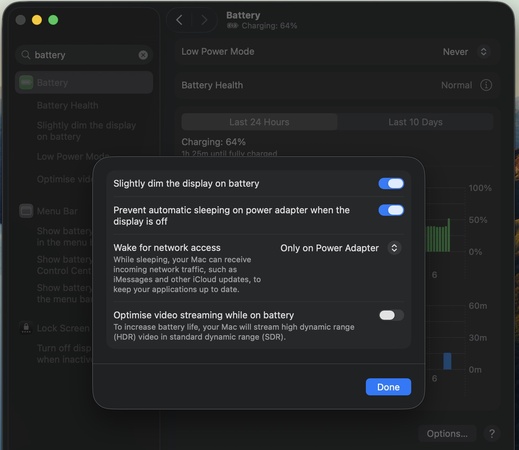
Below are the steps to follow on the latest macOS 26 to fix the disk not ejecting properly on Mac:
- Open "Settings" on Mac and go to "Battery," then click "Options."
-
Enable the “Prevent automatic sleeping on power adapter when the display
is off” option, then click "Done" and close settings.

- Now, connect your external hard drive to your Mac and go back to "Battery” in Settings and click “Options”
- Click the dropdown and select “Never” against “Put hard disks to sleep when possible and click “Done" to save. This option is not available by default with Macs with SSDs, but it may appear when you connect an HDD to a Mac.
These settings prevent sleep-related disconnections and reduce the frequency of the disk not being ejected properly when the Mac goes to sleep.
4. Run First Aid in Disk Utility
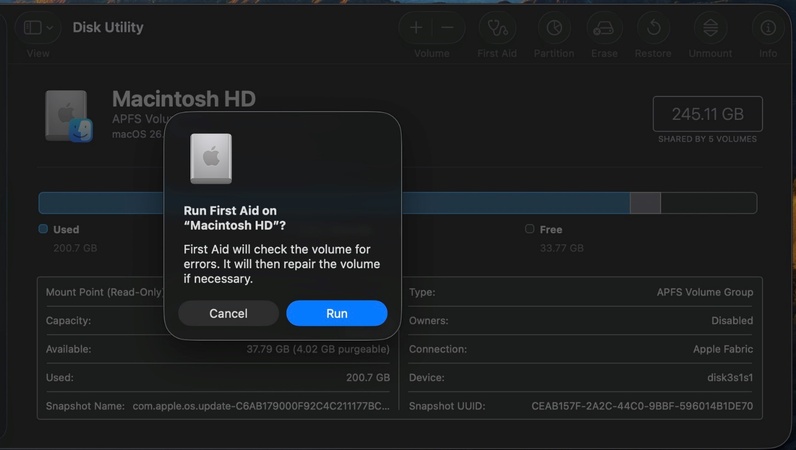
If your disk has minor file system issues, macOS may lose track of the drive temporarily, causing random disconnects. Disk Utility’s First Aid tool can repair directory errors and restore stability.
- Open Disk Utility from “Applications” and select the affected external drive.
-
Click “First Aid” at the top and confirm by selecting “Run”.

- Wait for the repair to complete and restart your Mac.
5. Reset the NVRAM or PRAM
NVRAM/PRAM stores system settings such as hardware configurations, ports, and volume data. If these settings become corrupted, the Mac may fail to communicate with external drives correctly, causing intermittent ejections. Apple Silicon Macs reset NVRAM automatically, so no manual action is required, and this method only works for Intel Macs.
-
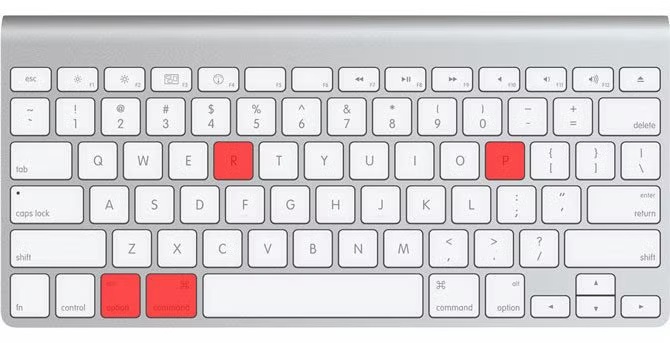
Shut down your Mac and turn it on, and immediately press “Option +
Command + P + R” before you see the grey screen.

- Hold for 20 seconds, then release when you hear the startup sound.
These resets help resolve the disk not ejected properly Mac keeps popping up errors caused by firmware miscommunication.
How to Prevent Disk Problems on Mac?
To avoid future disk not ejected properly notification on Mac issues, follow these prevention tips:
- Always eject the disk safely from Finder or the Desktop.
- Avoid using damaged cables or low-quality USB hubs.
- Keep your macOS updated for the latest hardware compatibility fixes.
- Disable disk sleep features if you frequently use external drives.
- Don’t move the drive while it’s in operation.
- Use powered hubs for high-capacity HDDs.
- Run First Aid regularly to maintain disk health.
These habits ensure stable disk performance and reduce unexpected interruptions.
How to Recover Lost Data from Local/External Disk?
If your drive disconnected unexpectedly and you lost data, you can still recover files using 4DDiG Mac Data Recovery. Sudden drive ejections often damage file structures, making data temporarily inaccessible, but not permanently lost.
4DDiG is designed to scan damaged, corrupted, or improperly ejected drives and rebuild their file structures. Instead of overwhelming users with features, it focuses on clarity, guiding you from detection to recovery with minimal steps.
Secure Download
Secure Download
Its deep-scan engine is particularly helpful for internal/external HDDs and SSDs affected by improper ejection, making it highly effective for the issue discussed in this article.
Here’s how to recover lost data with 4DDiG for Mac:
-
Launch 4DDiG Mac Data Recovery and select "Hard Drive," then click the
external or local disk where data was lost to start scanning.

-
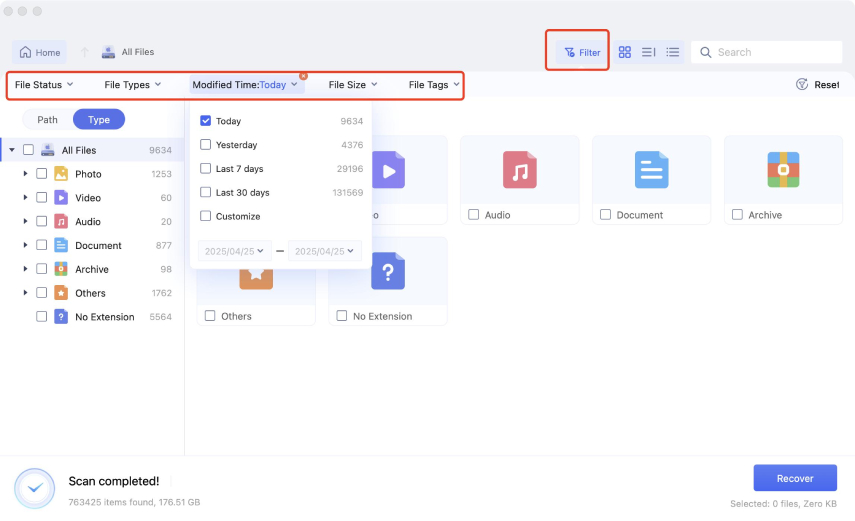
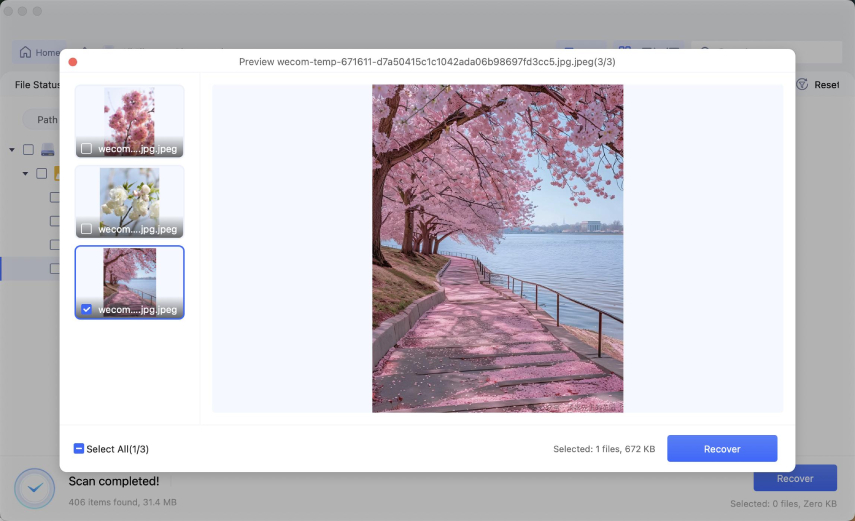
Preview recoverable files, including documents, photos, and videos. You
can use different filter options from the top to make searching quicker.

-
Select the files you want to restore and click “Recover”.

-
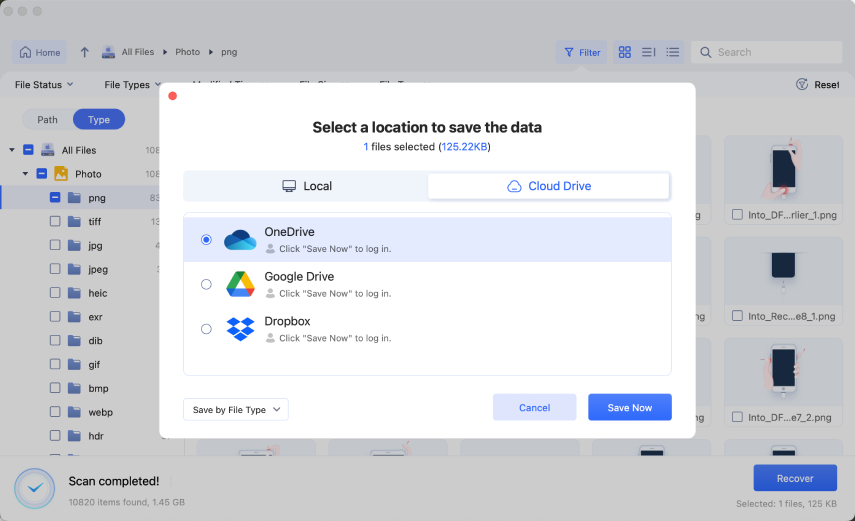
Save the recovered files to a new location by clicking "Save" and
selecting your desired location, then clicking "Save Now”.

By combining intuitive design with strong technical capability, 4DDiG offers users a reliable solution for recovering files lost due to disk errors, improper ejection, or corrupted sectors.
Conclusion
The disk was not ejected properly on Mac issue can come from anything ranging from loose cables to system sleep settings or disk errors. By adjusting macOS preferences, testing the hardware, and repairing the disk, you can usually eliminate the notifications completely.
However, if unexpected ejection has already caused data loss, using a professional recovery tool becomes essential. Tenorshare 4DDiG for Mac provides a safe and effective way to restore lost data from both local and external drives, ensuring your files remain protected even after disk issues.
Secure Download
Secure Download
💡 Summarize with AI:
You May Also Like
- Home >>
- Mac Problems >>
- How to Stop Disk Not Ejected Properly Notifications on Mac?

 ChatGPT
 Perplexity
 Google AI Mode
 Grok
Grok

