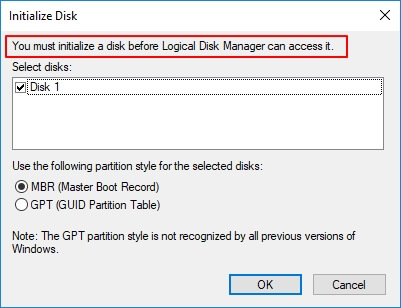
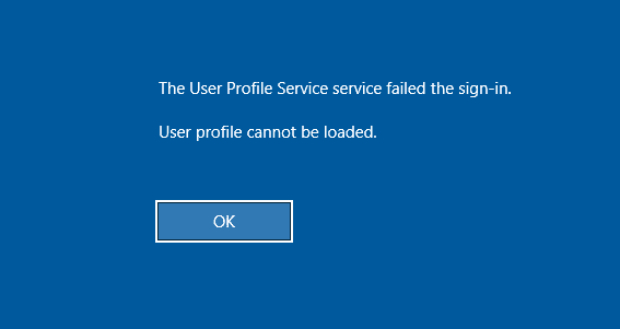
How to Fix Erase Process has Failed on Mac?

5 mins read

Updated on 2024-04-17 15:10:10 to Mac Problems

Is your Mac experiencing the "erase process has failed Mac" error" error? If so, you can benefit from this guide. The "Mac erase process has failed" error happens when you erase the data from your hard drive and attempt to reinstall your macOS or OS X. Fortunately, there are a few tips you can employ to fix this issue. The "Erase process has failed" issue on Mac is problematic because you can't get to your data and applications. If you are confronting a similar circumstance and searching for the ideal answer, this article has the solution to assist with that.

erase process has failed

Part 1: Why Does Erase Process Fail Mac?

What causes the "Mac disk utility erase process has failed" problem on Mac? To learn various ways of fixing, first, you need to know why disk utility won't erase hard drive. Coming up next are reasons behind the error to assist you with understanding its causes:

  • Unexpected termination of system files
  • Read/write interruption
  • Unexpected Formatting
  • Virus and malware attacks
  • Changes in BIOS setting
  • Corruption of header document
  • List documents hub debasement
  • Boot sector issues
  • Kernel Panic issues like BOSD in Windows

Part 2: How to Fix Erase Process Has Failed Mac?

Fix 1: Erase Disk via Terminal

  • Go to Finder and explore Applications > Utility.
  • Open Terminal as administrator and type "diskutil list." That will show data regarding different disks and volumes in your Mac.

    the diskutil list
  • Using the "erase disk" or "erase volume" command, erase a disk or a volume, respectively.
  • The correct configuration to erase disk2 in the HFS+ format of the command is "diskutileraseDisk HFS+ DISK disk2."

Fix 2: Update the macOS

If your Mac is running on an out-of-date version, then it can experience the "erase process has failed click done to continue" issue. Fortunately, it can, without much of a stretch, be fixed by refreshing your Mac to its most recent firmware. You can search for the most recent update for macOS from the App Store or click the Apple logo from the top, go to System Preferences > Software Update and check for new versions from here.

Fix 3: Erase Selected Volumes Instead

  • Right off the bat, go to your Mac's Finder > Applications > Utility.
  • Open the Disk Utility application on your framework and go to the upper left corner of the interface. From the dropdown menu, you can decide to see all volumes or external gadgets.
  • Presently, select a volume from the sidebar and format it using the "Erase" button on the toolbar.

    use erase button

Fix 4: Adjust the Security Levels for Formatting an External Device

  • Go to the Disk Utility application on your Mac and connect your external device with it.
  • Presently, select the gadget from the sidebar and press the "Erase" button. From the new window, go to its Security Options.
  • From here, you can change the security levels for formatting the gadget. Keep the security level on the lower side to not get the "can’t erase Mac hard drive" message.

    security option

Fix 5: Use a USB Boot Drive

  • Reboot your Mac after connecting the USB to it.
  • Hold down the OPTION key during boot, and select the attached boot drive.
  • At the boot menu, go to Disk Utility > First Aid and confirm the disk, and fix if necessary.
  • Presently play out the first task that tossed the "can’t erase Macintosh HD" message.

Fix 6: Use Mac Recovery Partition

  • Reboot the Mac holding down the OPTIONS key, and pick the Recovery partition
  • Select "Disk Utility" from the boot menu and go to "First Aid" to check and fix the disk, or format the disk by clicking the "Erase" option.
  • This process will settle the "disk erase failed Mac" error.

Fix 7: Forcibly Unmount a Disk via Terminal

  • From the Mac OS command line, input the following command: “diskutilunmountDisk force /Volumes/DRIVENAME”
  • DRIVENAME is the name of the volume you need to unmount, then, at that point, press the RETURN key to forcibly unmount.

Part 3: How to erase Macbook Air?

The process of formatting a Macbook Air is just a matter of a few clicks. Here is how:

  • Open the Disk Utility application

    Disk Utility is an internal application liable for running format procedures on the disk. You can go to Finder > Applications > Utility and get to the Disk Utility application from here.

  • Select a Disk to Format

    Presently, you will see all the accessible disks and the associated gadgets on the sidebar of the Disk Utility application that you wish to format.

  • Erase the Chosen Disk

    Select the internal drive and go to the Disk Utility toolbar on the right and select the "Erase" button. That will show a window to make changes to format the drive. For example, you can give it another name, change its file system, etc.

Video Tutorial: How to Fix Erase Process Has Failed on Mac?

FREE DOWNLOAD

Secure Download

FREE DOWNLOAD

Secure Download

Bonus: How to Recover Data from an Erased Disk on Mac?

Before formatting a disk, think about taking a backup of your data. However, considering you have not taken an earlier reinforcement and have designed your disk, utilizing a data recovery tool would be best if you lost data due to the "erase Macintosh HD failed" error. You can take the help of Tenorshare 4DDiG, which is a very dependable tool supporting all the macOS versions. The application has probably the best recovery rates and with an easy method to use.

FREE DOWNLOAD

Secure Download

FREE DOWNLOAD

Secure Download

  • Select a Local Disk

    Open Tenorshare 4DDiG after installing and go to the home interface beneath, which shows devices and drives. Pick the disk having your data saved before deletion.

    recover from crashed mac
  • Scan Hard Disk Drive

    4DDiG quickly scans and checks your hard drive all around to look for the deleted files. Then, you can see the result, which shows the number of records that have been found. You can click "Deep Scan" your system if you need a detailed scan result.

    scan and preview
  • Recover Files from Local Disk

    4DDiG lets you preview the data and choose your ideal files. Click the "Recover" button to get the files back again. After clicking on Recover, a window will open, requesting the area you wish to save the documents. Select the ideal, however, unique destination for the recovered files.

    recover files

FAQs

1. How do I force my Mac to erase a hard drive?

You can forcibly erase a hard drive from your Mac using the disk utility application. Open the disk utility app and select the hard drive you want to format. There will be an Erase button at the top to format the drive.

2. How do I fix the "delete process has failed Mac Disk Utility 2020"?

You can fix the "disk utility won't let me erase hard drive" error using the above-mentioned seven fixes. There can be other solutions, but we have listed down the best ones to get you going.

3. Why can't I erase my disk utility on Mac?

You can't typically imagine deleting the startup disk because your Mac is utilizing it to run macOS. Recovery Mode is an exceptional feature on your Mac you can use to get your data back from a backup, reinstall macOS, get online help, or get rid of the "disk utility won’t erase hard driveb" error. Firstly, back up your Mac before attempting to reformat it.

4. How to format MacBook pro?

  • Hold down the Command + R keys and turn on your Macbook pro.
  • Select your language and then go to Disk Utility.
  • Press "Continue" to proceed.
  • Pick your startup disk (namely Macintosh HD) from the sidebar and snap the Erase button to erase disk Mac.

Summary

After going through this guide, you will have an insight into the "disk erase failed Mac" error. You are now in a position to fix the "erase process has failed Mac" error using one of the above fixes. Moreover, Tenorshare 4DDiG can help you get back your files by following some simple steps in case of any data loss.

William Bollson (senior editor)

William Bollson, the editor-in-chief of 4DDiG, devotes to providing the best solutions for Windows and Mac related issues, including data recovery, repair, error fixes.

(Click to rate this post)

You rated 4.5 ( participated)