How to Remove Mosaic from Pictures (AI Solutions or Tools)
Have you ever seen a photo where part of it looks blocky or blurred? This happens when people try to remove mosaic from pictur es that are censored or pixelated. It can be frustrating when a nice photo has hidden faces or details you want to see clearly.
If you're trying to fix this, don't worry as you're in the right place. In this article, we'll show you simple ways to remove mosaic blur using free online tools and Photoshop. You don't need to be an expert. Just follow the easy steps, and you'll be able to make your pictures clear again.
Part 1. What Is Reducing Mosaic Meaning?
Mosaic censorship is a way to hide part of a photo or video. It covers areas, like faces, private parts, or text, with small square blocks so people can't see what's behind them. Mosaic blur means the same thing. It's just another way to say the image has been blocked or blurred using squares.
Let's look at the difference between mosaic, pixelation, and blur:
-
Mosaic shows lots of small square blocks. It looks like a tiled effect.
-
Pixelation is similar, but the blocks are bigger and fewer. See how to unpixelate an image.
-
Blurring makes the area look soft and fuzzy without sharp squares. See how to fix blurry pictures.
All three are used to hide things, but mosaic and pixelation use blocks, while blur looks smooth.
Reducing Mosaic Meaning
Now, what is the meaning of mosaic censorship? It simply means hiding parts of a photo or video using digital blocks. So when people talk about "reducing mosaic," they mean trying to remove those blocks and make the image clear again.
You might not get the original image back 100%, but with AI tools and photo editors, you can often improve the picture and see more of what's behind the mosaic.
Part 2. Use 3 Top Censor/Mosaic Removers Online Free
Here are three easy and free tools you can use to reduce Mosaic blur from pictures online. No need to install anything, just upload your image and let AI do the work.
1. Pixelied – Free Mosaic Censor Remover
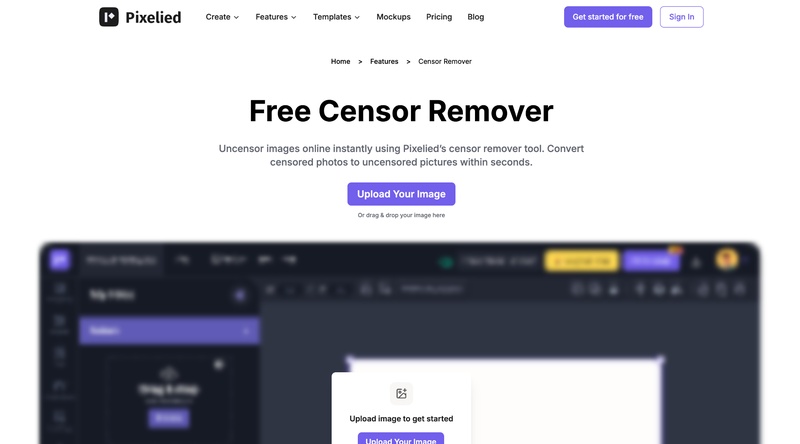
Pixelied is an online image editor that offers a free AI-powered censor remover. It helps clean up blurred or pixelated spots from photos quickly.
Steps to remove Mosaic censoring:
Go to Pixelied's censor remover tool.
Upload your photo.
-
Use the AI Enhance or Sharpen Tool to fix blurry or censored areas.
Download your edited image.
- Pro
- Cons
- 1. No login required
- 2. Easy for beginners
- 3. Offers extra photo editing features
- 1. May not work well on heavily pixelated images
- 2. Limited control over the AI result
3. Pokecut – Remove Mosaic Blur from Photos Online Free

Pokecut is a smart AI photo editor that includes a free mosaic remover. It works well for mild to moderate censorship or blur.
Steps to remove Mosaic online:
Go to Pokecut's Mosaic Remover page.
Upload your image.
-
Use the AI Enhance or Mosaic Remover tool.
Preview and download your photo.
- Pros
- Cons
-
- 1. Free and fast
- 2. Supports HD enhancement
- 3. No account needed
-
- 1. Limited daily usage for free users
- 2. Might not fully remove strong mosaic blur
3. YouCam Online Editor – Free AI Mosaic Remover
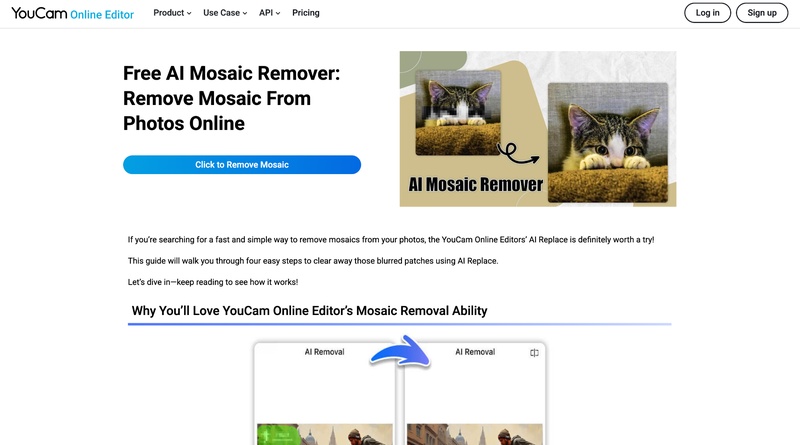
YouCam's AI tools can reduce mosaic blur using features like AI Replace and AI Enhance. It can even rebuild faces or details using AI generation.
Steps to use AI Mosaic remover:
Visit the YouCam Online Editor.
Upload your image.
-
Choose AI Replace or Photo Enhance from the tools.
Apply changes and download the result.
- Pros
- Cons
-
- 1. AI can restore faces or objects
- 2. Works on both desktop and mobile
- 3. Offers various editing tools
-
- 1. Requires sign-up
- 2. Uses credit system for edits
Part 3. How to Reduce Mosaic from Pictures Using Photoshop
Photoshop gives you more control to clean up mosaic or pixelated areas. It doesn't remove the mosaic fully but helps reduce the blocky effect and improve clarity.
Steps to Reduce Mosaic in Photoshop
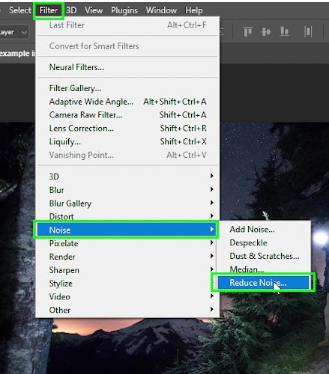
✅ Use the Reduce Noise Filter
This can also help to blend the blocky edges.
Open your image in Adobe Photoshop via “File” > “Open”.
Duplicate your layer (Ctrl+J / Cmd+J).
-
Go to “Filter” > “Noise” > “Reduce Noise” in Photoshop.

Play with the following settings and tap OK:
- Strength: 6–10
- Preserve Details: low (0–30%)
- Reduce Color Noise: ~50%
- Sharpen Details: 0%
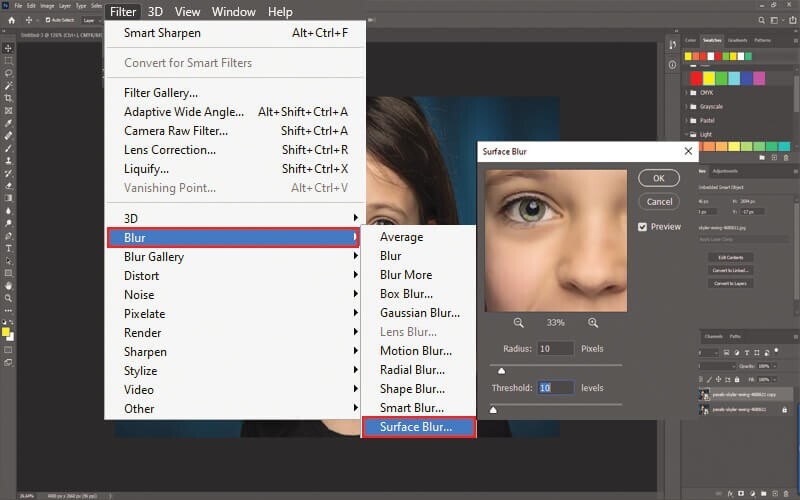
✅ Use the Surface Blur Filter
This softens the edges of blocks without destroying surrounding detail.
-
Select the pixelated area (use Lasso Tool or select the layer) on the omage.
Go to “Filter” > “Blur” > “Surface Blur”.
-
Adjust Radius and Threshold: Radius: 5–20 (depends on the block size); Threshold: 10–50. Then click OK.

✅ Use the Smart Sharpen Feeature
This method helps restore lost details in your image.
-
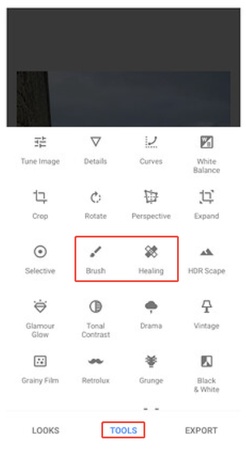
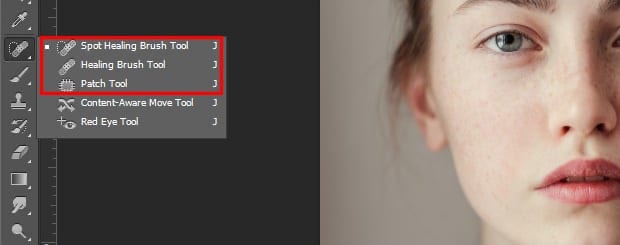
For extra cleanup, use the Smudge Tool or Healing Brush Tool manually.
-
Finally, apply “Filter” > “Sharpen” > “Smart Sharpen” to bring back lost details.

Always work on a copy of your image layer so you can compare before and after.
- Pros
- Cons
-
- 1. Full manual control
- 2. Works well for fixing specific areas
- 3. Can be combined with other Photoshop tools
-
- 1. Takes time and some Photoshop knowledge
- 2. Cannot fully restore heavily censored images
- 3. Requires paid Photoshop license
Bonus Tips: How to Remove Blur from Images with AI
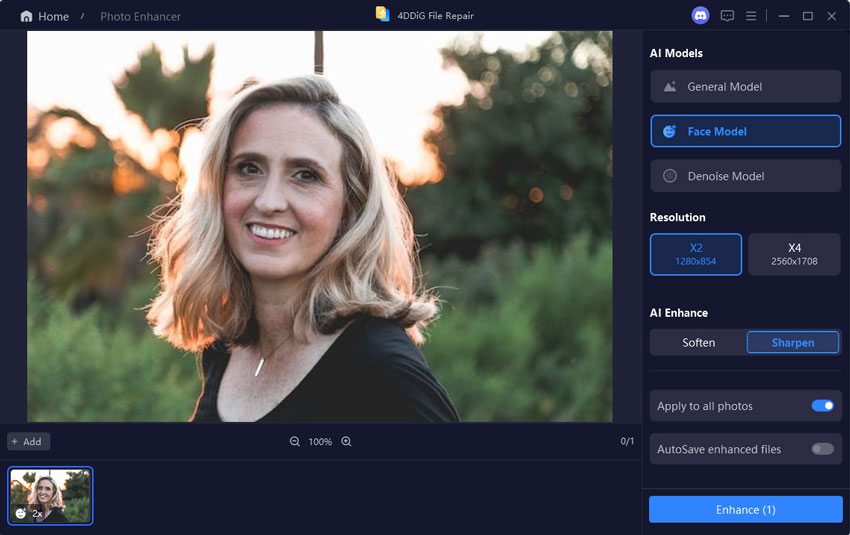
If your image is blurry (not pixelated), an AI enhancer like 4DDiG Photo Enhancer can sharpen it in one click. It is an AI-based tool that improves photo quality by reducing blur, removing noise, and upscaling images up to 8K. It's perfect for restoring low-quality or out-of-focus images.
Secure Download
Secure Download
Steps to Reduce Blurriness Using 4DDiG:
-
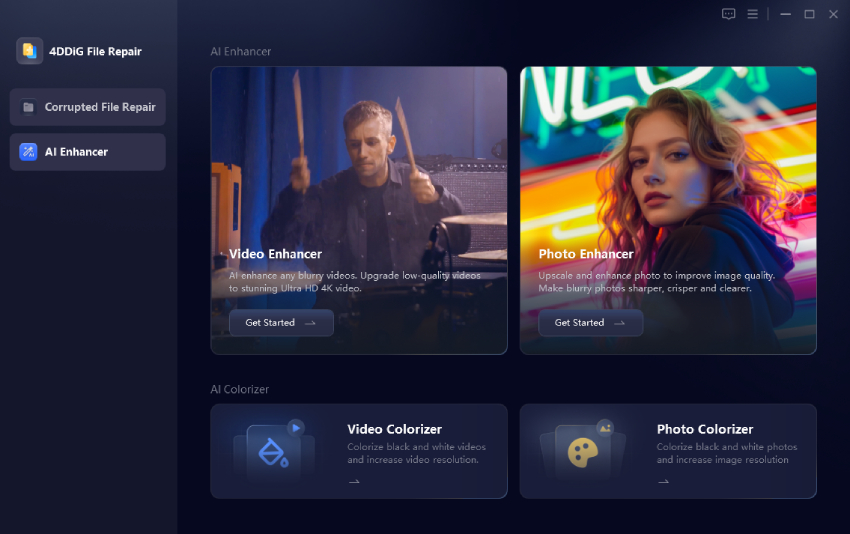
Launch the 4DDiG tool, click on “AI Enhancer”, then choose “Photo Enhancer”.

-
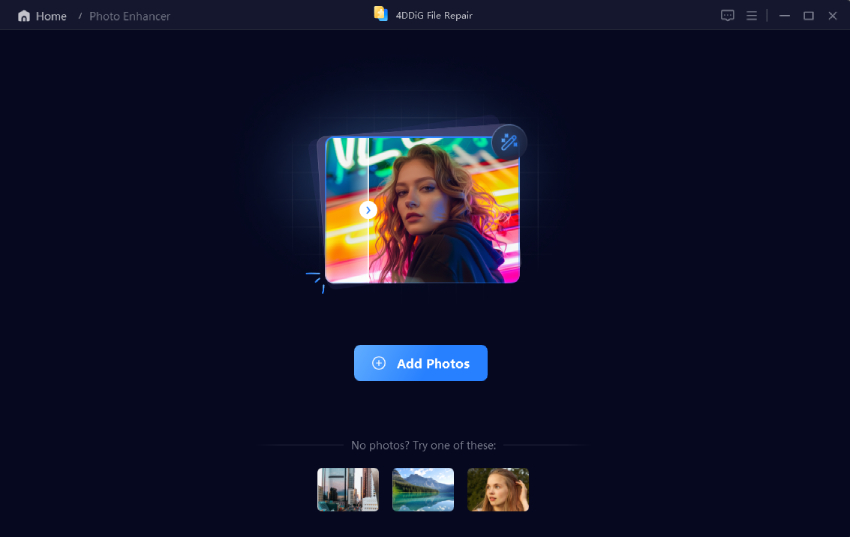
Click “Add Photos” or drag your blurry photo into the tool.

-
Choose an AI model according to your photo’s type. Meanwhile, select a resolution modeo for your images: X2 or X4.
-
General Model: Suitable for any type of photos, improving quality and clarity overall.
-
Face Model: Suitable for enhancing resolution of portraits and profile pictures, making facial feature or detail more natural.
-
Denoise Model: Remove unwanted noise generated in high-ISO or night environment from photo, making it clearer.
-
Colorize Model: Turn black-and-white photos to color, restoring old images.

-
-
Click “Enhance” and wait while the AI improves your photo. Zoom in to check the result. If you like it, click “Save” to download.
- Pros
- Cons
-
- 1. Beginner-friendly with simple interface
- 2. Multiple AI models for different photo types
- 3. Can upscale images and fix blur in one go4. Support multiple photo images, even including HEIC, HEIF, etc.
-
- 1. Requires software download
- 2. Free version has limitations
People Also Ask about Mosaic Removal
Q1: What is the meaning of mosaic censorship?
Mosaic censorship is a way to hide or blur part of an image, often using pixelated blocks. It's commonly used to cover private or sensitive content.
Q2: Can you remove mosaic from a photo?
Yes, AI tools and editing software can reduce or soften mosaic effects, but full restoration depends on the image quality and how strong the mosaic is.
Q3: Is it legal to remove mosaic censorship from content?
It depends on the situation. If the image is your own, it's usually fine. But removing censorship from copyrighted or sensitive media may be illegal.
Q4: How to remove mosaic from videos?
You can try video editing tools or AI video enhancers. However, results are not guaranteed, especially if the video is heavily pixelated.
Q5: Can AI remove mosaic?
AI tools can help reduce mosaic blur by restoring details, especially for faces or soft censorship. But results vary depending on the image.
Conclusion
Removing mosaic from pictures can be tricky, but with the right tools, like Pixelied, Pokecut, YouCam, or Photoshop, you can reduce the effect and improve image quality. For blurry or low-resolution photos, we recommend using 4DDiG Photo Repair. It uses smart AI to sharpen images, remove noise, and restore clarity in just a few clicks. It's an easy and effective way to remove mosaic from pictures and bring them back to life.
Secure Download
Secure Download

 ChatGPT
 Perplexity
 Google AI Mode
 Grok
Grok

