4 Best Ways to Fix No Available Time Machine Destinations
Download 4DDiG Mac Data Recovery to recover lost files caused by "no available Time Machine destinations" on your Mac. This guide provides effective solutions to fix the issue and safeguard your data. Keep reading to learn more!
Are you struggling with the frustrating issue of "no available Time Machine destinations" on your Mac? Time Machine, a reliable macOS feature, allows users to back up data to an external drive effortlessly. However, problems like this can disrupt backups and make file recovery challenging. This issue often occurs when your Mac fails to recognize the backup disk or Time Capsule. Fortunately, there are effective solutions to fix these errors and restore your system's functionality. In this guide, we’ll explore four proven methods to resolve "no available Time Machine destinations" and recover lost files using a powerful tool.
- How to Recover Lost Files on Mac Without Time Machine?HOT
- Method 1: Restart Your Mac
- Method 2: Rechoose Your Backup Disk
- Method 3: Updates macOS
- Method 4: Confirm Network Disk Backups
Part 1: What Causes No Available Time Machine Destinations?
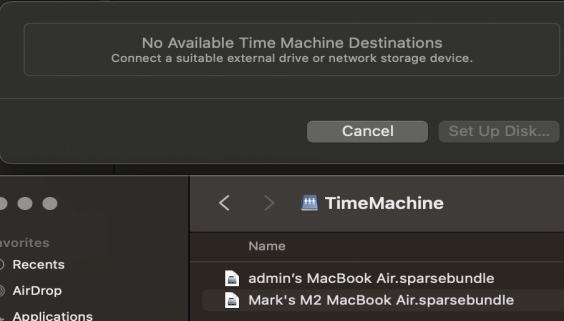
When encountering the “no available Time Machine destinations” error, identifying the root cause is the first step toward resolving the issue. Below are the most common reasons behind this frustrating problem.
- Unrecognized Backup Disk: If your Mac fails to recognize the external drive or Time Capsule, Time Machine won’t detect any destination for backups.
- Disconnected Network Drives: Network-based Time Machine backups, like Time Capsules, may stop functioning if there is a network disconnection or interference.
- Corrupted Backup Drive: A corrupted or damaged backup disk can prevent Time Machine from finding or writing to the destination properly.
- Incorrect Time Machine Settings: Misconfigured settings, such as choosing the wrong backup disk, can lead to this error.
- Outdated macOS Version: Using an outdated version of macOS might cause compatibility issues, disrupting Time Machine’s ability to detect backup destinations.
- Insufficient Disk Space: If the backup disk lacks sufficient storage, Time Machine may fail to initiate backups or recognize it as a valid destination.
Attempting to fix these issues yourself may cause complications or data loss. Stop using the device and consider professional recovery tools for the best results.
Part 2: How to Recover Lost Files on Mac Without Time Machine?
If you’re facing the issue of "No Available Time Machine Destinations" and have no recent backup, 4DDiG Mac Data Recovery offers a reliable way to recover lost files without needing a Time Machine backup.
This tool is ideal for situations where Time Machine can’t find your backup disk or if the backup itself is inaccessible. It allows you to retrieve files that were accidentally deleted, lost during system crashes, or even from formatted drives.
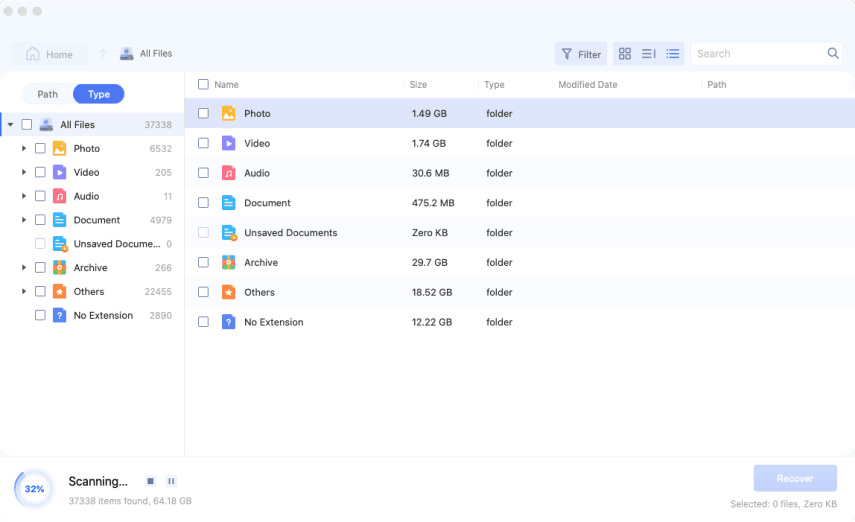
For users encountering the "no available destinations" issue, 4DDiG scans your Mac's internal or external drives, looking for lost or hidden files that Time Machine cannot restore.
It works well even if Time Machine fails to detect the backup location or if the backup data is corrupt. 4DDiG is a practical alternative to recover your important files in scenarios where Time Machine isn’t an option.
- Deep Scan Mode: Can thoroughly search for lost or deleted files mac, also on unrecognized or corrupted drives.
- Supports External Devices: Recovers files from external drives that Time Machine won't even detect.
- Preview Before Recovery: Lets you see how recoverable files are before you restore them.
- Easy-to-Use Interface: It simplifies the recovery process and can be used by everyone.
Secure Download
Secure Download
Here are the simple steps to recover lost files using 4DDiG Mac Data Recovery:
-
Download and Launch
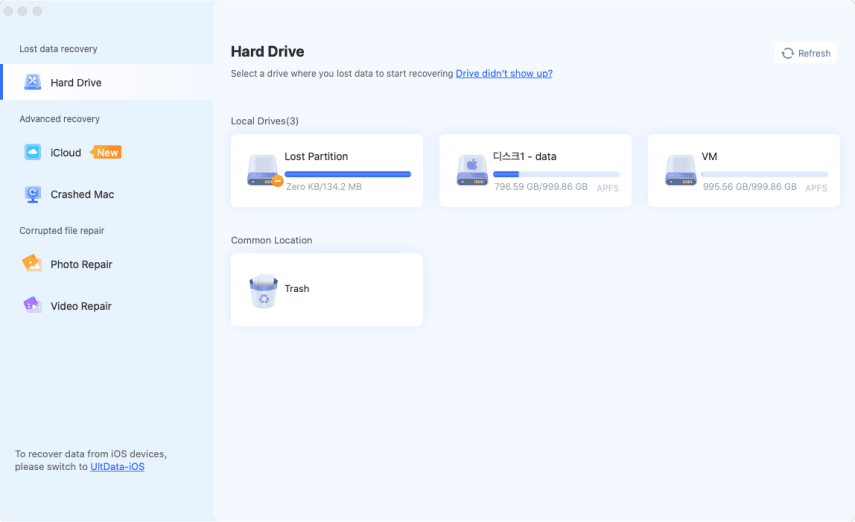
Install 4DDiG Mac Data Recovery and open the program. Choose the drive or location where your deleted files were saved.
-
Scan for Lost Files
Click "Scan" to start the process. The software will search for any lost files, including those not backed up by Time Machine.
-
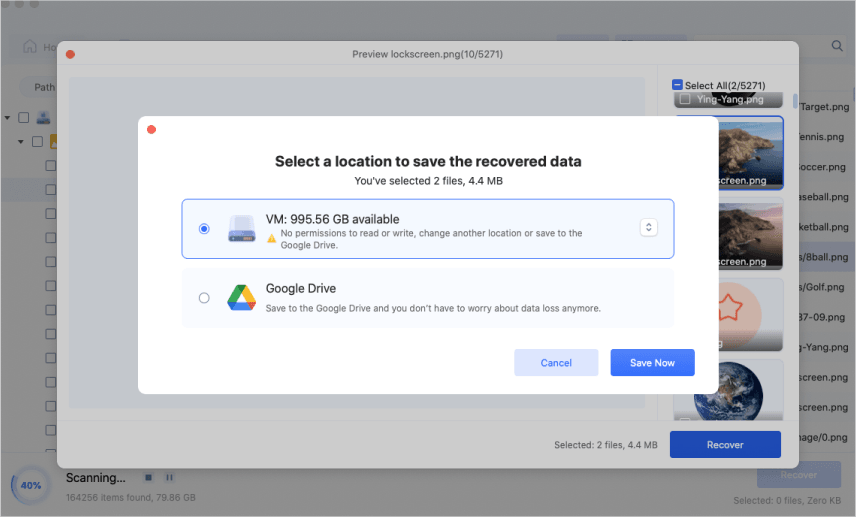
Preview and Recover
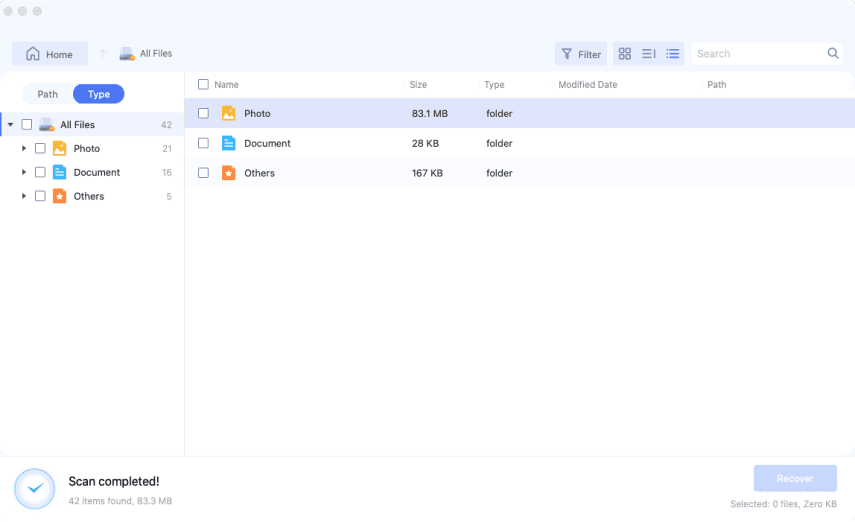
Once the scan is complete, preview the files. Select the ones you wish to recover and click "Recover" to restore them to a safe location.

Part 3: How to Fix No Available Time Machine Destinations?
If you’re encountering the "No Available Time Machine Destinations" issue, don't worry; there are several straightforward solutions to get your backups working again.
Below, we'll guide you through step-by-step methods to resolve this problem and restore your Time Machine functionality.
Method 1: Restart Your Mac
If you're seeing the "No Available Time Machine Destinations" error or can't find your backup on Mac, a quick restart might be all you need. Restarting your Mac refreshes the system, clears any minor glitches, and helps Time Machine detect the backup disk again.
Here's how to do it:
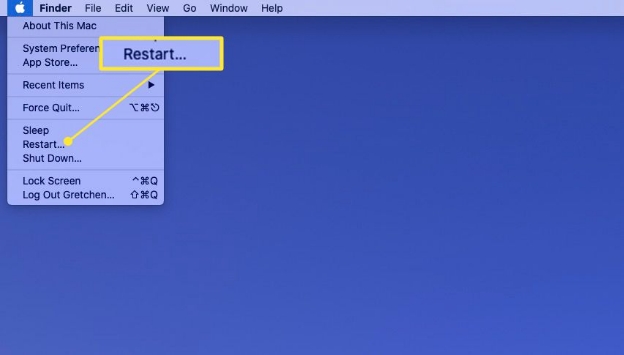
Click the Apple logo at the top-left of your screen.
-
From the dropdown menu, select "Restart."

-
Wait for your Mac to reboot. After it restarts, open Time Machine and check if your backup is now visible.
Restarting is a simple yet effective method to fix temporary software bugs and connection issues. Try this first before exploring other troubleshooting steps!
Method 2: Rechoose Your Backup Disk
If restarting your Mac didn’t resolve the issue, the next step is to reselect your backup disk. Sometimes, Time Machine may fail to detect the backup disk properly, and re-choosing it can fix the problem. Follow these steps to reselect your backup disk:
Click the Apple logo at the top-left corner of your screen.
Select "System Settings" from the menu.
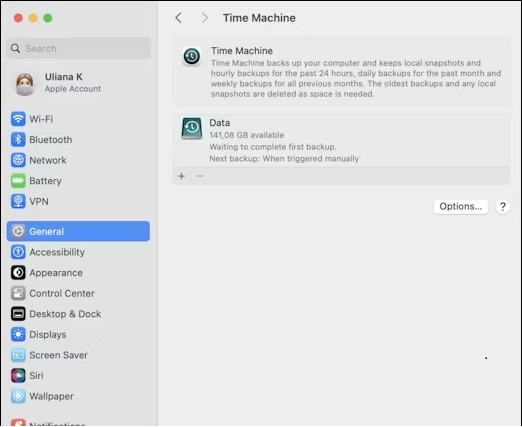
Go to "General" and then select "Time Machine."
-
If your backup disk is listed, click the "-" icon to remove it.
-
Click "Add Backup Disk," select your backup drive, and click "Use Disk."
-
If required, enter your password to reconnect network drives like Time Capsule.

By re-choosing your backup disk, you ensure Time Machine can properly recognize the drive again, allowing backups to run smoothly.
Method 3: Updates macOS
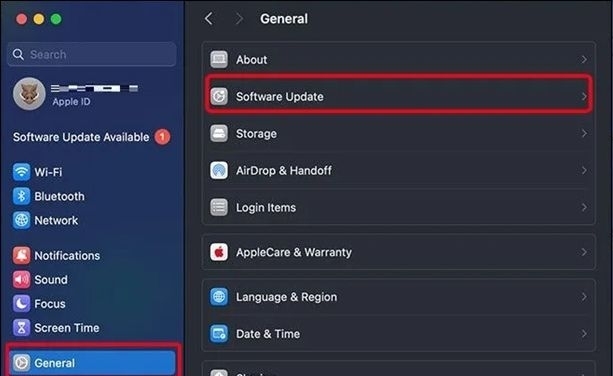
If you're still facing the issue, it's a good idea to check if your macOS is up to date. Older versions of macOS can cause bugs or compatibility issues, which may prevent Time Machine from detecting your backup disk. Here's how to update your macOS:
Click the Apple logo in the top-left corner of the screen.
Select "System Settings" from the dropdown menu.
-
Go to "General" and click "Software Update."

-
If any updates are available, click "Install Now" to update your system.
Updating macOS helps resolve potential bugs and ensures your system is compatible with the latest Time Machine features. Keeping your system updated can prevent future issues and improve overall performance.
Method 4: Confirm Network Disk Backups
If you're using a network disk for your Time Machine backups, it's important to confirm that the backup disk is working properly. Issues with network connections or disk integrity can cause Time Machine to not recognize the backup.
Here’s how to confirm your network disk backups:
Open Finder and go to "Applications" > "Utilities."
-
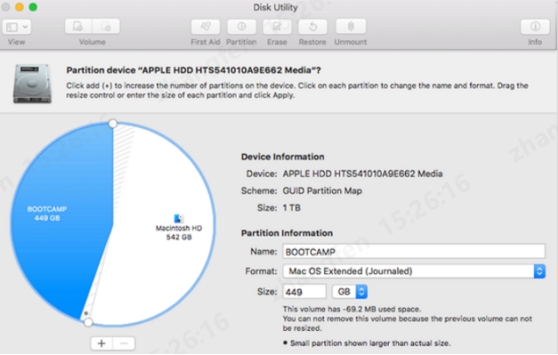
Launch "Disk Utility" from the list of utilities.

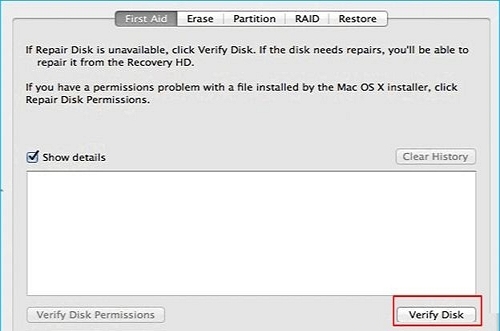
Select your Time Machine backup disk from the left panel.
-
In the right panel, click "Verify Disk" to check the status of your backup drive.

This process ensures that your network disk is functioning correctly and is accessible for Time Machine to use. If the disk is having problems, you may need to repair it before proceeding with your backups.
Part 3: Frequently Asked Questions
Q: Where has the Time Machine gone?
Ans: If Time Machine is missing, it might be due to a disconnected backup drive or a system glitch. Try reconnecting your backup disk or restarting your Mac to resolve the issue.
Q: Why has Time Machine stopped backing up?
Ans: Time Machine may stop backing up if the backup drive is full, disconnected, or there’s a software issue. Ensure your disk has enough space and is properly connected to your Mac.
Q: How do I get to Time Machine settings?
Ans: To access Time Machine settings, go to the Apple menu > "System Preferences" > "Time Machine." From there, you can manage backup options and restore files.
Final Words
If you're struggling with "No Available Time Machine Destinations" on your Mac, we've shared several fixes, including restarting your Mac, reselecting the backup disk, updating macOS, and checking network disk backups. However, if your data is still missing, we recommend using 4DDiG Windows Data Recovery. This powerful tool can help you recover lost data and ensure your backups are safe. Don't let data loss cause more stress; 4DDiG is a reliable solution to get your files back.
💡 Summarize with AI:
You May Also Like
- Home >>
- Mac Recovery Solutions >>
- 4 Best Ways to Fix No Available Time Machine Destinations
 ChatGPT
 Perplexity
 Google AI Mode
 Grok
Grok

