How to Recover Overwritten Files from Windows HD/USB/External HD/SD?
Have you accidentally overwritten an important file on your Windows HD, USB, External HD, or SD? Don't worry! With the right methods, it's possible to recover overwritten files and retrieve your lost data. This article provides you a complete guide (contains 5 effective methods) on how to recover overwritten files . So if you are confused by this, please be patient and read on!

Video Tutorial on How to Recover Overwritten Files on Windows 10/11
Trustpilot Rating 4.3
100% Secure
Part 1: What Is Overwritten Data Recovery?
Overwritten data recovery is the process of retrieving lost or deleted files that have been overwritten by new data on a storage device such as a Windows HD, USB, External HD, or SD card . When a file is overwritten, the original data is replaced with new data, making it more challenging to recover. However, with the right tools and techniques, it's possible to recover overwritten files. The next part will walk you through 5 effective methods on how to recover overwritten files. So read on to find out more!
Part 2: Recover Overwritten Files from the Previous Version-Limited Circumstances
Overwritten files are particularly challenging to recover, especially in version-limited circumstances. However, it is not impossible to recover overwritten files from the previous version in some cases.
Method 1: How to Undo an Overwritten File Replaced from the Previous Versions?
In search of solutions: How to restore overwritten files? You must understand that this option will only work in some limited circumstances, for example:
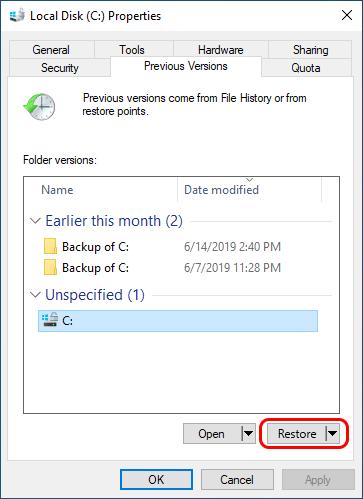
Suppose you have turned on the Windows Backup Service on your system. There is a high chance you may be able to recover an overwritten file with a previous version. Follow the given steps to attempt recovery.
Open the file explorer.
Head to the drive containing the data you want to recover.
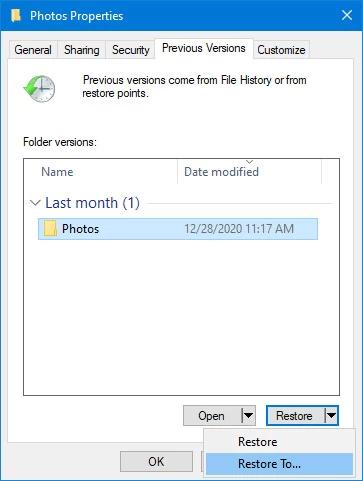
Select restore previous versions from the drop-down menu.
Select the original version or the one you want to recover from the list provided by Windows.
Click the restore button to retrieve the file.

Method 2: Recover Overwritten Files on Windows 10 By Previous Versions
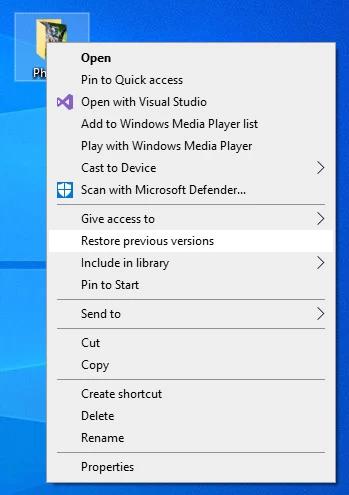
What are previous versions? Windows creates files as part of a backup or as a restore point. These are not original, but copies of the original ones and are called previous versions of the file. To recover overwritten files windows 10 you do not have to do much. You can do it by previous version. It is an automatic setting by the built-in operating system Windows for you. You can right-click on a folder or file you have modified and restore overwritten file to a previous version. It allows you to recover replaced files and the ones you accidentally overwrite.
Reach to the folder where your desired file resides.
Right-click on the file or folder.
Restore previous versions.

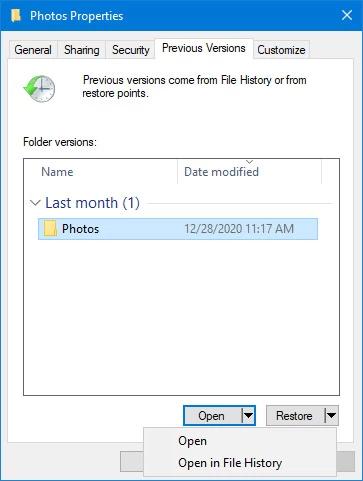
The system will take over from here, and you will be welcomed by a window. The window will have a list of all the previous versions available.

Confirm the file selection.
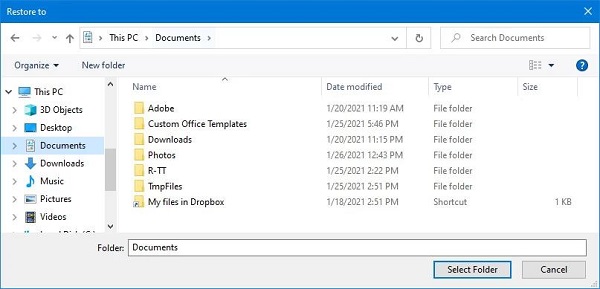
Restore folder or file.

Choose a location. That's how to restore replaced files.

Part 3. Recover Overwritten Files from a Back Up - Backup Required
Method 1: How to Recover Overwritten Files through System Restore?
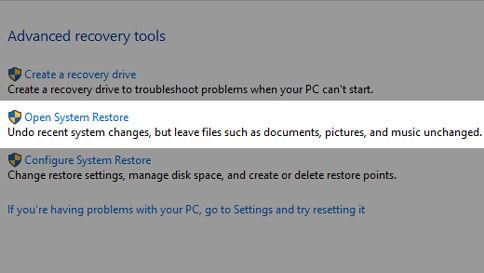
The following steps will explain how to restore overwritten files by restoring your system to the last backup point. System Restore is the most effortless and efficient way to recover overwritten files.
Search for "System Restore."

Click on the outcome.
Choose the previous date you lost the data.
Follow the instructions given by the system to recover overwritten files.
Method 2: How to Recover Overwritten Files on Windows 10 through a Backup?
If you have a backup of your files, recovering overwritten files on Windows 10 can be a relatively straightforward process. Here are the steps to recover overwritten files on Windows 10 through a backup:
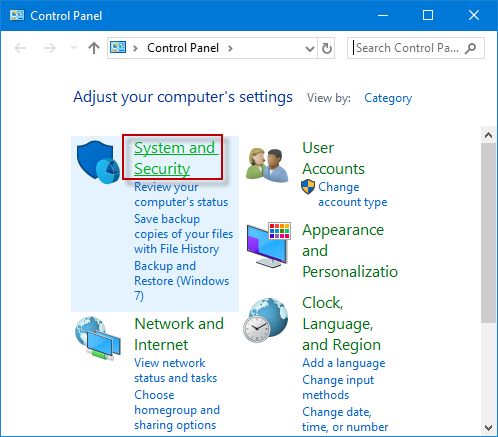
Open the Control Panel and click on "System and Security." Then, click on "Backup and Restore (Windows 7)" and choose "Restore My Files."

Choose the location where the backup is stored and click "Next." Then, select the files you want to restore and click "Next."
Select the location where you want to restore the files and click "Restore."
Part 4. Use Professional Data Recovery Software-High Success Rate HOT
If you are still looking for: How do I recover a file I accidentally replaced?It means you must use an effective recovery tool to get your hands on the files you lost due to overwriting. Tenorshare 4DDiG is the best recovery software for data recovery from Windows, especially from overwriting.
Trustpilot Rating 4.3
100% Secure
-
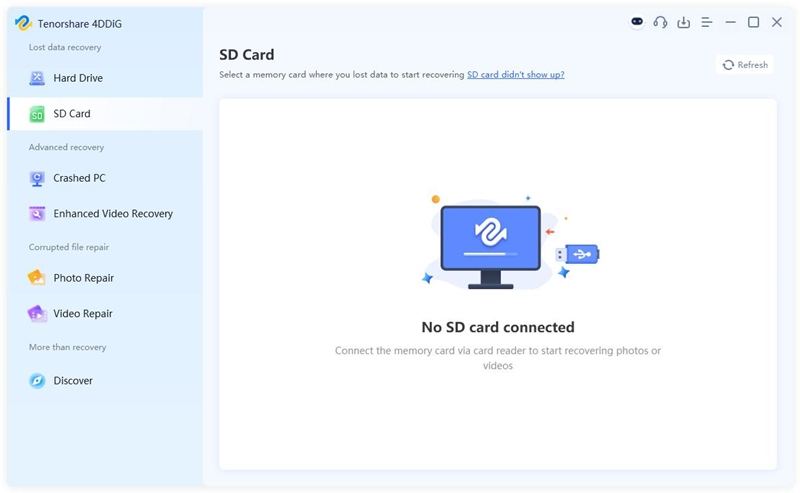
Download the software from the official website. Launch it and follow the instructions one by one. Connect your SD card and click Scan.

-
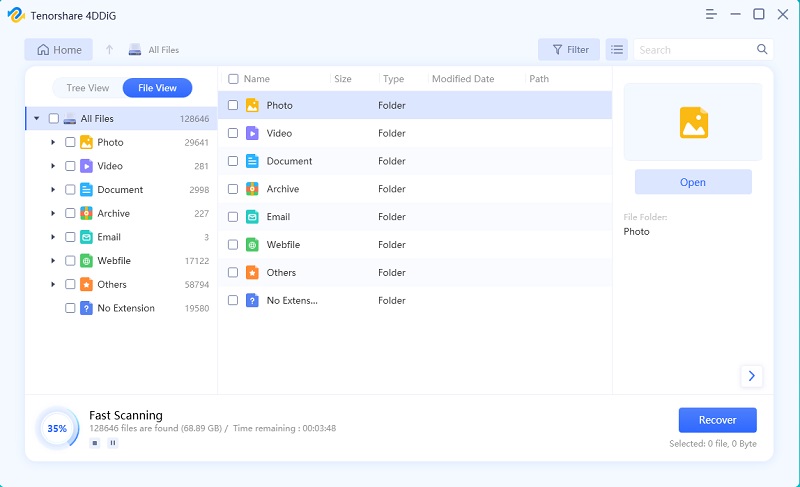
Start scanning.
![scanning local disk]()
-
How to undo an overwritten file through 4DDiG? Simple, preview, and recover files. Shown in the picture below. Do not save to the same partition where you lost them in case of disk overwriting.

The same procedure is performed if you overwrite the data using an external hard drive . You will select the external hard drive to scan while choosing the location.
Conclusion
We hope this article on how to recover overwritten files has been helpful. Losing important data can be a frustrating experience, but with the right methods, you can retrieve your lost files. The best way to restore overwritten file is to always turn the system backup on. The last resort of how to recover overwritten files is to use the recommended software Tenorshare 4DDiG . 4DDiG Windows Data Recovery tool is best for how to undo a replaced file, including photos, videos, documents, and audio. The software is also best for recovering files lost due to accidental deletion, formatting, lost partition, corruption, crashed system, virus attack, etc. So don't hesitate to try it!
💡 Summarize with AI:
You May Also Like
- Home >>
- Hard Drive >>
- How to Recover Overwritten Files from Windows HD/USB/External HD/SD?

 ChatGPT
 Perplexity
 Google AI Mode
 Grok
Grok


