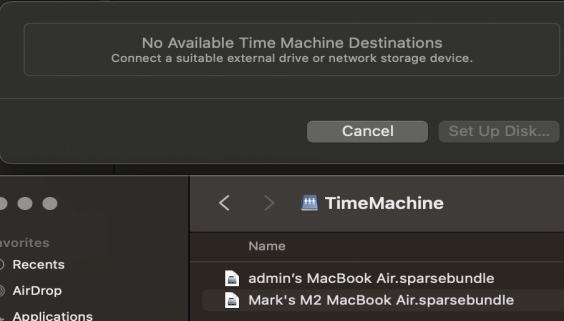
How to Recover Data from Mac Recovery Mode

5 mins read

Updated on 2025-03-11 14:41:43 to Mac Recovery Solutions

If your Mac suddenly fails to start, one effective way to recover data is to put mac in recovery mode. In this article, we’ll introduce three methods to perform data recovery in macOS Recovery Mode, and some of them don’t require creating a bootable USB drive.

Step 1. Boot Mac to Recovery Mode

Macs with different chipsets have different ways to enter macOS Recovery Mode. Check the steps below to find the one that suits your Mac model.

Mac with Apple Silicon (M1/M2/M3):

After shutting down your Mac, press and hold the power button. Release the button when the "Options" screen appears. Select the Options icon, then click Continue to enter Recovery Mode.

Intel Mac:

Turn on your Mac and immediately press and hold Command + R. Release the keys when you see the Apple logo. This will boot mac to recovery mode, allowing you to install the latest version of macOS.

Mac with T2 chip

Immediately press and hold Command + R after turning on your Mac. Release the keys when the user selection screen appears. You will be prompted to enter the firmware password for the administrator account, so please enter it.

Select an option and click Continue to enter Recovery Mode on your Mac.

restart Mac

Step 2. Restore Mac from macOS Recovery Mode (3 Ways)

Entering Mac recovery mode can be a little complicated, especially for those are unfamiliar with the startup options or key combinations. Here we’ll introduce 3 methods to perform data recovery in macOS Recovery Mode.

Way 1. Using 4DDiG Mac Data Recovery

One of the simplest methods to recover data in Mac recovery mode is to download Tenorshare 4DDiG Mac. This method differs from traditional data recovery in that it allows direct recovery from Recovery Mode. Here are the steps:

📌Launch Tenorshare 4DDiG Mac in a terminal

After entering recovery mode, launch the software in macOS Recovery Mode using Terminal.

  • Click "Terminal" from "Utilities"

    In Recovery Mode, select "Utilities" from the menu bar at the top of the screen, then click "Terminal." This will open a Terminal window where you can enter commands.

    open terminal
  • Run Tenorshare 4DDiG Mac using a command

    Once the Terminal window is open, you can run Tenorshare 4DDiG by entering the following command and pressing "Enter":

    https://download.tenorshare.com/downloads/4DDiG/boot.sh enter code to start 4ddig

After entering the command, press Enter to launch Tenorshare 4DDiG for Mac. This process allows you to utilize 4DDiG's data recovery functionality, even when the system cannot boot normally.

📌Recover Mac Data with Tenorshare 4DDiG Mac

  • When the Tenorshare 4DDiG Mac interface appears, select the disk or partition you want to scan, then click "Scan."

  • After the scan is complete, it will display a list of found files. A special feature is the ability to preview file contents before recovery.

  • Preview and check the files you want to recover, then click the "Export" button. Next, select the destination location to save the recovered files, and after specifying the target, click "OK" to begin the recovery process.

    export from crashed mac with 4ddig

Way 2. Restore from Time Machine Backup

  • Once you enter Recovery Mode, select "Restore from Time Machine" from the Utilities window, then click "Continue".

    recover macos from timemachine
  • A list of available backups will appear. Select the disk you want to restore from. If your Time Machine backup is stored on an external drive, you can connect it now and specify it as the backup source.

    select time machine backup to recover
  • Restore the backup in bulk:After selecting your backup, you will be prompted to choose the target disk to restore your data. Follow the on-screen instructions and click "Continue" to initiate the recovery process.

    untile recover from time machine
Note:

Restoring with Time Machine is a bulk recovery process, meaning you can't select or preview individual files or folders — the entire backup will be restored.

Way 3. Create a Bootable USB Drive

If your Mac fails to boot into Recovery Mode, you can use a USB drive to recover your data. This method requires you to first create a bootable USB drive on another Mac. You can then use it to start the faulty Mac and access your data. However, if you're unprepared, it may be difficult to act quickly in an emergency.

Recovering data via a USB drive can be complex, but Tenorshare 4DDiG Mac offers a simpler solution. It requires no prior setup and allows you to preview and selectively recover files, making data recovery easier and more efficient.

FREE DOWNLOAD

Secure Download

FREE DOWNLOAD

Secure Download

  • Download and install the software on a working Mac. Connect a blank USB drive to the Mac, open the software and turn to "Crashed Mac", select "USB Recovery" method.

    select a recovery mode
  • On the next screen, select the blank USB drive under Bootable Drive, then click "Create Now" at the bottom of the screen.

    create a bootable drive
  • A warning message will appear, stating that the USB drive will be formatted. Click "Format" to proceed. After a few moments, your bootable drive will be successfully created.

    usb trouble mac 4ddig
  • Connect the bootable drive to your faulty Mac, then hold down the Option key while turning it on to boot from the USB drive.

    open 4ddig mac
  • Once you reach the disk selection screen, release the Option key and choose "Tenorshare 4DDiG" as the startup disk. Select the files you want to recover and click "Export" to save them.

    export 4ddig mac

Comparison of Mac Data Recovery Methods in Recovery Mode

The methods discussed so far are summarized in the table below: Tenorshare 4DDiG for Mac stands out as the best solution, requiring no prior setup and offering flexible recovery with file preview. It is especially valuable in emergencies or when selective file recovery is needed.

  • Requirements
  • 4DDiG Mac Data Recovery
  • Time Machine Backup
  • Bootable USB Drive
  • USB Drive Required
  • No
  • No
  • Yes
  • Backup Required
  • No
  • Yes
  • Yes
  • Selective File Recovery
  • Yes
  • No
  • No

Conclusion

This article provides detailed information on how to recover data using Mac Recovery Mode. In particular, Tenorshare 4DDiG Mac offers an innovative solution, allowing you to directly perform data recovery in macOS Recovery Mode without the need to create a bootable USB drive

It's always a good habit to regularly back up your data using Time Machine or similar tools. However, if you do experience data loss, we highly recommend trying the latest recovery solution with Tenorshare 4DDiG Mac.

4DDiG Mac Data Recovery

  • Recover data from macbook, internal & external drive, USB flash disk, SD card,etc.
  • Recover 1000+ file types including photos, videos, documents, and audio.

people have downloaded it

ads

Sawart Mashab (senior editor)

Sawart Mashab, the content writer for 4DDiG, is adept at creating informative and practical solutions related to Windows and macOS issues, data recovery, file repair, and RAID storage.

(Click to rate this post)

You rated 4.5 ( participated)