Making a great lightweight Windows 11 image is easy and convenient with the newly released Tiny11 installer. All Windows users can easily use this highly efficient tool to quickly install the new operating system on old and low-end computers without the need for any complicated technical knowledge. With this intuitive program, you will be able to take advantage of all the features of Windows 11 and make your device more powerful than ever before. Here, we will provide you with a step-by-step guide so you can quickly create a lightweight Windows 11 image that will turn your PC into a high-performance machine.
Part 1: What Is Tiny 11?
Tiny11 revolutionizes the way we think about Windows installations. Whether you use a traditional PC or a low-spec system with limited storage, you can now install Windows 11 and keep it running at peak performance, thanks to its ability to condense the operating system down to around 8 GB. Not only can this save time and energy when dealing with installation issues, but it also allows users with minor technology knowledge to access high-level computing abilities easily. Combined with unique optimization methods and low power consumption, Tiny11 is an excellent choice for anyone looking to make the most of their devices and get ahead in modern computing!
- Low-end devices supported
- 2GB of RAM and 8GB of storage required
- Bloatware removed
- Small installation footprint
- Bypasses TPM and Secure Boot requirements
Part 2: What's Different about Tiny11
NTDev was able to shrink Windows 11 down to a fraction of its previous size by cutting out bloatware such as Microsoft Teams, Microsoft Edge, and sponsored apps. To make sure you can still get the most out of your experience on Tiny11, it comes with accessibility features like Narrator or Magnifier and apps like Notepad, Paint, and Calculator. You also have access to the Microsoft Store, where you can download any browser of your choice, as well as Xbox games or other apps. Alternatively, if you already have a favorite browser with which you are familiar, you can transfer it over to your Tiny11 machine via a flash drive from another computer.
With Tiny11, you have the choice to stay logged in with your local system. If you prefer a Microsoft account's convenience, it's also available. NTDev adds even more convenience to the local operating system by bringing back the Windows Store Component in its latest update. From the component, you can install language and feature packs, while all upcoming updates will be a breeze to install as well. Security updates, drivers, and .NET are also quickly updated through Windows Update. Have all the benefits of Windows 11 without being forced into using a Microsoft account - that's what Tiny11 delivers!
Part 3: How to Download and Install Tiny 11?
Upgrading from Windows 10 to Tiny11 certainly seems tempting, but in the words of experienced users: proceed with caution. Although upgrading to Tiny11 can technically be done, many users who have attempted this route failed to succeed. Instead, they encountered errors along the way. The better alternative is to perform a clean installation of Tiny11, which will likely prevent any complications during an upgrade process. To install it, you'll need an ISO image of Tiny11 and create a bootable media; with all tools in place, you can begin the installation process using the bootable media. Of course, no Windows setup is complete without an activation code – so make sure you have a standard key for either your existing version of Windows 10 or 11 Pro handy before hitting the download button.
Step 1: Download the Tiny11 ISO File
Go to the Internet Archive and find the official download link from NTDev. Although there may be other versions of Tiny11 available, it's best to use the link provided above to ensure that you're downloading the official version and avoiding any modified versions that may not be safe.
Once you've logged in, click on the 'ISO Image' option and select the tiny11 b2(nosysreq).iso file, the latest version that does not require the TPM/Secure Boot requirement. If your system meets those requirements, you can download the tiny11 b2.iso file instead. Both files are approximately 3.6 GB in size.
It may take some time, possibly a few hours, even with a fast internet connection due to the Internet Archive's bandwidth-limiting scheme. Alternatively, you can use a torrenting platform to download the file faster, provided there are enough seeders and peers.
Step 2: Create a Bootable Drive
You will need to create a bootable flash drive or CD for the ISO file after you download the file.You can use Rufus, a freeware tool, to create the bootable drive. Follow the steps outlined in our guide for creating bootable media, which will work the same for Tiny11.
If you want to create a virtual machine, you can directly mount the ISO file once it's downloaded to the VM. Make sure you allocate at least 2 CPU cores to the VM because Tiny11 cannot bypass the requirement for the number of CPU cores needed to install Windows 11.
Step 3: Change the Boot Order of Your Computer
To install Tiny11 using the bootable media, you need to make sure that your computer can boot from the media you created. This involves changing the boot order in the BIOS or UEFI settings. The interface and entering the BIOS settings themselves may vary from manufacturer to manufacturer, so you should consult your manufacturer's website to determine the exact key required to enter BIOS.
Turn off your PC, plug in the USB Drive, and enter the BIOS settings. Once you're in the BIOS settings, access the Boot options menu, and change the boot order to your connected USB drive or CD. Use the arrow keys to navigate between choices and press Enter to select the option.
Step 4: Install Tiny11 (Windows 11 Lite) OS
You will finally reach the 'Windows Setup' screen. Follow the on-screen instructions to complete the installation, including selecting the language, time format, and keyboard method. Accept Microsoft's Terms by checking the 'I accept the license terms' option and clicking 'Next'. Select the drive where you want to install the OS and click 'Next' at the bottom. Complete the further steps, such as selecting the country and keyboard layout method.
Set up the local account by entering a name for the account and a password. You can sign in to your Microsoft account later from settings if you want to. Complete the rest of the security instructions on the screen. Once you complete all the on-screen instructions, the installation will start. After the installation, you'll be running Tiny11 OS, a lightweight version of Windows 11, on your computer!
Part 4: How to Recover Lost Data on Tiny11
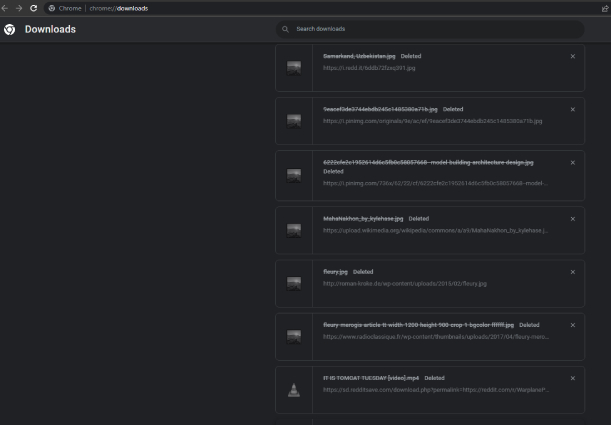
When you have lost important data and are looking for a dependable way to recover it, the Tenorshare 4DDIG Data Recovery is an excellent solution. This powerful software can restore files from laptops or PCs, internal and external hard drives, USB flash drives, SD cards, and more. Furthermore, with its 1000+ file type support, Tenorshare 4DDiG Data Recovery can salvage photos, videos, documents, audio files, and more. Finally, this product can tackle all types of data problems, such as those caused by accidental deletion or corruption following a virus attack. For anyone searching for a reliable data recovery product that encompasses an extensive range of devices and file types with good capabilities to salvage your corrupted files, Tenorshare 4DDIG Data Recovery is an ideal choice.
Secure Download
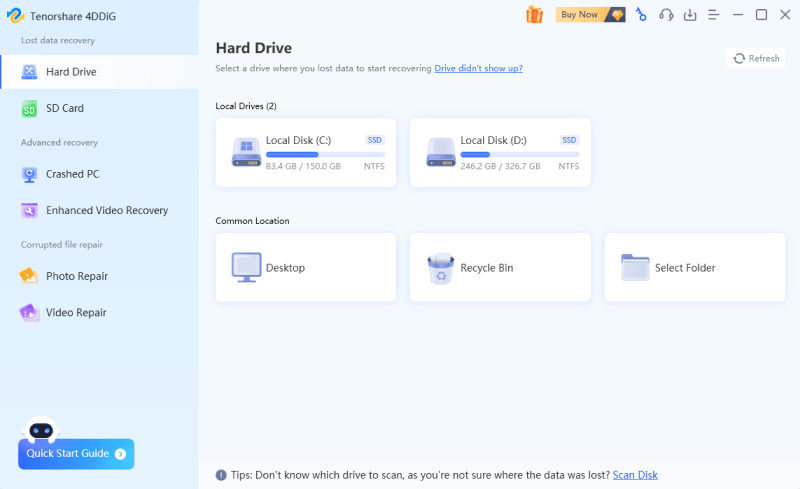
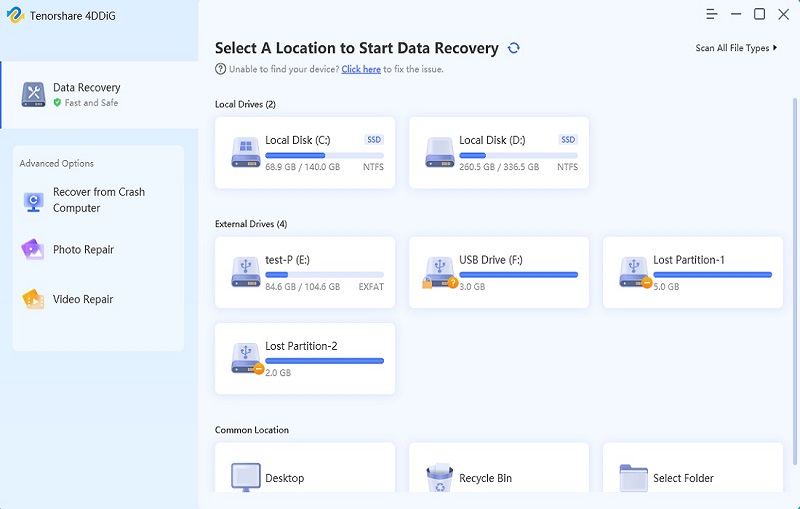
- Download and install Tenorshare 4DDiG Windows data recovery on your computer. Establish a connection between the hard drive and the PC with the help of a USB cable and initiate the scanning process.
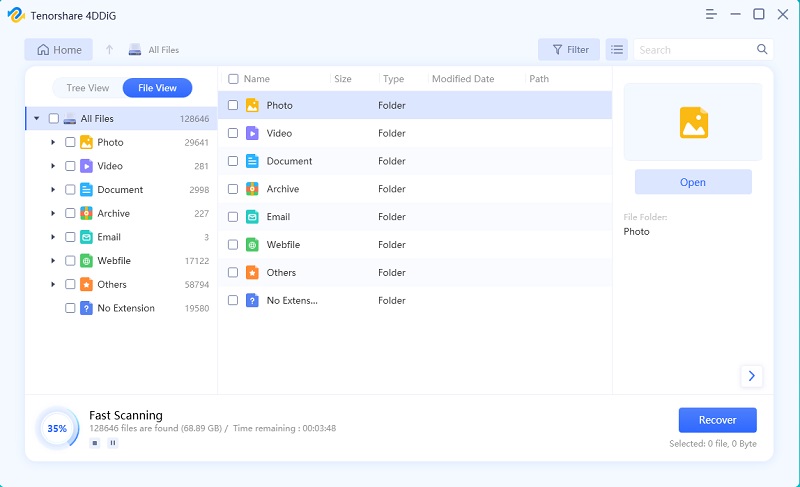
- The app will now start scanning the selected location for lost files. All data that is found will be showcased in the app window.
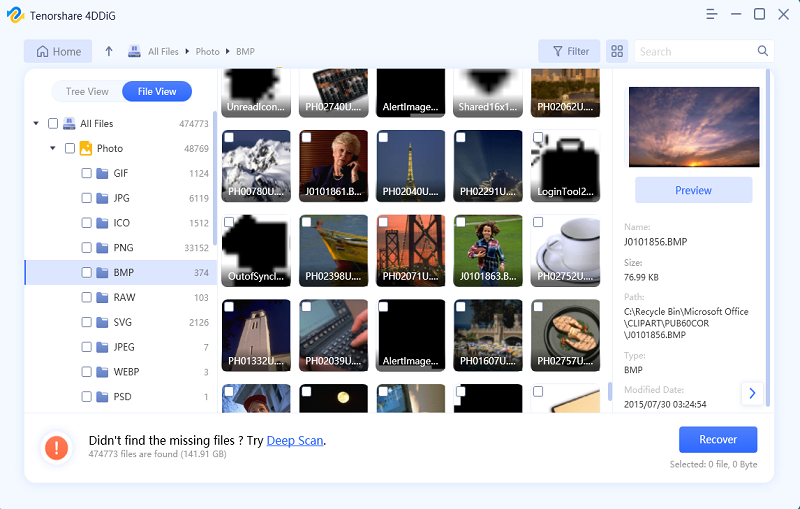
- Once the scanning is complete all recovered files will be shown in a list. You can preview these files and recover them to a location of your choice.
Part 5: What Is the minimum for Windows 11?
It is always exciting when the latest version of Windows is released. Windows 11 is no exception. To keep up with progress and take advantage of the latest features, it pays to ensure that your device meets the minimum requirements for Windows 11. With a processor that has at least 1 GHz speed or faster with two or more cores on a 64-bit processor or SoC and 4GB of RAM, you can ensure that your device runs efficiently with sufficient disk space for storage. Moreover, 64GB of disk space makes for a speedy download, so you're always close to enjoying the benefits Windows 11 has to offer.
Part 6: Should You Install Tiny11?
Tiny11 is a lightweight version of Windows 11 that adds more flexibility and scalability to how you use your device. It comes with the full suite of Microsoft Office applications, so you can remain productive anywhere. Additionally, it is an ideal solution if you require Windows 11 but need more resources to install the full version. However, since Tiny11 is stripped of some features, it may need more compatibility for certain programs and games. If you're looking for a lightweight OS with limited features, then Tiny11 might be an option worth considering. Otherwise, Windows 11 offers more comprehensive features than Tiny11 and should be preferred if you have sufficient resources to install it.
Conclusion
Creating a lightweight Windows 11 image with Tiny11 is a relatively easy task. All you have to do is make sure that Windows 11 is updated and have the current edition of Tiny11 installed. Additionally, you need to be familiar with the features offered by Tiny11 to make full use of them to create an effective, lightweight image. Once all these steps are completed, and the imaging process is done, your Windows 11 system will be much more efficient than before! However, if faced with any data loss while doing this or at any other time, Tenorshare 4DDiG Data Recovery can be used as it is an effective and useful tool for safely recovering lost data within no time. Why not try out this simple yet extremely beneficial task today?
People Also Read: [2026]How to Open ISO File in Windows11/10
 ChatGPT
 Perplexity
 Google AI Mode
 Grok
Grok
