How to Download macOS ISO with Step-by-step Guide?
Download 4DDiG Mac Data Recovery to retrieve lost/deleted, wrongly formatted, or lost files due to partition with just one click.
Loving your experience with the latest macOS Tahoe with new features and improvements, but can’t find a way to install the same on your non-Mac hardware, Virtual Machine, or VMware?
If you have a macOS ISO file, you can easily install Tahoe or any other version. macOS ISO file is a disk image file format that contains the entire installation package for the macOS, used to create bootable installation media like USB flash drives to run macOS on virtual machines and non-mac hardware.
This comprehensive guide will provide effective sources to download macOS ISO files step-by-step.
Why Do You Need to Download macOS ISO?
Apple doesn’t offer an official way to install macOS on virtual machines, VMware, or non-Mac hardware. With a macOS ISO file, you can get around this and install macOS more easily. An ISO is simply a full copy of the operating system in a format that works across different platforms.
If you already own a Mac, you don’t need to download an ISO. You can create one from your Mac and make a bootable image. If not, you’ll need to download it from a reliable source to use on a PC or virtual machine.
An ISO file works much like a DMG file: both act as if you’ve plugged in a real disk. The difference is that ISO files are supported on both Windows and Mac, while DMG files only work on Mac. That’s why, if you’re setting up macOS on a PC, you’ll need a macOS ISO file.
Make sure to download macOS ISO files from reliable, and trustworthy sources or it can lead to security risks and system instability issues, such as malware or corrupted files. In severe cases, it can also cause permanent data loss.
How to Create a macOS ISO File?
Before we proceed with the steps to create or download a macOS ISO file, make sure your system meets the hardware requirements to run smoothly. Apple has introduced new features and improvements to Tahoe that require some level of hardware to run.
Here’s the list of compatible Mac devices for macOS Tahoe:
- iMac 2020 and later
- Mac Studio 2022 and later
- MacBook Air 2020 and later
- Mac Mini 2020 and later
- MacBook Pro 2019 and later
- Mac Pro 2019 and later
Step 1: Get macOS Tahoe Full Installer
The first step is to download the macOS Tahoe installer on your Mac that is compatible with that macOS. If your Mac isn’t compatible with Tahoe, the App Store will dim the Get button, and will say that your macOS is not compatible with this device.
If your Mac is compatible with Tahoe, follow the steps below todownload the macOS Tahoe installer:
- Go to the App Store and search for the macOS version. Click the Get button to initiate downloading it.
- The Software Update window might pop up, leading you to download it from there.
- Once the downloading is completed, the installer will open up automatically.
Step 2: Create an ISO Disk Image
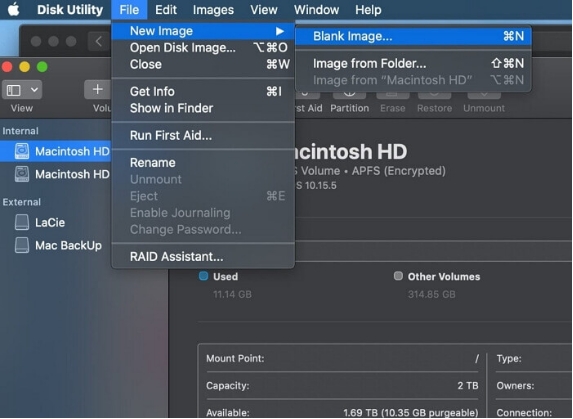
After downloading the macOS version that you want to install, create an ISO disk image using the Utility disk. Here is the step by step process to do so:
- Go to the Disk Utility app on your Mac.
- Select File, click New Image, then Blank Image.
- Type the filename for the disk image, add tags if required, and save it.
Step 3: Create the macOS Bootable Installer
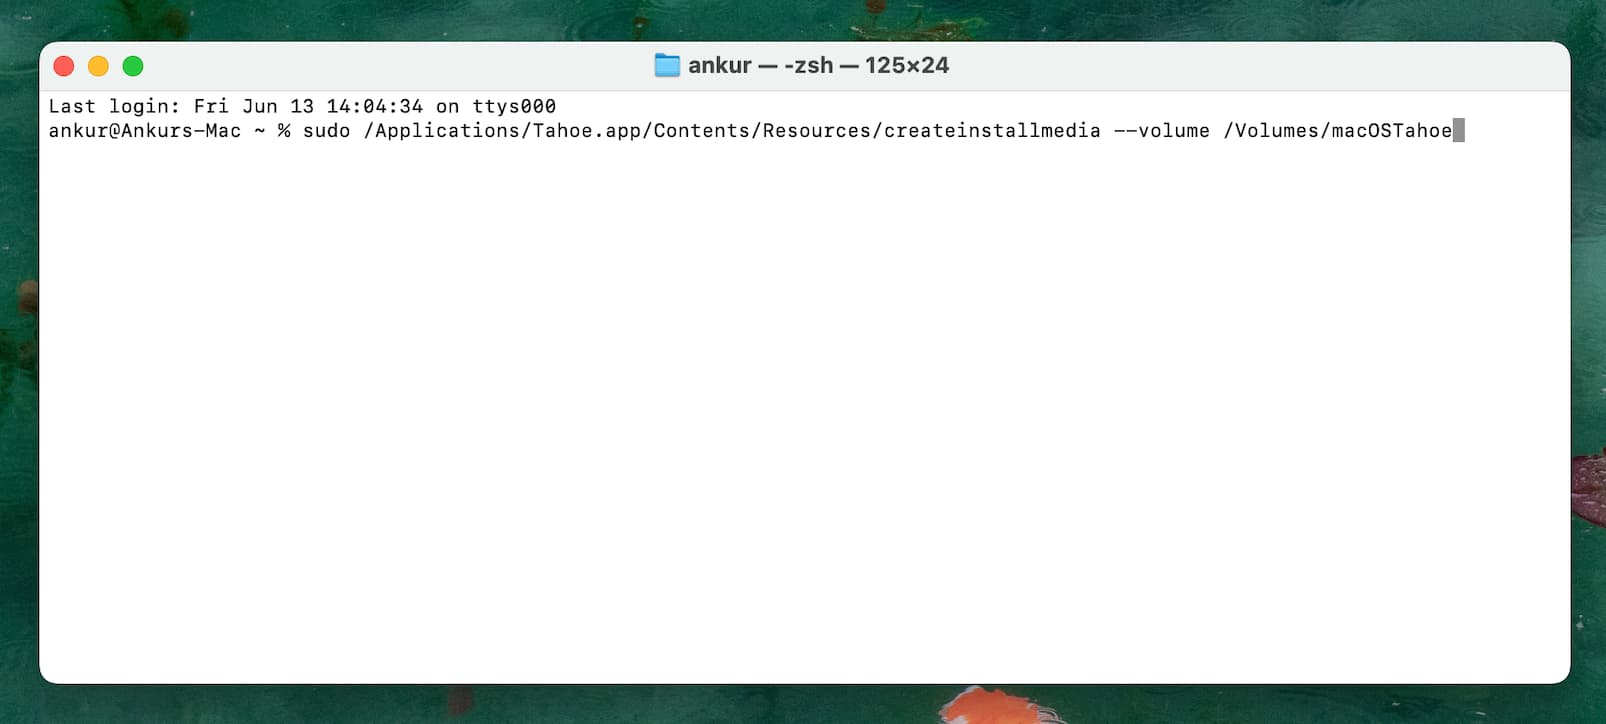
If you've successfully created the ISO disk image, you’re getting closer to the final steps. Now you need to create the macOS bootable installer using the Terminal by accessing the Utilities folder. Follow the steps below to learn how:
- Connect the USB stick to your Mac. Launch the Terminal app from the Utilities folder or directly search it from Spotlight.
- Type the following command in the terminal and hit Enter: sudo /Applications/Install\ macOS\Tahoe.app/Contents/Resources/createinstallmedia --volume/Volumes/MyVolume

- The command assumes that your USB drive is named My Volume, and located in the Application folder. Before executing it, make sure to rename your USB flash drive to My Volume.
- Enter your administrator password if required, then press Return.
- Type Y to confirm erase the volume on the prompted window, then press Return.
- Click on OK when Terminal grants the permission to access the files on the removable volume.
- Once done, the Terminal will show that Installer Media is available and saved as the name “Installer macOS Sequoia”.
Each macOS version requires a unique command to create a macOS bootable installer. If you want to create it macOS bootable installer on another version of macOS, use the following commands according to the matched version:
Step 4: Transform the Installer into an ISO
If you’ve completed step 3, you have created the macOS bootable installer. By default, macOS creates it as a CDR file. To convert it into an ISO file, use the following steps:
In the Terminal, type the following command, and hit Enter: mv /tmp/Name.cdr ~/Desktop/Name.iso
Make sure to replace the Name in the command with the name of the macOS version you’ve downloaded. After executing the command successfully, the terminal will save the macOS ISO file on the Desktop - ready for use.
How to Recover Lost Data on macOS with Data Recovery Software
If you’ve encountered a data loss situation after installing a corrupted or buggy macOS file, don’t despair. 4DDiG Mac Data Recovery allows you to recover your deleted, and lost files caused by system errors, accidental formatting issues, and file corruption.
With a 4DDiG Mac, you can effortlessly recover any type of lost or deleted files with a simple one-click process. Whether your files were lost due to system error, bug corruption from virus/malware, or accidental formatting, 4DDiG Mac makes it easier to recover them.
Key Features of 4DDiG Mac Data Recovery software:
- Recover data from hard drives, memory cards, SD cards, USB flash drives, etc.
- Recover formatted, accidentally deleted, lost due to macOS errors, update failure, and files inaccessible due to corruption.
- Easily retrieve photos, deleted videos, documents, audio, and more.
- Restore from crashed Mac, formatted, and lost partition.
- Restore your deleted data directly to your Google or OneDrive.
Secure Download
Secure Download
Steps to recover lost data on macOS using 4DDiG Mac Data Recovery:
-
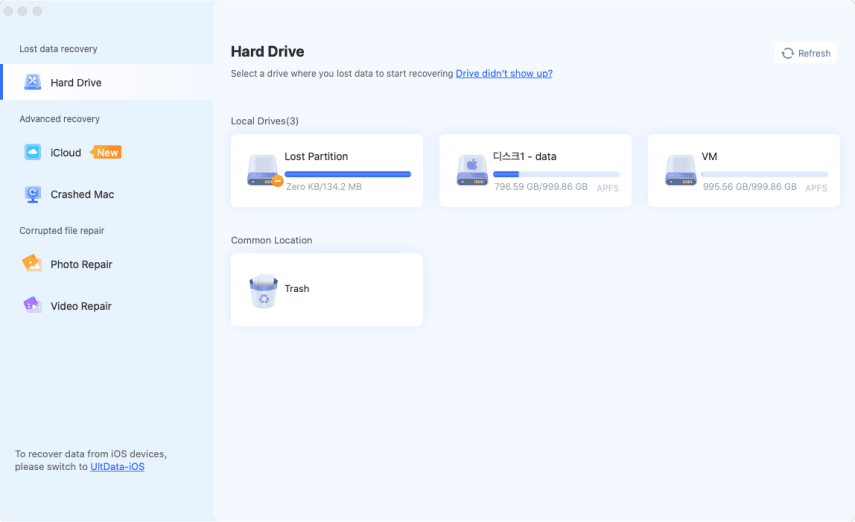
Install the latest 4DDiG version on your Mac and launch it. Select the Trash or drive from where you want to recover the files, and click "Start".

-
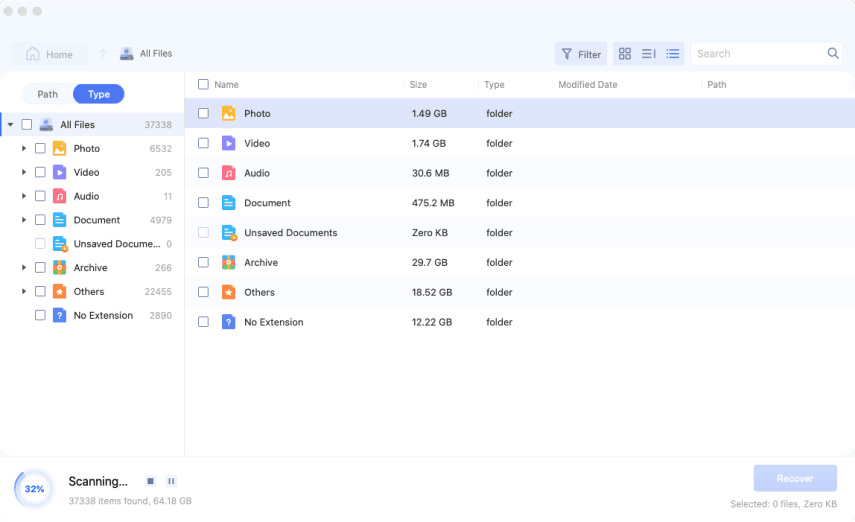
4DDiG will immediately initiate the scanning process to find deleted/lost files. You can pause or stop it at any moment if desired files are identified during the scan. Use the filter option to selectively search for the targeted files.

-
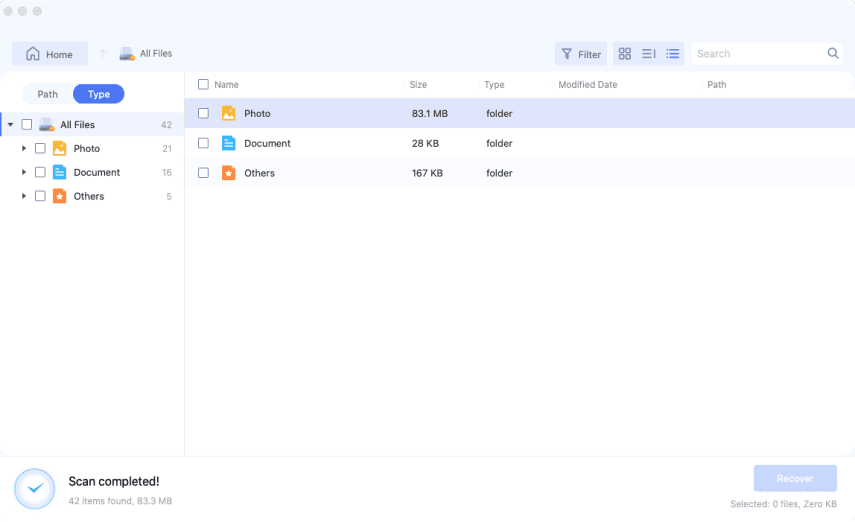
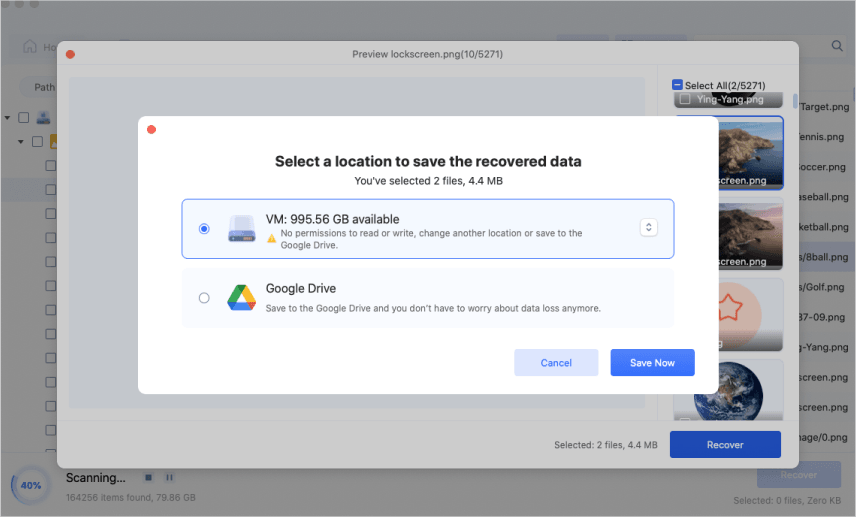
Once the scan is done, double-click the files to preview them. Once you’re ready to retrieve them, select the files, and click on the "Recover" button.

-
After that, select a location you want to store the recovered data.

FAQs About Downloading macOS ISO
Q1: Is it legal to download macOS ISO?
Yes, it’s completely legal, and authorized to download the macOS ISO file, as it has various applications and uses. Developers often use the macOS ISO to install the macOS on non-supported macOS, and virtual machines for testing apps, and programs.
Q2: Where can I download a macOS image?
You can download the macOS full installer by searching it on the App Store with the MacOS version. Alternatively, you can also use the Safari browser to search and download the macOS image. Apple’s official website also provides direct links for macOS images.
Q3: How do I reinstall macOS ISO?
You can reinstall the macOS from MacOS Recovery. Shut Down your Mac, and put it into the macOS Recovery. Select Reinstall macOS, and follow the onscreen instructions to complete the process.
Final Words
This guide explains the complete process to create and download macOS files with simple and easy steps. If you experience any data loss situation in the process, Tenorshare 4DDiG for Mac is a reliable and powerful tool that offers a one-click solution to recover your lost/deleted files.
Secure Download
Secure Download
💡 Summarize with AI:
You May Also Like
- Home >>
- Mac Recovery Solutions >>
- How to Download macOS ISO with Step-by-step Guide?
 ChatGPT
 Perplexity
 Google AI Mode
 Grok
Grok

