We would like to know if we can repair damaged images with photoshop? Nothing is more disheartening than watching photos of memories we hold dear slowly deteriorate, fade, or be destroyed. There are a lot of digital disturbances and interferences that can ruin a photo just after you take it. Examples include images with artifacts like patchiness, oversensitivity, or lack of saturation. Thankfully, Photoshop does quick work of rectifying any digital artifacts present in your photographs. You don't need expert knowledge in Photoshop to correct these issues. Photoshop is an excellent tool for addressing such problems, as it can restore or enhance the quality of damaged images and fix pictures in photoshop. In this piece, you'll learn how to fix a photo in photoshop and breathe new life into your damaged photographs, restoring them to their genuine luster.

Part 1: Things You Should Know about Adobe Photoshop:
Adobe Photoshop is a widely used program manipulating vector images on Macs and PCs. Although Thomas and John Knoll initially published the application in 1988, it has since grown into the de facto benchmark for manipulating raster graphics and visual art. It has also undoubtedly changed much during the past few years. When it comes to fix pictures in photoshop, Photoshop has many capabilities that are accessible and infused with AI. It can edit and compose multilayered graphics pictures and works with various color patterns. Photoshop uses its PSD and PSB file formats to facilitate these capabilities. It can edit and render raster graphics and textual and graphic images, but it can only do a little with 3d models or film. Connectors, standalone applications that operate within Photoshop and add new or enhanced functionality, are a great way to customize and extend the program's base functionality. Images can have the noise removed or repair damaged images with photoshop. Many other modifying options are available in Photoshop, including the ability to adjust the brightness and color of an image.
Part 2: 8 Steps to Repair Damaged Images with Photoshop:
If you're starting, you could need clarification on all of Adobe Photoshop's options. This easy method can help you restore damaged photographs in Photoshop:
Step 1: To begin repairing a photo, you must have Photoshop installed and running on your machine. To open a ruined picture in Photoshop, drag & click it onto the program's display or use the program's File > Open menu option.
Step 2: When the picture is opened in Photoshop, you may make all the changes to enhance its brilliance. To begin, for example, click the crop button in the toolbar, right-click on the region you wish to save and choose to maintain. In addition, the Ruler tool is accessible by right-clicking on the target image during the editing process. The line segments on Photoshop's toolbar will help you align the picture. The picture can be rotated to any fixed or random degree via the menu Image option. To further customize your experience, you may rotate the photograph 90 degrees or counterclockwise.
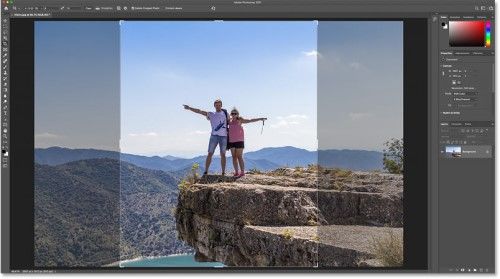
Step 3: As soon as you finish making all the little adjustments to the picture, you'll be ready to repair damaged images with photoshop. One of the most common problems is background noise in photographs. Select the menu, filter noise, and select the reduce noise option to make the necessary adjustments in Photoshop. This will bring up a fresh pop-up menu where you may adjust the saturation, brightness, and other aspects of the image noise. With the specified level of automated noise reduction, Photoshop will boost your photographs and provide you with a sample of the changes.
Step 4: Possibly, the primary color saturation is high in a translated old photograph. Luckily, Adobe Photoshop has a manual and an automated color grading option that allows us to fix the picture's colors. To apply a filter to your picture, select the images filters option from the adjustment layer button in the Layers menu. It's also accessible via the Picture Filter section of the Photo Editing menu. If you want to change the color palette later, you must select it using the filtering option on the side. To alter the general feel of a picture, you can use a warm or chilling filter. A customized filter's color can be chosen by clicking on the box with the corresponding hue. You can easily modify the picture's colors by using the associated slider.
Step 5: Various destroyed or faded patches on your images can occur for various causes. Adobe has included a restorative paintbrush to help you quickly and easily repair damaged images with photoshop. If you import an image into Photoshop and then click the healing button on the toolbar, you can fix any blemishes or scratches. A healing effect brush and a restorative patch brush are both available here. In Photoshop, the pointer will shift when you use a repair tool. Reduce or enlarge the brush's length and apply slight pressure as you work on the affected parts. Photoshop will dynamically blend the affected elements with those nearby to fix the damage.
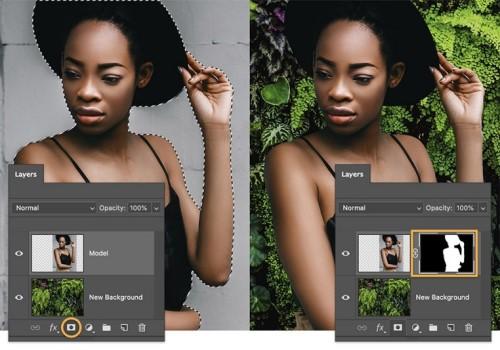
Step 6: It's common for images to have problems with the backgrounds as a whole. Photoshop’s fix function is all needed to make the necessary adjustments. With Photoshop, the patches tool is located in the heal submenu of the toolbar. With the symbol transformed into a tassel, all that is left to do is zero in on the background (or whatever else needs fixing) and hit the edit button.
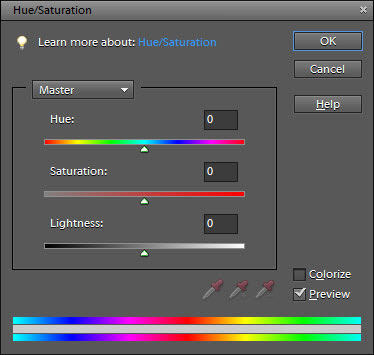
Step 7: Finally, Photoshop allows you to adjust the picture's vibrancy, tone, color, and other elements to repair damaged photographs. Tint, chroma, contrast, vibrance, and many more, are readily accessible.
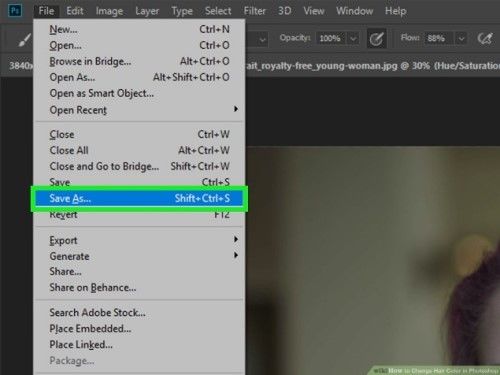
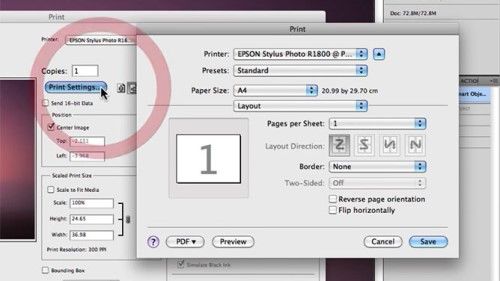
Step 8: After finalizing a photograph in Photoshop, users can save it in their chosen format. If you want to copy the photo and thus save it somewhere else, you can do so via the Menu bar. You also have the option to save individual layers or the full level.
Part 3: The Easiest Way to Repair Damaged Imaged
With 4DDiG File Repair, you can fix distorted or corrupted films and photographs on Pcs and Windows-based media, including Flash drives, memory cards, and output drives due to removal, reformat, and other loss circumstances. Follow this guide's steps, and you'll be able to fix your corrupted or broken video and photo files in no time. It all starts with downloading and installing 4DDiG File Repair on your machine. There are some features of this tool:
- Rapid Fixing: It is lightning quick and can quickly fix damaged pictures.
- Probability of success is very high: We provide a better success rate than competing apps thanks to our intelligent repair mechanism.
- A maximum of three thousand images: In a single session, the application may fix up to three thousand photos from any computer.
- Embrace a wide variety of forms: Different images with the same form or those with various file types can be fixed simultaneously by the editing software.
- Adjusted preview images: With 4DDiG Photo Repair, you can preview the repaired photos before uploading them to ensure everything looks good.
- Restore Damaged Photographs: Our team is now trying to perfect image repair, so that antique photographs can be returned to life.
How to fix damaged or corrupted photos with 4DDiG Photo Repair:
For PC
Secure Download
For MAC
Secure Download
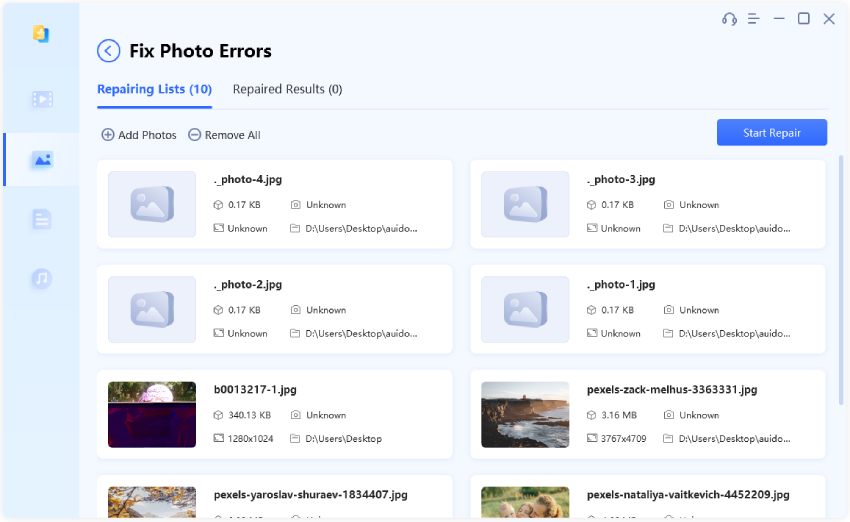
- Get 4DDiG File Repair and run it on your machine. Go to the Photo Repair tab and select "Fix Photo Errors."
- Add some photographs that have been damaged or corrupted and hit the Start Repair button. 4DDiG File Repair will start restoring your photos.
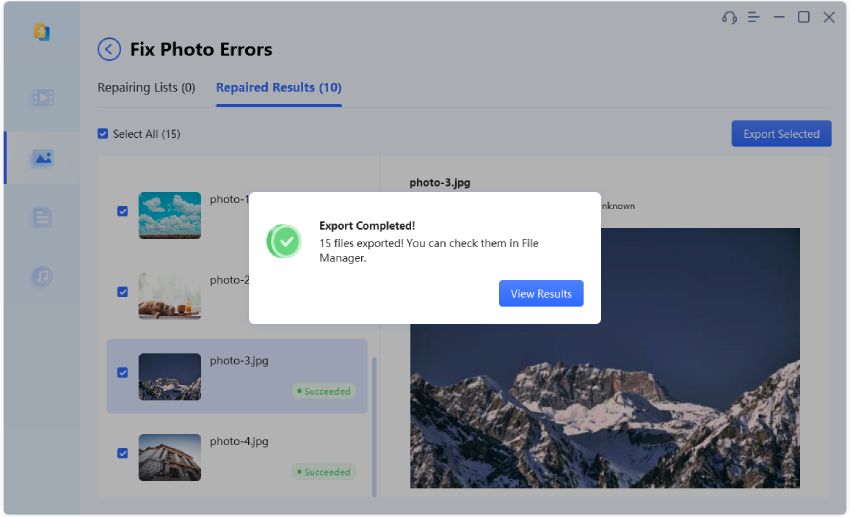
- When the fix is complete, select the photographs you want and click Export Selected to save them.

Part 4: FAQs about Repairing Damaged Images with Photoshop:
Can Damaged Photos Be Repaired?
There are numerous established and proven methods that can be used to fix damaged photographs. Using 4DDiG Photo Repair is the most promising option. Features of this picture editing program include: Rapid, easy, and obvious. Ingenious and cutting-edge formula, No spyware, no viruses, no ads. Capability to fix broken, blurry, greyed-out, or corrupted images. Various image formats (RAW, JPG, PNG, etc.) are supported.
How Can I Recover My Badly Damaged Photos?
4DDiG Photo Repair is a backup program that can fix damaged images. It's quick, easy to use, and can retrieve many different types of files. The 4DDiG program can be accessed via the Photos repair menu option. Please note the damaged pictures and get to work fixing them. Now that the photos have been fixed, you can save them wherever you like.
How Do I Restore Part of An Image in Photoshop?
The cost of hiring a skilled graphic artist to fix or improve your photos can add up quickly. You can show your love for your old images in other ways besides taking them to a digital picture repair specialist. You can significantly improve, repair, and even colorize previously monochrome images with professional-grade outcomes in Adobe Photoshop using just a few fundamental picture editing procedures.
Conclusion
Photographers, graphic designers, and professionals utilize Photoshop to enhance and alter their captured pictures. In addition, it can be used to fix or repair photographs damaged due to human error or natural causes. If you, too, have found that some of your most precious memories have been ruined by damage, you can fix them with the aid of 4DDiG File Repair.
 ChatGPT
 Perplexity
 Google AI Mode
 Grok
Grok
