How to Find Biggest Files on Mac
Does your Mac not work as well as it used to? A common reason could be that big files that aren't being used are taking up valuable disk room. If you know how to find biggest files on Mac, your system will run much faster. Not only do tools like 4DDiG Mac Data Recovery help you find these space-hogs, they also give you the option to get back important files you may have lost by accident. If you're asking, how do I find the biggest files on my Mac or need a reliable way to get rid of digital clutter, this guide has the answers. It also introduces you to powerful tools that will make your Mac run faster. With our simple tips, you'll be able to find the biggest files on my Mac and keep your system running quickly and efficiently.

Part 1: Why Should You Find Biggest Files on Mac?
To get the most out of your Mac, you need to find the files that take up the most space on the machine. The speed of your computer may slow down as the size of your hard drive grows. You might find it harder to do multimedia tasks or work quickly when the speed goes down. On your Mac, you can make the best use of disk space by making sure that only important files are taking up a lot of room. A good way is to learn how to correctly find biggest files on Mac. This method not only makes your computer run faster, but it also makes working with your files easier, which makes it easier to keep your digital space clean and useful.

A big folder, an old collection, or an old picture can take up a lot of space without being used. The removal of these items will make a big difference in the amount of storage room on your computer, which will make it run faster. If you keep these files in good shape, your Mac will be able to escape problems like applications running more slowly or taking longer to start up. You can easily keep your Mac's speed up by regularly looking for and getting rid of big files. Doing these things on a regular basis is necessary to keep your Mac running at its best. This will help you get your work done faster and better.
It is suggested that you regularly handle and arrange the files on your Mac. In addition to being more efficient, the gadget will last longer. By doing these things, you can keep your hard drive in great shape and reduce the chance of losing data or having your system crash because it doesn't have enough space. Users of Mac who want to make sure their system works well and efficiently need to know where their largest files are stored and come up with a good way to handle them.
Part 2: How to Recover Deleted Biggest Files on Mac?
Deleting important files on your Mac mistakenly is probably one of the most irritating thoughts one could ever have. Luckily, this nightmare now has a perfect solution called 4DDiG Mac Data Recovery, a three-step method for Mac data recovery that will get all your lost data back within no time. This innovative approach makes this tool an all-in-one solution for getting back large files that are accidently deleted.
To begin, the program is simple to set up and use; it only takes a moment to download and is laid out in a very clear way. After that, the focused scan tool only looks at certain storage places to speed up the recovery process and make it more accurate. The sample and recovery method also make sure that users only get back the data they need, so they don't have to go through a lot of trouble. This sleek and easy way not only saves time but also improves the recovery process, making 4DDiG great for jobs that need to be done quickly.
Secure
Download
Secure
Download
-
Download and Install
First, download and set up to begin, go to the 4DDiG page and get the Mac Data Recovery tool. Make sure that it works with your version of Mac, and then continue with the download.
-
Select/Pick out and Scan
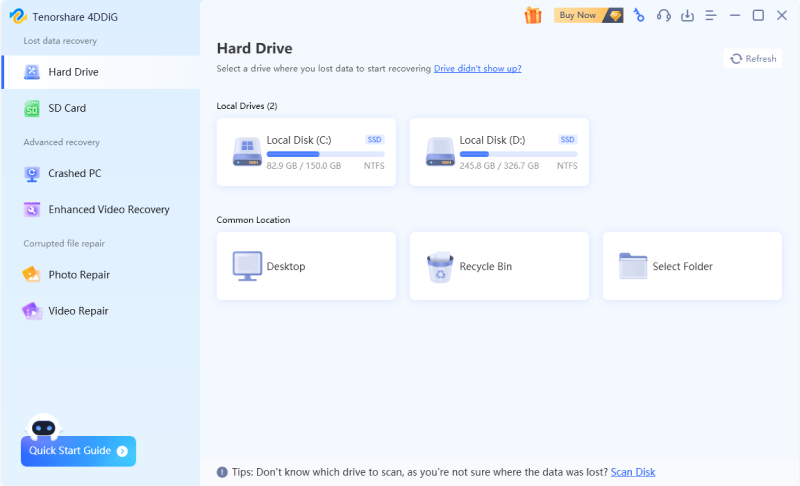
Start the programme and pick the drive or place where your files were last saved. This focused method cuts down on scan times and makes the recovery more accurate. Start the process, the advanced algorithm of 4DDiG Mac Data Recovery will then deeply look for lost files, making sure that even the biggest files are fully recovered.
-
Preview and Recover
Preview and look over the recovered files after the scan is done to make sure you only bring back and recover the files you needed to recover. This important step helps make sure the information is correct before going for the final recovery step. Pick out the big files you want to get back and click "Recover." Pick a new place to save these files that is not the same as the original one so that you don't overwrite any data.4DDiG Mac Data Recovery stands out because it has an easy-to-use interface and strong recovery features that are designed to handle and restore big files quickly. Following these easy steps will help you lessen the effects of accidentally deleting files and better organize your digital workspace.

Part 3: How to Find the Biggest Files on Mac?
Do you want to know how to find the biggest files on Mac? It's just as important to find and handle the biggest files that are taking up space on your Mac as it is to recover lost data. Managing these files will not only free up space on your hard drive, but it also makes your Mac run faster. Let's look at four good ways to find these files using various tools and methods.
Way 1: Use 4DDiG Duplicate File Deleter to Find Biggest Files on Mac
Install the Tool: Start by going to the Tenorshare website and getting and setting up the 4DDiG Duplicate File Deleter. For the best results, make sure your Mac meets the system needs.
Secure Download
Secure Download
-
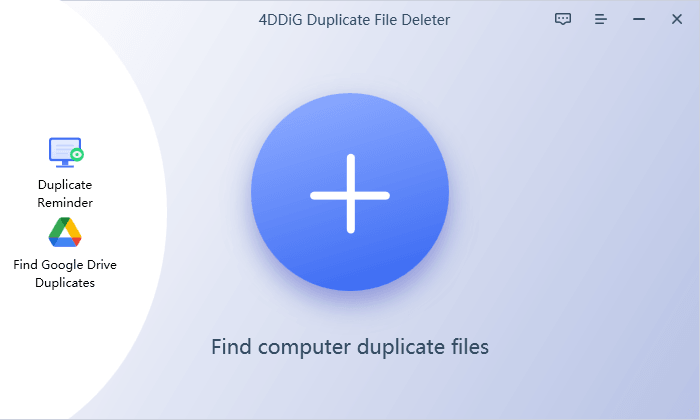
Launch and select a folder
Now launch the application and select a folder to start the scanning process.
-
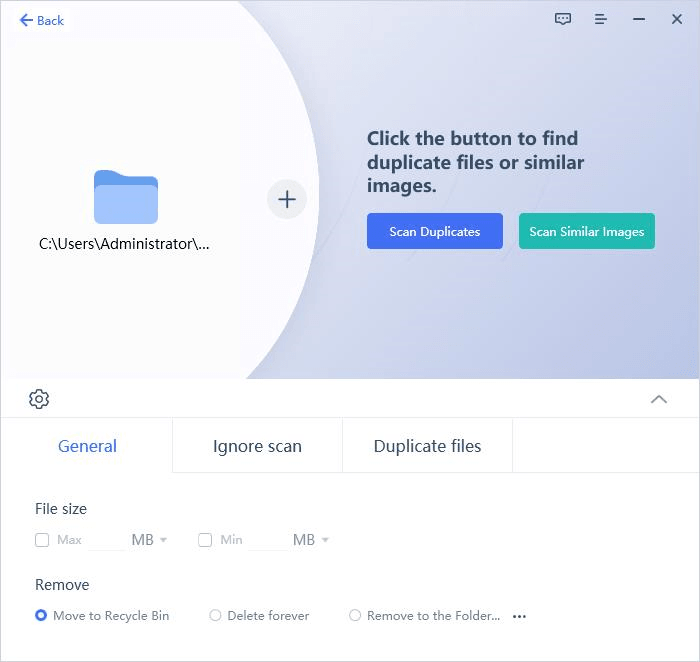
Start the Scanning process by setting scan mode
Customize your search by clicking on the gear button available at lower left corner. Now set the file size under the “General” tab and scan duplicates.
-
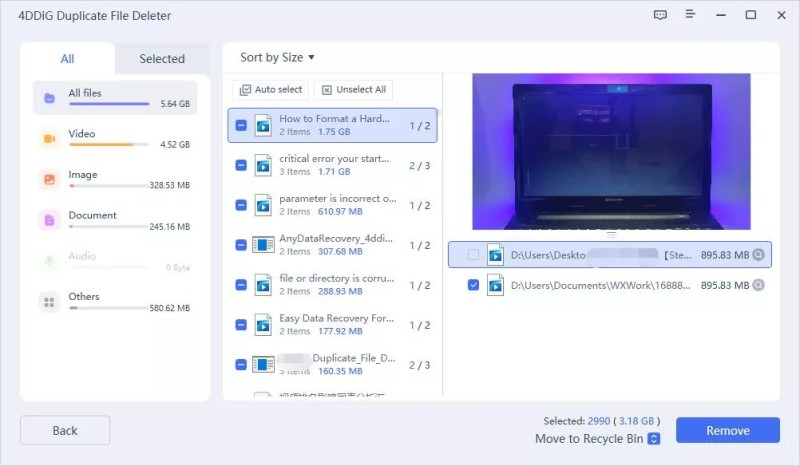
Preview and Delete
4DDiG Duplicate File Deleter will show all the duplicate files when the scan gets completed. Preview them by clicking on Eye icon and then simply click on “Remove” to delete duplicate files.
Way 2: Find Biggest Files on Mac via Finder Spotlight Search
Open Finder: Press Command + F.

Set Search Parameters: Set parameters to find what you are searching.
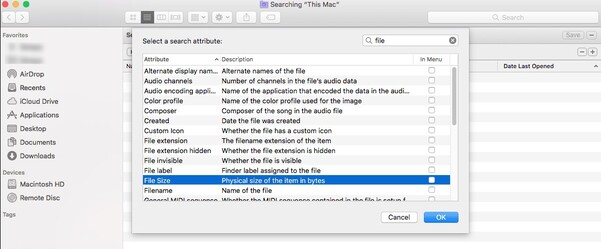
Review and Manage: Consider the results and get rid of the useless files and move them to trash.

Way 3: Storage Management to Find Biggest Files on Mac
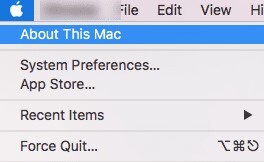
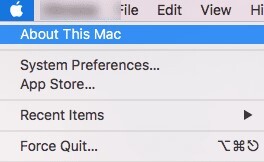
Access Storage Management: To get to Storage Management, click on the Apple sign in the upper left corner, choose "About This Mac," then click "Storage" and then "Manage."
Explore Recommendations: Use the tools on the Recommendations tab, such as "Optimise Storage," "Empty Trash Automatically," and "Reduce Clutter."
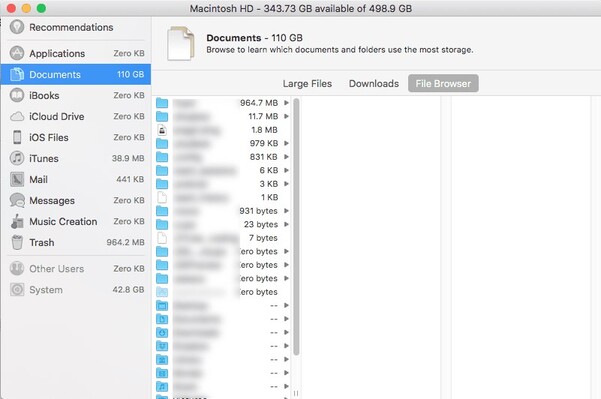
Review Documents and Applications: Look through the Documents and Applications folders for big files, and remove or delete them as needed.
Way 4: Use Terminal to Find Biggest Files on Mac
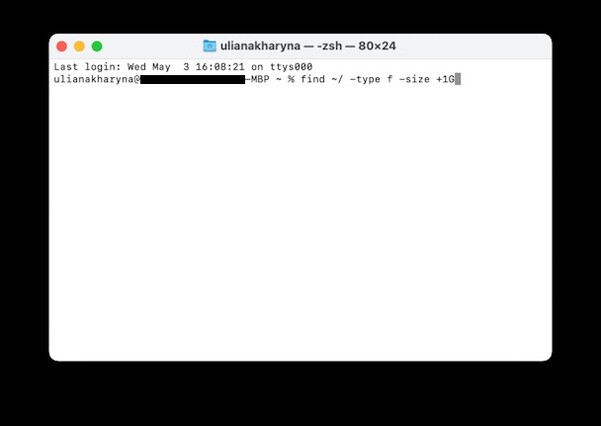
Open Terminal: You can open Terminal by going to Applications or searching for it in Spotlight.
Type in Command: Type ‘sudo find / -type f -size +1000000k -exec ls -lh {} \; | awk '{ print $9 ": " $5 }’ to find files larger than 1GB. Adjust the size as needed.
Examine Result: Check the results and choose which things you can get rid of or store to make room.
4DDiG Duplicate File Deleter, macOS features, and sophisticated Terminal instructions will help you manage large files on your Mac. Keep your system organized and working smoothly with these recommendations.
Part 4: FAQs
Q1: How to show hidden files on Mac?
To show hidden files, press Command + Shift +. (period).
Q2: How do I scan the most obvious places?
Pay attention to the Downloads folder, the desktop, and the apps. A tool like 4DDiG Duplicate File Deleter can be used to do focused checks.
Q3: Is it safe to delete system files on Mac?
It’s risky unless you are sure about their functioning, as incorrect removal may cause system inabilities.
Q4: How do I clear System Settings on Mac?
To restart the system, go to System Preferences and make the changes you want or reset them. If the problem is more serious, restart your Mac and hold down Command + Option + P + R for 20 seconds to reset NVRAM or PRAM.
Conclusion
Maintaining the greatest possible system performance and trouble-free operation of your Mac depend on knowing how to locate the largest files on it. 4DDiG Mac Data Recovery is a trustworthy approaches to remove undesirable files, recover lost data, or improve the organization of your existing files. Using Terminal instructions, Spotlight Search in Finder, or 4DDiG Duplicate File Deleter, you may take charge of the storage on your Mac. You must have got the answer to the question such as how to find the biggest files on Mac? Big files that you seldom use should not be allowed to slow down your computer. Check into these techniques right now. Recall that a seamless and speedy computing experience requires understanding where to locate the largest files on your Mac. Are you prepared to improve Mac performance? Visit 4DDiG's official website to learn more about their powerful tools and get started on optimizing your device right away.


 ChatGPT
 Perplexity
 Google AI Mode
 Grok
Grok


